Setting up, accessing, and troubleshooting the File Maintenance profile photo feature
For various reasons, you might wish to keep photos of personnel, assets, companies, and safety-related issues on file. In TMWSuite, you can attach photos to the following types of records:
-
Driver profiles
-
Company profiles
-
Trailer profiles
-
Non-Driver Employee profiles
-
Safety System reports
Note: The Safety Report System is an add-on that must be purchased from TMW. For details, contact TMW Sales.
This topic set describes the following procedures:
-
Setting up TMWSuite to use the profile photo feature (administrators, only).
-
Viewing, adding, and deleting photos of drivers, non-driver personnel, trailers, companies, and safety reports (all users).
More extensive image management is available with the TMW Imaging system, a licensed option to TMWSuite. Refer to the TMW Imaging User Guide for details. The functionality described in this topic set does not make use of the TMW Imaging system.
Working with trailer profiles
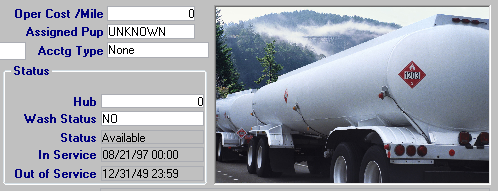
Trailer File Maintenance supports two methods for attaching photos to a trailer profile. You can use both methods with one trailer profile.
-
You can insert a photo directly into a trailer profile window.
-
This method applies only to the Trailer File Maintenance window. It is not used for other profiles.
-
The photo occupies the upper right corner of the window.
-
You can insert only one photo into the window. Inserting a second photo replaces the existing photo.
-
This method does not require system setup. If you plan to add photos to other profiles or the Safety Report System, you still need to set up your TTS50 to identify the photo container type. See Setting up the File Maintenance photo feature for details.
-
-
You can attach photos to a trailer profile using the View Attached Object window.
-
You access the View Attached Object window clicking
 Photo in the sheet toolbar, or by selecting View > Photo.
 -
You can attach multiple photos to the window.
-
You must, at minimum, set up your TTS50 to identify the photo container type. See Setting up the File Maintenance photo feature for details.
-
Refer to Viewing, adding, or deleting photos in a trailer profile for more information about adding photos to a trailer profile.
Setting up the File Maintenance photo feature
These INI settings allow you to attach photos in the View Attached Object window:
-
[Misc]DriverPhotoContainerObject
This setting specifies the object type the system uses to attach image files to the TMWSuite database. The object types are OLE and PICTURE.Note: While the INI setting name implies that it only affects the driver profile, the setting also applies to profiles for non-driver employees, trailers, companies, and the Safety System.
-
[Misc]DefaultPictureType
This setting determines the default image file type (.jpg, .bmp, .gif, etc.) that appears in the View Attached Object window Files of type field. You can override this file type when you add a photo.
Choosing a DriverPhotoContainerObject setting
A computer used to attach and view profile photos must also have Microsoft Office 2003, Office 2007, or Office 2010 installed. These Office versions include Microsoft Picture Manager, which the system uses to render photos attached to the TMWSuite database.
The [Misc]DriverPhotoContainerObject setting is used to configure the photo attachment feature. Options include PICTURE and OLE.
-
PICTURE
ThePICTUREoption is fully compatible with Microsoft Office 2003-2010, as well as Office 2000 and Office XP. If you are configuring TMWSuite to store photos for the first time, use the[Misc]DriverPhotoContainerObject=PICTUREsetting. -
OLE-
This is a legacy option. While it is the default, it is not recommended if you are using Microsoft Office 2003, Office 2007, or Office 2010. Changes in Microsoft Office have made this option only partially compatible with Office 2003-2010.
If you are setting up a new workstation on an existing TMWSuite system that is already set up for the photo feature, your DriverPhotoContainerObject setting could specify OLE or PICTURE. In either case, you should generally not change this setting once you have begun adding photos to profiles and the Safety Report System.
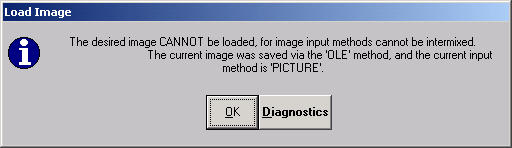
If you try to view a photo when your version of Microsoft Office is incompatible with your [Misc]DriverPhotoContainerObject setting, the system displays an error message.
If you encounter compatibility issues, refer to Troubleshooting problems when Microsoft Office 2003-2010 is used with the TTS50 OLE setting or contact your TMWSuite Support team.
| Installing and setting up Microsoft Office is the user’s responsibility. For instructions on installing Office and Picture Manager, consult your Microsoft documentation. |
Setting a default picture file type for selecting a photo
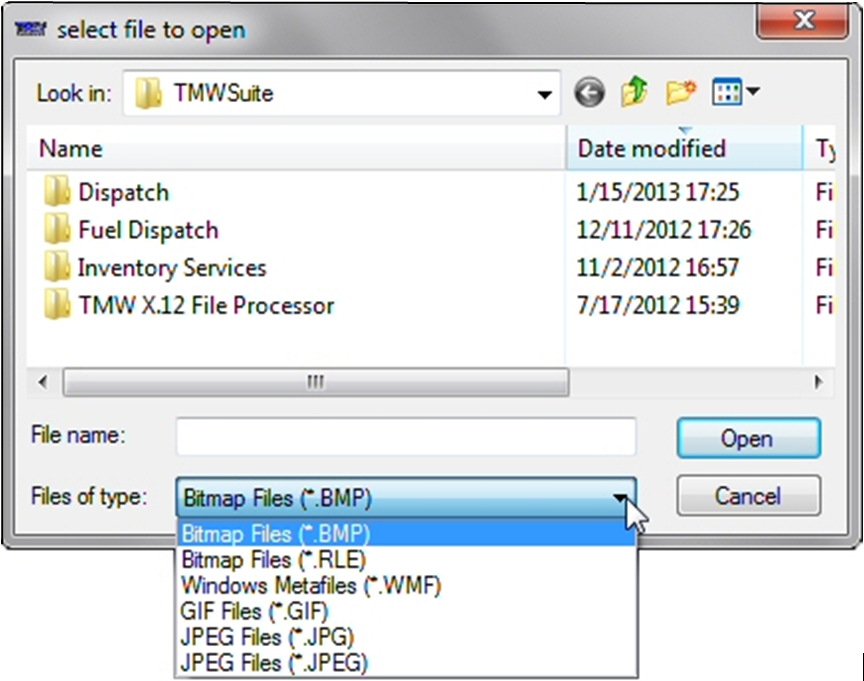
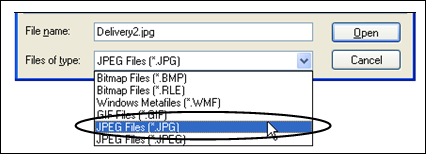
The Select file to open window opens when you click Load New in the View Attached Object window. The TTS50 [Misc]DefaultPictureType setting specifies the default file type that appears in the Select file to open window’s Files of type field. This example shows the window with .BMP set as the default file type.
| If a photo file you want to attach is not one of the supported types, it must be converted to one of the supported types. |
Requiring a selection from the Picture Type field
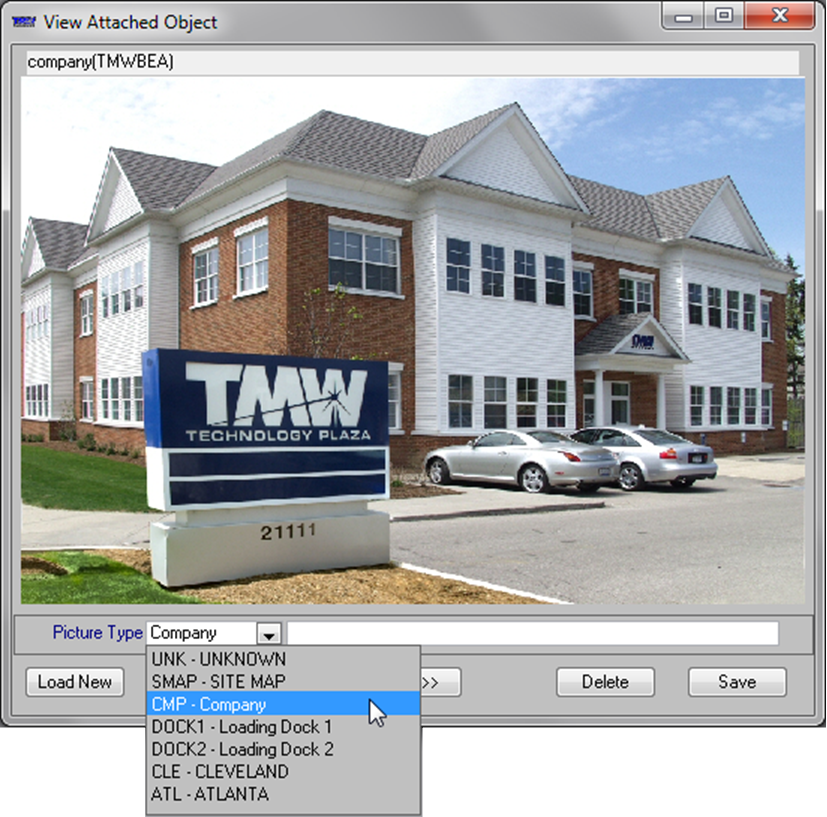
The View Attached Object window includes a Picture Type drop-down list that you can use to associate a company-defined category with a picture you attach to a profile.
By default, making a selection from the Picture Type field is optional. You can require a selection by editing the [Misc]RequireTypeOnPicture setting in your TTS50.
Providing options for the Picture Type list
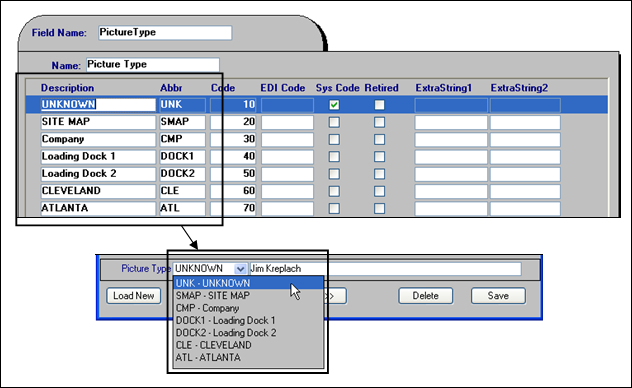
The options in the Picture Type drop-down list should help users categorize pictures in a way that is meaningful to your operation. Use the PictureType label to set up the options. You edit labels in the System Administration application.
For details, see Using the label file to customize fields in the System Administration guide.
Eliminating image distortion
When the View Attached Object window displays an image, the image might appear compressed vertically or horizontally.
This distortion is caused by the photo being stretched to fill the window’s image area, which has an aspect ratio of 4:3. This is the same ratio as 640x480, 800x600, 1024x768, and 1600x1200 images.
If an image’s aspect ratio is not 4:3, you can eliminate distortion by using a graphics program to edit the image before you attach it. To achieve the 4:3 ratio, you can:
-
Add horizontal or vertical borders.
-
Crop the image.
If the photo is already attached, you can correct distortion temporarily by using the mouse to resize the View Attached Object window vertically or horizontally.
Working with photos in the View Attached Object window
The following steps for viewing, adding, and deleting photos in applications and profiles where the View Attached Object window is available.
Viewing a photo
In the View Attached Object window, you can view photos previously attached to a profile or the Safety Report System. Commands and icons for accessing the window differ slightly, depending on the profile/application.
-
Do one of the following:
-
In the sheet toolbar, click
 Photo.
 -
Select View > Photo (not available in company profile).
-
In a driver profile, click
 Driver next to the driver ID field, if available. (This icon indicates one or more photos are already attached.)
 -
In the Safety System Report tab, click
Photo, if available. (This icon indicates one or more photos are attached.)
Note: If you try to view a photo when your
[Misc]DriverPhotoContainerObjectsetting is incompatible with your version of Microsoft Office, the system displays an error message similar to this example. Contact your TMWSuite system administrator for help. -
-
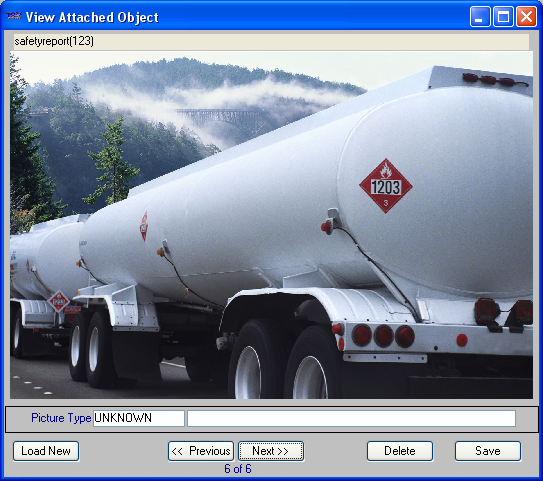
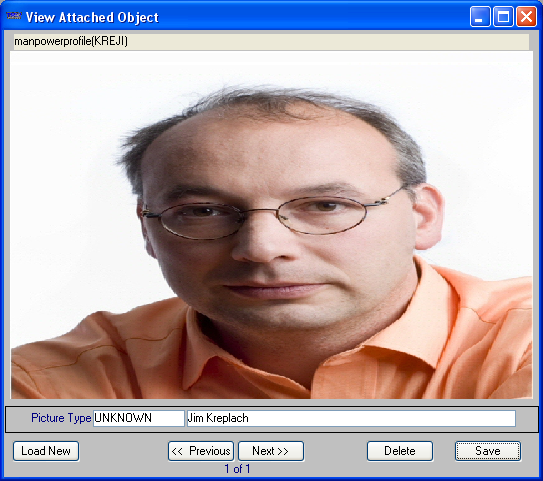
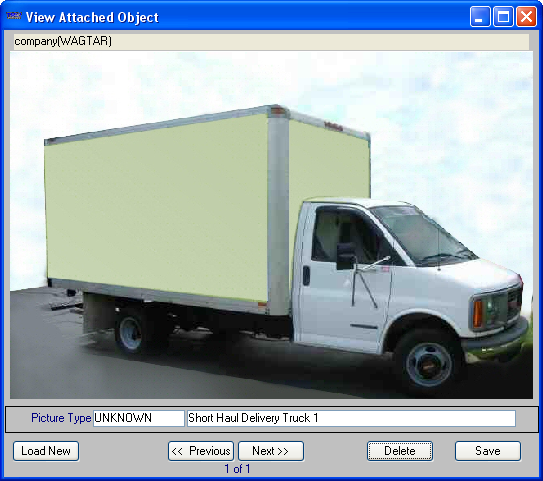
The View Attached Object window opens.
If no photos are attached, the window’s image area is blank. If there are one or more photos attached, the window displays a photo.
-
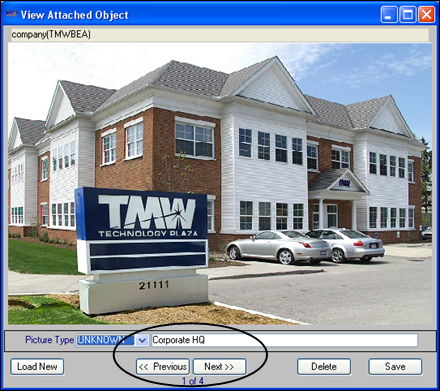
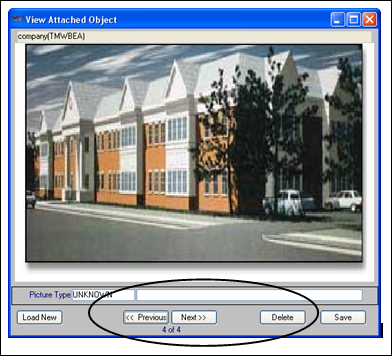
You can scroll through multiple photos by clicking the Previous or Next button. A counter at the bottom of the window indicates the number of the current photo among the total number, e.g., 1 of 3, 2 of 3, etc.
-
You can drag a corner of the window to:
-
Enlarge the photo for more detail.
-
Change the photo’s shape if the photo appears compressed vertically or horizontally.
-
-
-
The unlabeled field beneath the photo displays any comment saved with the photo. If you wish, you can add a new comment or edit the existing one, then click Save to store the comment with the photo.
Note: The Picture Type field to the left of the comment field has no effect during photo viewing.
-
To close the window, click
 in the upper right corner of the View Attached Object window.
Adding a photo
To add a photo to the currently displayed profile, follow these steps:
| For photos, the .JPG file format is very memory-efficient. |
-
In the desired profile or Safety Report System, open the View Attached Object window. This procedure is described in Viewing a photo.
Note: If multiple photos are attached to the profile, you do not need to go to the last one. The photo you are adding is automatically added as the last in the series.
-
Click the Load New button in the lower left of the window. The Select file to open window opens, displaying image files of the default file type.

-
The File of type field displays the default image file type.
If you need to load a photo having a file type other than the default, click the Files of type drop-down list and select a new file type.
-
Browse your system for the image file you wish to attach. Select the image file and click the Open button. A preview appears in the View Attached Object window.
Note: The image having an aspect ratio other than 4:3 will appear compressed vertically or horizontally. You can eliminate distortion before you attach the photo by adding horizontal or vertical borders, or by cropping the photo.
-
If you want, click the Picture Type field and select an option from the drop-down list.
Notes:
-
If
[Misc]RequireTypeOnPicture=Yin your TTS50.ini file, you must select an option other than UNKNOWN from the Picture Type drop-down list, or an error message appears when you click Save.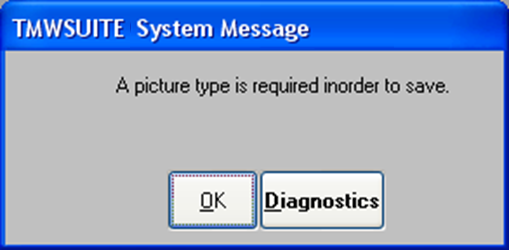
-
The options in the Picture Type drop-down list are user-defined in the PictureType label, which you can access in the System Administration application.
-
-
In the field to the right of the Picture Type field, enter a comment as needed. This comment is optional.
Note: You can also edit this field for a photo already added to the profile.
-
Click the Save button once. The new photo is attached, and the counter at the bottom of the View Attached Object window updates.
-
To close the window, click
in the upper right corner of the View Attached Object window.
Deleting a photo
To delete a photo from the currently displayed profile, follow these steps:
-
With the desired profile displayed, open the View Attached Object window. This procedure is described in Viewing a photo.
-
In the View Attached Object window, confirm the picture is the one you want to delete. If it is not, click the Previous or Next button to display the photo. The counter at the bottom of the View Attached Object window indicates which of the available photos you are viewing.
-
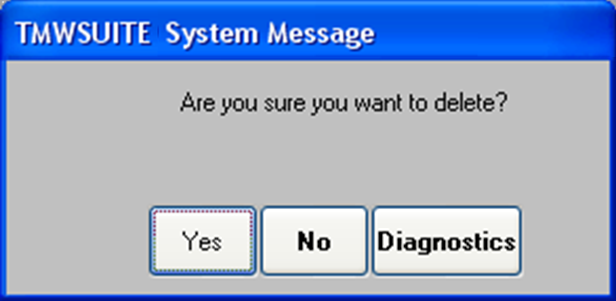
Click the Delete button. A confirmation request appears:
-
Click Yes. The photo is deleted immediately, and the counter updates.
Note: Do not click the Save button.
-
To close the window, click
in the upper right corner of the View Attached Object window.
Viewing company and driver photos outside of File Maintenance
TMWSuite users who do not have access to File Maintenance can view company or driver photos in applications that provide access to the Tools> Scroll Companies and Tools > Scroll Drivers commands.
-
In applications having the Tools menu, select Tools > Scroll Drivers or Tools > Scroll Companies.
-
In the Find Drivers or Find Companies window, enter restrictions as needed.
-
Click Retrieve.
-
In the Find Drivers or Find Companies window, select the desired driver or company and click Profile.
-
View the image(s)
-
For driver photos, click the Driver Photo
 tab in the Profile Driver window.
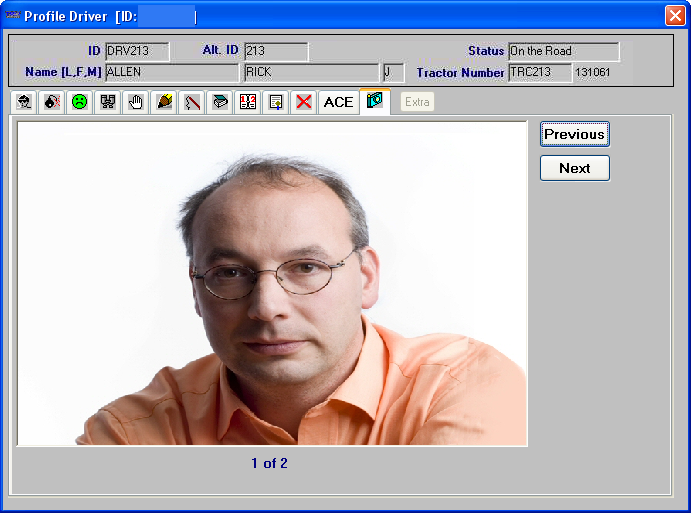
-
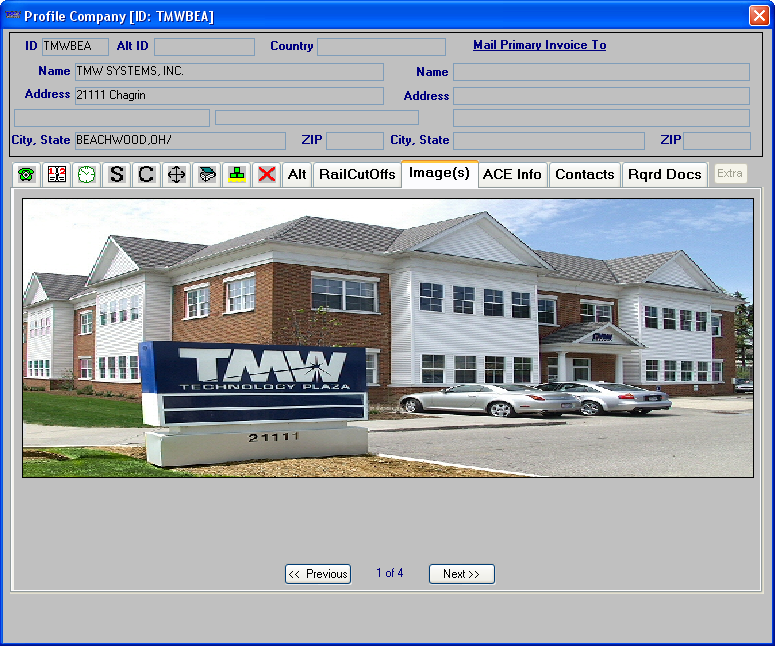
For company photos, click on the Image(s) tab in the Profile Company window.
-
Troubleshooting problems when Microsoft Office 2003-2010 is used with the TTS50 OLE setting
If you have [Misc]DriverPhotoContainerObject=OLE in your TTS50, you might experience the following problems in the View Attached Object window on a computer having Office 2003, 2007, or 2010:
-
You cannot view previously attached photos.
-
Icons or file names might appear in the window in place of photos.
-
The image area appears blank when you try to attach a new photo.
-
Users who have Office 2000 or XP can successfully attach and view photos.
This problem does not affect the photo area in the Trailer File Maintenance window. You can attach and view photos in this area regardless of the DriverPhotoContainerObject setting.
|
Cause
Versions of Microsoft Office before Office 2003 included Microsoft Photo Editor, which functioned as an OLE server to attach or display image files in the View Attached Object window. In Office 2003 and later, Microsoft replaced Photo Editor with Microsoft Office Picture Manager, which does not provide the same OLE support.
If you upgrade to Office 2003-2010, the Office setup program removes the components of any Microsoft Office version installed earlier, including Photo Editor.
Resolution
Microsoft is aware of this problem, and suggests working around it by installing or reinstalling Microsoft Photo Editor. The following Microsoft support article provides more information: http://support.microsoft.com/?kbid=817095.
If you have just a few photos attached to profiles, we suggest you remove the photos from the database, change the [Misc]DriverPhotoContainerObject=PICTURE INI setting, and then reattach the photos. To avoid further compatibility problems, use the PICTURE setting going forward.