Looking up recruit information
After adding recruit profile records to your system, either manually or automatically, you will want to update them, change the status, send communications, or delete them. You can look up existing recruit profiles in these ways:
-
Using the Recruit File Maintenance window
Use this method when you know the first few characters of the recruit profile ID, and you want to review, edit, or send a communication to one profile at a time. -
Using the Find Recruits window
Use this method when you want to scroll through a list of profiles that meet a selected set of restrictions, and you want to send a communication to several profiles at one time.
Using the Recruit File Maintenance window
To open the profile of a recruit already entered into the system, do the following:
-
Go to Edit > Recruits.
A blank Recruit File Maintenance folder is displayed, along with the icons that make up the sheet toolbar. -
In the tab area of the folder, enter at least the first few letters of the recruit display name. The system will show the recruit’s display name in the tab’s field.
Note: If multiple recruits have display names starting with the same letters, you can use the field’s drop-down list to select the correct recruit. -
To look up the recruit profile, do one of the following:
-
Press ENTER.
-
Go to File > Open.
-
Click
 Open in the sheet toolbar.
-
| A recruit record with no entry in the Status field indicates the recruit profile was entered in the Recruit File Maintenance window, but no hiring decision has been made. |
Using the Find Recruits window
The Find Recruits scroll window, shown here, can be accessed only when the Recruit File Maintenance window is opened.
To display the Find Recruits window, go to Edit > Recruits > Scroll Recruits.
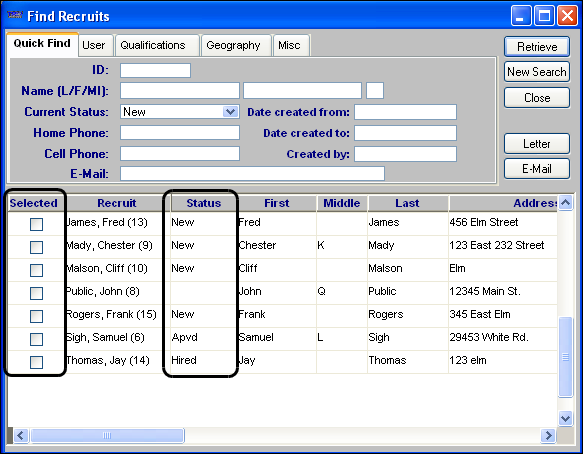
The window contains Quick Find, User, Qualifications, Geography, and Misc tabs. You set the criteria to refine your search on these tabs. For more information on the restrictions you can set using these tabs, see the following sub sections.
The Find Recruits retrieval list displays information from the recruit’s profile in these columns:
|
|
|
|
Using the Quick Find tab
This tab allows you to set restrictions based on recruit ID, name, or status. Save your entries and close Notepad.
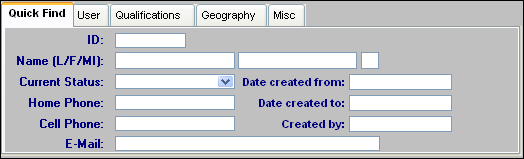
ID |
System-generated recruit ID |
Name (L/F/MI) |
Three fields display for the recruit’s last name, first name, and middle initial, respectively. |
Current Status |
Recruit’s status The two system code options are:
Note: If you want to retrieve records for recruits who have not been accepted for employment, leave the Current Status field blank. |
Home Phone |
Recruit’s home phone number |
Cell Phone |
Recruit’s cellular phone number |
Recruit’s e-mail address |
|
Date created from |
Starting date of the date range in which the recruit’s profile was entered into the system |
Date created to |
Ending date of the date range in which the recruit’s profile was entered into the system |
Created by |
User ID of the person who created the profile |
Using the User tab
This tab allows you to set restrictions based on user-defined recruit classifications. In this illustration, the Recruit Type1 and Recruit Type2 labels have had their display names changed.
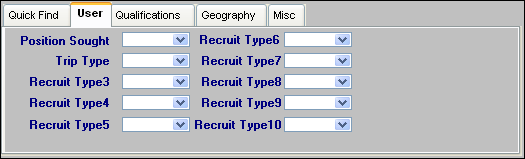
The Recruit Type1-10 fields allow you to select specific recruiting-related information about the recruit. The options displayed in the drop-down list in each field are user-defined in the Recruit Type1 - 10 labels, which are accessed in System Administration.
Using the Qualifications tab
This tab allows you to set up to four restrictions based on recruit qualifications.
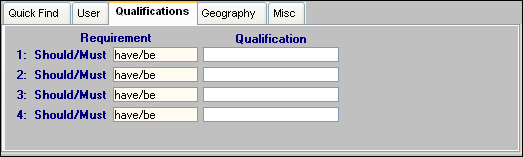
Requirement 1-4 |
Select:
|
Qualification 1-4 |
Choose qualifications from the drop-down list. Note: Recruit qualifications are set up in the DrvAcc label in System Administration. |
Using the Geography tab
This tab allows you to set restrictions based on a recruit’s home location.
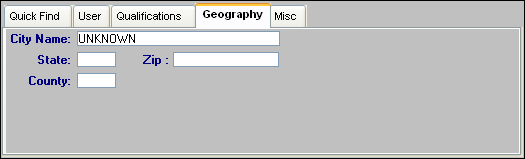
City Name |
City in which the recruit resides |
State |
State/province in which the recruit resides |
Zip Code |
ZIP/postal code in which the recruit’s home city is found |
County |
County in which the recruit resides |
Using the Misc tab
This tab allows you to set restrictions based on other recruit-related fields.
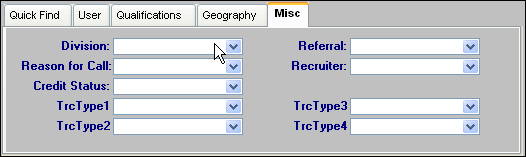
Division |
Division in your company in which the recruit is interested |
Reason for Call |
Reason the recruit contacted your company |
Credit Status |
Recruit’s credit rating |
TrcType1-4 |
Recruiting-related information about the recruit’s tractor |
Referral |
Means by which the recruit was referred to your company |
Recruiter |
Person in your company who is working with the recruit |
Viewing a history of activity for a recruit record
To track the activity associated with a recruit record, look up the desired record and click History. The Recruit Correspondence History window opens.

The window shows:
-
When the recruit record was created
-
When correspondence was sent to the recruit, which document was sent, and how it was sent
-
Changes in the recruit’s status