Adding/maintaining a company record
Primary company profile information is recorded in the Company File Maintenance window. To save a profile, the system requires only two entries:
-
A company ID.
-
A city and state/province.
Your company’s business requirements determine the other data that you must enter. Naturally, entry of a company name, complete address, and phone number would be expected by any business.
To use TMWSuite properly, TMW recommends that, at minimum, you make the following entries:
Section |
|
General |
|
Phones |
|
Switches |
Applicable company flag(s). |
Credit |
Applicable for Bill To’s:
|
Billing |
Applicable for Bill To’s:
|
Tax Rates |
Applicable for Canadian companies for which tax applies. |
Miscellaneous |
Currency. |
Revenue Types |
One or more of the RevType fields, if your company uses these to assign revenue classifications to orders associated with the company. |
For definitions of all fields, see Company File Maintenance field definitions.
Adding a new company record
To create a profile by entering only the data required by the system, follow these steps, follow these steps:
-
Do one of the following:
-
Select Edit > Company.
-
Click
 Company in the frame toolbar.
A blank Company File Maintenance folder is displayed, along with the company sheet toolbar.
-
-
Select File > New, or click
 New in the sheet toolbar. A new company profile is displayed.
 -
To assign a company ID, do one of the following:
-
Manually enter the ID.
Note: The maximum length is eight alphanumeric characters. -
To have the system assign an ID for you, leave the Company ID field blank. Make an entry in the Company Name field.
-
-
Make an entry in the City, State field.
Note: If you opted to let the system assign the ID, you must tab out of the City, State field. By default, the system creates the ID for you based on the first three characters of the city’s name, followed by the first three characters of the company’s name. For complete details about automatic creation of company IDs, see Letting the system assign a company ID.
-
Click
 Save.
Save. -
Select File > Save, or click
 Save in the sheet toolbar.
| While each company should have a complete profile to maintain the accuracy of system data, it is possible to add a mini-profile "on the fly." If, for example, you wish to enter an order but find that the shipper has not yet been added to the system, you can select Tools > Add Company to create a company profile that contains the minimum amount of information necessary to use the company as a shipper in the system. That mini-profile must later be modified to create a complete profile. |
Assigning company IDs
Before you save a new company record, you can manually enter a user-defined ID. However, by default, the system will assign an ID automatically.
Letting the system assign a company ID
If you prefer to let the system assign the company ID, do the following:
-
Enter the company’s name in the Name field.
-
Make the appropriate entry in the City, State field.
-
Leave the Code field blank.
When you tab out of the City, State field, the system automatically assigns a company ID. The code consists of the first three characters of the company name, followed by the first three characters of the city name. For example, suppose Gifford Manufacturing is located in Columbus, Ohio. The system will assign an ID of GIFCOL.
To prevent multiple companies from having the same ID, the system will append a 2-digit suffix to each subsequent instance of the 6-character ID. The suffix 01 will be assigned to the first instance of a duplicate ID, 02 will be assigned to the second instance, and so on. For example, suppose that Gifford Manufacturing, Giffinger Machines, and Giffolk Distribution are all located in Columbus, Ohio. The system will assign IDs of GIFCOL, GIFCOL01, and GIFCOL02, respectively.
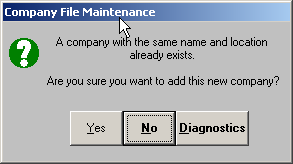
By default, if you attempt to create and save a duplicate profile for company, the system will display a warning message to let you know that a company with the same name and location already exists. The message is a warning only. If you click Yes, the system will create the profile and will append a 2-digit suffix to the company ID as explained above.
After the system reaches 99 as the 2-digit suffix, it uses these suffixes:
-
00 ( assigned immediately after 99)
-
A0 - A9, B0 - B9, C0 - C9, etc. up to Z9. At this point, if you try to create a new ID, you are prompted to create your own ID because the system can no longer auto-generate an ID.
Checking for duplicate companies
A company profile can be created in the Company File Maintenance window, or a miniprofile can be created in the New Company quick add window (accessed via the Tools menu), or the .NET version of the Company Profile window.
By default, if the company you are adding has a name and location that would result in the same system-assigned ID as another company, you get a message similar to this:
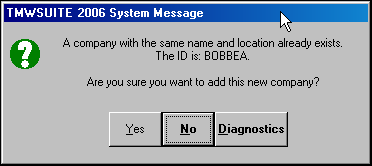
If you click Yes, the system appends a numeric suffix to the ID.
As a result, you can have multiple companies with very similar IDs, which would make it difficult to know which company you were using on an order:

The system can be set up to warn you if the company profile you are entering already exists in the database.
For example, in our database we have a company profile set up for Mentor Building Supplies at 7550 Tyler Boulevard in Mentor, Ohio.

If we began creating a new profile like the following example:

The system would alert us of the duplicate by displaying the Duplicate Company Entries window as soon as we tabbed out of the Address field.
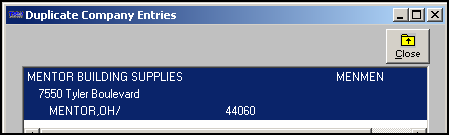
The Duplicate Company Entries window is strictly informational. After closing the window, you can continue creating the new profile, or you can delete it. This enhancement affects the File Maintenance application and the Add New Company window.
To use this feature, you must have a value of OLD for the DistanceLookupVersion General Info Table setting.
|
Setting up the system to check for duplicate companies
The SearchDuplicateAddress General Info Table setting is used to set up the system to check for duplicate companies.
Understanding the logic the system uses to search for duplicates
The logic used by the search mechanism is designed to limit the results to the most applicable companies, and yet allow for possible variations. To accomplish this, the system looks at the data recorded in the Name and the Address fields of the profile being entered and compares that data to companies in the database. If the data in both fields of the new profile match an existing profile in the database, the system warns you that the profile you are entering may be a duplication.
However, to allow for possible variations, the search is not limited to exact matches. The system will also warn you when it finds certain types of partial matches.
To be considered a possible duplicate, the profile being created must match an existing profile in both the following ways:
-
All characters entered in the Address field of the new profile match the existing profile.
For example, entering 7750 Oak in the new profile would be considered a match to any of the following entries in an existing profile:
-
7750 Oak Street
-
7750 Oak Hill
-
7750 Oak Forest Lane.
Note: Words such as street, drive, boulevard and their abbreviations are ignored by the system when comparing addresses.
-
-
The first character in the Name field must match.
For example, Mott Company would be considered a match for Mott Co., or even for Mickey’s Towing Service.
Although each of these matches by itself is not very limiting, together they provide a useful search tool.
Specifying the ID format
The [Misc]CompanyIDFormat setting in your TTS50 allows you to set up your system to use one of three different formats when assigning a company ID.
Adding characters to system-assigned company ID’s
If desired, you can add characters to the default, system-assigned six-character company ID.
The Company ID Padding feature is used to add one or two user-defined characters to the end of the system-created company ID. The Company ID Padding feature does not affect manually entered company ID’s. Three INI settings are used to set up the Company ID Padding feature.
The following example illustrates how the system used the Company ID Padding feature to create a company ID of eight characters.
-
The first three characters (NOR) are from the company name.
-
The next three characters (EUC) are from the city.
-
The last two characters (AA) are from the
[Misc]CmpIdPadValueINI setting.

To prevent multiple companies from having the same Company ID, the system coordinates the Company ID Padding feature with the existing feature that appends a suffix to duplicate instances of a company ID.
The next example illustrates how the system handles duplicate company ID’s when the Company ID Padding feature is used. In this example, the INI setting CmpIdLength=8. In addition, the company ID NOREUCAA already exists in the database. When a new company profile is created that would duplicate the existing ID, the system substitutes the number 1 for the last character.
In the company ID illustrated below, NOREUCA1:
-
The first three characters (NOR) are from the company name.
-
The next three characters (EUC) are from the city.
-
The second to the last character (A) is from the
[Misc]CmpIdPadValueINI setting. -
The last character (1) is added by the system to indicate that this ID is a duplicate instance of the ID.
The system will append a suffix to each subsequent instance of the company ID. The suffix 1 will be assigned to the first instance of a duplicate ID, 2 will be assigned to the second instance, and so on.

Manually assigning a company ID
If you prefer not to have the system assign the company code, manually enter an ID in the Code field before you save. The maximum length is eight alphanumeric characters.
| If you make entries in the Name and the City, State fields before you enter the ID, the system will automatically add the first three characters of the company name and the first three of the city to the ID field. However, you can click in the field and manually enter the ID. If you save without manually recording the ID, the system-generated ID will be used. |
Preventing manual entry of a company ID
You can use the [Misc]AllowEditOnNew setting in your TTS50 to make the Company File Maintenance window’s ID field display only. This will prevent the user from editing the field’s contents, resulting in system-generated company IDs.
Opening an existing company record
To review and/or edit an existing company profile, follow these steps:
-
Select Edit > Company, or click
Company in the frame toolbar. A blank Company File Maintenance folder is displayed, along with the company sheet toolbar. -
In the tab area of the folder, enter the company ID.
-
Do one of the following to open the company profile:
-
Press ENTER
-
Select File > Open.
-
Click
 Open in the sheet toolbar.
-
Deleting a company record
It is recommended that you mark unneeded companies as inactive rather than deleting them. To do so, clear the check mark from the Active switch in the company’s profile. This will prevent the company’s ID from being displayed in drop-down lists from which you would select a company as the Order By, Bill To, shipper, or consignee on a record.
| You can still see IDs for inactive companies if you have the Show Retired Items check box selected in the Set List Box Property window. The window is accessed from the Tools menu in all base applications. |
However, if needed, you can delete a company record, as long as the company has never been recorded on a trip.
| The system does not check for references to a deleted company on any records other than trips. |
-
With the record for the company you want to delete displayed, do one of the following:
-
Click
 Delete in the sheet toolbar.
 -
Select File > Delete.
-
-
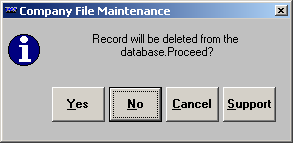
The system will ask for confirmation before deleting the company record.
-
Click Yes to delete the company record.
The system checks to see if the record has been used on a trip.
-
If the system check shows that the company was never used as the Order By, Bill To, shipper, consignee, or the location of a stop on a trip, the record will be deleted.
-
If the system check shows that the company has been referenced on a trip, the record will not be deleted and a message similar to the one shown here is displayed:
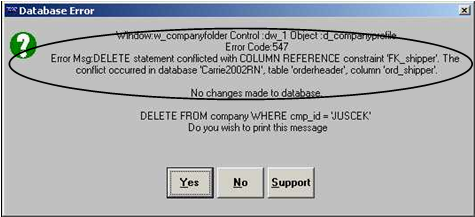
In this example, the company was used as a shipper on an order and will not be deleted.
-
Copying a company profile
There are times when a company you do business with changes its name and/or address. Although it is easiest to just change the information in the company’s profile, the history of the old information is lost. To maintain history, you might prefer to create a new profile for the company. You have the ability to do this by means of the Copy Company window, which is accessed via the Company File Maintenance window.
This illustration shows the Copy Company window with sample data:
The following topics describe the purpose of each section of the window.
Data that is always copied from the old profile to the new one
When you use the copy feature, all information about the Company File Maintenance screen itself is copied from the old profile to the new one.
In addition, the system copies the information recorded in these windows:
| Window name | Window layout |
|---|---|
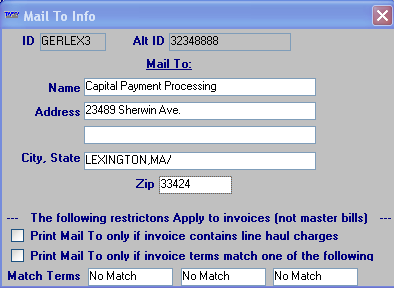
Mail To Info |
Note: This window is available only for Bill To companies. You can access it by clicking |
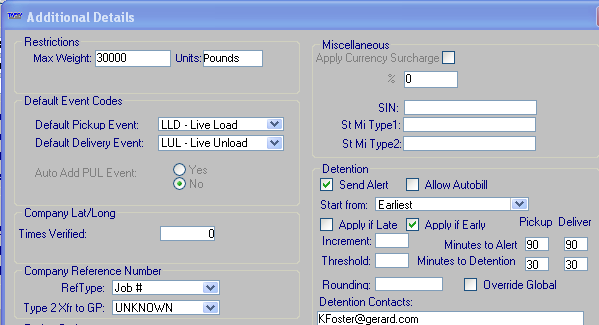
Additional Details |
Note: You can access this window by clicking the |
Options for copying other company data
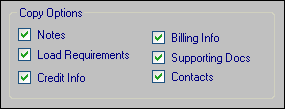
The Copy Options section of the Copy Company window allows you to select data that you want copied from other windows accessible from the Company File Maintenance window.
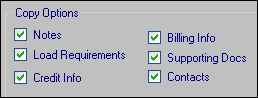
You can elect to copy data from any or all of the windows illustrated below.
| If you select this check box… | … you will copy the data in this window |
|---|---|
Notes |
You can access this window by clicking |
Load requirements |
You can access this window by clicking |
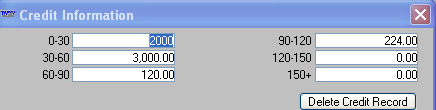
Credit Info |
You can access this window by selecting Edit > Credit Info. |
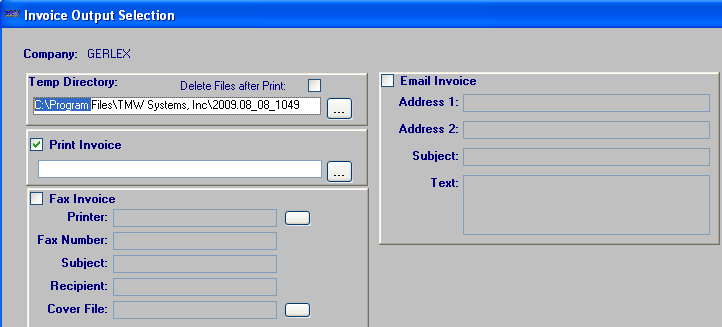
Billing Info |
This window is accessible only when the Enhanced Printing feature is enabled. To access it, select |
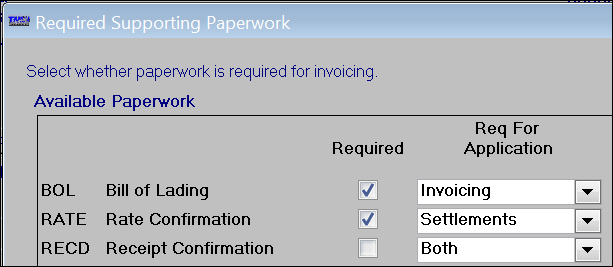
Supporting docs |
You can access this window by clicking |
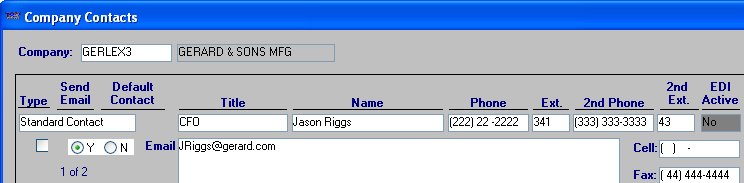
Contacts |
You can access this window by clicking Guide: Recording contact information for TMWSuite entities | Section: Using the Company Contacts window |


Updating other company records with the new ID of a copied Bill To or Parent
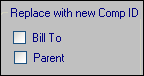
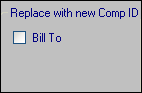
The Replace with new Comp ID section is applicable only for Bill To’s or Parent companies. If the original company is flagged as the Bill To or Parent for other companies, you can use a check box in the Replace with new Comp ID section to specify that the old ID is to be automatically replaced by the new ID on those profiles.
The setup of a company’s profile determines what you see in this area of the Copy Options window.
-
You will see a Bill To check box if the company is a Bill To. If the company serves as the Bill To for other company records, select the box to replace the old Bill To company ID with its new ID on those profiles.
-
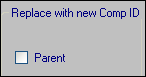
You will see a Parent check box if the company is a Parent. If the company serves as a Parent for other company records, select the box to replace the Parent’s old company ID with its new ID on those profiles.
-
If the company is not a Bill To or a Parent, the Replace with new Comp ID section is not visible.
Updating billing rates with the new ID of a copied Bill To or Parent
The Tariff Options section is applicable only for Bill To’s or Parent companies. If the old company ID was entered as a Bill To or Parent restriction on the index(es) of billing rate schedule(s), you can use the Tariff Options section to have the system automatically add an identical index to each of those rate schedules. The old Bill To or Parent ID remains on the old index. The new index is an exact copy of the old index, except that the new ID will be saved to the Bill To or Parent restriction field.

When you perform the copy, updates are made to all primary, secondary, linked line item, and line item billing rates that have the Bill To or Parent as an index restriction. This allows you to successfully rate orders associated with the old ID, as well as orders associated with the new ID.
|
The setup of a company’s profile determines what you see in the Tariff Options area of the Copy Options window.
-
You will see a Bill To check box if the company is a Bill To.
-
You will see a Parent check box if the company is a Parent.
-
If the company is not a Bill To or a Parent, the Tariff Options section is not visible.
Creating a new company profile by copying an old one
-
On the Company File Maintenance window, look up the company profile you want to copy.
-
Click
 Copy, or select File > Copy, or press CTRL+Y.
The Copy Company window opens.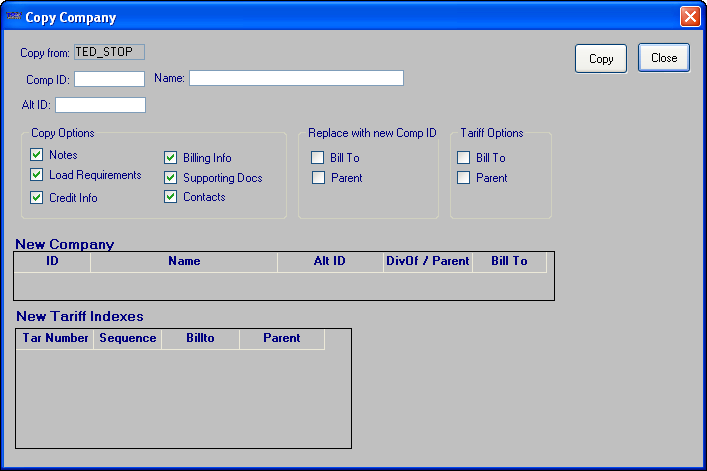
-
Enter the following information for the new company.
Required: *
Copy from
Read-only field that displays the ID of the company being copied.
Comp ID *
Unique identification code for the new company profile. A maximum of eight alphanumeric characters is allowed.
Name *
The name of the new company.
Alt ID
An alternate, user-defined code assigned to the new company.
Note: To tie the old company profile to the new company profile for accounting and reporting purposes, you can use the same Alt ID on both profiles.
In the Copy Options section, all check boxes are automatically selected. If you want, you can clear the check mark(s) for any information that you do not want copied to the new profile.
Note: For details about these check boxes, see Options for copying other company data.
-
If the company is a Bill To or Parent, the Replace with new Comp ID section is displayed.
-
If the company is a Bill To, you will see a Bill To check box.
If the company serves as the Bill To for other company records, select the box if you want to replace the Bill To’s old company ID with its new ID on those profiles.
-
If the company is a Parent, you will see a Parent check box.
If the company serves as a Parent for other company records, select the box if you want to replace the Parent’s old company ID with its new ID on those profiles.
Note: If the company is not a Bill To or a Parent, you will not see the Replace with new Comp ID section.
-
-
If the company is a Bill To or Parent, the Tariff Options section is displayed.
-
If the company is a Bill To, you will see a Bill To check box.

If the Bill To was used as an index restriction for any billing rate schedules, select the box if you want to update those rate schedules. For each rate, the system will duplicate the index that has the old Bill To ID as a restriction. The only difference is that the new index will have the new Bill To ID as a restriction.
-
If the company is a Parent, you will see a Parent check box.

If the Parent was used as an index restriction for any billing rate schedules, select the box if you want to update those rate schedules. For each rate, the system will duplicate the index that has the old Parent ID as a restriction. The only difference is that the new index will have the new Bill To ID as a restriction.
Note: If the company is not a Bill To or a Parent, you will not see the Tariff Options section.
-
-
Click Copy in the upper right of the window.
The system automatically creates a new company profile based on the old one.
| The copy process will not inactivate the original company. You must go to that profile and inactivate it manually by clearing the Active check box. |
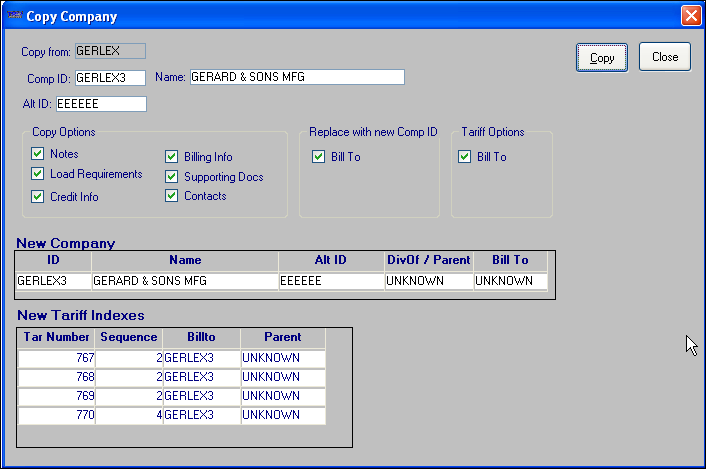
When the new copy is created, information regarding the new profile is displayed in the lower portion of the Copy Company window, as shown here:
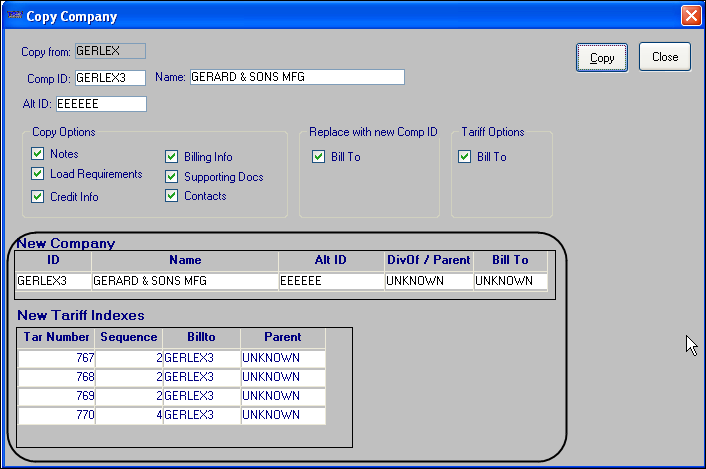
In the New Company section, you will see the ID, name and Alt ID for the new profile. If an ID was recorded in the DivOf / Parent field or the Bill To field for the original profile, that ID has been copied to the new profile’s DivOf / Parent field or the Bill To field.
The New Tariff Indexes section is applicable only if the original company is a Bill To or Parent. If you selected a Bill To or Parent check box in the Tariff Options section before you made the copy, the system will list all billing rate schedules that were updated with the new company ID.