Using Microsoft Word for recruit correspondence
To use the full functionality of the Recruitment module, you will need to make entries in new and existing labels, and set up the Word file(s) for the letters or other correspondence you want to send to recruits.
| The Recruitment module supports mail merge functionality between TMWSuite and Microsoft Word V.2003 or later. It does not support mail merge functionality available from earlier versions of Word or from other document creation software packages. |
Setting up the Word file(s) the Recruiting module will use
When you use the E-mail or Letter buttons in the Recruit File Maintenance window to send correspondence to a recruit, the system performs a mail merge function to create a Word file. This file is sent as an e-mail attachment or printed on your default printer.
Two INI settings allow you to specify how letters and e-mails to recruits will be created:
If you use the bookmarks method, you must add bookmarks in the body of your Word document. The bookmark titles must match these fields in the recruit table of your TMWSuite database:
|
|
|
|
Things to consider about using the BOOKMARKS option:
-
Pros: The setup for this type of document is very quick and easy.
-
Cons: A bookmark can only be used once. For example, once you use the fname field, you cannot use it again later in the document.
If you use the Wordmerge option, the Word document is set up by completing the Microsoft Word Mail Merge Setup Wizard. Things to consider about using this option:
-
Pros: A field can be used any number of times within the document.
-
Cons: The setup for this type of document, including creation of a data source, is more complex.
Setting up the Word file(s) when using bookmarks
You must set up the Word file(s) the system is to use, creating bookmarks for the data the system will pull from the recruit’s profile and merge into the document. The bookmarks and their corresponding fields in the Recruit File Maintenance window are shown here.
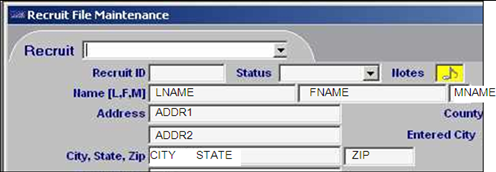
| These bookmarks are hard-coded into the system so you must use them in your Word file or the mail merge functionality will not work. |
In addition to the Word file for the letter, you can also set up a Word file for the envelope in which it will be mailed if desired.
|
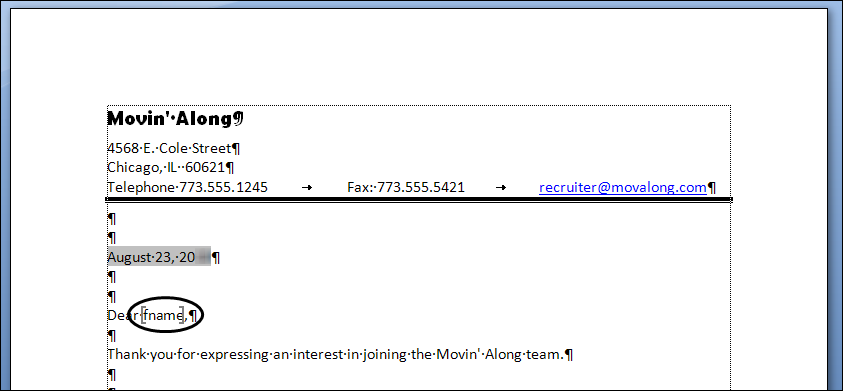
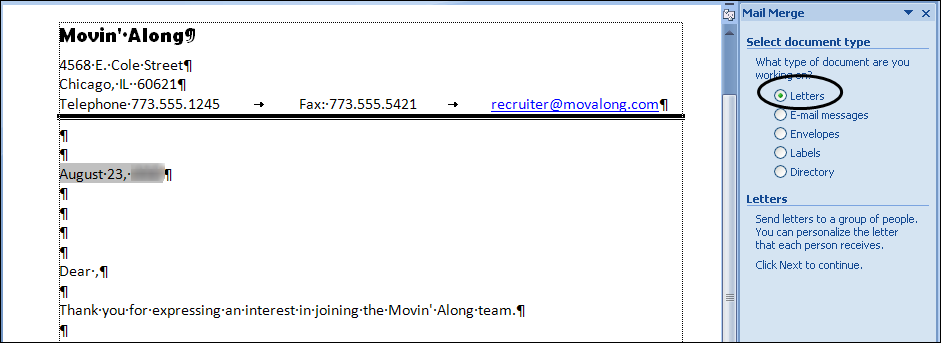
A sample Word file with bookmarks is shown below.
Tips on working with bookmarks
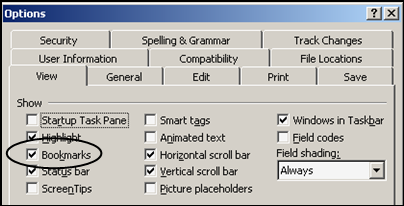
For the example above, we set up Word to show the Bookmarks so that we can see the bookmarks (gray brackets) we added for the inside address:
In Word 2003, the Options window is accessed from the Tools menu. Select the Bookmarks check box in the Show section of the View tab.
We also inserted our bookmarks by typing the text of the bookmark and highlighting it before selecting Bookmark from the Insert menu to access the Bookmark dialog box. You may wish to do this when you are creating your Word file since some methods of adding bookmarks would result in the appearance of blank spaces.
There are two issues you should be aware of regarding bookmarks:
This method can result in the text of the bookmark being displayed in the Word file. This happens when the field referenced by the bookmark does not contain data in the recruit profile for which you are creating an e-mail attachment or printing a letter.
For example, suppose you include a bookmark for addr2 in your Word file. You are printing a letter to a recruit for which no address 2 data has been entered. If your letter is set up as in the example on the previous page, when the letter is created, the text of the bookmark, i.e., addr2, will display in the letter below the recruit’s street address and above the city, state, and ZIP Code.
To avoid this issue, you can insert your bookmarks without typing the text of the bookmark in the Word file. The resulting bookmark, represented by an empty open and closed bracket (  ), resembles an I-beam.
You cannot repeat a bookmark in your Word file using this method. If you need to repeat bookmarks, e.g., you want the recruit’s first name to appear in the inside address and as part of the salutation, you should use the RecruitMergeType=MAILMERGE option. Set up for that method is provided in Setting up the Word file(s) when using the mail merge method.
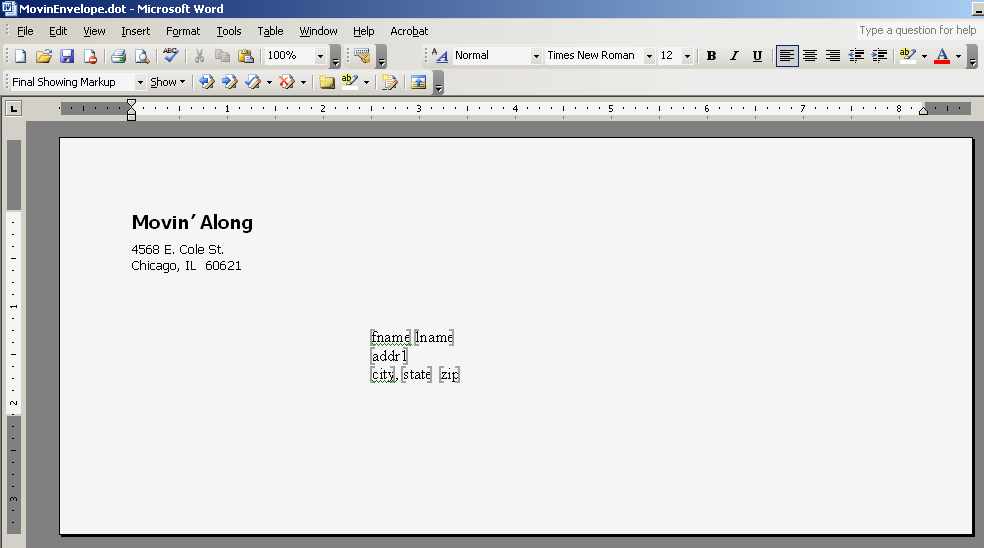
If you set up a Word file for an envelope to be printed with the letters, you can use the Page Setup dialog box to specify which tray in your default printer to use as the source for the envelope.
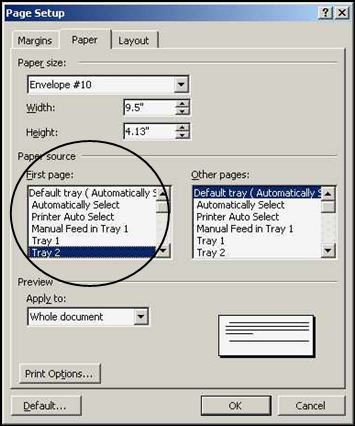
A sample envelope set up is shown below.
| Be sure to note where you stored the file(s) that will be used for the mail merge process. You will need to access the folder when you create an e-mail or print correspondence. |
Setting up the Word file(s) when using the mail merge method
Although the setup for using the RecruitMergeType=WORDMERGE option is similar to setting up a standard mail merge project in Word, there are steps that are specific to creating mail merge correspondence from within the Recruit File Maintenance window. The instructions below provide information on creating a standard letter using Word’s mail merge wizard.
| As a courtesy, this topic provides basic instructions on using Word’s mail merge feature. This explanation describes how to create a letter using TMW’s recruit data. Word’s mail merge functionality also allows you to create envelopes and e-mail messages. To create these types of communication, refer to the Word help system for instructions. TMW does not track updates to third party applications. If you are using a later version of Word and/or a different operating system, or if you need more advanced information, consult Microsoft’s user documentation for instructions. |
-
Go to Tools > Letters and Mailings > Mail Merge.
The Mail Merge pane opens at the right side of the window.
-
The Letters radio button should be selected by default. If this is not the case, select it before clicking Next: Starting document at the bottom of the pane.
-
The Mail Merge pane displays Step 2 of the mail merge wizard. At the top of the pane, select the radio button for the appropriate option.
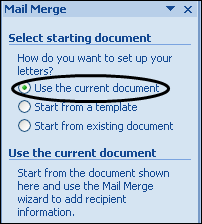
In our example, since we started the wizard with the letter we want to use in the mail merge opened, we selected Use the current document.
-
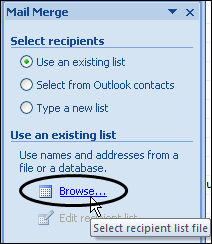
Click Next: Select recipients at the bottom of the pane.
-
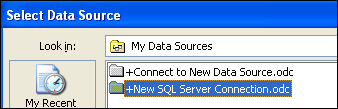
At the top of the Mail Merge pane, click Browse under Use an existing list.
-
The Select Data Source dialog box is displayed. Click on New SQL Server Connection.odc.
-
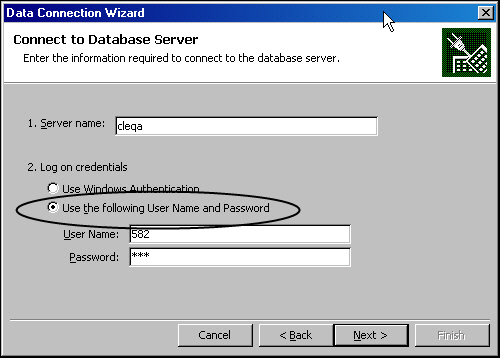
The Data Connection Wizard displays the dialog box for entering database connection information.
-
In the Server name field, enter the name of the server on which your TMWSuite database resides.
-
Do one of the following:
-
If you are using Windows Authentication to log into your TMWSuite database, select the Use Windows Authentication radio button.
-
If you are using a login and password specific to your TMWSuite database, select the Use the following User Name and Password radio button, and enter your user name and password in the appropriate fields.
-
-
Click Next.
-
-
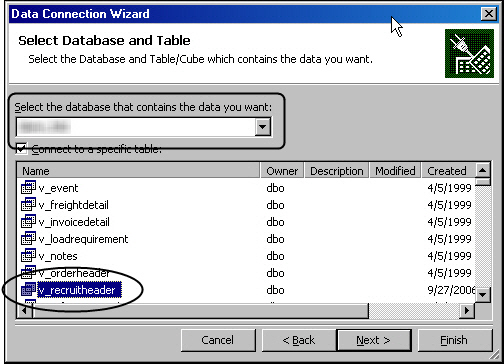
In the Select Database and Table dialog box, select your TMWSuite database from the drop-down list, and then highlight the v_recruitheader table in the list of tables.
-
Click Next.
-
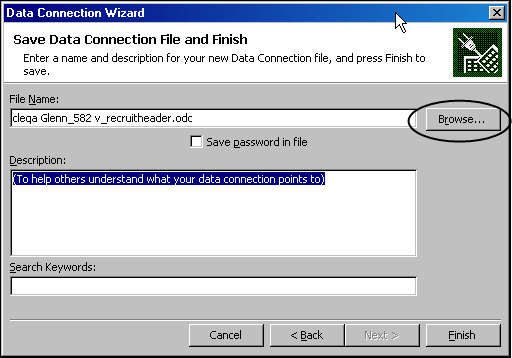
In the Save Data Connection File and Finish dialog box, click Browse to navigate to the folder where you want to save the connection. You will need this location as your entry for the `RecruitODCPath `INI setting.
-
In the File Save dialog box, use the drop-down list to navigate to the place on your system or network where you want to store the connection file. You can change the file name to something easier to remember if needed.
In this example, we chose not to accept the file name the system suggested.
+
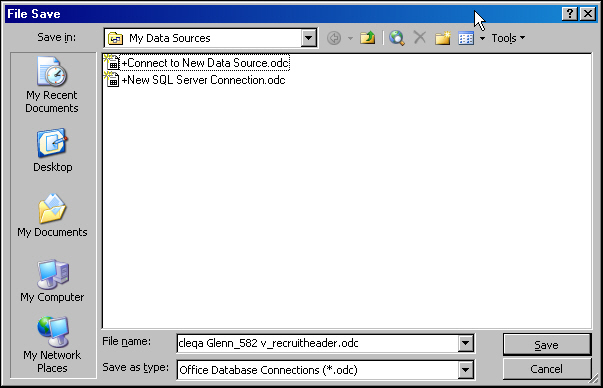
+ We saved our connection file using the table name.
+
-
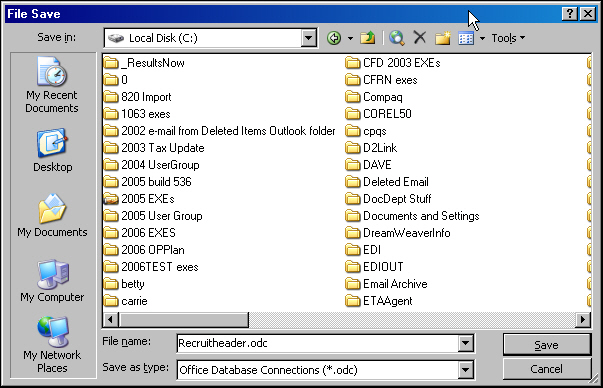
Write down the location and file name so that you can enter it in the RecruitODCPath INI setting.
-
Click Save.
The Save Data Connection File and Finish dialog box displays the file name and path that you used.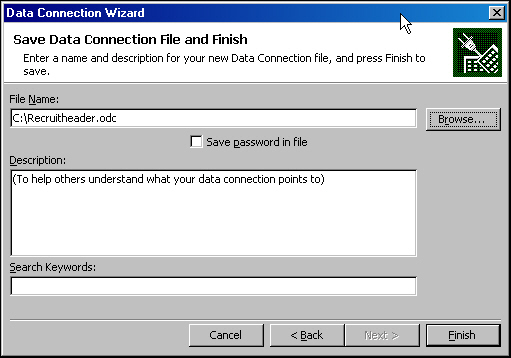
-
Click Finish.
The Data Link Properties dialog box allows you to test the connection that you just created. The server name and log in information should display as you entered them in the wizard’s Connect to Database Server dialog box. If the Use a specific user name and password radio button is selected, you must enter your password in the Password field.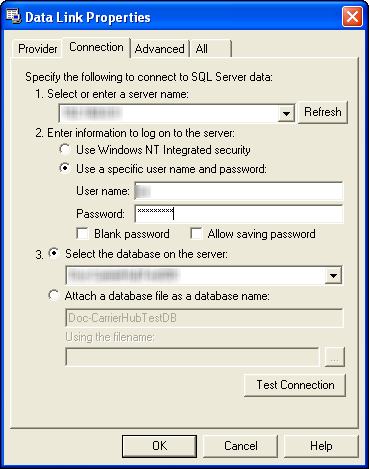
-
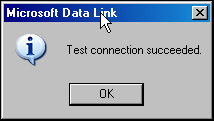
Click Test Connection.
A message stating the connection succeeded should display. -
Click OK.
-
After closing the message, do one of the following in the Data Link Properties dialog box:
-
If you are using Windows Authentication to log into your TMWSuite database, click OK.
-
If you are using a login and password specific to TMWSuite, enter your password again and click OK.
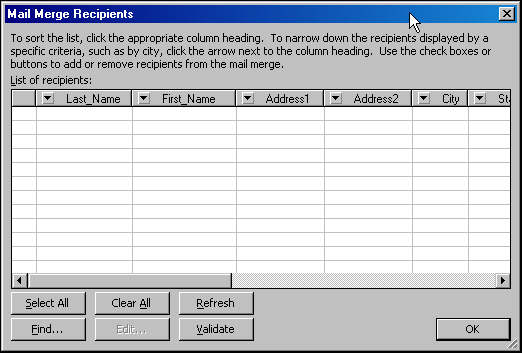
The Mail Merge Recipients window opens. If you have not created any recruit records, the list will be blank, as shown here.
-
-
Click OK to close the list.
-
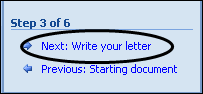
You can now begin adding the mail merge fields to your letter. At the bottom of the Mail Merge pane, click Next: Write your letter.
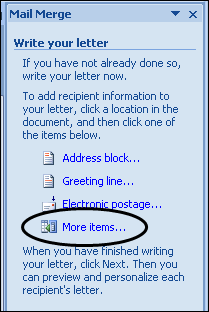
The Mail Merge pane should be showing the Write your letter instructions.
-
Position the cursor in the place in the letter where you want to add the first field, and then click More items.
-
A list of the table fields is displayed. Highlight the first field you want to use in the letter and click Insert.
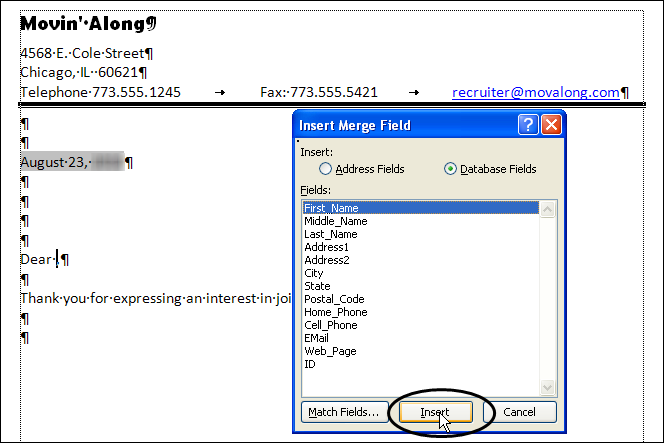
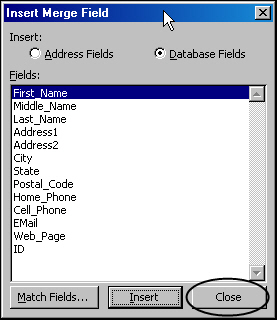
Note: The Cancel button becomes the Close button.
You must close the Insert Merge Field dialog box to position the cursor in the letter where the next field will be inserted. For example, suppose you inserted the First_Name field on the first line of the inside address. To have a space between the first and last names, you must close the dialog box, press the space bar, and then click More Items in the Mail Merge pane to redisplay the insert Merge Field dialog box so that you can insert the Last_Name field. You must repeat this process for each field that you add to the letter.
-
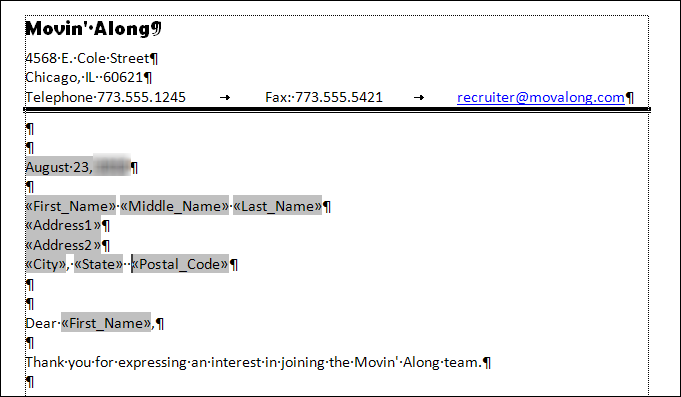
When you have added all necessary fields for the mail merge, save your Word file. A sample letter with all fields required for your mail merge recruit letter is shown below.
When you open the file in Word, this message is displayed.
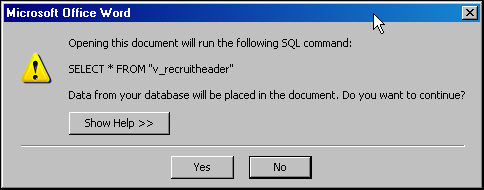
Click Yes to continue.
Sending correspondence to a recruit using Word forms
You can send correspondence to a recruit as an e-mail attachment or by printing a letter that will be mailed.
| Both the e-mail and letter options require that you have created a Word file that will use the mail merge functionality between TMWSuite and Word. For instructions on setting up Word files with bookmarks, see Setting up the Word file(s) the Recruiting module will use. |
You can send correspondence to individual recruits from the Recruit File Maintenance window, or you can send correspondence to multiple recruits using the Find Recruits scroll window.
Sending an e-mail to a single recruit
To send correspondence to a single recruit via e-mail, follow these steps:
-
With the desired recruit’s profile opened in the Recruit File Maintenance window, click E-mail in the lower right section of the window.
Notes:
-
If the recruit does not have an e-mail address on record, the system displays a message similar to this.
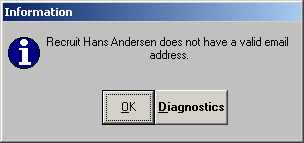
-
The only check the system makes to verify the e-mail address is valid is to look for the @ symbol in the address. If the address contains the @ symbol but is not correct in other regards, your e-mail system will notify you that the message is undeliverable.
-
-
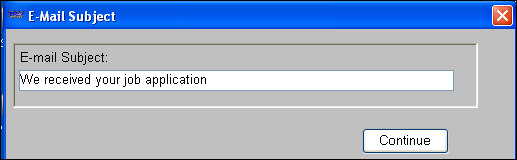
In the E-Mail Subject dialog box, enter an appropriate subject line, and click Continue.
-
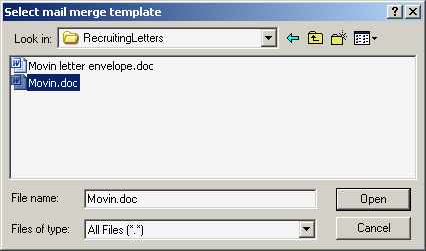
In the Select mail merge template dialog box, browse to the appropriate folder and highlight the required Word file.
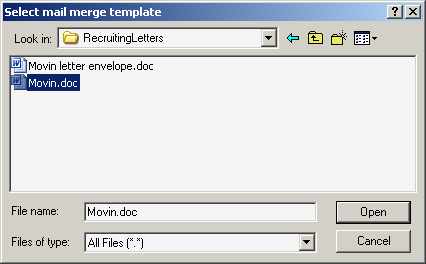
-
Do one of the following:
-
Click Open.
-
Double-click the file name.
-
The system automatically sends the correspondence defined by the selected Word file as an attachment to an e-mail.
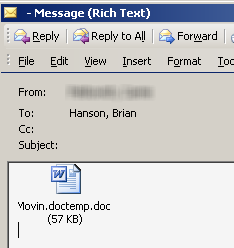
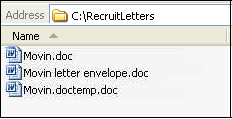
The illustration above shows a message sent from the Recruiting module in our Outlook Sent folder. Note that there is no entry in the Subject line. Also note how the system named the attachment. It inserted .doctemp between the original file’s name and the .doc extension.
If you look at the folder where you store the Word file for the letter, you will also see that the file attached to the e-mail is stored there.
Each time you send an e-mail to a recruit, the system revises the file, updating the name and address of the recruit to which it was previously sent with the name and address of the latest recruit to which you have sent it.
Sending a letter to a single recruit
To send a letter to a single recruit, follow these steps:
-
With the desired recruit’s profile opened in the Recruit File Maintenance window, click Letter in the lower right section of the window.
-
In the Select mail merge template dialog box displays, browse to the appropriate folder and highlight the required Word file.
-
Do one of the following:
-
Click Open.
-
Double-click the file name.
The system merges the name and address from the currently displayed recruit record with the selected letter and prints it to your default printer.
If you wanted to print the envelope in which the letter will be mailed, you would repeat the process but select the sample envelope Word file.
-
Sending correspondence to multiple recruits
You can send correspondence as e-mail attachments or letters to recruits using the Find Recruits window.
-
From the Recruit File Maintenance window, select Edit > Recruits > Scroll Recruits.
-
Retrieve the list of recruits.
Note: For more information on retrieving recruits, see Looking up recruit information.
-
In the Selected column of the retrieval list, select the check box for each recruit you want to send correspondence.

-
Do one of the following:
-
Click E-Mail.
-
Click Letter.
-
-
In the Select mail merge template dialog box, browse to the appropriate folder and select the required Word file.
-
To perform the requested function, i.e., send an e-mail or print a letter, do one of the following:
-
Click Open.
-
Double-click the file name.
The system will redisplay the Select mail merge template dialog box.
-
-
Select the Word file that will be e-mailed to or printed for the next recruit selected in the Find Recruits window’s retrieval list.
This will happen until e-mails have been sent to all selected recruits or letters have been printed for all selected recruits.