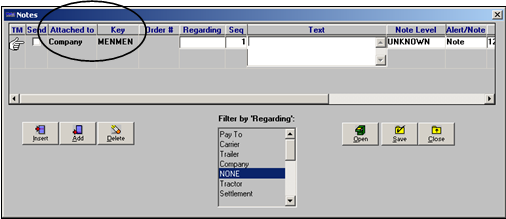
Recording/viewing notes for a company
A note recorded for a company will be included on any trip with which that company is associated. Notes entered for companies are accessible in most base applications. The exceptions are System Administration and Rate Schedules.
| By default, the maximum length of the text you can enter for a note is 256 characters. However, you have the option of increasing a note’s length to a maximum of 8,000 characters. For setup instructions, see the Notes feature guide. |
Adding notes to a company profile
To add a note for the currently displayed company profile:
-
Use one of these methods to open the Notes window:
-
Select Edit > Notes.
-
Click the
 Notes icon on the sheet toolbar.
 -
Click the
 Notes indicator in the profile.
The Notes window is displayed.
-
-
Click Add to complete the *Attached to* and *Key* fields automatically.
Note: You can also click the Insert button to add a new note before an existing note.
-
Make entries in the following fields:
Attached to
This display-only field shows the profile type for which the note was recorded.
Key
This display-only field shows the ID of the record to which the note applies.
Order
This display-only field will be blank.
Regarding
Use the drop-down list to select the filter that will be applied when someone retrieves the note in the future. The options are:
-
Pay To
-
Carrier
-
Trailer
-
Company
-
NONE
-
Tractor
-
Settlement
-
Driver
-
Billing
-
EDI
-
Commodity
-
LoadPin
-
Tank Sizes
-
Delivery Instruction
-
Loading Instruction
-
CADEC Data
For example, if you are entering a billing note for an order, select Billing as the filter. For a note meant for payroll personnel, select Settlement. If you do not want filtering applied to the note, select NONE.
Note: The options available in this field are set up using the NoteRe label. For more information, see the Notes feature guide.
Text
Enter the text of the note in the field. You may enter up to 256 characters, but only 68 characters can display in the text box at one time.
Notes:
-
If your note exceeds 68 characters, use the LEFT ARROW or RIGHT ARROW keys to scroll the rest of the note into view. You can also highlight the note, right-click the text box, and select Zoom Field to view the text in its entirety.
-
You can cut a word or phrase from an existing note and paste it in a different spot by highlighting the portion to be cut and pressing CTRL+X. Note that the word(s) are deleted from their original location. Position the cursor in the spot where you want to paste the word(s) and press CTRL+V.
-
To copy a word or phrase from an existing note, highlight the portion you want to duplicate and press CTRL+C. Then, position the cursor in the spot where you want to paste the word(s) and press CTRL+V.
-
. You can configure the system to increase the note length to a maximum of 8,000 characters. For more information, see the Notes feature guide.
Seq
The system will automatically assign a number in this field. You can change this to any number from 0 to 9999.
Notes:
-
The system will assign the number 1 to the first note, 2 to the second, and will increment all subsequent numbers by one.
-
Higher-numbered notes will be displayed first in the Notes window.
-
You may assign the same Seq number to more than one note. If more than one note has the same Seq number, the note that was added most recently displays at the top of the Notes window.
Note Level
From the drop-down list, select the internal classification for the note.
Notes:
-
The options are user-defined in the NotesLevel label, accessed in System Administration.
-
For information about setting up your own classifications, see the Assigning internal classifications to notes section in the Notes feature guide.
-
This classification is strictly informational - it is not used by the system for any purpose.
Alert/Note
Use the drop-down list to specify the importance of your note. The options are:
-
Note
The note is informational. -
Alert
The note is of critical importance, not merely informational.
The ranking determines how the system displays the Notes indicator on windows associated with your note. For notes ranked as Alert, a red indicator will display; for notes ranked as Note, either a blue or a yellow indicator will display.
Note Expires
Enter the date and time the note is to expire, if applicable.
Note: Once the expiration date has passed, the Notes indicator is shown in gray. By default, the expired note continues to display in the Notes window. This behavior can be changed by editing the following General Info Table settings:
For details on these settings, see the Notes Feature Guide.
Updated By
This display-only field shows the user ID of the user who last updated the note.
Last Updated
This display-only field shows the date and time the note was last updated.
-
-
Click Save to save the note.
-
Click Close to exit the Notes window.
Note: To cancel any changes, click the Retrieve button before you save. The system displays the previously existing notes. You can also click Close and click No when prompted to save your changes.
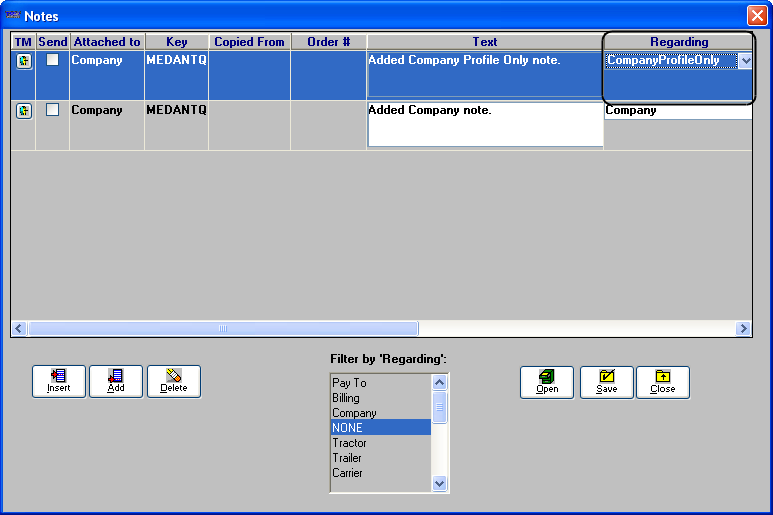
Hiding company profile notes
The Company Profile Only note type allows you to hide or show notes regarding the profile of a company. As with Company notes, you can record and view Company Profile Only notes in File Maintenance. However, unlike Company notes, you can use the [FileMaint]ViewCompanyNotesInFMOnly setting in your TTS50 to prevent Company Profile Only notes from being viewed in applications other than File Maintenance.
| Company Profile Only notes are always visible in the Notes tab in the Tools > Scroll Companies window. |
To enter a Company Profile Only note:
-
Click Add.
-
Select the CompanyProfileOnly note type from the Regarding field.
-
Enter the details of the note in the Text field.
-
Click Save.
-
Click Close.
In File Maintenance, we added a Company note and a CompanyProfileOnly note to the MEDANTQ company profile.
In Order Entry, we opened order 658. We can view the Company note for the Bill To company, MEDQNTQ; however, the Company Profile Only note is not shown in the Notes window.
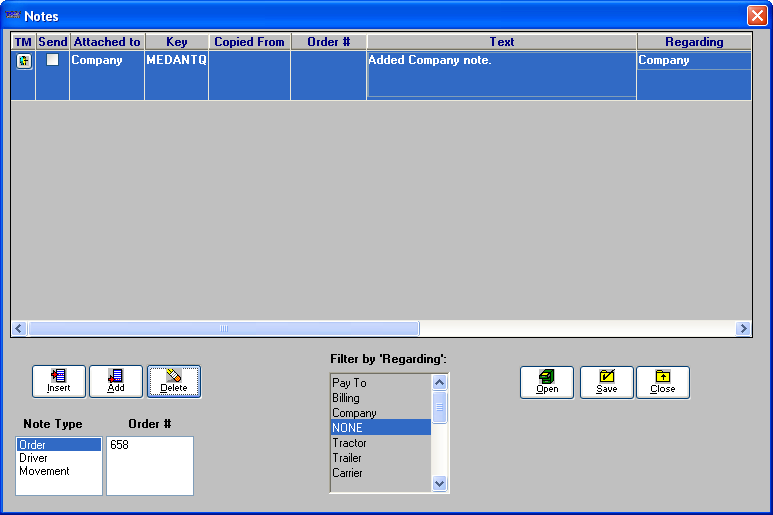
| It is possible to enter Company Profile Only notes in Order Entry, Dispatch, Invoicing, and Settlements. However, it is not recommended because once they are saved, no one will be able to see them in any application except File Maintenance. |
Deleting notes
You can delete notes that are no longer needed.
Highlight the note to be deleted by positioning the cursor anywhere in its row.
Click the Delete button.
When the Delete Row confirmation message displays, click Yes.
Viewing notes
Notes are available from almost all TMWSuite applications. The color of the Notes indicator signifies the status of the note(s) attached. In File Maintenance, the Notes indicator appears in a yellow box.
-
Gray
No active notes are attached. Expired notes may be attached. -
Blue
At least one active note is attached; none of the active notes has an Alert status.Note: In TMWSuite applications other than File Maintenance, the indicator for active notes displays yellow.
-
Red
At least one active note with Alert status is attached.
Follow these steps to view existing notes:
-
To open the Notes window, click
Notes in the sheet toolbar or select Edit > Notes. You may also click the Notes indicator. -
Use the Filter By Regarding list box to select the type of notes you want to see. To see all notes, select None. As you select different filtering options, the displayed notes will reflect the current filter.
-
Click Close to exit the Notes window.
Using the pop-up notes feature
To make notes more visible to the user, the pop-up notes feature automatically displays (pops-up) the Notes window when you access an order or a master file record that has an active note attached. For more information about configuring or using the pop-up notes feature, see the Notes feature guide.