Adding, editing, and deleting recruit records
Adding a recruit to your system manually
To record a profile for a recruit, follow these steps:
-
Go to Edit > Recruits.
The Recruit File Maintenance window opens.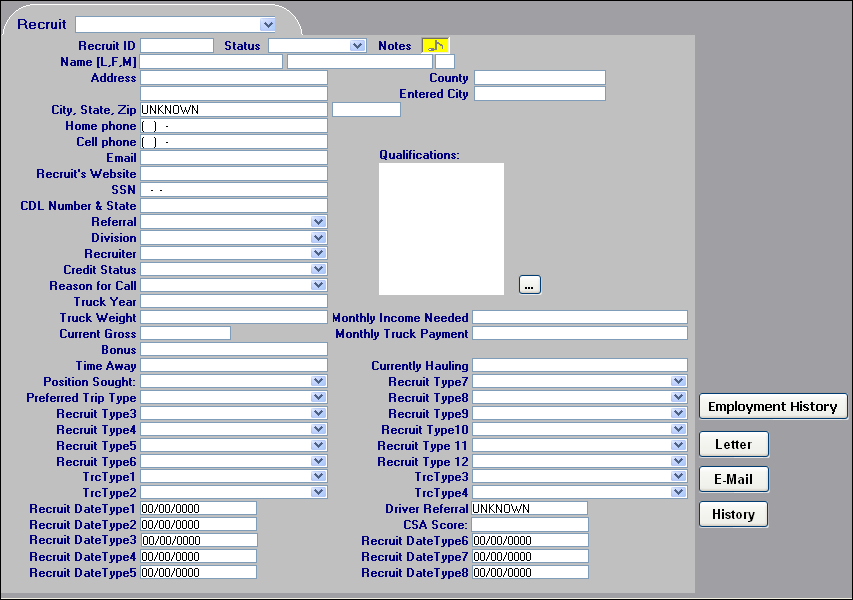
-
Make entries in the following fields:
Recruit ID This field is read-only. The system will generate a numeric ID when you save the profile. Each time a recruit record is created, the ID increments by one (1). Status
Recruit’s status
For a recruit who has not been accepted, leave this field blank. This indicates that the recruit has not yet been accepted for employment.
The options displayed in the drop-down list are user-defined in the RecStatus label, accessed in System Administration. The two system code options required by the system are:
-
Approved
The recruit meets the criteria of the position for which he/she applied.Note: To have the system automatically create an active driver profile for the recruit, this status must be specified.
-
Hired
The recruit has been hired.Note: The system automatically sets the Status field to this value when you use the Create Active Driver feature to create a driver profile from a recruit profile.
Name [L, F, M]
Recruit’s last name, first name, and middle initial
Address (Line 1)
First of two address lines for the recruit’s street address
A maximum of 30 alphanumeric characters are allowed.
Address (Line 2)
Second of two address lines for the recruit’s street address
A maximum of 30 alphanumeric characters are allowed.
Entered City
This field is not applicable when you manually enter a recruit profile; it is read-only
City, State, ZIP
City and state/province in which the recruit resides is entered in the first field; the five-digit or nine-digit ZIP/postal code is entered in the second field.
County
This field is not used when you are manually entering a recruit profile
Home phone
Recruit’s home phone number
Cell phone
Recruit’s cellular phone number
Email
Recruit’s e-mail address
Note: The system will verify that a valid e-mail address is recorded in this field when you click the E-Mail button. You cannot send an e-mail without a valid entry in this field.
Recruit’s Website
Address of the recruit’s personal website
SSN
Recruit’s social security number
Note: Do not enter spaces or dashes between numbers-the system will format the number properly.
CDL Number & State
Recruit’s commercial driver license number and the state that issued it
Referral
Means by which the recruit was referred to your company
The options displayed in the drop-down list are user-defined in the RecReferral label, which is accessed in System Administration.
Division
Division in your company in which the recruit is interested
The options displayed in the drop-down list are user-defined in the RecDivision label, which is accessed in System Administration.
Recruiter
Person in your company who is working with the recruit
The options displayed in the drop-down list are user-defined in the RecRecruiter label, which is accessed in System Administration.
Credit Status
Recruit’s credit rating
The options displayed in the drop-down list are user-defined in the RecCreditStatus label, which is accessed in System Administration.
Reason for Call
Reason the recruit contacted your company
The options displayed in the drop-down list are user-defined in the RecCallReason label, which is accessed in System Administration.
Truck Year
If the recruit is an owner/operator, enter the model year of his/her truck.
Truck Weight
If the recruit is an owner/operator, enter the weight of the tractor only (no fuel or driver) of his/her truck.
Monthly Income Needed
Dollar amount the recruit has requested as monthly pay
Current Gross
Dollar amount the recruit is making before taxes and other deductions
Bonus
This field allows you to enter a value or text. For example, you can enter Yes or No, a dollar amount like 500, or a percent like 2%.
Monthly Truck Payment
If the recruit is an owner/operator, the dollar amount of his/her truck payment
Time Away
Amount of time the recruit is willing to be on the road
The limit for the field is 30 alphanumeric characters.
Currently Hauling
Free-form field you can use to describe the types of loads the recruit handles at the present time
Recruit Type1 - 12
These fields allow you to record specific recruiting-related information about the recruit. The options displayed in the drop-down list in each field are user-defined in the Recruit Type1 - 12 labels, which are accessed in System Administration.
TrcType1 - 4
Applicable for an owner operator
These fields allow you to record specific recruiting-related information about the recruit’s tractor. The options displayed in the drop-down list in each field are user-defined in the TrcType1 - 4 labels, which are accessed in System Administration.
Recruit Date Type 1-8
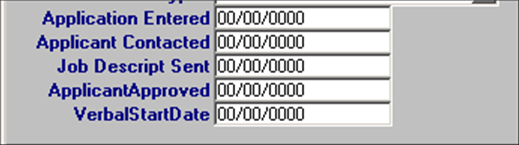
These fields allow you to record specific recruiting-related dates.
Note: The options displayed in the drop-down list are user-defined in the rec_datetype1-8 labels, which are accessed in System Administration. This illustration shows the date labels rec_datetype1-5 changed to better describe the dates.
Driver Referral
The ID of the driver who referred the applicant to your company
Notes:
-
The Driver Referral field displays a list of all driver IDs in your TMWSuite database, including retired drivers.
-
This field should not be confused with the existing Referral field, which displays the means by which the recruit was referred to your company.
CSA Score
The Carrier Safety Administration score enhances compliance with Federal Motor Carrier Administration (FMCSA)
Note: If the recruit is hired as a driver, the score will be included in the driver profile record.
-
-
Click
 Save in the sheet toolbar to retain your entries. The system automatically generates the recruit ID and the recruit name.
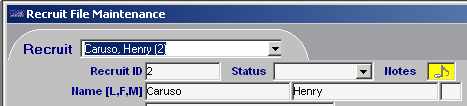
In this example, the system-assigned Recruit ID is 2, because the profile for this recruit was the second profile entered into the system. The Recruit display name is the recruit’s last name, first name, and his/her numeric ID.
Note: Recruits with the same last and first name can be distinguished by the unique numeric ID. For example, there will be a unique record for Caruso, Henry (2), and for Caruso, Henry (35).
Recording a recruit’s qualifications
The recruit’s profile must be saved before you can record qualifications. To record qualifications for an existing recruit, follow these steps:
-
Open the profile of the recruit for whom you want to record qualifications.
-
Click
 to the right of the Qualifications field.
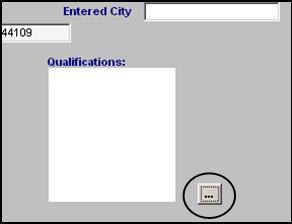
The Qualifications window opens.
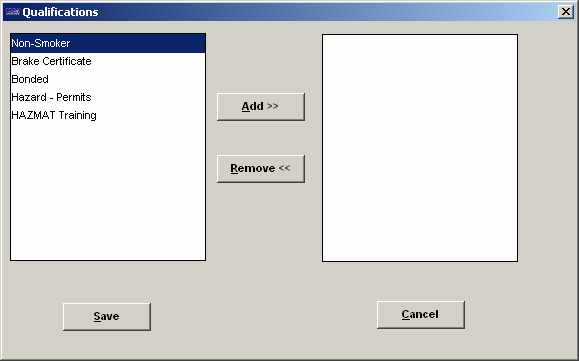
The field on the left displays the driver qualifications your company has defined in the DrvAcc label.
-
To assign qualifications to a recruit, do the following:
-
From the list on the left side of the window, select the qualifications you want to assign to the recruit. You can select multiple qualifications at once.
-
To highlight non-adjacent rows, press CTRL while clicking on the appropriate rows.
-
To highlight adjacent rows, click on the first record in the group. Then hold down the SHIFT key and click on the last record in the group.
-
-
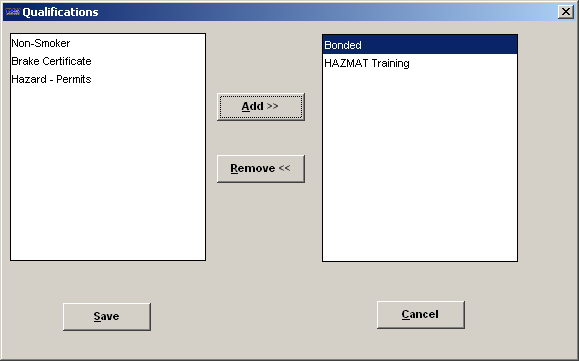
Click Add in the center of the window. The qualifications you selected are displayed in the list on the right side of the window.
Notes:
-
Assigned qualifications no longer display in the list on the left side of the window.
-
If you need to remove a qualification from the assigned list, highlight it and click Remove. The qualification will move to the list on the left side of the window.
-
-
-
Click
Save in the sheet toolbar to retain your entries.
Adding and deleting notes
Notes regarding recruits are only available in the File Maintenance application. The Notes indicator is gray when there are no notes, or when there are only expired notes attached to a recruit record. When an unexpired note is available, the Notes indicator is displayed in blue. If a note has been assigned Alert status, the indicator is displayed in red.
Opening the Notes window
You can open the Notes window for a recruit in any of these ways:
-
Click on the Notes
 in the sheet toolbar.
 -
Go to Edit > Notes.
-
Click the
 Notes indicator.
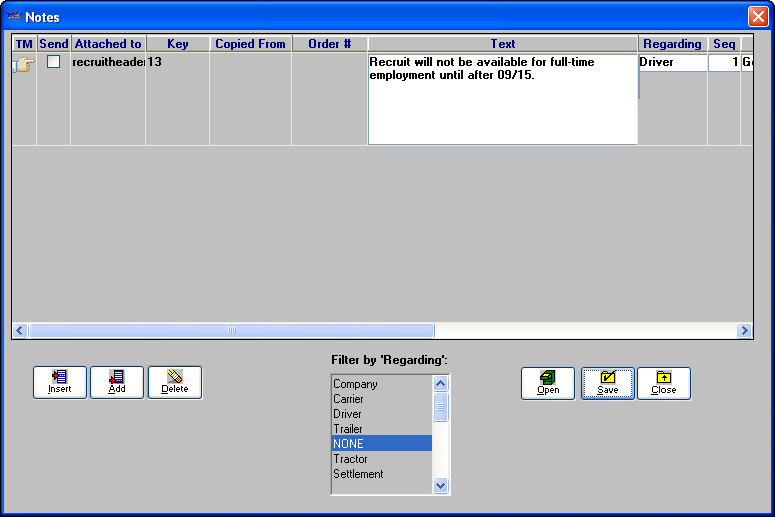
The Notes window opens.
Adding notes to a recruit profile
You can add notes to a recruit’s profile.
-
With the recruit’s profile opened, open the Notes window.
-
In the Notes window, do one of the following:
-
To add a note to the end of the list, click Add.
-
To insert a note before an existing one, highlight the existing note and click Insert.
The system automatically provides some information:
-
It puts Recruit in the Attached to field.
-
It puts the recruit’s ID in the Key field.
-
-
Select the appropriate entry in the Regarding field. The option you select controls how the note is filtered when a user retrieves notes later. The options are:
-
Company
-
Settlements
-
Carrier
-
Pay To
-
Driver
-
Billing
-
Trailer
-
Order
-
Tractor
-
-
Enter the text of the note in the textbox.
-
Although the text box display up to seven rows of text, you can view the text in its entirety by doing one of the following:
-
Use the vertical scroll bar at the right of the text box.
-
Right-click on the text box, and select Zoom Field from the shortcut menu.
-
-
To copy a word or phrase from an existing note, highlight the portion you want to duplicate and press CTRL+C. Then position the cursor in the spot where the word(s) are to be pasted and press CTRL+V.
-
You can cut a word or phrase from an existing note and paste it in a different spot. To do so, highlight the portion to be cut and press CTRL+X. Note that the word(s) are deleted from their original location. Position the cursor in the spot where the word(s) are to be pasted and press CTRL+V.
-
-
Position the cursor in the Note/Alert field. Highlight one of the options to rank the importance of your note.
-
Select Note if your note is informational, but not of critical importance.
-
Select Alert if your note is of critical importance.
The ranking determines how the system displays the Note indicator on windows associated with your note. For notes ranked as Note, a yellow indicator is displayed; for notes ranked as Alert, a red indicator is displayed.
-
-
Notes may be assigned an expiration date. Position the cursor in the Expiration Date field, and enter the date and time the note is to expire, if applicable.
Note: Once the expiration date has passed, the note no longer triggers the Note indicator to show as yellow or red. However, the expired note continues to display in the Note window.
-
Click Save to save the note.
Note: To cancel any changes, click Retrieve; the system displays the previously existing notes.
-
Click Close to exit the window.
-
Click
Save in the sheet toolbar to retain your entries.
Deleting a note
You can permanently remove a note from a recruit’s profile.
-
With the recruit’s profile opened, open the Notes window.
-
Position the cursor in the note you want to remove.
-
Click Delete.
The system displays a confirmation dialog box.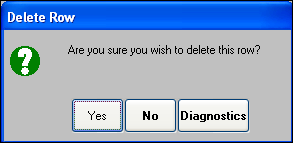
-
Click the Yes button to delete the note.
-
Click
Save in the sheet toolbar to save the deletion.
Recording a recruit’s employment history
When recording a recruit’s employment history, you may find that a company the recruit provided is one used by other recruits. Instead of recording the same company in each recruit’s profile, you can create a reusable list of companies. This list becomes an Employer Profiles database. You can use it when recording recruit profiles in the future.
| With the Integrated Reporting module, you can combine the information on the Employment History window to generate employment verification forms that can be printed or e-mailed. |
Use this procedure to record the recruit’s employment history.
-
With the recruit’s profile opened, click Employment History.
The Employment History window opens. -
Click Add.
A blank record displays.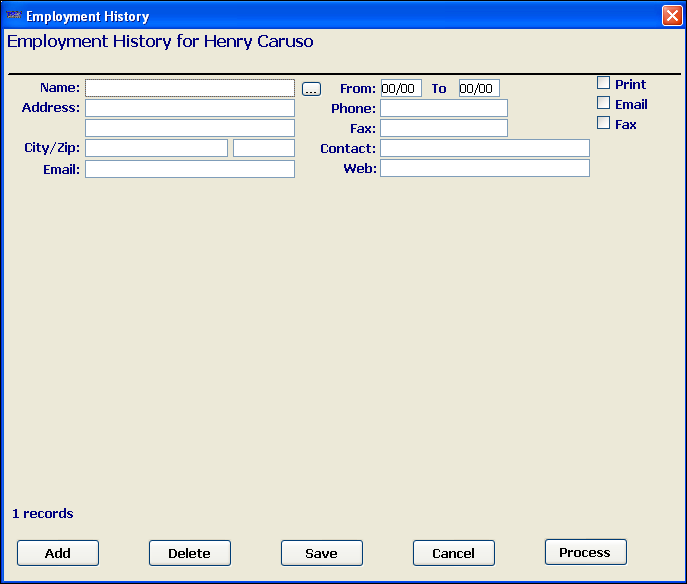
-
To open the Employer Profiles window, click
 to the right of the Name field.
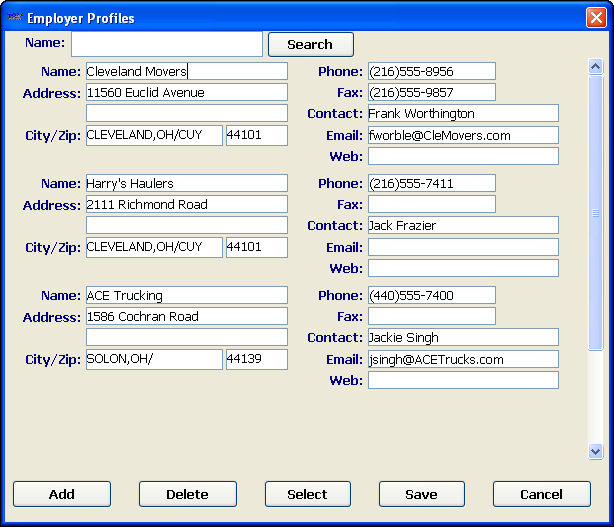
-
Do one of the following:
-
If you have not compiled a database of employer profiles, click Add, and then complete the fields.
Name
Company name of the previous employer
Address
Two lines are available to record the street address of the previous employer
City/Zip
Two fields:
-
City and state/province of the previous employer is entered in the first field
-
Five-digit or nine-digit ZIP/postal code is entered in the second field
Email
Company contact’s e-mail address
From / To
Month and year date range of employment
Phone
Company’s telephone number
Enter numbers only. When you TAB out of the field, the system will format the numbers to a standard telephone number display.
 to
to 
Fax
Company’s FAX number
Enter numbers only. When you TAB out of the field, the system will format the numbers to a standard telephone number display.
 to
to 
Contact
Name of the contact individual at the company where the recruit was previously employed
Web
Company’s Web address
-
-
If you have already compiled a database of employer profiles, locate the company name you want to use by doing one of the following:
-
In the Name field, enter the first few characters of the company, and click Search.
The first record matching the characters is highlighted. -
Scroll through the list until you locate the company.
-
-
-
Click on the company name you want to use and click Select.
The Employer Profile window closes and the company information is inserted in the recruit’s employment history. -
If you are using Integrated Reporting to generate employment verification forms, select the appropriate check box to indicate the method of communication:
-
Print
Verify a valid mailing address is also entered in the Address and City/Zip fields. -
Email
Verify a valid e-mail address is also entered in the Email field.Note: The From field of the e-mail will be the Microsoft Outlook address of the individual processing the communication from the Employment History window.
-
Fax
If you intend to FAX the employment verification form and you are using an e-mail integrated faxing system, see Setting up your system to use the employment verification form.
-
-
Repeat steps 2 through 6 until all previous employers are entered.
-
When finished, click Save to save and close the Employment History window.
-
Click
Save in the sheet toolbar to retain your entries.
Deleting a recruit profile
You can permanently remove a recruit’s profile from the system.
-
In File Maintenance, look up the recruit.
-
Go to Edit > Delete, or click
 Delete.
A message asks you to confirm your intent to delete the record. -
Click Yes.
The system deletes the record immediately.
| You can delete a recruit record whether or not a driver profile has been created. |