Company File Maintenance overview
The File Maintenance application records relevant information regarding entities that are key to your business operation. These records are called profiles.
A company profile must exist for each entity with which your company does business, such as shippers, consignees, and companies responsible for payment of invoices. Proper profile setup and maintenance play a critical role in the successful use of TMWSuite, and any other TMW add-ons your business has purchased.
The following pages provide instructions for setting up and maintaining company profiles.
Company File Maintenance field definitions
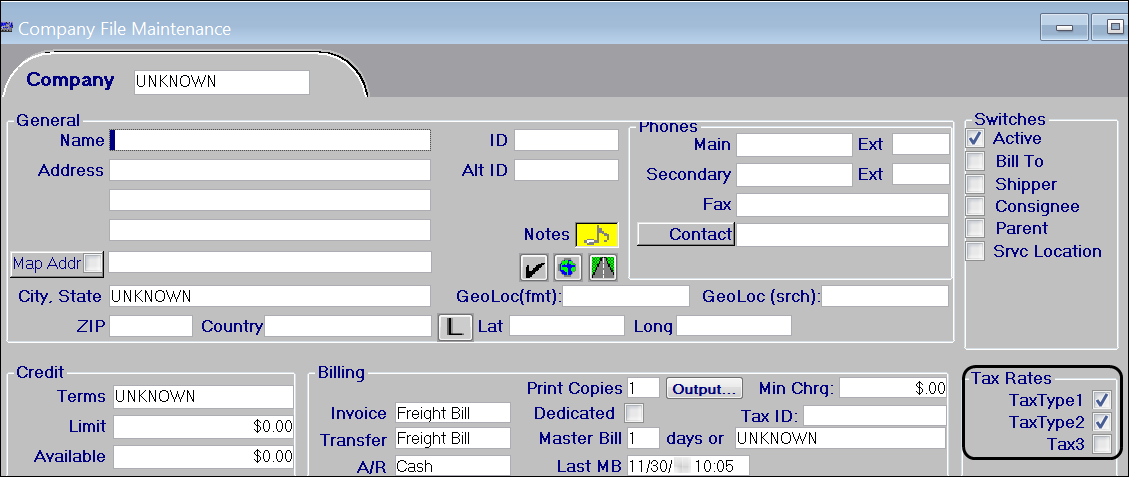
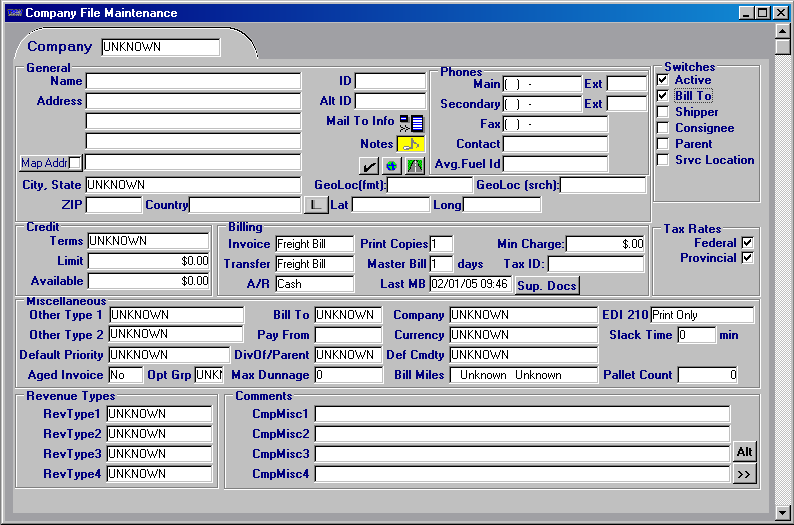
The Company File Maintenance window, shown here, is used to record company profile information.
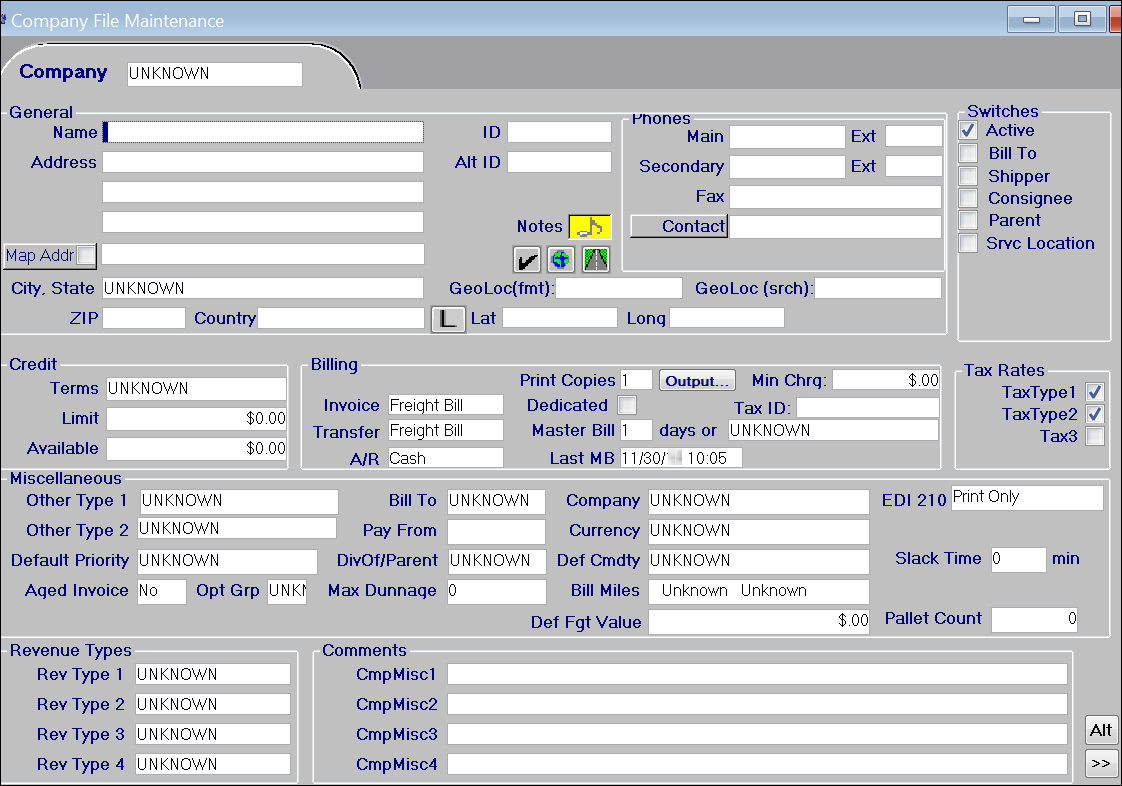
The following tables list the fields and command buttons that exist in the various sections of the Company File Maintenance window.
Information in fields identified with a blue asterisk (*) shows in company field drop-down lists.
General section
The fields in this section provide information common to all companies, except where otherwise noted.
Name * |
The name of the company. A maximum of 100 alphanumeric characters is allowed. Notes:
|
Address * |
Three lines used to record the street address for the company. A maximum of 100 alphanumeric characters is allowed in each line. Note: The address fields in Order Entry, Invoicing, and Settlements may display a truncated name. TMWSuite’s invoice formats and the EDI flat file outputs do not necessarily support an address line longer than 40 characters. |
Add City
|
This check box enables you to add a city profile for any Custom Place you have created in PC*Miler. The check box displays only if you have For complete instructions on activating and using this feature, see Adding a city profile from Company File Maintenance. |
Map Addr
|
When this check box is selected, ALK’s PC*MILER|Streets will use the designated street address for mileage lookups and mapping. This address will be used only for mapping and mileage, not as a mailing address. Note: The system can be set up to populate the Map Address field for you. For more information, see Recording/viewing mapping information. |
City, State * |
City and state/province location of the company. |
ZIP * |
Five-digit or nine-digit ZIP or postal code for the city. |
Country |
Country in which the company is located. |
ID * |
Identification code for the company. Typically, an ID is assigned by the system when a new company record is first saved. It consists of the first three letters of the company’s name, followed by the first three letters of the city’s name. For details, see Letting the system assign a company ID. However, if desired, you can enter a user-defined ID before you save a new company record for the first time. A maximum of eight alphanumeric characters is allowed. For details, see Manually assigning a company ID. Note: See Adding characters to system-assigned company ID’s for information about configuring the system to add user-defined characters to the ID automatically. |
Alt ID * |
An alternate, user-defined code assigned to the company. A maximum of 25 alphanumeric characters is allowed. An alternate ID is sometimes needed to identify the company in a separate computer system (such as an accounting package) to which TMWSuite interfaces. |
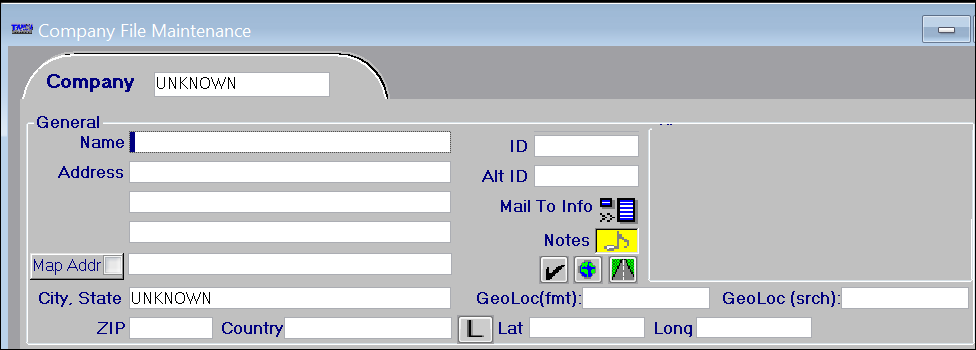
Mail To Info
|
This field displays only when the Bill To check box is selected in the Switches section of the window. Click the button to access the Mail To window. This window is used to record an alternate mailing address when invoices should be sent to a third-party freight payment service. For details, see Recording a mailing address for a freight payment service company. Note: The Mail To Info label displays in red after an address has been entered. |
Notes
|
Click this button to view/record notes for a company. The color of the button indicates note status :
For more information, see Recording/viewing notes for a company. |
Check Address
|
Click this button to check the street address against the PC*MILER|Streets database. If the street address is not found, the Address Not Found window is displayed so that you can select an address recognized by PC*MILER|Streets. The address you select will be recorded in the Map Addr field. For more information, see Recording/viewing mapping information. |
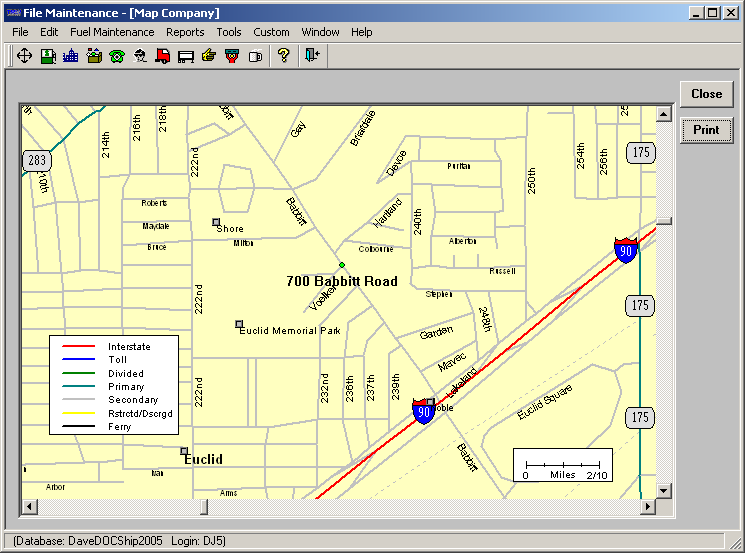
Map Address
|
Click this button to see a map of the company’s location.
Notes:
|
Calc Distance
|
Computes the mileage between the company location in the first Address field and the ZIP Code recorded on the profile and the main post office (usually near the center of a city) for that ZIP Code.
For more information, see Recording/viewing mapping information. |
GeoLoc(fmt) |
Free-form geographic identifier used when the company does not have a standard street address. Record the identifier with all required formatting such as dashes. For more information, see Using free-form geographic identifiers for company locations without standard addresses. |
GeoLoc (srch) |
Free-form geographic identifier used when the company does not have a standard street address. To simplify lookup later, record the identifier as users will search for it, i.e., without formatting such as dashes. For more information, see Using free-form geographic identifiers for company locations without standard addresses. |
Get Lat/Long
|
If you are using PC*MILER|Streets, this button populates the Latitude and Longitude fields with data based on the company’s address. For more information, see Determining a company’s latitude and longitude. |
Latitude |
Numeric code that represents the latitude of the company’s location. For more information, see Determining a company’s latitude and longitude. |
Longitude |
Numeric code that represents the longitude of the company’s location. For more information, see Determining a company’s latitude and longitude. |
Phones section
When entering a phone number, do not enter dashes or spaces. The system will format the field correctly.
Main * |
Primary telephone number by which the company can be reached. |
Secondary |
Alternate telephone number by which the company can be reached. |
Ext |
Two fields that allow you to record extension numbers for the company’s primary and secondary phone numbers. |
Fax |
Fax number for the company. |
Contact * |
Name of the person who is the primary telephone contact at the company. |
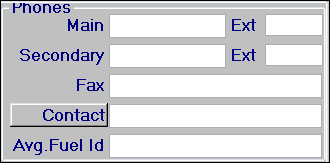
Avg. Fuel ID |
This field displays only when the Bill To check box is selected in the Switches section of the window. Use it to enter the ID of the Average Fuel Price table to be used for the company when fuel surcharges are calculated. For details on how to set up an Average Fuel Price table, see the see the "Average Fuel Price Maintenance" chapter. |
Switches section
A check mark indicates that the switch is set to on.
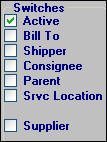
Active |
Select the Active check box if you actively do business with this company. |
Bill To * |
Select the Bill To check box if the company is to be billed for work performed. This is a critical designation because it has a profound effect on how the system:
Note: If the Bill To check box is selected, the Bill To field in the Miscellaneous section must be set to UNKNOWN to prevent billing problems. |
Shipper * |
Select the Shipper check box if the company will serve as a pickup location. |
Consignee * |
Select the Consignee check box if the company will serve as a drop location. |
Parent |
Select the Parent check box if the company owns enough voting stock in another firm, i.e. a Bill To company, to control management of its operations |
Port |
Location from which your drivers and/or carriers pick up containers, and to which they will return them. The check box is used for the intermodal feature, which is available in TMWSuite’s Dispatch application. For details, see the Intermodal Feature Guide. |
Srvc Location |
Select the Srvc Location check box to designate the company as a service location for use with the Trailer Wash Tool and/or the Purchased Services add-on module. For detailed information about setting up and using these features, see: |
Depot |
Railroad station used to handle the receipt and transfer of freight. The check box is used for the intermodal feature, which is available in TMWSuite’s Dispatch application. For details, see the Intermodal Feature Guide. |
Supplier |
Used in Fuel Dispatch to denote a company that sells branded and unbranded fuel to service stations. For details on Fuel Dispatch, see the Fuel Dispatch online help. |
Credit section
The fields in this section provide information about a Bill To company’s credit status.
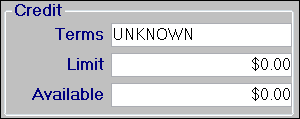
Terms |
Payment terms for the customer. Note: This is a user-definable field and the options for the field are set up in the Credit Terms label in the System Administration application. |
Limit |
Maximum amount of credit allowed the customer. |
Available |
The company’s current credit balance, which you can edit manually, or which can be updated automatically via TMW’s Microsoft Dynamics GP interface. |
| For details on the credit checking feature, see the Credit Checking Guide. |
Billing section
The fields in this section provide information about companies that are billed for services.

Invoice |
Applicable for Bill To companies; indicates how the system is to generate invoices and/or master bills for the company. The options are:
|
Transfer |
Indicates the format in which information will be exported to your accounting system.
|
A/R |
Indicates if this is a Cash or Credit customer. |
Print Copies |
Applicable for Bill To companies. Specifies how many copies of each invoice are to be printed. |
Output
|
This button opens the Invoice Output Selection window, where you can enter information needed by TMWSuite’s Enhanced Printing feature. The feature allows you to e-mail reports, such as invoices. Note: The button displays only when you have a value of Yes in the String1 field for the `EnhancedInvoicePrint General Info Table setting. For more information, see the Enhanced Printing Guide. |
Master Bill_days or |
Applicable only for Bill To companies that receive master bills. You use this field and the Last MB field to identify the schedule for printing master bills. For detailed instructions on scheduling master bills, see Setting up a company for master bills. |
Last MB |
Applicable only for Bill To companies that receive master bills. The system updates this field every time a master bill is printed. Notes:
|
Min Charge |
Company-specific minimum line haul charge allowed for an order. If the line haul amount computed falls below this minimum, Invoicing will add an invoice detail with the description, Order Minimum Adjustment, to the invoice for the difference. Warning: Because supplemental invoices have no line haul amount, the system applies the entire company minimum charge on supplemental invoices for companies that have a minimum charge recorded in their profiles. |
Tax ID |
Custom. |
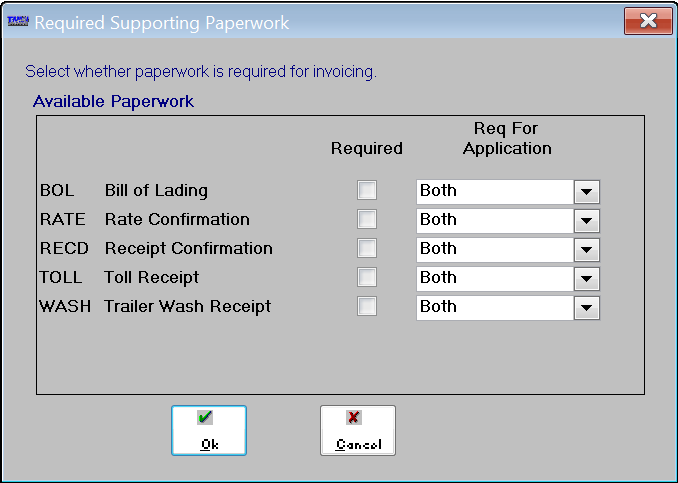
Sup. Docs
|
This button displays only when the Bill To check box is selected in the Switches section of the window. It opens the Required Supporting Paperwork window. It allows you to record the types of paperwork the Bill To company requires for each of their orders. If you have configured the system to do so, it will prevent the saving of an invoice if paperwork has not been checked in for the order. For more information, see the Using the paperwork tracking feature guide.
|
Tax Rates section
The Tax Rates section is designed for use with Canadian taxes. Rates are set up using the Tax Maintenance window in the System Administration application.
Check boxes indicate the taxes that the Bill To company must pay. By default, the tax type fields are called TaxType1, TaxType2, and Tax3. In the label file, they can be renamed as GST, PST or HST, and QST, respectively. For example:
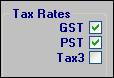
GST |
Tax Type 1 is used for GST (Goods and Services Tax). |
PST |
Your setup in the Tax Maintenance window for a particular province determines whether Tax Type 2 is used for PST (Provincial Sales Tax) or HST (Harmonized Sales Tax). Note: If you use Tax Type 2 for both PST and HST, you will be able to define only one name in the label file for display purposes. For example, if you rename the TaxType2 label to PST, it will display as PST on the company profile. Even if the Tax Type 2 check box is labeled PST, your HST setup for a province enables the system to correctly apply HST when a company is billed. |
Tax3 |
Used for QST (Quebec sales tax). |
Changing the Tax Type field names
By default, the Tax Type check boxes are labeled as shown in this illustration.
To use the tax type name with which you are familiar, e.g., TaxType1 is GST, TaxType2 is PST, Tax3 is QST, you must edit the display names in the label file.
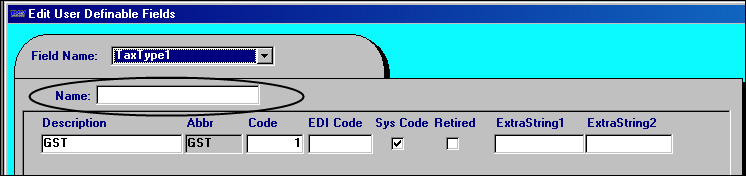
The label file is edited in the System Administration application. To access it, select Edit > Label File. The TaxType1 label is shown below. For the TaxType1 - 2 labels, the Name field is blank by default. This indicates that the display name will be the value in the Field Name field. To change the field’s displayed name, make an entry in the Name field.
By default, the TaxType3 label already has a display name specified:
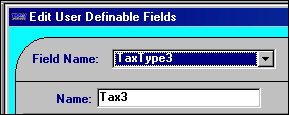
If you are using TaxType3 for QST taxes, you can change the display name to QST.
Note: Changing the displayed name for the TaxType1 - 3 labels affects the check box names in the company and commodity profile windows, and the Edit/Enter Charge Types window.
Determining when to use the Tax Type check boxes
The TaxType1 and TaxType2 check boxes are selected by default. This means that whenever you create a new Bill To company profile, the company is flagged as being subject to those types of taxes when an order for that company meets the taxation requirements.
| Although the TaxType1 and TaxType2 check boxes are selected by default for every new company for which you set up a profile, taxes are only applied when a company is used as the Bill To on an order. |
Also by default, the Tax3 check box is cleared on every new company profile. Unless a Bill To company has the Tax3 flag set, the system will never apply TaxType3 taxes to invoices for that Bill To. To ensure that TaxType3 taxes will be applied, each Bill To company for which TaxType3 taxes are applicable must have the Tax3 check box selected.
For each Bill To company recorded in the system, remember that:
-
If a Bill To company is to be subject to a particular type of tax, make sure the corresponding check box is selected.
-
If a Bill To company is to be exempt from a particular type of tax, make sure the corresponding check box is cleared.
For detailed information about setting up Canadian tax rates in TMWSuite, see the Setting up Canadian tax rates chapter in the System Administration guide.
Miscellaneous section
The fields in this section provide general company information.

Other Type 1 |
The name and options for this field are user-defined. Setup occurs in the Other Type 1 label in the System Administration application. |
Other Type 2 |
The name and options for this field are user-defined. Setup occurs in the Other Type 2 label in the System Administration application. Note: If you are using Microsoft Dynamics GP as your accounting package, your entry in this field can turn on the ability to transfer the first reference number recorded in the invoice header to the Document Number field in Microsoft Dynamics GP. To use the entry in this way, you must add an option to the Other Type 2 label that has REF as the value in its ABBR field. You also must select this option in the Other Type 2 field in the company profiles of the customers for which you want to transfer the reference number, as well as the TMW invoice number. For example, you may have Bill To companies that typically reference the reference number in the invoice header, often the Bill of Lading, when they remit payment. Using this feature allows the system to transfer the first reference number and the invoice number. So, if the first reference number is 45633 and the invoice number is 8776A, the document number would be sent to Microsoft Dynamics GP as 45633-8776A. A hyphen is always inserted to separate the reference number from the invoice number. |
Default Priority |
Priority assigned to orders placed by this company. The priority selected here will be applied as the default priority in Order Entry for orders placed by this company, e.g., the Order By company on the order header. The descriptions for the priority are defined in the Order Priority label in the System Administration application. |
Aged Invoice |
Indicates whether a Bill To has any invoices that have gone unpaid for more than 30 days. Manually set this field to Yes or No. |
Opt Grp |
The volume optimization group to which the company has been assigned. Note: The information in this field is used by TMWSuite’s Volume Optimization add-on module. For more information, see the Using the Volume Optimization feature guide. |
Bill To * |
Applicable for companies for which invoices are to be sent to a different company. Enter the ID of the Bill To company to be billed for orders placed by this company. When you enter an order in Order Entry or Dispatch and you record a company’s ID in the Order By field, the system will look at the company’s profile to determine whether it is marked as a Bill To. If it is not, it will check the entry in the Default Billto field, and then automatically populate the order’s Bill To field with that ID. Note: When the Bill To check box in the Switches section is selected, this field must be set to UNKNOWN to prevent billing problems. |
Pay From |
Custom. |
Div Of/Parent |
If the company is a division or subcompany of a larger one, this field identifies the parent company. For more information, see Setting up parent and subcompanies. |
Max Dunnage |
Maximum dunnage allowed for this company. |
Company |
Applicable if you want to classify multi-company customers. Select the classification to which this company belongs. Note: The options for this field are user-defined in the Company label, accessed in the System Administration application. |
Currency |
Enter the type of currency to be used when the company is billed. Note: The Currency options are user-defined in the Currency label, accessed in the System Administration application. |
Def Cmdty |
ID of the commodity that this company typically hauls. The commodity recorded here will display automatically in Order Entry and Dispatch as the default commodity for orders placed by this company, e.g., the Order By company on the order header. |
Bill Miles |
Indicate the type of miles that will be used to bill the customer. The options are set up in the [
Note: Settings that determine the interface to be used for billing miles exist in three locations: the TTS50, Bill To profiles, and rate schedules. When an order is auto-rated in Order Entry, Dispatch, or Invoicing, the system uses the following hierarchy when determining which mileage type to use:
|
EDI 210 |
Indicate whether invoices for this Bill To will be printed or sent as an EDI 210 (electronic invoice) document. The options are:
Note: The EDI 210 field appears when String1 is set to N in the For information about using the window to control invoice handling based on invoice type, definition, and customer terms, see the Selecting the invoice output method section in the Working with invoices chapter of the EDI Interface guide. |
Slack Time |
Currently not functional. |
Pallet Count |
Number of carrier’s pallets at the customer location. This number is informational only. |
Def Fgt Value |
The default freight value for a company’s typical shipment. If the system is set up to do so, the default value recorded for a Bill To, shipper or consignee will be copied to orders in Order Entry and Dispatch. This feature is active only if values are entered for the Guide: Order Entry | Chapter: Performing Order Entry setup procedures |
Revenue Types section
The revenue classifications selected here may be applied as the defaults in the RevenueType 1 - 4 fields in Order Entry for orders involving this company. Revenue Type defaults are determined by settings in your TTS50. For details, see:
Guide: Order Entry | Chapter: TTS50.ini settings that affect Order Entry
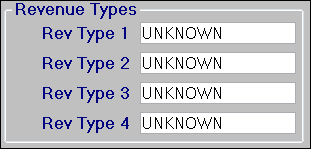
RevType1-4 * |
The names and options for these fields are user-defined; setup occurs in the Revenue Type 1-4 labels in the System Administration application. Assignment of orders to revenue classifications allows you to track revenue collected for different types of loads. |
Comments section
The fields in the Comments section allow you to record free-form comments about the company.
Company Misc 1-4 |
The names for these fields are user-defined; setup occurs in the CmpMisc1-4 labels in the System Administration application. In these fields, you can enter a free-form comment up to a maximum of 254 characters. Note: The information in the Company Misc 1-2 fields can be transferred to the Comment 1-2 fields in the Microsoft Dynamics GP Customer Maintenance window. The Comment 1-2 fields will display only the first 30 characters of the entry. |
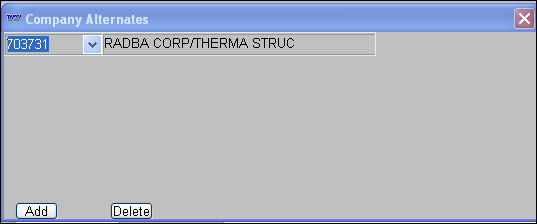
|
Opens the Company Alternates window, which may be useful to fuel haulers who use TotalMail. When a load assignment form goes out, it identifies the rack as well as a list of alternate pickup locations. Sometimes a driver goes to pick up fuel only to find that the rack has run out of gas. So he/she must travel to one of the alternates. The driver sends a form back identifying which alternate they went to, and TotalMail automatically changes the original rack to the alternate on the order. Use of this feature requires assistance from TotalMail Support.
|
|
Opens the Additional Details window, which displays fields for multiple features. For more information, see Recording information in the Additional Details window.
|

Out of Area fields
Out of Area fields display across the bottom of the window only if [Misc]ShowOOAInformation=Yes is in your TTS50. These fields enable you to set an out of area range for each shipper so that you can bill extra charges and generate extra pay for OOA miles and stops.
![]()
Centroid City/State |
City/state from which OOA miles are to be calculated. A company’s centroid city/state comes into play only when that company is used as the initial shipper on an order. |
Centroid Zip |
Applicable if you want to specify a particular zip code within the centroid city/state. OOA miles will be calculated based on distance from the portion of the city designated by the zip code. |
OOA Miles |
Number of miles that define the radius from the centroid city; miles greater this radius are considered out of area. The number of miles entered here does not necessarily represent the distance between the shipper and the centroid city. The number only determines the number of miles from the centroid city that are considered free, i.e., miles for which OOA charges and pay will not be calculated. |
OOA (Stop) |
This field defaults to the number of miles recorded in the OOA Miles field. However, in addition to per-mile OOA charges and pay, you can create secondary rates for stop charges and stop pay. If desired, to have the system determine which stops are to be counted for stop charges and stop pay, you can use the OOA (Stop) field to specify a mileage amount other than the one used for OOA Miles. The system will count only those stops that are beyond the radius defined by your entry. |
For more information about using the Out of Area feature, see Using the Out of Area (OOA) rating feature in the Pay Rate Examples Guide.
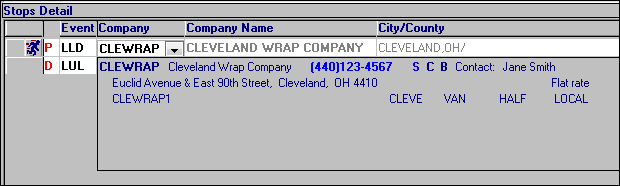
Company field drop-down list information
Information in fields identified with a blue asterisk (*) in the tables above shows in company field drop-down lists. The information layout varies depending on where the drop-down list appears within an application. This illustration shows how the information is displayed in the Dispatch Trip Folder’s Stop Detail grid.
Extended drop-down list information is available in the Company field in these windows:
| Application | Window/Field |
|---|---|
File Maintenance |
Company File Maintenance
|
Invoicing |
Edit Invoice Folder
|
Order Entry |
Order Entry Folder
|
Rate Schedules |
Edit Settlement Rate Schedule Folder
|
Settlements |
Restrict Settlement Data
|
All |
Tools > Edit Company Contacts
|