Add assignments and employees in Shop Planner
You add assignments and employees in Shop Planner using the Open Repairs view. From that view, you can open the Add Assignment/Employee window.
Open the Add Assignment/Employee window
-
Open Shop Planner Repair View by going to Menu > Activities > Shop Planner. The Shop Planner opens in Planner view.
-
Select Open Repairs in the toolbar to open the repair view.
-
Select a row.
-
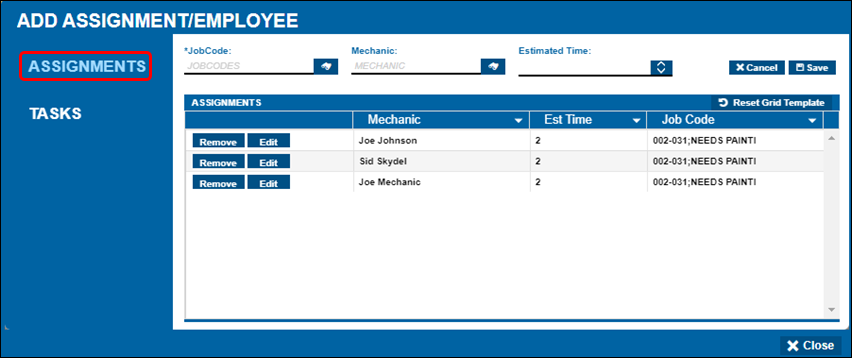
From the Actions menu, select Add Assignment/Employee. The Add Assignment/Employee window opens with the Assignments tab open.

You can switch between assignments and tasks using the tabs. In the preceding illustration, the Assignments tab is marked with a red box.
Add an assignment or employee
-
Complete the following fields:
Required field: *
Field
Definition
Job Code *
You can enter a job code or find one using the
 Search icon.
Mechanic
You can enter a mechanic (that is, an employee) or find one using the
 Search icon.
Estimated Time
Enter an estimated time for the repair, or use the up and down arrows to select one.
-
Select Save to save your changes and close the window.
Add a new task
-
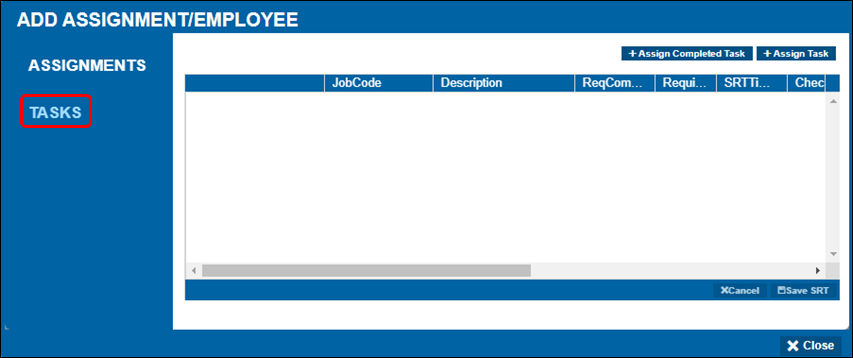
Select the Tasks tab. The task view opens.

-
Select Assign Task. The Task Search window opens.
-
You can enter a job code or find one using the
 Search icon.
 -
If your selected job code has several tasks, select one or more from the table.
-
If you want, you can add a description.
-
Select Save SRT to save your changes.
Add a completed task
Sometimes an employee will need to perform an additional task to complete a repair. To keep a record of these actions, you can assign the completed task to the employee with the Add Assignment/Employee window.
-
Select the Tasks tab. The task view opens.
-
Select Assign Completed Task. The Select the Employee window opens. You can enter an employee or find one using the
 Search icon.
 -
Select OK. The Task Search window opens.
-
You can enter a job code or find one using the
 Search icon.
 -
If your selected job code has several tasks, select one or more from the table.
-
If you want, you can add a description.
-
Select OK to save your task selections and close the window.
-
Select Save SRT to save your changes.
