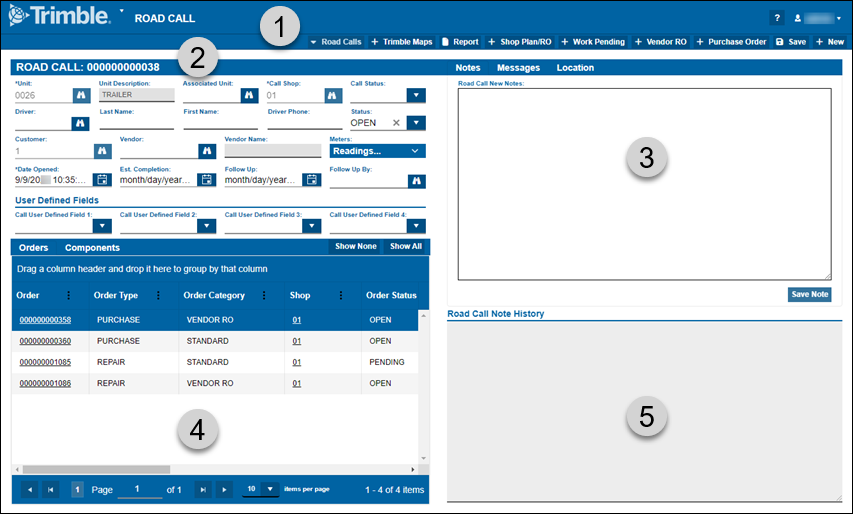
Road Call page overview
The Road Call page buttons
Road Calls
First available in V.2024.2
Selecting the Road Calls button shows you helpful links that you can bookmark in the application, such as a weather website. These links are customizable; you can set these links by going to Menu > Setup > Integration Options > Road Calls.
If the Road Calls button is turned off, it means that no road service links have been created for your setup.
|
Before V.2024.2, the Road Calls button was named Road Service. The Integration Option was also named Road Service (that is, Menu > Setup > Integration Options > Road Service). |
Trimble Maps
If you have the Trimble Maps integration, you can use the Trimble Maps button on the Road Call page to view the unit location and nearby service providers or points of interest (POIs) based on Categories like gas, truck services, and others, on an interactive map.
| The Trimble Maps button is only available on existing road calls. It does not appear when you create a new road call, because there is no unit to track at that point. |

Selecting Trimble Maps opens the Select Trimble Maps Place window. The window shows the unit’s current location using latitude and longitude. It also shows the nearest service providers and/or points of interest (POIs).
| If the latitude and longitude for the unit is not populated on your selected road call, you can use the search bar to find service providers or POIs in the area you want. You can search by the company name, address, or latitude and longitude value. |
The window shows the unit’s location ![]() and surrounding service providers, as seen in this illustration.
and surrounding service providers, as seen in this illustration.

You can change the view of the map by zooming in or out or moving the field of view on the map.
You can use the window to select which provider you want to send the unit to. Selecting OK saves your change.
| You may be prompted to select a verified place. A verified place refers to a location that has been authenticated and confirmed for accuracy regarding its address, contact details, and other relevant information. Verified places typically include businesses, service centers, parking spots, and other points of interest crucial for logistics and transportation planning. |
You can configure Trimble Maps in TMT Fleet Maintenance (TMT) by going to Menu > Setup > Options > Integration Options if not already available. For more information, see Integration Options: Trimble Maps.
Report
You can use the Report button to email or print road calls.
-
Go to Menu > Activities > Road Calls > Road Calls Listing to view existing road calls.
-
Select the road call you want to email or print.
-
Select Report to open the Report Viewer window.

-
At the bottom of the window, you can select Email to send the report through email. When you select the button, the Email Report window appears.

-
Enter the necessary information in the fields. The fields behave in the same way as other email services.
-
By default, reports are sent in PDF format. You can change the Attachment Format by selecting another option from the dropdown list.
-
Select Send to send the report.
-
Select Print to generate a PDF of the road call report. The file automatically downloads to your device.
Shop Plan/RO
Use the Shop Plan/RO button to create a shop plan and/or a repair order (RO) for a road call. For more information, see Create a shop plan or repair order.
Work Pending
Select the Work Pending button to create a Work Pending RO after you create a new road call. For more information, see Create a work pending repair order.
Vendor Repair Order
Use the Vendor Repair Order button to create a VRO and add it to your road call. For more information, see Create a vendor repair order (VRO)
Purchase Order
Select the Purchase Order button to create a PO and add it to your road call. For more information, see Create a purchase order.
New
Select the New button to create a new road call. For more information, see Create a road call.
The Road Call pane
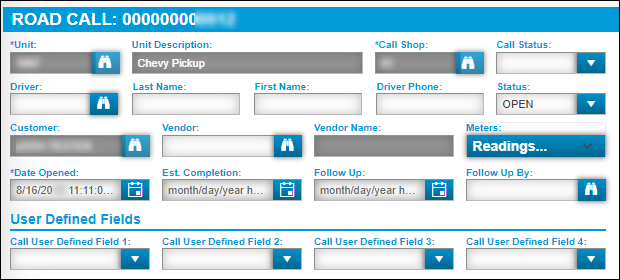
The Road Call pane is where you create and edit road calls.
-
For more information on creating road calls, see Create a road call.
-
For more information on editing road calls, see Edit a road call
This illustration show the Road Call pane of an existing road call.
The Notes, Messages, and Location tabs
The Notes tab
The Notes tab lets you record any important information and attach it to the road call. In this illustration, the user has entered the note "Driver broke off key in ignition."

Unlike the other tabs, the Notes tab has its own Save button: Save Note. In the preceding illustration, the Notes tab and the Save Note button are called out in red.
The Messages tab
The Messages tab shows any standard message create for your setup, if applicable. Usually, the message is used to provide a standard set of instructions for the road call during its creation, if one is set up for the shop.
You cannot edit a road call message on this tab. To edit a Road Call message, see Standard Messages.
The Orders and Components tabs
With each of these tabs, you can scroll to the right to see more information.
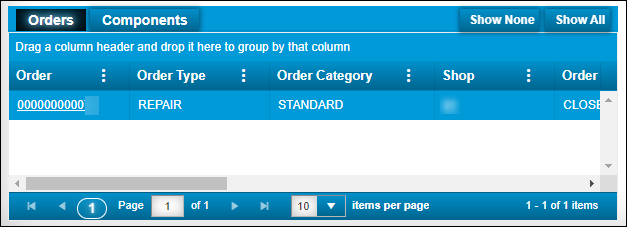
The Orders tab shows all orders (repair and purchase) connected with the road call. You can use the Show None and Show All buttons to control what the tab shows.
-
Show None hides all orders.
-
Show All shows all orders.
In this illustration, there is only one repair order attached to the road call.
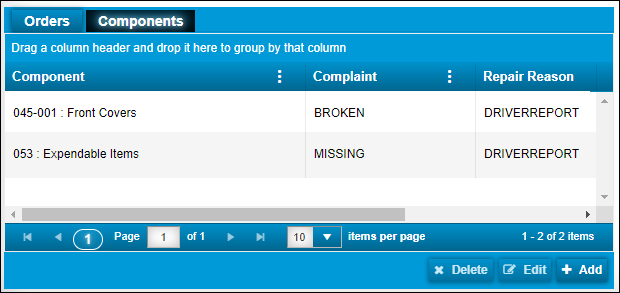
The Components tab shows all components (that is, parts) connected with the road call. This illustration shows two components: Front Covers and Expendable Items.
The Road Call Note History pane
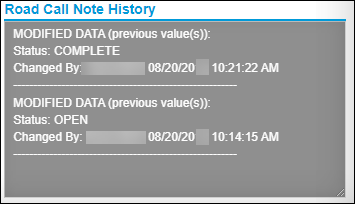
The Road Call Note History pane shows the road call change details, such as when the road call was created and by whom, and any notes attached to the road call. Items are presented in reverse chronological order (that is, with the most recent item on top and the oldest item on the bottom).
The program completes all entries in the Road Call Note History pane. You cannot edit this information.
In this illustration, the pane shows what has happened to the road call. No one has left any notes at this point.
