Updating trip details
After you plan trips, you might need to edit a trip or the assigned resources. These topics describe editing a planned trip using the Planning Worksheet Assignment Plan pane and the Deadhead/Trip Editor.
The fields you can edit depend on the method you select.
| Planned trips can be edited in other applications beside those listed above. Please refer to the related topics listed below for additional information. |
Updating trip details in the Planning Worksheet Assignment Plan pane
The Planning Worksheet is a driver-oriented window that lets you assign orders to drivers, and to view previously planned trips. These trips appear in the Assignment Plan pane, which is located in the lower right portion of the Planning Worksheet. The pane displays the trips assigned to the driver selected in the driver pane at the left of the window.
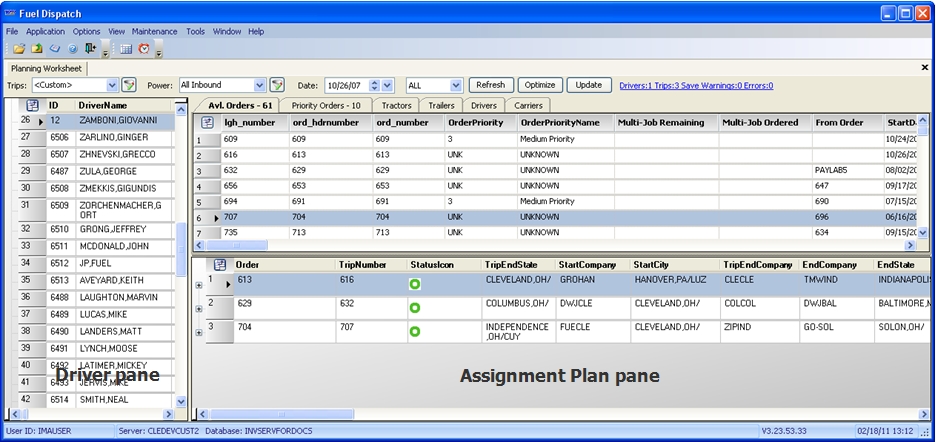
As you work in the Planning Worksheet, you might find it necessary to modify some aspects of a planned trip, such as arrival/departure time or product volumes. This trip can be one you have just planned, or one that was planned previously.
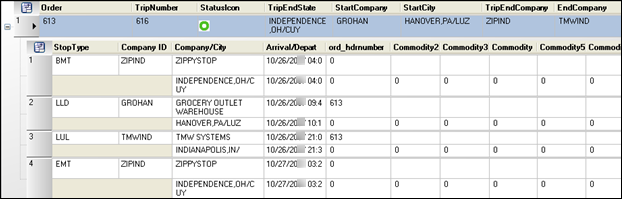
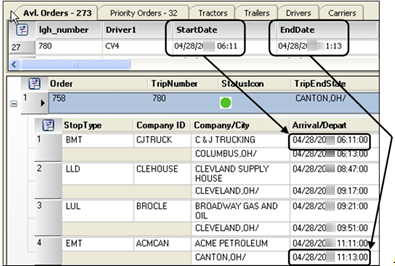
You can edit the trip directly in the Planning Worksheet Assignment Plan pane, which is referred to as inline editing. Clicking ![]() Expand at the left of a planned trip expands the trip to show its stops. Some fields in these stop rows are editable.
Expand at the left of a planned trip expands the trip to show its stops. Some fields in these stop rows are editable.
Enabling inline editing
The ability to edit a trip in the Planning Worksheet Assignment Plan pane is enabled by the [FuelDispatch]AllowInlinePlanningWorksheetChanges setting in your TTS50. This capability is turned off by default.
Editing fields in the Assignment Plan pane
To modify editable fields in the Assignment Plan pane, follow these steps.
-
Select Application > Planning Worksheet.
-
If you want to filter the data retrieved into the Planning Worksheet, define or select a view.
-
In the header section, set restrictions.
-
Click Refresh.
-
Select a driver with assignments, or assign an order to a driver. One or more trips appear in the Assignment Plan pane.
-
Edit the following fields as needed.
Note: Fields not listed below are read-only in the Assignment Plan pane.
Arrival/Depart |
This field name identifies a column showing a trip’s stop event dates and times:
|
ActualQuantityX |
Quantity of the commodity that is loaded by the driver Note: A commodity must be loaded into a tank before ActualQuantity can be edited. |
NetVolumeX |
Quantity of the commodity delivered Note: A commodity must be loaded into a tank before NetVolume can be edited. |
-
To save your changes, click Update.
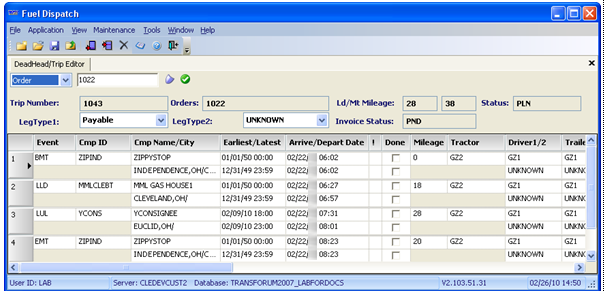
Updating trip details in the Deadhead/Trip Editor
The Deadhead/Trip Editor window displays a trip’s stop events in grid form. It is available:
-
As the Deadhead/Trip Editor window, accessed from the Application menu
-
As the Deadhead/Trip Editor (Embedded Edit Mode) window in the Card Planner and Planning Worksheet
The versions of the window are similar in appearance. They differ chiefly in how you open a trip for editing, and how you save the modifications. This illustration shows how trip data is displayed in the window.
In the Deadhead/Trip Editor, you can:
-
Actualize stops
-
Classify segments using user-defined fields (LghType1 and LghType2)
-
Edit specific fields in the stop detail grid
-
Insert a deadhead movement before a segment, or add a deadhead movement after a segment
|
Editing a trip with the Deadhead/Trip Editor must be done with caution because there is little or no error checking applied to changes. In addition, there are slightly different degrees of error checking in the Deadhead/Trip Editor window versus the Deadhead/Trip Editor (Embedded Edit Mode) window. Specifically, a change you save in the tabbed version may be corrected if you edit the same trip in the embedded mode window version. Closely follow the instructions for using the Deadhead/Trip Editor, and check your changes before and after you save a trip. For routine editing of orders, it is recommended you use the Call On Demand Order Entry application. |
Overview of the Deadhead/Trip Editor
The Deadhead/Edit Trip Editor window consists of two sections: the header and the Stop Detail grid.
The header displays the trip segment number, order number, and several other read-only fields. It also displays the LegType1 and LegType2 fields. These fields are used to classify trip segments for dispatch or pay purposes.
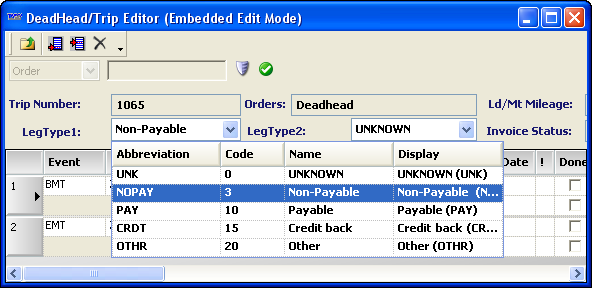
The LghType1 and LghType2 values can be included as restrictions when you define views. These fields are located in the Other Types sections of the Inbound/Power Board and Outbound/Loads Board definition windows. See Creating and managing views for details.
Available selections for the LegType1 and LegType2 fields are options that have been created by your company in the TMWSuite label file for the LghType1 and LghType2 labels. The label file can be accessed in the TMWSuite System Administration application.
The Stop Detail grid displays the stops on the trip.

| The Deadhead/Trip Editor (Embedded Edit Mode) window can be used in the Card Planner or Planning Worksheet. It is recommended you use it only in the Card Planner because it is easier to locate specific orders and tell whether an order is already planned. Instructions in the remainder of this section regarding the Deadhead/Trip Editor (Embedded Edit Mode) window apply to the Card Planner. |
Editing a trip in the Deadhead/Trip Editor
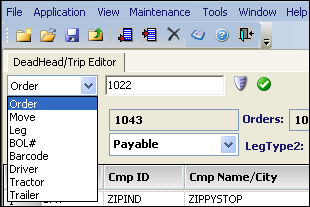
How you access the Deadhead/Trip Editor affects how the order is opened for editing.
-
If you access the editor through the Application menu, you must load the trip manually.
-
If you access the editor from the Card Planner, you must right-click the trip. When the editor opens, the trip is displayed automatically.
-
Do one of the following:
Open the Deadhead/Trip Editor from the Fuel Dispatch Application menu-
Select Application > Deadhead/Trip Editor.
-
In the window header, select an ID type, and enter an ID number in the ID field.
-
Click
 Open.
Open.
Open the Deadhead/Trip Editor in the Card Planner-
In the Card Planner, set restrictions as needed.
-
Click Refresh.
-
In the Assignment Plan pane, locate the trip and right-click it.
A shortcut menu opens. -
From the shortcut menu, select Deadheads > Edit Trip.
The Deadhead/Trip Editor (Embedded Edit Mode) window opens, displaying the stops for the trip you selected.
Show me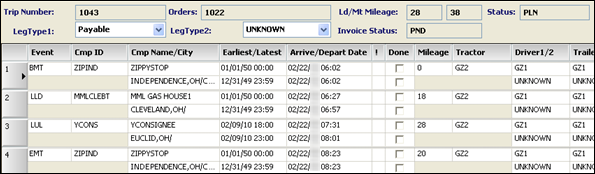
-
-
Edit the following window header fields as needed:
-
To modify the Leg Type1 and Leg Type2 fields, click the field and select an option from the drop-down list.
-
To complete stops, select the appropriate checkbox(es) in the Done column.
-
-
In the Stop Detail grid, you can edit the following fields:
-
Earliest/Latest
-
Arrive/Depart Date
Note: You can change the dates only when you open the Deadhead/Trip Editor window from the Application menu.
-
Tractor
-
Driver 1 / 2
-
Trailer 1 / 2
-
Carrier
-
Est. Arrive/Depart date
Note: To make an entry in this field, you must have
[FuelDispatch]AllowEstimatedTimeEdits=Yin your TTS50. This setting also enables the Reset Est Times button. You use it to reset all Est. Arrive/Depart date fields to 01/01/00 00:00. -
-
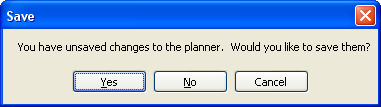
Save your edits by doing one of the following:
If you are working in the Deadhead/Trip Editor window-
Click
 Save. The system displays a confirmation window.
-
Click Yes.
-
-
If you are working in the Deadhead/Trip Editor (Embedded Edit Mode) window-
Click
 Close.
 -
Click Update.
Note: If you click Refresh before you click Update, Fuel Dispatch displays this notification. Click Yes.
-
Inserting or adding a deadhead
In the Card Planner, you can insert a deadhead movement before an order or add one after it.
-
In the Card Planner, set restrictions as needed.
-
Click Refresh.
-
In the Assignment Plan pane, locate and right-click an order.
-
From the shortcut menu, do one of the following
-
To add a deadhead before the order, select Deadheads > Insert Deadhead.
-
To insert deadhead after the order, select Deadheads > Add Deadhead.
-
-
A deadhead movement having the same resources as the order will be added before or after the selected order. The deadhead will be given an ID number DHXXXX.
Show meIn this illustration, the deadhead inserted before order 992 has been given the ID DH1063.

-
Close the window.
-
Click Update.
-
To make updates to deadhead information, double-click on the deadhead.
The Dispatch/Trip Editor opens.
-
Make any needed changes and save.
Recalculating deadhead and order times on a shift
As you work with deadheads and orders on a shift, you might find that a conflict develops in the chronology of stop events. That is, a stop event begins before the previous stop event ends. In the Card Planner, Deadhead/Trip Editor functionality lets you recalculate stop times for the entire shift.
| It is easier to track event start and end times if you use the Fuel Dispatch Cell Designer to add the StartDate and EndDate fields to the Card Planner’s card format. See Setting up the Card Planner and Planning Worksheet. |
-
In the Card Planner, set restrictions as needed.
-
Click Refresh.
-
In the Assignment Plan pane, locate the driver’s shift where you want to recalculate times.
-
Right-click on any deadhead or stop in the shift, and select Deadheads > Recalculate Deadheads from the shortcut menu. Fuel Dispatch recalculates stop times on the shift.
-
Click Update.
Re-planning an order
After you plan a trip, it might be necessary to change the resource assignments. This could be for a number of reasons, including illness, equipment breakdown, order changes, etc.
In such cases, you can re-plan the order in the Card Planner or Planning Worksheet. The [FuelDispatch]AllowStartedTripsToBeReplanned INI setting in your TTS50 controls when you can re-plan a trip.
-
When the setting has a value of
Y(default), you can re-plan an order up until its status is Completed. -
When the setting has a value of
N, you can re-plan an order only until the order’s status is Started.
For more information about planning an order, see these topics: