Terminating resources and reactivating drivers
The Expiration feature is used to remove resources (drivers, tractors, trailer, and carriers) temporarily or permanently from service.
Using expirations to reposition available tractors
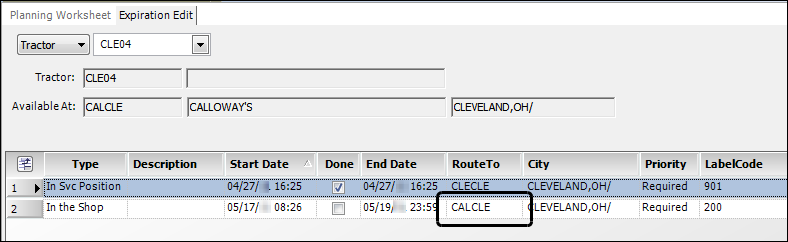
When you add a dispatch type expiration for a tractor, you must record a place-in-service location. By default, the system creates an In-Service move to that location when the expiration for an available tractor is marked as Done. This repositions the tractor.
-
If you are using the Expiration Edit window, make your entry in the Route To or City field.
-
If you are using the Expirations tab in the tractor’s profile, make an entry in the Route To Company or City/State field.
Note: To use the Expirations tab, you must have access to the TMWSuite File Maintenance application and have
[FuelDispatch]ProfileEditDisabled=Nin your TTS50.
The system assigns an Arrival and Departure date that matches the date recorded in the expiration’s End Date field.
Empty move created when the tractor’s expiration was completed:

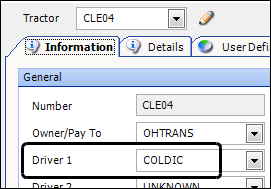
The driver from the tractor’s profile is the driver used for the empty move:
Taking a tractor or trailer out of service
To prevent dispatchers from using equipment that has been taken out of service, you can use a Terminated expiration for a tractor, or an Out of Service expiration for a trailer.
|
Follow these steps:
-
Select Maintenance > Expiration Edit.
The Expiration Edit window opens. -
In the first field, select the resource type.
-
In the second field, select the appropriate resource ID.
-
Click
 Open.
Open. -
Click
 Add.
Add.
A new expiration line appears in the lower portion of the window. -
Make entries to define the expiration.
Required field: *
Field Definition Type *
Select
-
Terminated to take a tractor out of service.
-
Out of Service to take a trailer out of service.
Start Date *
Enter the date/time the asset was taken out of service.
Done
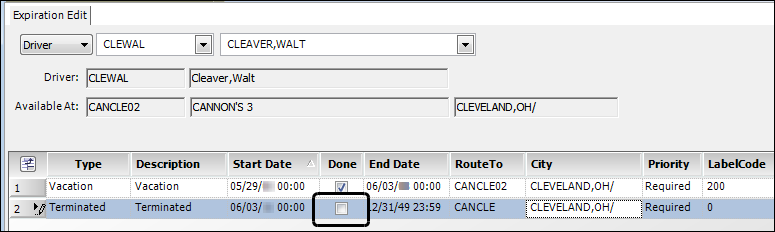
Warning! Do not select the Done checkbox when taking a resource out of service permanently. If the checkbox is selected, the system assumes that the termination is no longer effective after the date indicated in the End Date field. Dispatchers will be able to assign the resource.
End Date
The field defaults to 12/31/49 23:59. Do not change the value.
Priority *
Select Required.
Route To *
Enter the resource’s last location.
-
-
Click
 Save before closing the window.
Note: After a resource’s termination date/time passes, it is no longer listed in the Scroll Tractors/Scroll Trailers retrieval lists. However, you can include retired tractors or trailers in a retrieval.
-
In the Scroll Tractors window, select the Include Retired Tractors? checkbox on the Quick Search tab.
-
In the Scroll Trailers window, select the Include Retired Trailers? checkbox on the Quick Search tab.
-
Retrieving terminated resources in these windows is not controlled by the [Misc] GracePeriod setting in your TTS50 or the GRACE setting in the General Info Table.
|
Terminating a driver
When a driver’s employment ends, use a Terminated expiration to prevent dispatchers from using him/her on future trips.
IDs for terminated equipment continue to appear in drop-down lists until the specified grace period expires. Two settings determine the length of the grace period: [Misc]GracePeriod in your TTS50 and GRACE in the General Info Table. The default is 90 days from a resource’s termination date.
|
To terminate a driver:
-
Select Maintenance > Expiration Edit.
The Expiration Edit window opens. -
If needed, select Driver ID in the first field.
-
In the second field, select the ID of the driver you are terminating.
-
Click
Open. -
Click
Add.
A new expiration line displays in the lower portion of the window. -
Make entries to define the expiration.
Required field: *
Field Definition Type *
Select Terminate.
Start Date *
Enter the date/time the employment ended.
Done
Warning! Do not select the Done checkbox when taking a driver out of service permanently. If the checkbox is selected, the system assumes that the termination is no longer effective after the date indicated in the End Date field. As a result, dispatchers will be able to assign the driver as a resource.
End Date
The field defaults to 12/31/49 23:59. Do not change the value.
Priority *
Select Required.
Route To *
Enter the driver’s last location.
-
Click
Save.Note: After a driver’s termination date/time passes, the driver is no longer listed in the Scroll Drivers window. If you want to include the driver in the retrieval, you must select the Include Retired Drivers? checkbox on the Quick Search tab. Retrieving terminated drivers in this window is not controlled by the [Misc]GracePeriod in your TTS50 or the GRACE setting in the General Info Table.
Reactivating the profile for a terminated driver
If a terminated driver is re-hired, you can reactivate their driver profile by completing the termination expiration. Follow these steps:
-
Select Maintenance > Expiration Edit.
The Expiration Edit window opens. -
If needed, select Driver ID in the first field.
-
In the second field, select the ID of the driver you are reinstating.
-
Click
 Open.
Open. -
In the End Date field, specify the date/time the termination status ended.
-
Select the Done checkbox.
The system will assume the termination is no longer effective after the date indicated.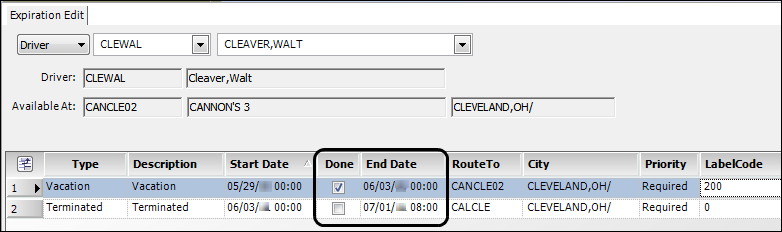
-
Click
 Save.
Save.Notes: In the driver’s profile, the driver’s status changes from OUT to AVL.
-
When the driver’s status is changed to Available, the system replaces the date of termination with 12/31/2049 in the Complete Date field. If you want to track whether the driver was terminated and later re-hired, you can record the information using:
-
The Notes tab in the driver profile.
-
One of the Driver Misc 1-4 fields on the User Definables tab in the driver profile.
-
The Description field in the Expiration Edit window.
-
-
In the Scroll Drivers window, the Planning Worksheet, and the Card Planner, the driver will show as Available as of the End Date recorded for the termination.
-