Using advanced sorting with forecasted orders
First available in Fuel Dispatch V. 15.40
You use the Planning Worksheet or the Card Planner to assign forecasted short loads to resources. When working with short loads, you need to sort the available orders logically, so you can plan trips or consolidate orders. Sometimes, the basic sorting and filtering features available on the Avl Orders tab or the Priority Orders tab does not readily fill this need. You can use advanced sorting options to organize short loads in ways that make it easier to plan trips.
Advanced sorting options are available from the right-click shortcut menu. You can use the following commands to sort orders:
-
Sort Closest Split by Distance
Sort orders based on the number of air miles between stops.
-
Sort Closest Split by Split Group
Sort orders based on their split group, and then by air miles.
Note: Stores must have a split group assigned for their orders to be sorted using this option.
-
Sort Next Drop Arrival from Departure
Sort orders based on departure time of the selected order with the arrival times of other orders.
-
Sort Closest Split by History
Sort orders based on consolidation history between two consignees.
|
To use the split group sorting options, you must:
|
Sorting loads by air distance
When working with forecasted short loads in the Card Planner or the Planning Worksheet, you need to see which loads can be consolidated logically. Use the Sort Closest Split by Distance command to arrange orders based on air miles between stops.
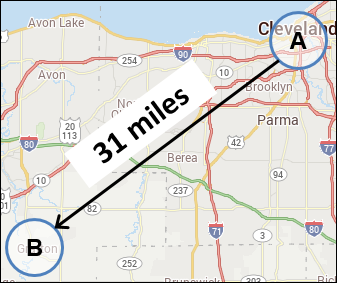
If you had a delivery in Cleveland, OH and another in Grafton, OH, this option estimates the air miles between these stops. In this example, the air miles would be thirty-one miles.
To sort loads by air miles, follow these steps:
-
Do one of the following:
-
Go to Application > Planning Worksheet.
The Planning Worksheet window opens. -
Go to Application > Card Planner.
The Card Planner window opens.
-
-
On the Avl. Orders tab or the Priority Orders tab, right-click on an order.
The shortcut menu opens. -
Select Sort Closest Split by Distance.
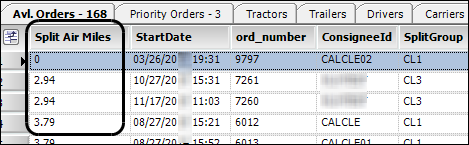
The system:-
Moves the selected order to the top of the grid
-
Sorts orders by distance from the selected order
Those closest to the selected order appear at the top of the grid.
-
Adds the Split Air Miles field to the grid to show the distance from the selected order
-
Sorting loads by split group
When working with forecasted short loads in the Card Planner or the Planning Worksheet, you need to see which loads can be consolidated logically. Use the Sort Closest Split by Split Group command to arrange orders by split group and then by air miles.
Before you use this type of sorting:
-
Define your split groups
Your company defines split groups using the ForecastSplitGroup label. For details on adding label options, see Using the label file to customize fields in the System Administration guide.
-
Assign stores to a split group
You assign stores to a split group using the Commodity Forecast Setup window. This window is available in the Inventory Services application. For details, see the Inventory Services help.
-
Add the split group field to the grid
To take advantage of the split group sorting options, you can add the SplitGroup field to the Card Planner and/or Planning Worksheet. Use the Field Chooser to add it to the Avl. Orders and/or the Priority Orders tabs. For details, see Displaying and hiding columns with Field Chooser.
Trimble Recommends:
Trimble updated the default dispatch view (All Loads) for the split group sorting options. Based on these changes, Trimble recommends recreating custom dispatch views before using this feature. For details on creating dispatch views, see Creating and managing views.
To sort loads by split group, follow these steps:
-
Do one of the following:
-
Go to Application > Planning Worksheet.
The Planning Worksheet window opens. -
Go to Application > Card Planner.
The Card Planner window opens.
-
-
On the Avl. Orders tab or the Priority Orders tab, right-click on an order.
The shortcut menu opens. -
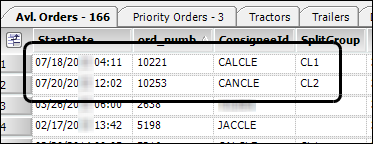
Select Sort Closest Split by Split Group.
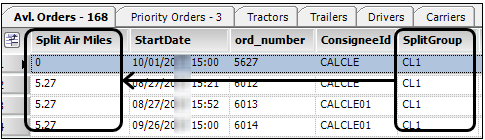
The system:-
Moves the selected order to the top of the grid
-
Sorts orders by split group, then by distance from the selected order
Those closest to the selected order appear at the top of the grid.
-
Adds the Split Air Miles field to the grid to show the distance from the selected order
-
Sorting loads by departure and arrival times
When working with forecasted short loads in the Card Planner or the Planning Worksheet, you need to see which loads can be consolidated logically. Use the Sort Next Drop Arrival from Departure command to arrange orders based on arrival/departure dates or times.
The system sorts loads based on the following:
-
Arrival time before departure time
Orders with an arrival time before the selected order’s departure time are moved above the selected order.
-
Arrival time after departure time
Orders with an arrival time after the selected order’s departure time are moved below the selected order.
Orders are arranged from shortest time difference to longest time difference.
To sort loads by arrival/departure time, follow these steps:
-
Do one of the following:
-
Go to Application > Planning Worksheet.
The Planning Worksheet window opens. -
Go to Application > Card Planner.
The Card Planner window opens.
-
-
On the Avl. Orders tab or the Priority Orders tab, right-click on an order.
The shortcut menu opens. -
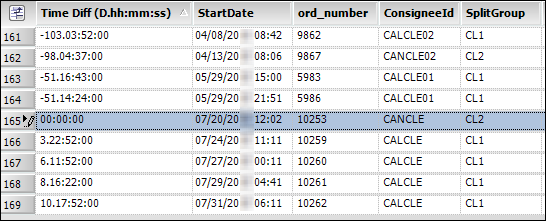
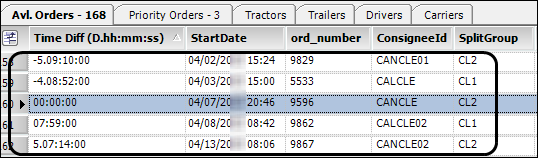
Select Sort Next Drop Arrival from Departure.
The system adds the Time Diff (D.hh:mm:ss) field to show the difference between the arrival and departure times.
Using consolidation history to sort orders
When working with forecasted short loads in the Card Planner or the Planning Worksheet, you need to see which loads can be consolidated logically. Use the Sort by Load History command to arrange orders according to their consolidation history.
The system sorts loads based on how many times the store on the selected order was paired with another store. By default, it looks back 21 days to find consolidated orders.
If you want, you can change the number of days used for the search. To do so, use the [FuelDispatch]SortClosestSplitByHistoryDays INI setting.
To sort loads by consolidation history, follow these steps:
-
Do one of the following:
-
Go to Application > Planning Worksheet.
The Planning Worksheet window opens. -
Go to Application > Card Planner.
The Card Planner window opens.
-
-
On the Avl. Orders tab or the Priority Orders tab, right-click on an order.
The shortcut menu opens. -
Select Sort Closest Split by History.
The system:-
Moves the selected order to the top of the grid
-
Checks for the consignees with which the store on the selected order shared consolidated orders
The check is based on the number of days specified by the
[FuelDispatch]SortClosestSplitByHistoryDaysINI setting in your TTS50. -
Displays orders for the consignees having consolidation history according to the most consolidations to the least
Note: If the system does not find consolidated orders, it displays an error message. It states, "This Consignee is not paired with any other Consignee in the last X days." Your entry for the
[FuelDispatch]SortClosestSplitByHistoryDaysINI setting appears in the error message. -