Viewing an asset’s assignment history
To view a history of the trips assigned to a driver, tractor, trailer, or carrier, you can:
-
Use a menu command or toolbar icon to access the Asset Assignment History window from anywhere in Fuel Dispatch.
-
Use the right-click shortcut menu in the Card Planner or Planning Worksheet to access the Asset Assignment History window for a specific resource.
Accessing Asset Assignment History
Methods for accessing the Asset Assignment History window are summarized in this table:
| Access point | Location | Steps | |
|---|---|---|---|
Toolbar |
|
Click the Assignment History icon, which is available at all times. |
|
Main Menu |
View menu |
Go to View > Assignment History. |
|
Card Planner * |
Shift pane |
|
|
Assignment Plan pane |
|
|
|
Planning Worksheet * |
Resource pane |
|
|
Assignment Plan pane |
|
|
|
* The gray areas in the Card Planner and Planning Worksheet representations indicate where you can right click to see the Asset Assignment option. |
|||


Window overview
No matter how you access it, the window shows the same information. An example of the Asset Assignment History window is shown here.
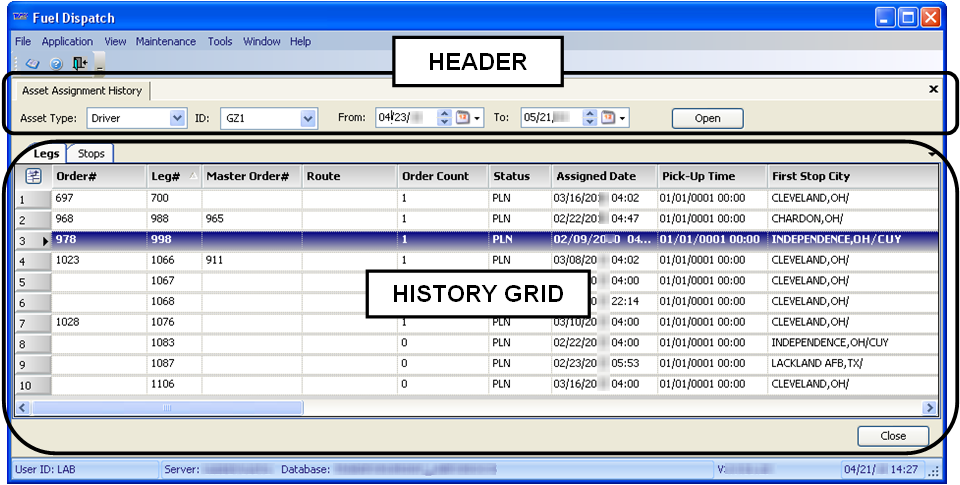
The Asset Assignment History window is divided into two sections:
-
Header
The header contains look-up fields for the asset type and ID, and fields for defining a date range for the asset’s history. -
History grid
The History grid displays information about the selected asset over the specified date range. The information is read-only. By default, trips are listed from oldest to newest. You can sort the grid if needed.There are two tabs in the History grid:
-
Legs
Each row in the Legs tab represents a trip segment, also known as a leg header.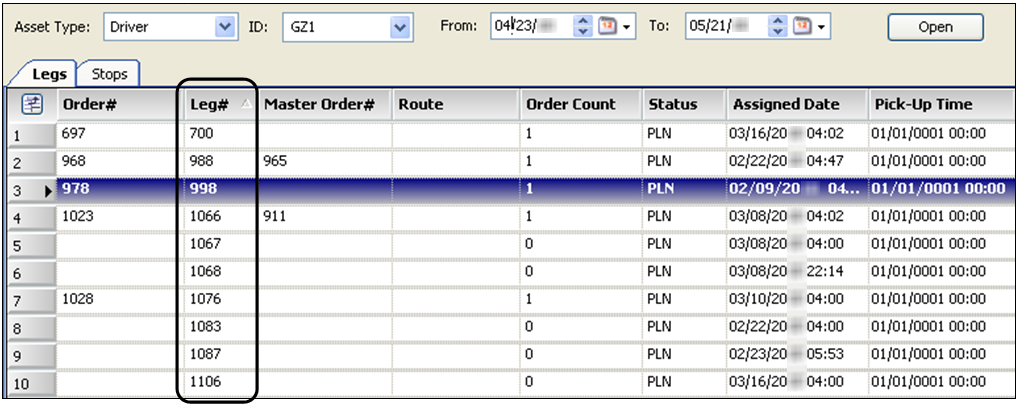
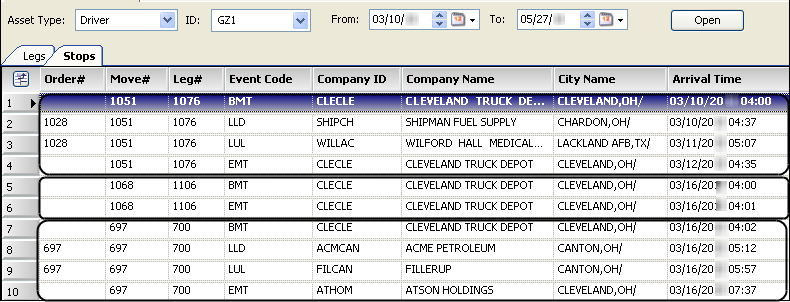
-
Stops
The Stops tab lists all billable and non-billable stops for each trip shown.Each boxed area in this illustration shows the stops for a specific trip segment. Note that the Order # column shows no order number for some stops. The column is blank to indicate that the stop is not part of an order, that is, it is non-billable. For logistical reasons, the driver traveled empty.
-
Viewing the history
After you open the Asset Assignment History window, you can view an asset’s history.
-
If you opened the window by going to View > Asset History or by clicking
 Assignment History in the toolbar, you must specify an asset type and ID.
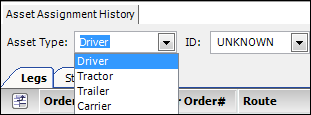
-
In the Asset Type field, select an asset type from the list.
-
Click the ID field and enter an asset ID.
Note: If you open the window using the shortcut menu in the Card Planner or Planning Worksheet, the asset type and ID are filled in automatically. They are read-only.
-
-
Enter the date range.
From
Specify a beginning date for the trip start date range.
Note: The default for this field is 30 days before the current date.
To
Specify an end date for the trip start date range.
Note: The default for this field is 30 days after the current date.
-
Click Open. The history grids are populated.
-
Select the Legs or Stops tab to display the desired grid.
In the grids, you can:
-
You can view other asset histories or date ranges by returning to Step 1. Otherwise, click Close.