Introduction to Inventory Control
The Inventory Control window is Fuel Dispatch’s product monitoring and forecasting module. You can:
-
View a store’s tank readings.
Readings can be imported through data exchange or entered manually. -
Manually enter a store’s tank readings.
-
View a store’s delivery history.
-
Assess each store’s need for deliveries.
-
Create orders to replenish a store’s products.
To access the window, go to Application > Inventory Control.
Note: The Inventory Control window was available in the earliest versions of Fuel Dispatch. Its functionality is limited. Trimble strongly recommends that you use Inventory Services instead of the Inventory Control window.
The Inventory Services module offers more features that help you monitor and forecast your customer’s need for product. When you use Inventory Services, you can take advantage of:
-
The Forecaster Console
This application creates and updates orders automatically. Forecaster Console functions can be applied to all stores, or to subsets of stores that have been grouped into batches. -
The Importer Service Console
This application lets you import tank readings and fuel pricing from flat files.
Overview of the Inventory Control window
To access the window, go to Application > Inventory Control.
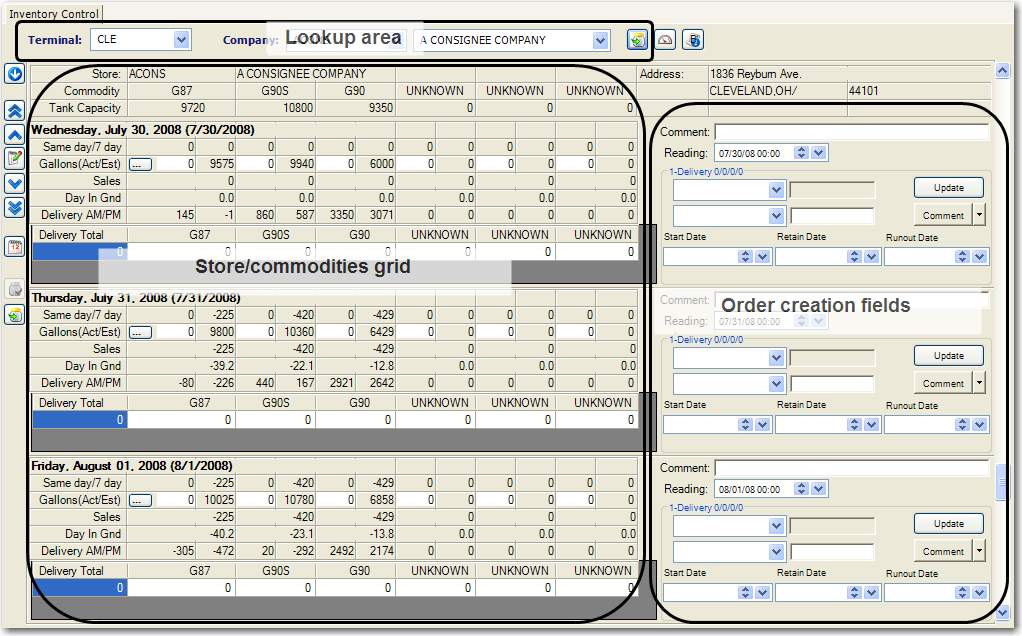
The window consists of three parts:
Lookup area |
The lookup area allows you to retrieve the stores for which you want to see readings. |
Store/commodities grid |
The grid shows the tank readings used to forecast a store’s delivery needs. For each commodity the store sells, you can:
|
Order Creation Fields |
The order creation fields allow you to generate an order without the need to use the Call On Demand Order Entry window. You can:
|
Performing the required setup
Before using the Inventory Control window, you must:
-
Associate stores with terminals
The stores shown in the Inventory Control window are the consignees for which you have profiles in your database. To retrieve a store in the Inventory Control window, it must be associated with a terminal. A store is linked to a terminal by the RevType1 value recorded in its consignee’s profile. For details, see Entering general profile information. -
Record tank information for each commodity a store sells
For a store’s commodities to show in the Inventory Control window, you must provide information about the tanks that hold the commodities. Tank information is entered on the Tanks Commodities tab in the consignee’s profile, in the Company Profile Relations window. If any tank information for a commodity is missing on the Tanks Commodities tab, the commodity is not shown in the Inventory Control window. For details on setting up tank information, see Associating commodities with consignees. -
Create master orders
Any order you create in the Inventory Control window must be based on a master order. You generate master orders in the Call On Demand Order Entry window. For details, see Step 3 in Recording the basic order information.
Looking up stores associated with a terminal
The lookup fields at the top of the Inventory Control window allow you to retrieve stores associated with a terminal. You can look up a specific store or you can retrieve all the stores, and then look up the ones you need.
Looking up a specific store
To look up a specific store, use this procedure.
-
To access the window, go to Application > Inventory Control.
-
In the Terminal field, select the needed terminal.
The Company fields show the first company associated with the terminal. Companies are listed alphabetically by ID.
-
In the Company field, start typing the ID of the needed store.

-
A drop-down list of the store IDs beginning with the letters you have entered is displayed. You can select the store from the list or just complete typing the ID.
Looking up all stores
To retrieve all stores, use this procedure.
-
To access the window, go to Application > Inventory Control.
-
In the Terminal field, select the needed terminal.
The Company fields show the first company associated with the terminal. Companies are listed alphabetically by ID.
-
Click
 Refresh Data.
The first store’s readings are displayed. By default, the readings are for today, tomorrow, and the day after tomorrow.Show me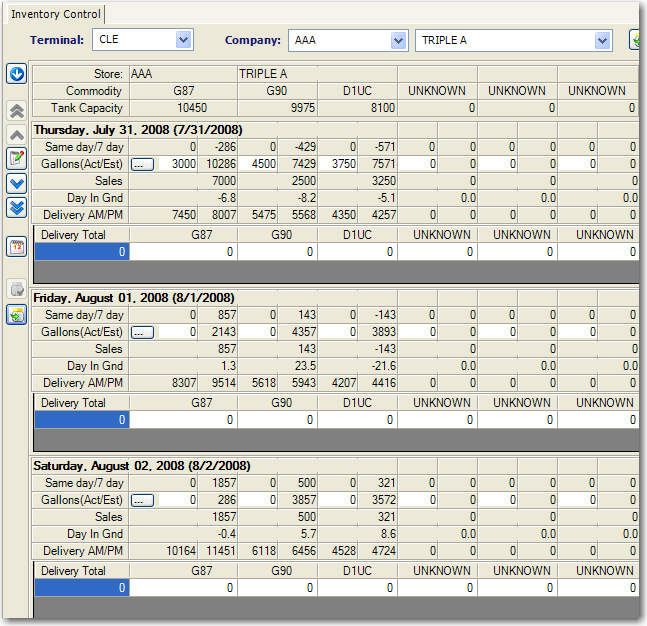
-
If you know which store you want, do any of the following:
-
Pick from the Company list

Click in the Company lookup field to display the store list, select the one you want, and then click
Refresh Data.Show me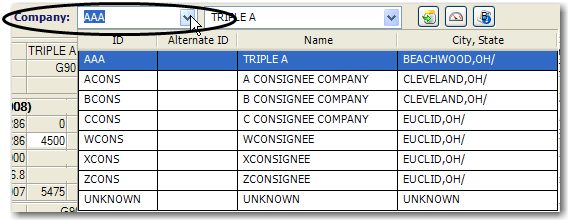
-
Pick from an expanded list

Click Expand Header Section in the toolbar at the left side of the window.
Show me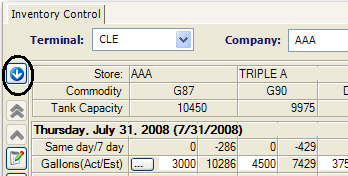
Select a store from the expanded list. Expanding the list displays additional information about each store.
Show me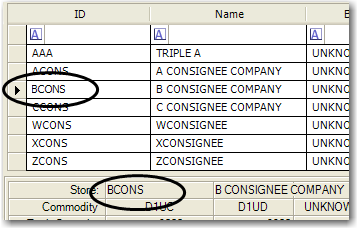
Note: To close the expanded store list, click
 Shrink Header Section.
-
Scroll through the list

 Next Store
Moves forward through the list of stores, one store at a time. Go to last store
Moves forward through the list of stores, to the last store. Previous Store
Moves backward through the list of stores, one store at a time. Go to first store
Moves backward through the list of stores, to the first store.
-