Order entry setup
Many pieces of critical information comprise the orders you create. Some of this information can be retrieved automatically by the system if you have it set up properly.
You can set up the system to simplify entering an order.
Defining standard retain/runout windows
When you create an order in the Call On Demand Order Entry window, you must identify the earliest dates/times and latest dates/times acceptable for the load and unload, respectively.
-
You enter the earliest date/time for the load in the Retain Date/Time field.
-
You enter the latest date/time for the unload in the Runout Date/Time field.
Show me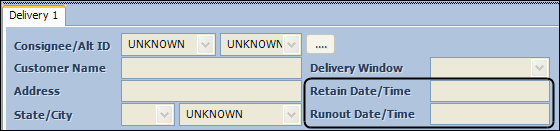
To save time when entering the earliest and latest delivery date/time for an order, you can use the Delivery Window feature to pre-define commonly used earliest and latest dates/times. Typically, these delivery windows would be set up when Fuel Dispatch is installed. When you create an order, you would choose one of the pre-determined delivery windows from a drop-down list.
-
Go to Maintenance > Delivery Window.
The Delivery Window Maintenance window opens.Show me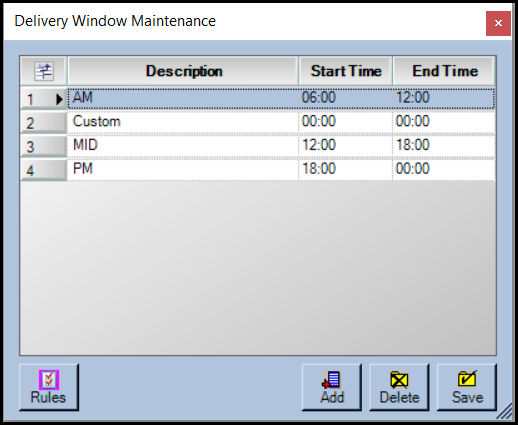
-
Click Add.
A new row is added.Show me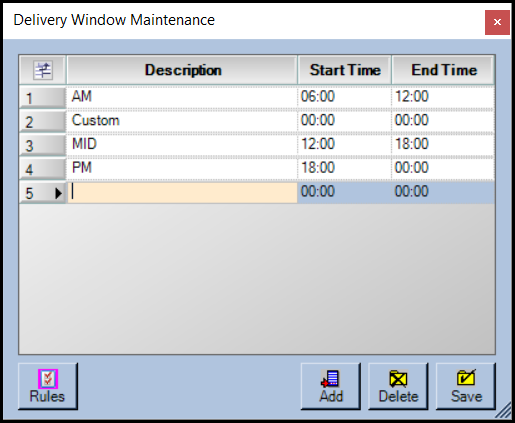
-
In the new row, enter the following information:
-
Description: A brief description of this delivery window option.
-
Start Time: The earliest a delivery can be delivered.
-
End Time: The latest a delivery can be delivered.
-
-
To define more windows, click Add and repeat Step 3.
-
Click Save.
-
Click Close.
Defining delivery window rules
When you create an order you have the option to set delivery window rules to deliver during a specific time frame. You can set this up in the Delivery Window Maintenance window.
-
Go to Maintenance > Delivery Window.
The Delivery Window Maintenance window opens.Show me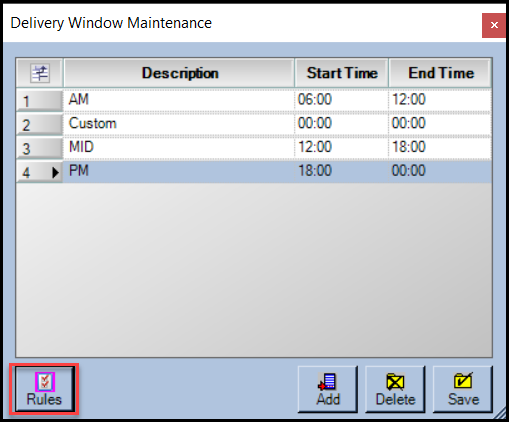
-
Click Rules.
The Delivery Window Rules window opens.Show me
-
Enter in this information:
-
RuleTime: The time (in military time) to place the order by.
-
MinStartTimeHours: The minimum required delay before a delivery window is available.
-
For example:
-
If you place an order by 10:00 AM, the first shift available is 6:00 PM that evening.
-
10:00 AM-6:00 PM = 8 hours
-
If you place an order by 1:00 PM, the first shift available is 6:00 AM the next morning.
-
1:00 PM-6:00 AM = 17 hours
Show me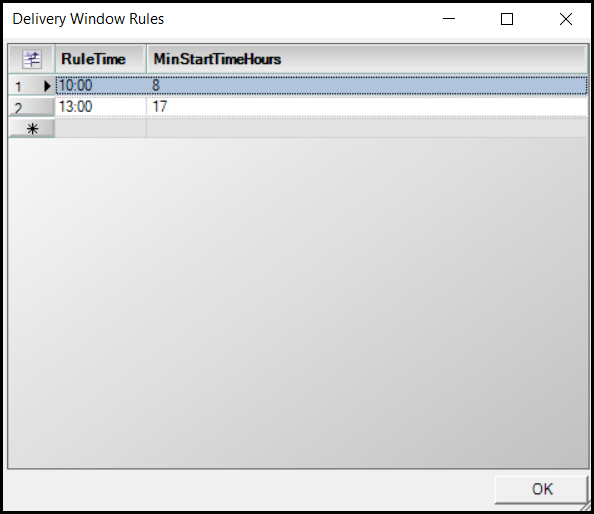
-
-
-
Click OK.
-
Click Save on the Delivery Window Maintenance window.
-
Click Close.
You can set up the system to show users a warning when they save an order that has an invalid delivery time. To do this, you use the [FuelDispatch] StopTimeWindowRuleCheck setting.
|
Setting up how the system handles dwell times
When you create orders in Call On Demand Order Entry, the time needed to load the fuel at a rack and unload it at the consignee needs to be built into the order. To ensure that this happens, Fuel Dispatch allows you to record dwell times.
By default, the system adds 30 minutes for dwell time at pickups and deliveries. If you want, you can:
-
Change the length of the system-wide dwell time.
-
Record dwell times for specific shippers and/or consignees.
Dwell times specific to shippers and consignees override the generic dwell time. -
Record dwell times for companies/commodities.
Dwell times for company/commodity combinations override those recorded for specific shippers or consignees.Note: Using company/commodity specific dwell times requires that you have the
[FuelDispatch]UseCompanyCommodityDwellTime=Ysetting in your TTS50. -
Assign dwell times to the trailers you plan on trips. The system adds the trailer’s dwell time to the trip’s existing pickup and delivery dwell times. See Using trailer-specific dwell times for setup information.
The system uses this hierarchy to determine the dwell times that will be used on an order.
-
Is there dwell time recorded for the company/commodity combination on the stop?
-
If so, the system uses it.
-
If not, the system will check the profiles for the shipper and the consignee on the order.
-
-
Is there dwell time recorded for the shipper or consignee on the order?
-
If so, the system will use it for the appropriate stop.
-
If not, the system will use the generic dwell time.
-
-
Is the order planned with a trailer that is associated with a dwell time?
If so, the system adds the trailer dwell time to existing pickup and delivery dwell times.
Recording a dwell time for a shipper
A shipper’s dwell time is the average amount of time a driver will need to load the tank. The time is recorded in the shipper’s profile. If dwell time has been entered for a shipper, the system determines the pickup’s Departure time by adding dwell time to the pickup’s Arrival time.
For example, if the pickup Arrival time is 10:00 and the shipper’s dwell time is 60 minutes, the pickup Departure time will be set to 11:00.
You record a company’s dwell time in the Dwell Time field in the Company Relations Profile window. For details on that window, see Entering general profile information.
Recording a dwell time for a consignee
A consignee’s dwell time is the average amount of time a driver will need to unload. The time is recorded in the consignee’s profile. If dwell time has been entered for a consignee, the system determines the drop’s Departure time by adding dwell time to the drop’s Arrival time.
For example, if the drop’s Arrival time is 13:00 and the consignee’s dwell time is 75 minutes, the drop’s Departure time will be set to 14:15.
You record a company’s dwell time in the Dwell Time field in the Company Relations Profile window. For details on that window, see Entering general profile information.
Specifying a generic dwell time
In cases where the shipper or consignee do not have dwell times specified in their profiles, the system uses a default 30 minute dwell time for the stop. If you want, you can change the default from 30 minutes to a shorter or longer time, using the [FuelDispatch]DefaultLoadUnloadDwellTimeMinutes setting in your TTS50.
Using commodity-specific dwell times
In addition to the general dwell time recorded in a shipper or consignee profile, you can record dwell times for each commodity associated with that company.
| Because the dwell time is specific to the company/commodity combination, the same commodity used with a different company could have a different dwell time. |
Using the [FuelDispatch]UseCompanyCommodityDwellTime INI setting in your TTS50, you can have the system look at these dwell times instead of the general ones recorded for the shipper and/or consignee.
-
You record dwell times for a shipper’s commodities on the Shipper Cmds tab in the Company Relations Profile window. For details, see Associating commodities with shippers.
-
You record dwell times for a consignee’s commodities on the Tank Commodities tab in the Company Relations Profile window. For details, see Associating commodities with consignees.
| You cannot override dwell times in the Call On Demand Order Entry window. |
Using trailer-specific dwell times
You can set up a trailer to add a specific number of dwell time minutes to pickup and delivery stops when you plan a trip with that trailer. The system adds these trailer-dependent minutes to default, company, or commodity dwell times that already apply to the stops.
These steps summarize how to attach a dwell time to a trailer. Detailed procedures follow.
-
Defining trailer dwell times
Select which TrlType1-4 label will define trailer dwell times. You can create one or more label options, and assign a dwell time to each of them or you can use existing label options.
Note: This step is optional. You can record dwell times for trailers manually.
-
Activating trailer-specific dwell times
Edit TTS50 settings to turn on the trailer-specific dwell time feature and specify the TrlType label you used to create trailer dwell time options.
-
Recording a dwell time for a trailer
In the profile of each trailer you want to associate with a dwell time, do one of the following:
-
Record the dwell time minutes in the Dwell Time field on the Information tab.
-
Apply the appropriate TrlType1-4 label option on the User Definable tab.
-
Defining trailer dwell times
You define trailer dwell times using one of the TrlType1-4 labels.
-
In the System Administration application, open the label file.
-
Scroll to the TrlType1-4 label you want to use to define trailer dwell times.
-
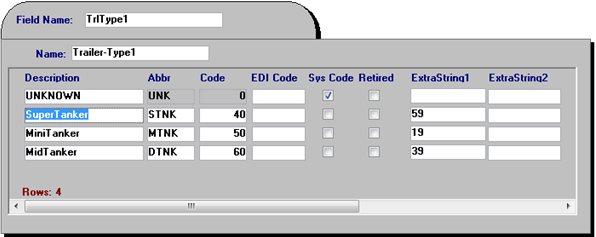
Create the desired label options(s). For each of these label options, enter the desired dwell time in the option’s ExtraString1 field.
In this example, we used the TrlType1 label to record dwell times for three trailer types.
Note: You can also enter a dwell time in the ExtraString1 field of an existing label option.
-
Save the label file.
Activating trailer-specific dwell times
Before you can use the trailer dwell time feature, you must:
-
Enable the feature using the
[FuelDispatch]UseTrailerDwellTimesetting. -
Identify the TrlType1-4 label used to set up dwell time label options in the
[FuelDispatch]TrailerTypeDwellTimesetting.Note: This step is optional. You can also manually record a trailer’s dwell time in its profile.
Recording a dwell time for a trailer
You can record a dwell time for a trailer in two ways:
-
Record the number of minutes directly in the Dwell Time field in the trailer’s profile.
-
Select the TrlType1-4 option your company uses to define the correct dwell time.
Follow these steps to record a dwell time for a trailer.
| You cannot use TMWSuite Trailer File Maintenance to record dwell time for a trailer. |
-
Access the TrailerProfile window:
-
Select Tools > Trailer Scroll.
-
Retrieve a list of trailers.
-
Do one of the following.
-
Double-click the desired trailer.
The TrailerProfile window opens as another tab in the Fuel Dispatch window -
Select the desired trailer and click Profile.
The Trailer Profile window opens as a separate window.
-
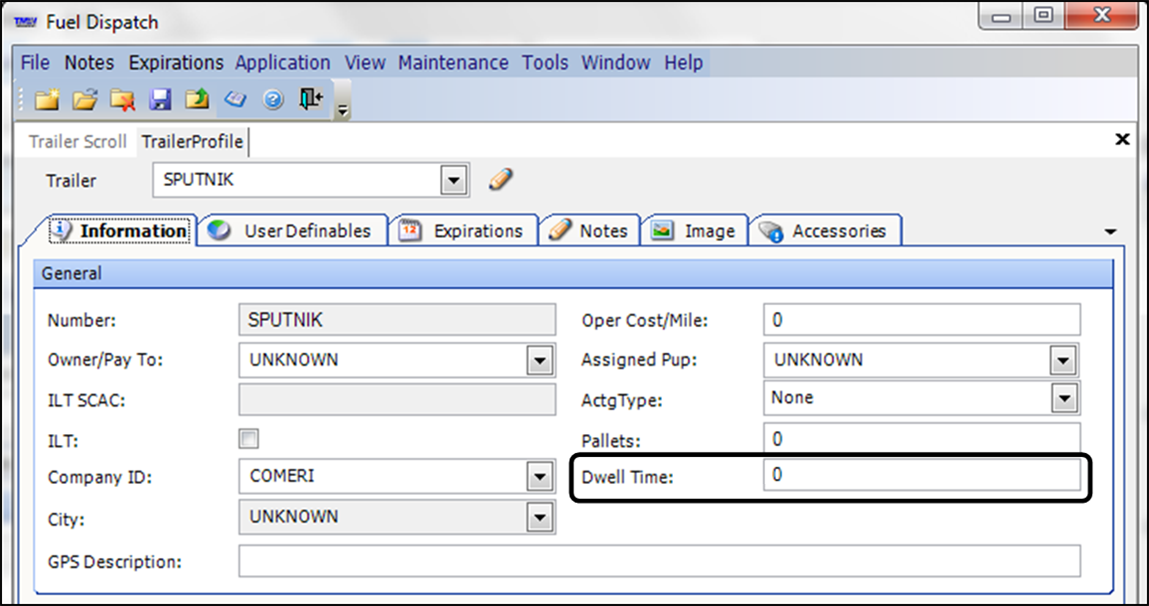
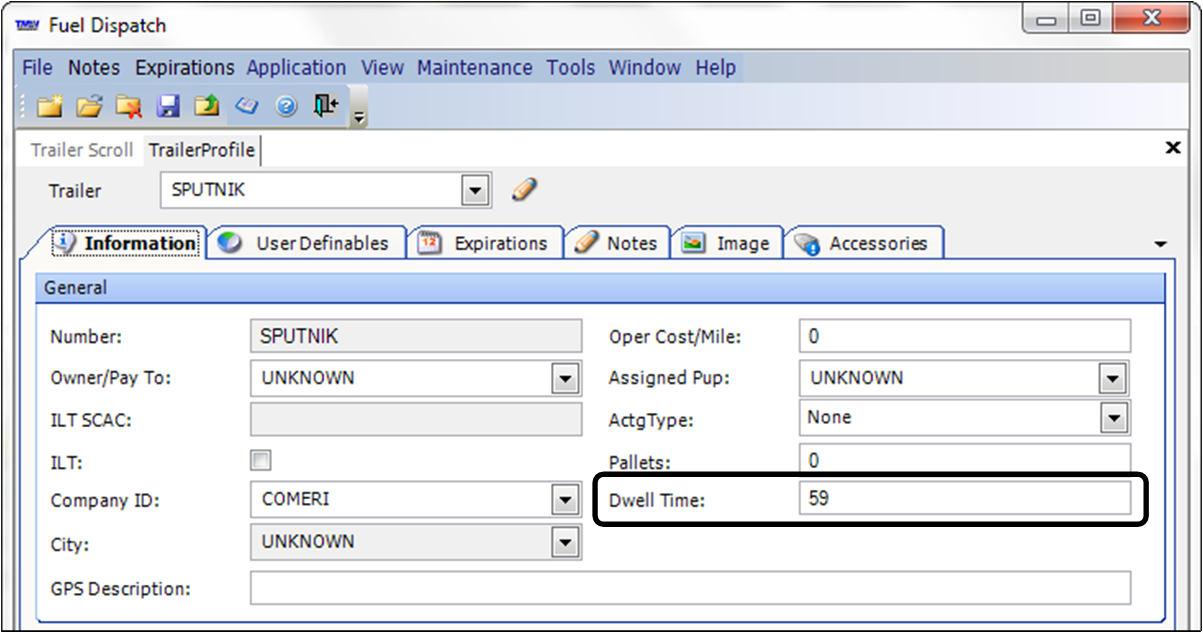
On the Information tab, note the Dwell Time field.
-
-
Do one of the following:
-
Record a dwell time manually
Enter the number of minutes in the Dwell Time field.
Note: This entry can be different from dwell times associated with label options. A manual entry overrides an existing dwell time, including one associated with a TrlType label option on the User Definables tab.
-
Record a dwell time defined by a label option
-
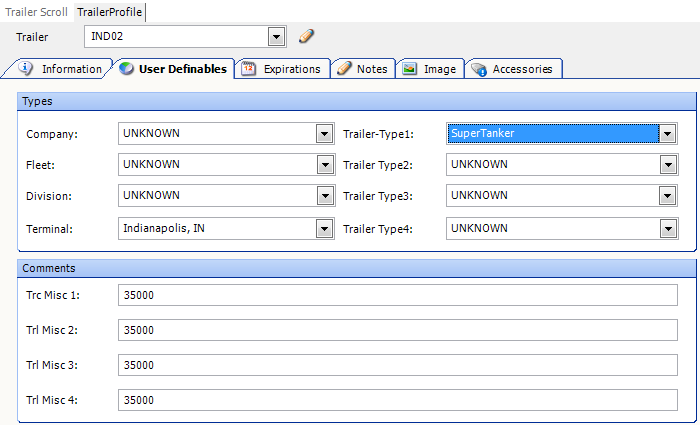
Select the User Definables tab.
-
In the appropriate TrlType 1-4 field, select the trailer type option associated with the desired dwell time.
In this illustration, the SuperTanker option has been selected in the Trailer Type1 field. The dwell time associated with this option is 59 minutes.
-
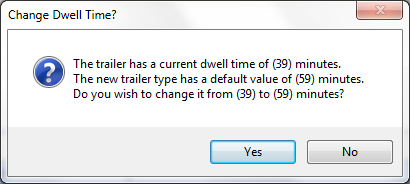
If the trailer has a previously assigned dwell time, the system asks for confirmation. Click Yes.
-
Select the Information tab and confirm the Dwell Time field displays the expected dwell time.
-
-
-
Click
 Save.
Save. -
Repeat the procedure as needed for other trailers.
Specifying how RevTypes are set on new orders
Revenue types allow your company to classify orders for many different purposes. You set up the classifications using the RevType1-4 labels in TMWSuite’s System Administration application. Two mutually exclusive setup options determine how RevType values are set when users create new orders on the Call On Demand Order Entry window. You must determine the one you want.
-
By default, the system automatically copies all RevType values from the consignee’s profile to new orders. If you prefer users to enter these values manually, you can disable the auto-copy feature.
-
In Fuel Dispatch, one purpose of revenue types is to associate an order with the terminal responsible for its completion. As part of the required setup for Fuel Dispatch, your company set up one of the RevType1-4 labels to identify your terminals. For details, see Setting up RevType/Terminal relationships.
If you use RevType1 to identify your terminals, you can set up the system to do the following:
-
Copy the terminal value from the user’s profile.
-
Require users to enter RevTypes2 - 3 manually.
-
Setting RevType1 - 4 values manually or from the consignee’s profile
The [FuelDispatch]SetRevTypesByConsignee setting in your TTS50 determines whether revenue type values are copied to orders from consignees' profiles.
| If a user changes an order’s consignee later, the RevType values are updated to those of the new consignee. |
Using the user’s profile to set the terminal on new orders
If your company uses RevType1 to identify its terminals, you can have the RevType1 value from the user’s profile copied to new orders. To do this, use the [FuelDispatch]DefaultUserTerminalOnNewOrder setting in your TTS50.
| An order retains the RevType1 value from the user who created it, unless it is manually changed. If a different user makes changes to an order, including changing the consignee, the RevType1 value is not updated automatically. |
Allowing orders to be entered for a store’s tanks
By default, the Call On demand Order Entry window displays only the Freight tab for you to enter freight details on an order.
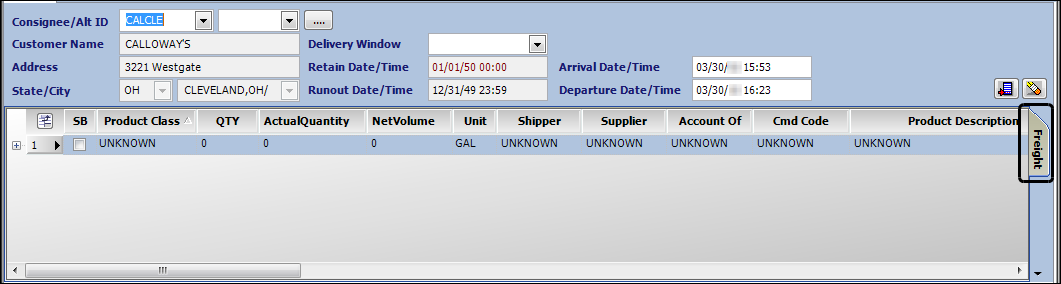
When you enter information on this tab, you must be sure to select the appropriate commodity for the store.
If your company is using the FuelTMS Inventory Services module, it has created tank profiles for each of the stores to which you deliver product. These profiles identify the commodities carried at each store.
To help eliminate order entry errors, you can set up Fuel Dispatch to display the Tanks tab as well as the Freight tab.
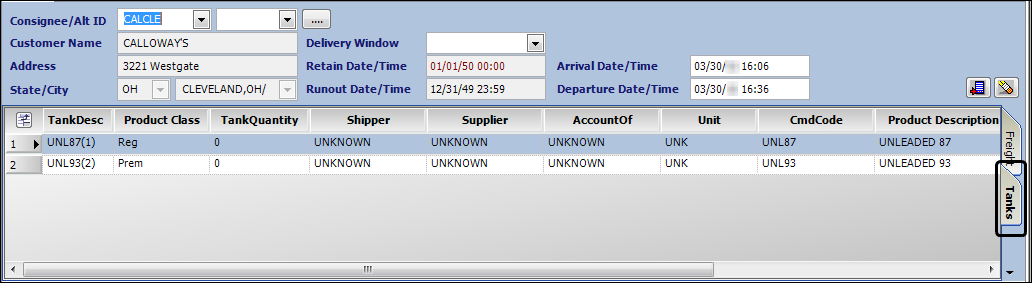
The Tanks tab shows the commodities that the store handles, as recorded in its profile in the Inventory Services application. Using this tab eliminates entering an incorrect commodity.
This feature is controlled by the [FuelDispatch]OrderEntryTankMode setting.
Putting initial focus on the Consignee field
By default, when you create a new order in Call On Demand Order Entry, the system puts focus on the Bill To field. If your system is set up to retrieve the Bill To based on the consignee on the order, selecting the Bill To is an unnecessary step.
Now, you can set up the system to put initial focus on the Consignee field instead. Use the [FuelDispatch]SetCodoeInitialFocusConsignee setting in your TTS50.