Entering and working with notes
A note allows you to convey information to other users who will access it from within Fuel Dispatch. You can add, edit, or remove a note for a movement, an order, a company associated with the order, a resource assigned to the order, or a commodity recorded on the order. Users of other TMWSuite applications can also view these notes.
In the Call On Demand Order Entry window, there are two ways to view and work with notes. You can use the ![]() Notes icon and the Notes tab.
Notes icon and the Notes tab.
Notes icon
By default, when you click the ![]() Notes icon, the Notes window opens to the Summary tab. This tab provides an expanded list of existing notes, which are listed in groups by note category (that is, record type, such as order, commodity, driver, etc.).
Notes icon, the Notes window opens to the Summary tab. This tab provides an expanded list of existing notes, which are listed in groups by note category (that is, record type, such as order, commodity, driver, etc.).

Notes tab
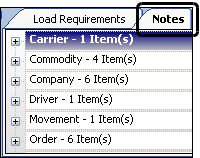
The Notes tab is shown to the right of the Load Requirements tab in the upper right of the Call On Demand Order Entry window. It provides a quick view of the quantity and content of notes that exist for the order. To read the notes, you can click the ![]() icon for a note category. You cannot add, change, or delete notes on the Notes tab, but you can double-click on a note or note category to open the Notes window.
icon for a note category. You cannot add, change, or delete notes on the Notes tab, but you can double-click on a note or note category to open the Notes window.
Overview of the Notes window
The Notes window consists of:
-
A Summary tab that provides a quick look at all the notes.
-
A Detail tab for each note category.
The
 icon appears on a tab when a note exists for that tab.
-
Movement
This category is for notes that are associated with the entire movement, not just billable stops on the order.
-
Order
-
Driver profile
-
Company profile
-
Commodity profile
-
Tractor profile
-
Trailer profile
-
Carrier profile
-
Notes window Summary tab
On the Summary tab, notes are listed in groups by category, (i.e., record type, such as order, commodity, driver, etc.). Shown to the right of each category is the total number of notes for that category. For example:
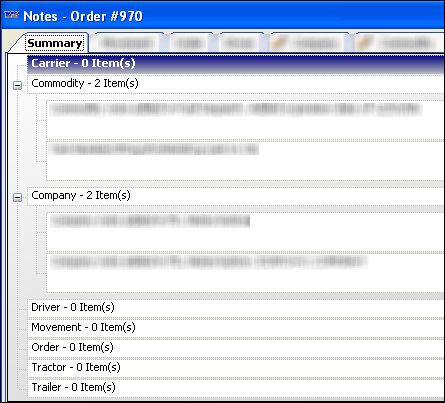
If a note exists for a category, the category’s grouping is automatically expanded when you click the Summary tab. Use the ![]() or
or ![]() icons to collapse or expand the grouping.
icons to collapse or expand the grouping.
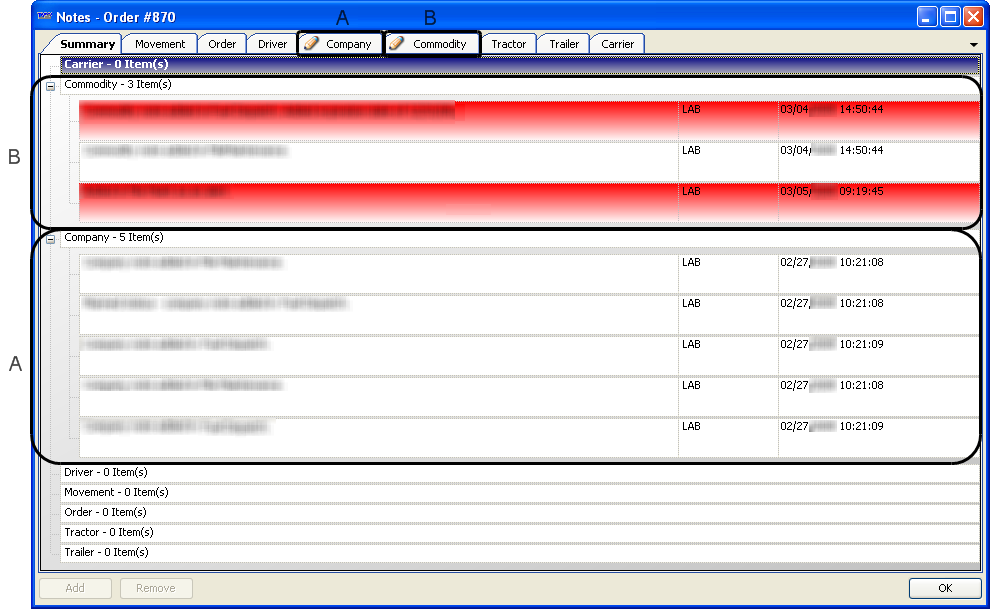
When a category is expanded, the Summary tab displays the note text, the user ID of the person who last updated the note, and the date and time the note was updated. This example shows three company notes and five commodity notes for order #870.
Notes window Detail tabs
Each detail tab name (Driver, Company, Commodity, etc.) identifies the note category. Each tab allows you to add, edit, or remove a note for that category.
|
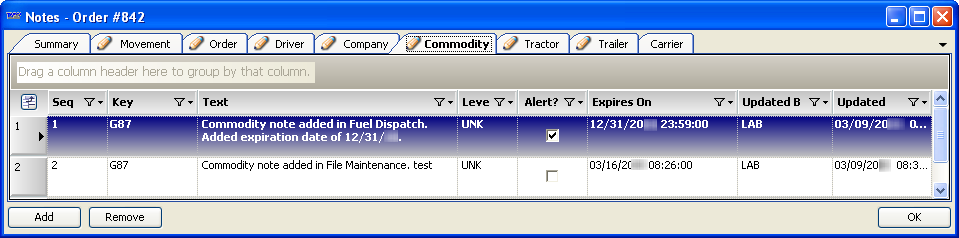
All tabs, with the exception of the Summary tab, provide the following information for a note.
Seq |
The numeric identifier assigned to notes as you add them - lower numbered notes were added earlier than higher numbered notes. By default, notes are sorted by the sequence in which they were added. |
Key |
ID of the record to which the note applies. Note: Starting with Fuel Dispatch version 2020.2, this field is included as a default column in the Call On Demand Order Entry Notes tab. |
Text |
Contains the contents of the note |
Level |
Drop-down list from which you select the internal classification for the note Notes:
|
Alert? |
To indicate that the note is of critical importance, select the checkbox to flag it as an alert. Alerts are identified by a color code. For more information, see Explanation of color coding below. |
Expires On |
Enter the date and time the note is to expire, if applicable. |
Updated By |
User ID of the person who last updated the note |
Updated |
The date and time the note was last updated |
If you want, you can also rearrange and sort the data display. For details, see Using data grids.
Explanation of color coding for Notes
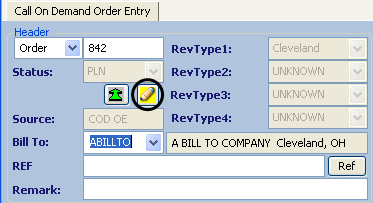
By default In the Call On Demand Order Entry window, a Notes icon is shown under the Status field. Its color signals whether note(s) exist, and whether one or more are alerts.
|
An un-highlighted pencil icon indicates that no notes exist. |
|
A yellow-highlighted icon indicates at least one note is attached. No notes are marked as alerts. |
|
A red-highlighted icon indicates at least one alert is attached. Notes that are not alerts may also be attached. |
This example shows at least one note exists for the order, and none are marked as an alert.
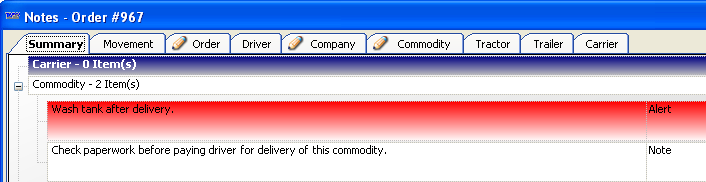
Color coding on the Summary tab of the Notes window is used to help you identify when a note is attached, and when that note is marked as an alert.
Red shading |
The note is an alert. |
No shading |
The note is not an alert. |
This example shows one Alert and one non-critical note for a commodity.
The same color coding is used on the Notes tab:

Accessing the Notes window
In the Call On Demand Order Entry window, you can access the Notes window by either of two methods. Each method provides different benefits as described below - the most important is whether you can add and remove notes for all note categories, or just for the Order category.
Notes icon shown under the Status field
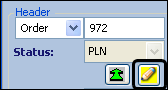
When you click the Notes ![]() icon, the Notes window opens to the Summary tab. This tab provides an expanded list of notes, which are listed in groups by note category. Within the Notes window, you can click the appropriate detail tab to add, edit, or remove any note.
icon, the Notes window opens to the Summary tab. This tab provides an expanded list of notes, which are listed in groups by note category. Within the Notes window, you can click the appropriate detail tab to add, edit, or remove any note.
|
Allowing users to add or delete any kind of note can be problematic, particularly for notes for companies, commodities, drivers, tractors, trailers, or carriers. This is because such notes are attached to master file profiles, not to the order. Therefore, any additions or deletions will affect the profiles themselves, as well as any future order with which those records are associated. If you want, you can set up the system to limit users to additions and deletions of Order notes.
|
Notes tab located to the right of the Load Requirements tab
This tab provides a quick view of any notes associated with an order. You cannot add, modify, or view them here, however.
When you click any category or note within the Notes tab, the Notes window always opens to the Order tab. When the Notes window is accessed in this way, your actions are limited. You can view and modify all notes for all categories; however, you can only add or remove Order notes.
Adding, changing, or removing a note
Use this procedure to add, edit, or delete a note that is associated with an order.
-
Look up the order In the Call On Demand Order Entry window.
-
Click the appropriate detail tab.
-
Do one of the following:
To add a note-
Click Add.
If multiple notes exist, the new note is added to the end of the list. -
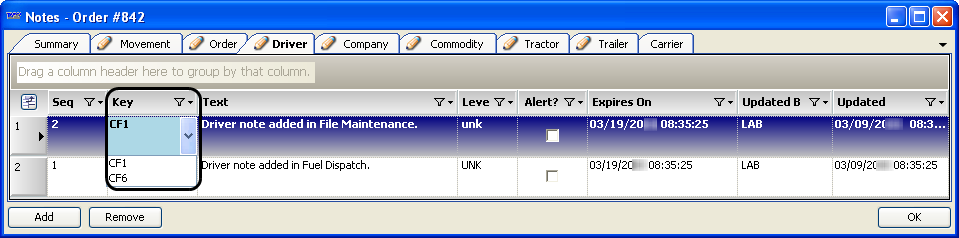
In the Key field, select the ID of the record for which you are adding a note.
This example shows driver notes. The order is being hauled by a team; therefore, multiple driver IDs are shown in the Key drop-down list.
-
Enter the details of the note in the Text field.
-
If you want, mark the note as an Alert by selecting the Alert checkbox.
To edit a noteMake any necessary changes to the key, text, alert status, and expiration date.
To delete a noteSelect the note to delete and click Remove.
Note: When you delete a note having a type other than Order or Movement, a confirmation message appears, advising that deleting the note will affect all orders that contain the note. For example:
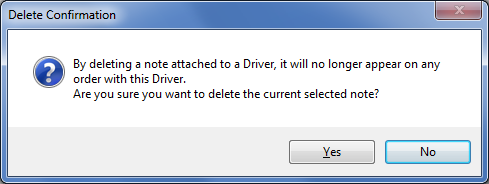
Warning: When you delete a company, driver, tractor, trailer, carrier, or commodity note, you are deleting it from the profile, not just the order.
-
-
Click OK.
-
Save the order.
Note: If you do not save the order, you will lose all changes to the note(s).
Copying profile notes to an order
When you make changes to a note for a company, commodity, driver, tractor, trailer, or carrier associated with an order, you are updating the profile of the company, commodity, or resource itself, not the order. Changes made to movement notes apply to all stops on a trip, not just billable stops for an order. You can set up the system to copy a company, commodity, resource, or movement note from the Summary tab to the Order tab, where you can view and change the copied note(s). This is helpful if you want to make changes for a specific order, but not make changes to master file profiles or a movement.
To copy notes to the Order tab, you must have [Order]EnableCopyNotesToOrder=Y in your TTS50. This setting determines whether the Copy to Order checkbox and button are accessible on the Summary tab.
Use this procedure to copy a note to an order.
-
Look up the order In the Call On Demand Order Entry window.
-
On the Summary tab, select the Copy to Order checkbox for the note(s) that you want to copy.
Show me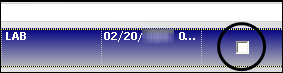
Note: A column heading is not shown for the checkboxes.
-
If you only selected one note, press TAB.
Note: This action activates the Copy to Order button, which is shown at the bottom left of the window. If you have selected multiple notes, the Copy to Order button is activated automatically.
-
Click Copy to Order.
Show me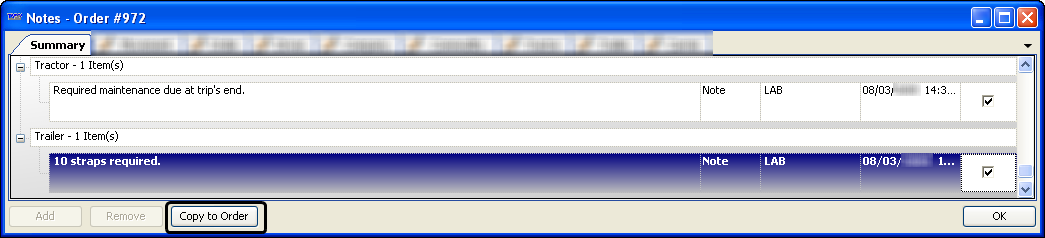
The copied note(s) are shown automatically in the Order grouping on the Summary tab. If you click the Order tab, you will see the note(s) there as well. The copies will not be saved until you click OK and save the order.
Note: Whenever you exit and return to the Summary tab, all Copy to Order checkboxes are cleared.
-
On the Order tab, make changes as needed to the note(s) you copied.
Note: Copied notes are not tagged with the ID of the profile from which they were copied. If it is not clear which profile the note is for, you may want to add supplemental information to identify it.
-
Click OK.
The Notes window closes. -
Save the order.
| If you return to the Summary tab to copy more notes, the system allows you to copy the same note(s) multiple times. |