Managing company relationships
Relationships can be established in two ways:
-
Using Learning Mode to create relationships on the fly as orders are created in Call On Demand Order Entry.
-
Manually linking companies in the Company Relations Profile window.
Using the Company Relations Profile window, you can also remove links for companies with which you no longer do business. Removing links between shipper, supplier, and Account Of companies does not affect previously established Bill To relationships used on orders. However, removing links can affect future orders if you are set up to enforce company relationships in Call On Demand Order Entry.
Using Learning Mode to create relationships
By default, Learning Mode is activated. As you enter orders in Call On Demand Order Entry, the system records the combinations of companies on the orders and saves them as company relationships. Over time, Learning Mode will record every combination of consignee, shipper, supplier, and Account Of companies that you use with a particular Bill To.
Typically, Learning Mode is used during initial setup to reduce data entry efforts. Once you have established the bulk of your setup, you can turn off Learning Mode and add or change company relationships manually as your business changes.
You can disable Learning Mode using the [FuelDispatch]DefaultLearnMode INI setting.
Setting up company relationships manually
When manually linking companies in the Company Relations Profile window, the company type determines which tabs are available. For example, shippers can only be linked to suppliers, so in a shipper profile, the only company type tab accessible is the Suppliers tab.

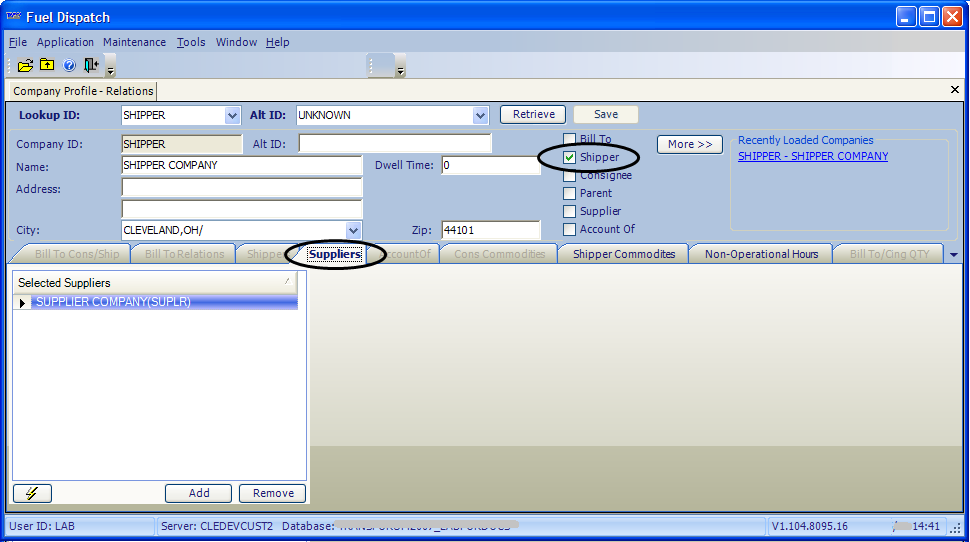
Each tab contains a pane where you establish relationships. The name of the pane reflects the type of company you are linking.
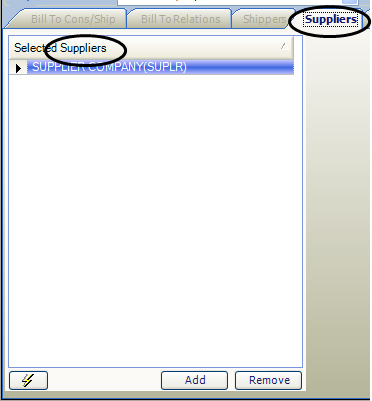
In the Selected pane, you can add or remove companies of the type specified on the tab you are using.
The procedure used to add or remove linked companies is the same, no matter which company types you are linking.
Linking shippers and suppliers
Before you can manually link other types of companies in relationships, you must establish links between shippers and suppliers. Shipper/supplier links are required when you are using the Bill To or the Global relationship enforcement level. Only previously linked shipper/supplier pairs are available when linking companies in a Bill To profile. Also see Setting the company relationship enforcement level.
|
You can link shippers and suppliers in either of their profiles.
-
In the shipper profile, you link suppliers on the Suppliers tab.

-
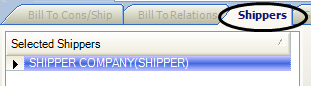
In the supplier profile, you link shippers on the Shippers tab.
Linking suppliers and Account Of companies
Before you can manually link other types of companies in relationships, you must establish links between suppliers and Account Of companies. Supplier/Account Of links are required when you are using the Bill To or the Global relationship enforcement level. They are also required when you are recording PIN codes. Only previously linked supplier/Account Of pairs are available when linking companies in a Bill To profile. For more information, see Setting the company relationship enforcement level.
|
You can link suppliers and Account Of companies in either of their profiles.
-
In the supplier profile, you link Account Of companies on the Account Of tab.

-
In the Account Of profile, you link suppliers on the Suppliers tab.

Shippers can be linked to Bill To companies in two ways:
-
They can be linked directly, which is a requirement of the Global relationship enforcement level, and when you set up state PIN codes, i.e., those based on shipper/commodity combinations.
-
They can be linked to consignees that are linked to the Bill To. This linking is required by the Bill To relationship enforcement level, and when you set up PIN codes based on consignee/commodity combinations.
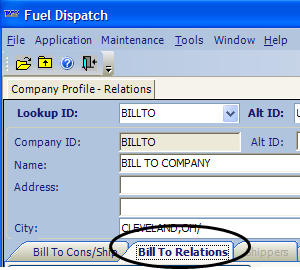
Shippers are linked to Bill To companies in Bill To profiles.
-
To link a shipper to a Bill To directly, you use the Bill To Relations tab.
-
To link a shipper to a Bill To through the consignee linked to the Bill To, you use the Bill To Cons/Ship tab.

The consignee profile does not provide access for linking with other company types. However, using the Bill To relationship enforcement level and setting up PIN codes based on consignee/commodity combinations require shippers and consignees to be linked.
Shippers are linked to consignees in Bill To company profiles on the Bill To Cons/Ship tab. The linking process is:
-
Link the consignee to the Bill To.
-
Link the shipper to the consignee that has been linked to the Bill To.
To add a company link, follow these steps.
-
Go to Maintenance > Company Relations Profile.
The Company Relations Profile window opens.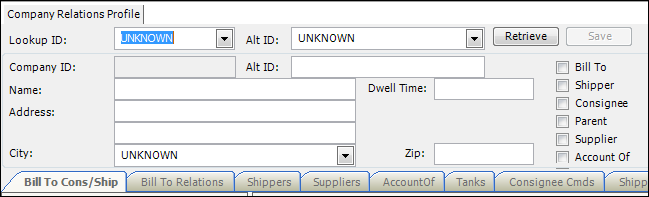
-
In the Lookup ID field, enter the ID of the company for which you are creating the relationship.
-
Click Retrieve.
-
Select the appropriate tab for the relationship type you want to define.
Note: Some company types can have relationships with more than one other company type. Access to the Company Relations Profile window’s tabs is controlled by the type of company whose profile you are editing.
-
In the Selected pane, click Add.
Show me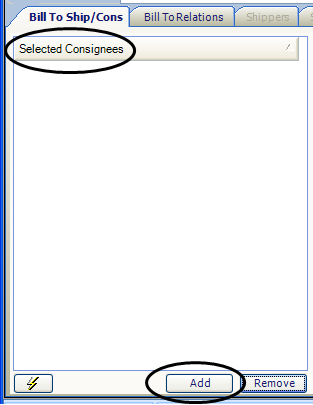
Note: In most company profiles, a tab for linking companies will have only one Selected pane. When working with Bill To profiles, both the Bill To Ship/Cons and Bill To Relations tabs contain multiple Selected panes for linking different types of companies to the Bill To.
The Select Companies window opens. It displays a row for each company in the database identified as the type of company noted in the window name.
-
Select the companies you want to link to the profiled company.
Notes:
-
To select a company, you must select its row indicator (the box to the left of the row). The selected row shows an arrow in the box.
-
If needed, you can click Select All to add all companies shown in the window.
-
If needed, you can click Unselect All to clear your selections.
-
Currently, the Reset button is not functional.
Show me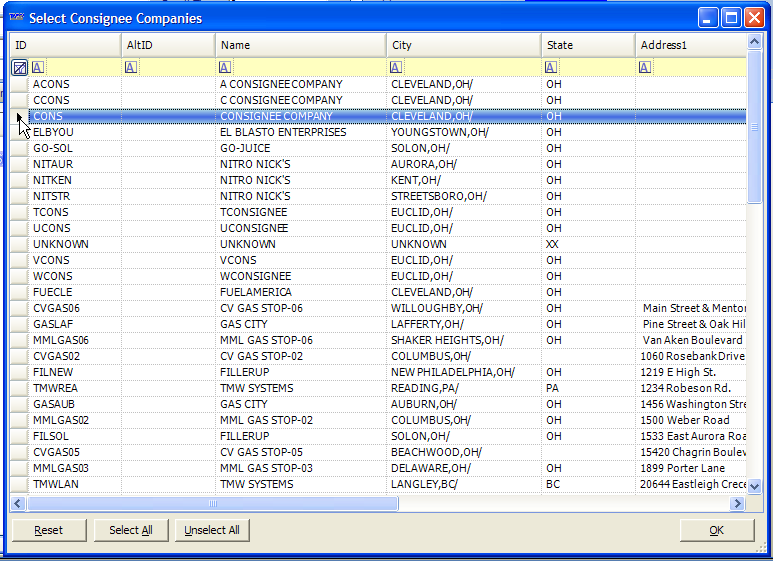
-
-
Click OK.
The More Additions message is displayed.Show me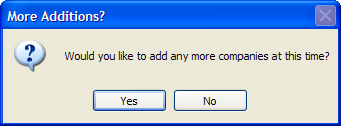
-
Do one of the following:
-
If you want to add more companies, click Yes and repeat Steps 3 through 5.
-
If you are done adding companies, click No.
The Selected pane is updated with your selections.
-
-
Click Save.
Show me
Note: If needed, you can record PIN codes. For more information, see Recording PIN codes manually.
There may be times when company relationships are no longer valid and you may want to remove those relationship links.
When severing relationships, note the following:
-
Removing the link between two companies in either of the profiles removes it from the other profile. For example, if you remove the link between a supplier and an Account Of company in the supplier’s profile, the link is also severed in the Account Of company’s profile.
-
If those same two companies were previously linked on a Bill To profile, the links are not severed on the Bill To profile.
-
Likewise, if the links between the two companies on a Bill To profile are removed, the links in their profiles are not removed.
-
Use this procedure to remove company relationships.
-
Select the appropriate tab for the relationship type you want to remove.
Note: Some company types can have relationships with more than one other company type. Access to the Company Relations Profile window’s tabs is controlled by the company type of the company whose profile you are editing.
-
In the Selected pane, click Remove.
-
Click Save.
Show me