Check Register
Use Check Register to post checks that have been printed through Check Printing and Instant Checks. The posting process generates entries in GL Journal Entries.
The register also updates the status of:
-
Affected invoices in AP Inquiry
-
Pay and deduction entries in Driver Pay Audit (in the case of driver deductions)
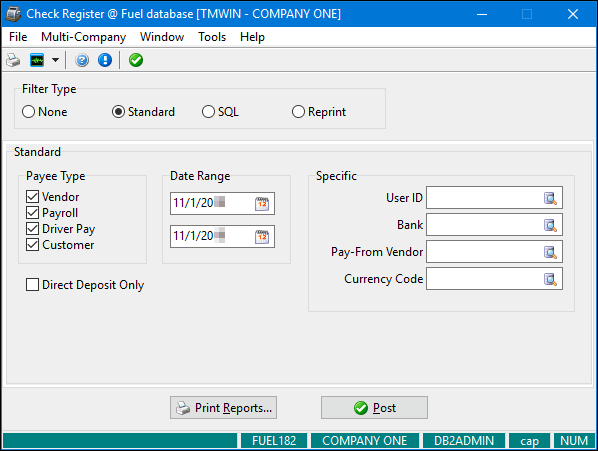
Several different filter types are available. The fields that appear differ depending on the filter type. This illustration shows the fields that appear when you select the standard filter (default).
To access Check Register:
| From this location | Go to |
|---|---|
TruckMate Menu and TruckMate Task List |
|
Windows Start Menu |
TruckMate 20xx > Check Register |
Windows Explorer |
C:\Program Files (x86) > TruckMate 20xx > ApNcr.exe |
What’s new in Check Register
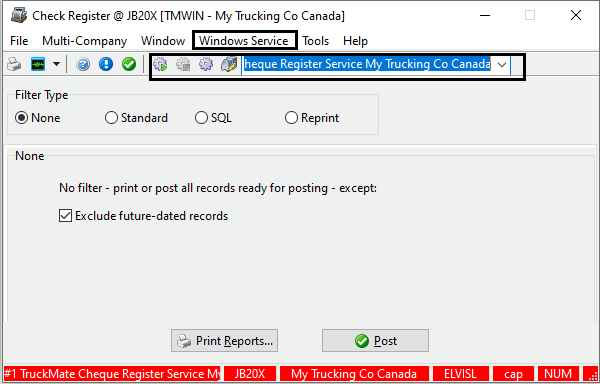
Check Register converted to a service (TM 2021.1)
The Accounts Payable > Check Register (ApNcr.exe) program has been converted to run as a Windows service to allow the register to run in the background at pre-scheduled time without user intervention.
A new Windows Service tab has been added to the main form of the Check Register program together with some associated icon buttons and a pull-down menu in the tool bar.
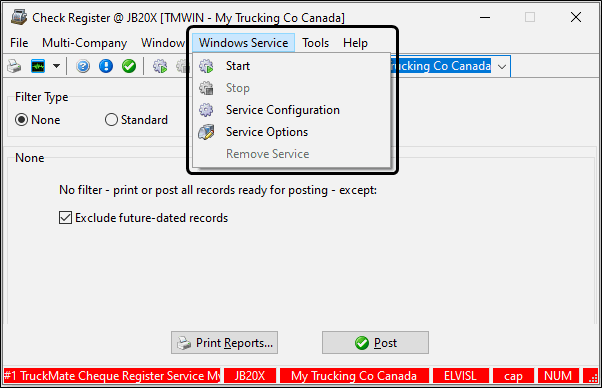
The Service Configuration form is used to set up the database and other settings and to install the service in the same way that other TruckMate Windows services are set up and configured.
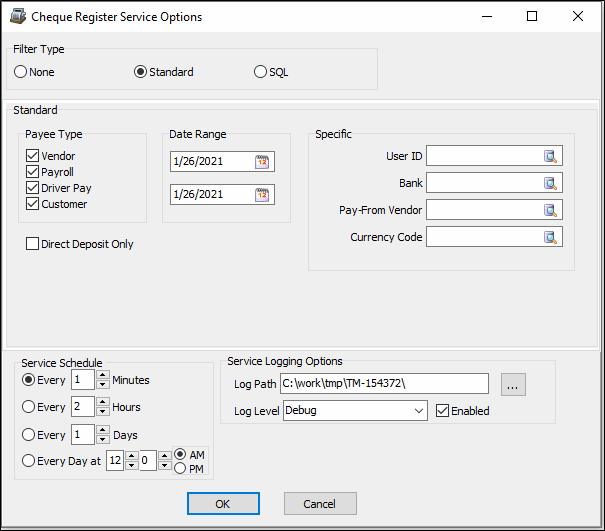
The Service Options form is used for configuring other settings specific to this new service. The settings are saved in the Windows Registry.
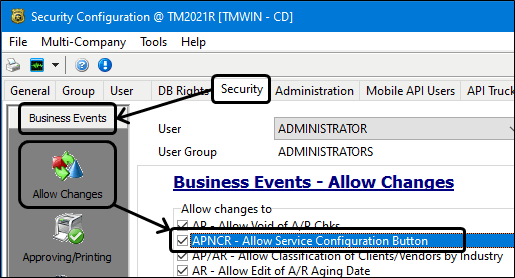
There is a new APNCR - Allow Service Configuration Button checkbox option in the Utilities > Security Configuration program > Security tab > Business Events > Allow Changes section.
Setting up Application Configurator for use with Check Register
The following Application Configurator options for Check Register are listed under Configuration Options > APNCR.EXE.
Allow Inactive GL |
Determines system behavior when the user attempts to use an inactive General Ledger (GL) account. Options are:
|
Auto-Correct Closed Period Posting Dates - Past |
Determines how Check Register handles "bad" past dates. Options are:
|
Auto-Correct Closed Period Posting Dates - Future |
Determines how Check Register handles "bad" future dates. Options are:
|
Commit Each Trans |
When this option is set to False, the system commits all transactions at once, rather than separately. |
Create the Pay From Vendor AP_BILL record |
If you are using one vendor to pay another vendor’s bill, this option instructs the system to generate supporting details to track the payment. The details appear in aging reports and in AP Inquiry. |
Subtotal GLTRANS Postings |
When this option is set to True, all of the GL transactions in the register are grouped/summed together by GL account and date (creating a single total per combination). If left at the default, transactions are grouped by GL account, date, and source transaction ID. |
Update claim chk.# |
When this option is set to True, the system resets the check number in Claims for checks (and AP invoices paid on checks) posted by Check Register. This allows the system to store a check number on a claims payable record. |
Setting up Security Configuration for use with Check Register
The following Security Configuration options for Check Register are listed under Security tab > Security > Payroll.
Check register program - Ability to run a payroll batch |
When selected, users belonging to the selected pay group cannot process a payroll batch. |
The following Security Configuration options for Check Register are listed under Security tab > Business Events > Allow Changes section.
APNCR - Allow Service Configuration Button |
When selected, it enables the Windows Service tab on the main form of the Accounts Payable > Check Register (ApNcr.exe) program together with some associated icon buttons and a pull-down menu in the tool bar. |
Types of General Ledger postings
When you post checks in Check Register, the system makes the following General Ledger postings.
Credit posting
The system makes a credit posting to the bank account from which the check was issued.
Invoice payments
The system makes a debit posting to the AP control account for checks generated from invoices selected in AP Inquiry (using the Pay Bills function). To determine the AP control account, the system looks for the lowest numbered general ledger account (as configured in GL Chart of Accounts) that fits the following criteria:
-
It is of the Accounts Payable type.
-
It is not a sub-account.
-
It is of the same currency as the invoice.
COD payments
The system makes a debit posting to the COD Payable account for checks generated in COD Payables. To determine the COD Payable account, the system looks for the lowest numbered general ledger account (as configured GL Chart of Accounts) that fits the following criteria:
-
It is of the COD Payable type.
-
It is not a sub-account.
-
It is of the same currency as the COD transaction.
Driver payments
The system makes a debit posting to the Driver Payable account for checks generated in Driver Statements. To determine the Driver Payable account, the system looks for the lowest numbered general ledger account (as configured in GL Chart of Accounts) that fits the following criteria:
-
It is of the Driver Payable type.
-
It is not a sub-account.
-
It is of the same currency as the payment issued to the driver.
Instant checks
The following table describes the types and locations of postings made for checks created using Instant Checks.
| Item | Type of postings made | Location of postings |
|---|---|---|
Bills |
Debit |
Account specified on the Instant Checks Bills tab |
Driver deductions |
Debit |
Account(s) specified on the Instant Checks Driver Deductions tab |
Expenses |
Debit |
Account(s) specified on the Instant Checks Expense tab |
Payroll checks |
Credit and debit |
The system will make a posting for each pay code included on the payroll check. Pay code posting references are configured in Payroll Configuration and attached to employees in Employee Profiles. |
Posting checks
The general process for posting checks in Check Register is:
-
Select a filter type. Options are:
-
None
-
Standard
-
SQL
-
-
Enter one or more search criteria, as described below.
-
If you want, review the check register report for accuracy prior to posting.
-
Click Post.
-
After you have finished reviewing the reports, close the report windows.
A message appears indicating that the posting is complete.
Posting checks without using a filter
-
In the Filter Type section, select None.
The Check Register window redisplays as shown in this illustration.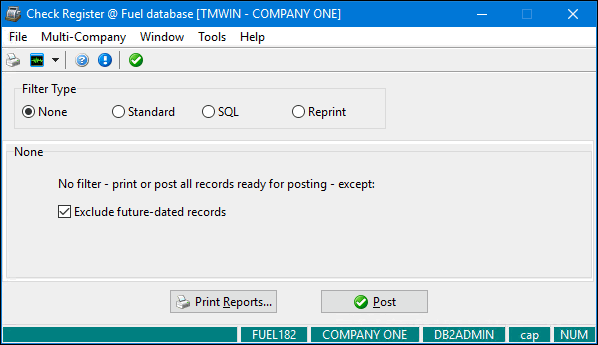
-
By default, future-dated records are excluded. If you want to include them, deselect Exclude future-dated records.
Posting invoices using the standard filter
-
In the Filter Type section, select Standard if it is not already selected.
The Check Register window redisplays as shown in this illustration.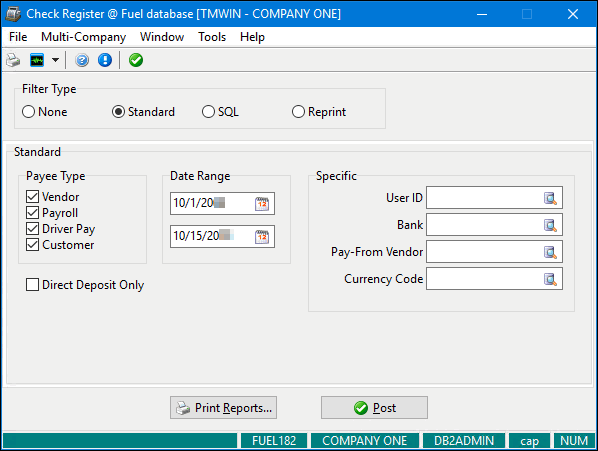
-
Enter one or more filter criteria. Note that the more criteria you enter, the narrower the results.
Field Definition Payee Type
Select one or more payee types. If you want to include only Direct Deposit checks for the payee type(s), select Direct Deposit Only.
Date Range
Enter valid check dates or click
 Calendar to search for and select a date.
User ID
Enter the ID of a user who entered the corresponding invoice. You can also click
 Pick List to search for and select a user ID.
Bank
Enter the number of the bank (GL) account from which the check was issued. You can also click
Pick List to search for and select an account number.Note: You cannot enter values in both this field and the Pay-From Vendor field.
Pay-From Vendor
Enter a valid vendor ID or click
Pick List to search for and select a vendor ID.Notes:
-
You cannot enter values in both this field and the Bank field.
-
The ID specified in this field appears on the first page of any quick reports.
Currency Code
Enter a valid currency code or click
Pick List to search for and select a currency code. -
Posting invoices using the SQL filter
-
In the Filter Type section, select SQL.
The Check Register window redisplays as shown in this illustration.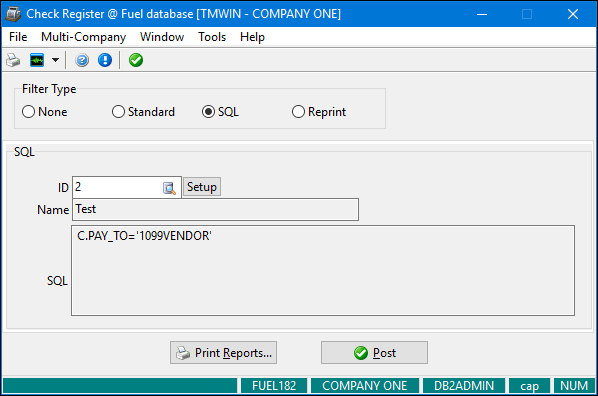
-
Do any of the following:
-
Enter a valid custom SQL filter ID.
-
Click
Pick List to search for and select a custom SQL filter ID. -
Click Setup and create a custom SQL filter in the SQL Filter window.
The name of the SQL filter and its corresponding SQL code appear in the Name and SQL fields.
-
Printing and reprinting reports in Check Register
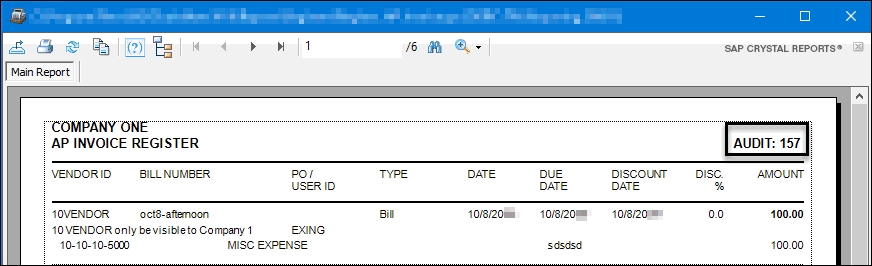
To see reports listing invoices that meet your search criteria, click Print Reports. Two reports appear, each in a separate window:
-
AP Invoice Register
-
AP Invoice Register - GL Summary
If you click Print Reports prior to posting, the message "Audit Not Posted" appears in the upper right corner of the report. You can review this report for accuracy prior to posting.
After posting, the audit number appears in the upper right corner of the report.
To reprint reports:
-
In the Filter Type section in AP Invoice Register, select Reprint.
The AP Invoice Register window redisplays as shown in this illustration.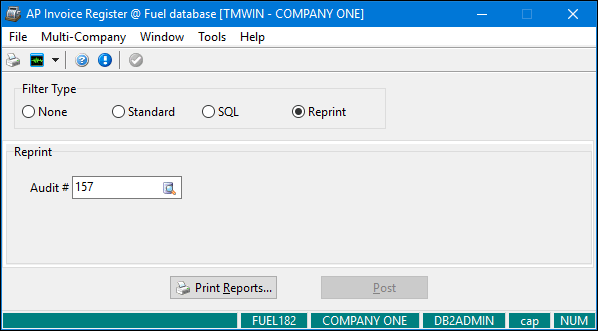
-
Enter a valid audit number in the Audit # field or click
Pick List to search for and select an audit number. -
Click Print Reports.