Mobile Communications Macro Setup Modify window

Clicking on the modify button when an existing Macro is highlighted opens the Macro Editing window. The window title bar helps you identify the Macro that is currently being edited by what network the Macro belongs to, the Macro number, and the Macro revision letter.
New Object (Ins) / Delete Object (Alt+Del)
The New Object / Delete Object buttons allow you to add or remove fields from the Macro body area. The arrow buttons allow you to move field objects around the Macro body area, or you can just drag and drop them with your mouse.
Insert New Line
Selecting this button will allow the User to insert a blank line into a new (or existing) Macro. The user will be asked to specify which row to insert the blank line. The program will then move all the fields down one row to create that blank line.
Duplicate Object
This button allows you to Copy a field and insert it back into the Macro Body area.
Up / Down / Left / Right
Use these arrows to position your inserted Macro Objects where you would like to see them display when the Macro is run.
Title
The Title field is where you enter the description of the Macro that appears in the main grid and also in the messaging areas of the system.
Default Macro Priority
The Default Macro Priority setting allows you to set a different priority level to use with this Macro than the priority level set by default for the network type in Communications Manager.
Message priority level is a feature available in some mobile communications networks that allows some messages to be processed more quickly than other messages because they are flagged with a higher priority level.
Reply Macro
The Reply Macro option corresponds with a feature on some mobile devices that allows a you to specify a default reply Macro number to be used any time the Driver keys a response to this Macro.
Example: any time a Driver receives a LOAD OFFER Macro, you want him to respond with a LOAD ACCEPT Macro - which is return Macro number 10. This is where you set the number of the reply Macro to allow this to happen.
Options
These options are network-specific options (currently PeopleNet Macros support these options) that apply to the Macro as a whole. In the above screenshot, the Macro is marked with the 'Keep History', 'Dispatcher Can Send' and 'Driver Can Send' flags, which tells the PeopleNet network whether or not to upload the Macro to the truck.
For more information on what the various operations do to your Macros, see Macro Options.
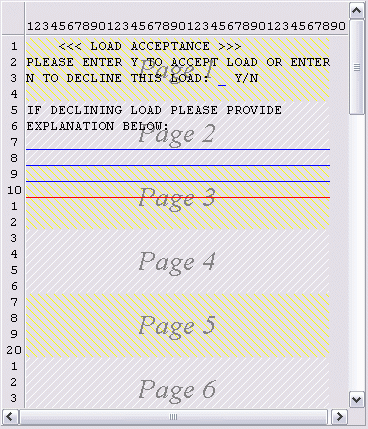
Macro Body Display
The column numbers across the top of the Macro Body Display section show the limits of the Macro width. This changes according to the communications network the Macro is matched to and is mainly a function of the screens available in the mobile devices.
The line numbers, page numbers, and alternating shading in the Macro body indicate how many lines make up a page - or the maximum number of lines that appear on the screen of the remote device at one time. Again, these limits vary according to the communications network the Macro is defined for. Similarly all networks enforce a limit to the number of lines and pages which may be included in one Macro message
No field can be made to stretch beyond the set width of the screen, so if you have free-form text that spans more than one line, you will have to add in multiple free-form text fields to allow the text to break on multiple lines.
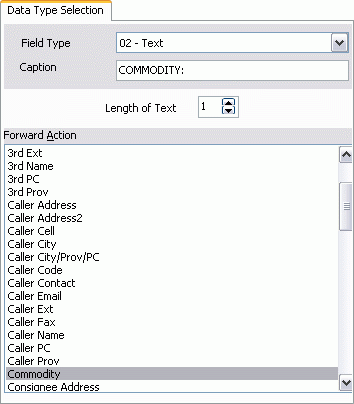
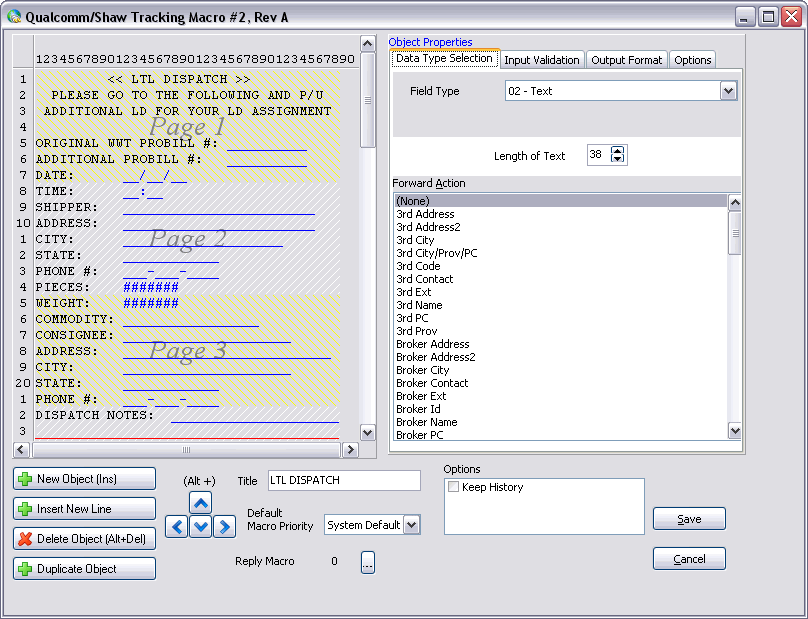
Field Type
Use the pull down menu to select a Field Type for the new Macro Object you have inserted into the Macro Body display. See below for a listing of available Field Types and their definitions.
| Type 18 allows some special functionality- see the Object Properties > Options Tab > Foreign Type field for more information. |
Object Text / Caption
The field labelled 'Object Text' (or 'Caption' for PeopleNet Macros) is actually a Dynamic field, and will change to reflect the Field Type that is selected. For the Field Type of '00 - Free Form Text', the User is presented with a text field that they may enter any text they wish to appear in the Macro. The fields that will appear are detailed in the section on Field Types below.
Number Format / Length of Text
Increasing the integer values in this field will increase the length of the line that follows the text you have entered as the 'Caption' above when it is passed to the driver, allowing more room for potential replies. As you increase this value, the line following the 'Caption' text will elongate dynamically in the Macro Body preview window.
Forward Action
The 'Forward Action' field will display any Actions that can be 'attached' to the Object Field Type you are inserting into the Macro. These 'Actions' will input additional data into the Macro body automatically, using your Communications and TruckMate software to gather the information. See the below Field Types section for more information on Field Type specific Actions.
| If you are working with a Return Macro, this field will be labelled 'Return Action', and you will have available Return Actions listed here. See the below Field Types section for more information on Field Type specific Actions. |
Object Properties
The Object Properties Section of the screen contains four Tabs where an object added to the screen can be resized, assigned a Field Type, and a Forward or Return action:
Data Type Selection Tab
Field Type
Use the pull down menu to select a Field Type for the new Macro Object you have inserted into the Macro Body display. See below for a listing of available Field Types and their definitions.
| Type 18 allows some special functionality- see the Object Properties > Options Tab > Foreign Type field for more information. |
Object Text / Caption
The field labelled 'Object Text' (or 'Caption' for PeopleNet Macros) is actually a Dynamic field, and will change to reflect the Field Type that is selected. For the Field Type of '00 - Free Form Text', the User is presented with a text field that they may enter any text they wish to appear in the Macro. The fields that will appear are detailed in the section on Field Types below.
Number Format / Length of Text
Increasing the integer values in this field will increase the length of the line that follows the text you have entered as the 'Caption' above when it is passed to the driver, allowing more room for potential replies. As you increase this value, the line following the 'Caption' text will elongate dynamically in the Macro Body preview window.
Forward Action
The 'Forward Action' field will display any Actions that can be 'attached' to the Object Field Type you are inserting into the Macro. These 'Actions' will input additional data into the Macro body automatically, using your Communications and TruckMate software to gather the information. See the below Field Types section for more information on Field Type specific Actions.
Note: If you are working with a Return Macro, this field will be labelled 'Return Action', and you will have available Return Actions listed here. See the below Field Types section for more information on Field Type specific Actions.
Input Validation Tab
The Input Validation Tab controls how the data is modified before entering the Macro.
Default Value / Validation Regexpr
The 'Default Value' and 'Validation Regexpr' options are an attempt to preprocess the data. Basically, 'RegExpr' is a "Regular Expression" that describes a pattern that the input must fit. If the input matches the pattern, then great. If not, the input is rejected and the 'Default Value' is used. In general, the 'Default Value' will be used if a "real" value cannot be found in the database.
Output Format Tab
The Output Format Tab controls how the data is modified before leaving the Macro. For instance, if you have a NUMERIC field for, say a temperature value and you set scale to '0.55555555' and offset to '-32', then any Fahrenheit temperature the Driver enters will be converted to Celsius before it gets stored in the table.
The formula is: NewValue = (OldValue + Offset) * Scale
Scale
Enter the Scale value that will be applied in the output formula (see the above description for an example).
Offset
Enter the Offset value that will be applied in the output formula (see the above description for an example).
Format
The Format field is a way to post-process the data. It is a "template" that is applied against the data to modify it BEFORE it gets stored in the Database.
A particular example might be a requirement for Bills of Lading (BOLs). When processing their BOLs, a particular Company noticed that of the 20 or so characters in a BOL, the first 12 or so were always the same for their set of Customers, so they wanted to configure their system so the Driver could simply enter in the last 8 characters of the BOL, instead of all 20. The Format field allows you to append these 8 characters properly, by using a format such as:
BOL-284028%sAA
The '%s' character is a 'placeholder' where the data goes. Suppose the driver entered '122333' then the full value that would get stuffed into the database would be:
BOL-284028122333AA
| The format field can also be used to change the format of dates, times, currency, etc. |
Options Tab
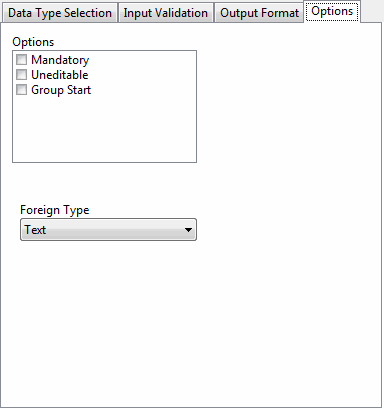
The Options Tab contains configuration settings that determine how the Macro should look on the network (i.e. it contains Network Specific options that determine how the Macro behaves on the foreign network). For instance, where TruckMate has a 'TRIP' data type, we would map that to a 'Numeric' datatype on PeopleNet, or a 'Positive' datatype in D2Link.
This Tab can also hold formatting options, such as the 'Right Justify Numbers' option available for PeopleNet Macros.
Options
This section will display the available options for your selected Network Type. An option was added for applicable networks called 'Group Start'. This option was added as a flag for multi record details. If the detail part of a macro includes multiple records, this flag is used to mark the starting field of a new record. Using this flag, the system will accumulate relevant macro fields on the record (item) level rather than the freight bill level, so every time the marked field is reached again a new record is fetched from the database.
| For 'Return' macros only, and for devices that are marked as training (Training Mode = 'True'), there is an option available 'Do Not Process'. If this option is selected, and the device is in training mode, the selected field will not be automatically processed in TruckMate when the return macro is received. Furthermore, in the Message Center program, the field will be displayed in green color, which will allow the user to easily distinguish those fields that are not to be processed in a return macro. This could be helpful for tracking and debugging purposes. |
Foreign Type
Use the drop-down menu to select a Foreign Macro object to link the TruckMate Data (selected in the 'Options' field above) with. The Foreign Type field can be used in concert with the 'Type 18' Datatype and a set of pre-defined User Types to allow your Drivers to choose from a list of possible values. Those values entered in the 'User Datatypes window' will appear in the text field directly below the 'Foreign Type' field (and will appear as a selection list to Drivers in the Return Message form).
Follow these instructions:
-
Define a set of user defined types on the Define User Datatypes window (accessed from the File menu). These can be thought of as name value pairs
-
Add a new object to a macro and set it to 'Type 18'.
-
Set the 'Action' to the user defined type you made.
-
The 'Foreign Type' field will be automatically set to 'data_multiple choice' (for PeopleNet users).
-
When you compile the macro and send it out, it will also send out the possible choices.
-
When the Driver selects this field, he will be presented with a drop down list of possible values, reducing the amount of typing required.
|
If a macro field’s Foreign Type is set to Uneditable, that field will not be editable on the device. This applies only for Reply macros. User can also select "Radio" and "Select" options under Foreign Type. For the "Radio" option under Foreign Type, the user must create new User Defined Datatypes in File→ User Datatype Definer of DataType=Free Form Text and action=(none). Then select "Radio" as the Foreign Type in this Options tab. When exported to device, the field will show as radio button group listing Key Values created under User Datatype Definer as radio buttons. |