Auto Dispatch tab and Available Freight Bill Grid

Auto Dispatch tab

The Auto Dispatch Tab is used to quickly organize a list of Trips assigned to a Driver and allows the Dispatcher to send out mobile communications messages (load offers, etc.) in the order that the Trips are specified, as the Driver completes each Trip assigned to him/her.
|
To access the Auto Dispatch Tab, the 'Enable Auto Dispatch' flag must be checked in the Communications Manager program > Configuration > General Tab, and the Application Configurator program > COMMGR.EXE > 'Use Auto Dispatch 2.0' option must be set to 'True'. While the Tab does not display by default when the Dispatch program opens, the Dispatcher can double-click in either the Driver Tab > 'Next Trip' field, or the Trip Tab > 'Load Offer Status' field to display the Auto Dispatch Tab. The Auto Dispatch Tab will Filter on a single Driver’s pending Trips. If Auto Dispatch Tab is accessed via the Driver Tab > 'Next Trip' field, the Driver selected will become the Filter. If the Tab is accessed via the Trip Grid > 'Load Offer Status' field, the Driver attached to the Trip record selected will be the Filter. |
How it works
In previous versions of TruckMate, Auto Dispatch functionality sent out a single communications message to a Driver, outlining all of his/her pending Trips in one lump communication. While this method is still available (accessed via the Trip Tab > 'Mobile Messaging' > 'Manage Auto-Dispatch' right mouse click option), the Auto Dispatch Tab introduces a new way of setting up automatic Driver communications.
Auto Dispatch 2.0, as this new logic is referred to, will allow Trips to be setup and sent to the Driver one load offer at a time. When the Driver completes the first load in the sequence, the Mobile Communication systems will automatically send the load offer for the next Trip, and so on, until Trip queue completion.
Additionally, when completing a Trip with a Trailer, the current Trailer will appear on the next Auto Dispatch Trip. If the Driver has swapped the original trailer out (drop and hook) at the Consignee site, the swapped Trailer will be carried over.
The user has a number of options when using the Auto Dispatch Tab:
-
Resources can be simply dragged and dropped from other areas of the Dispatch program, such as the various Resource Tabs.
-
Trips displayed on the Auto Dispatch Tab can be reorganized by using the green 'Up' and 'Down' arrows to the right of the details grid, or can simply be dragged and dropped into the desired order.
-
The Auto Dispatch Tab can be undocked (using the <Ctrl><Shift><U> hotkey combo when the cursor is within the Tab) and can be used on its own, as a separate window. When undocked, drag and drop functionality from other areas of the Dispatch program still functions.
-
The <Del> key can be used to de-assign Resources from the Trips displayed on the Auto Dispatch Tab grid. De-assigning a Resource that is associated with another will cause a prompt to appear, asking to confirm the de-assign of the linked Resource.
Auto Dispatch Grid Details
The database columns displayed on the Auto Dispatch Tab are carried over from the Manage Auto Dispatch window used for auto Driver messaging in previous versions of TruckMate. There have been some enhancements, however.
StopList Exists
This field will display 'Yes' or 'No' depending on if the Dispatcher has used the 'Save Stop List' right mouse option on a detail line in the Auto Dispatch Grid.
Comments
The 'Comments' field can be double-clicked to open a standard Trip Notes window, which allows the Dispatcher to enter/edit any notes against the Trip that is being assigned to the Driver.
Context Menu
Toggle Design Mode
Selecting this option will turn on Screen Design mode on the Auto Dispatch Tab. See the Screen Design section for more information.
Save Stop List
Selecting this option will open a slightly modified version of the Load Offer window that is accessed from the Trip Grid. The Dispatcher still has access to the Stop Profile editing functionality, and can move the stop sequences to suit the requirements of the Trip, but cannot send Load Offers directly. When the user clicks the 'Save' button, the Stop List sequence will be saved (for later Load Offers sent via the 'Send Load Offer' option below), and the 'StopList Exists' field in the Auto Dispatch grid will update to 'Yes'.
Send Load Offer
Selecting this option will open the Load Offer window (see the 'Load Offer' option documentation).
Close Tab
Selecting this option will hide the Auto Dispatch Tab. In order to access it again, the user will have to double-click in either the Driver Tab > 'Next Trip' field or the Trip Tab > 'Load Offer Status' field a second time.
Available Freight Bill Grid
The Freight Bill Grid displays a list of summary information about Freight Bills that have a status of 'Available', 'Docked', or 'Entry' depending on the Filter checkbox you have selected.
Some Freight Bill features and fields include:
-
Optimization for Trips with Interliners: provides the ability to include advance and beyond legs in the trip optimization.
-
Service Failure Codes: provide the ability to indicate the reason for a service failure.
-
Security Setup: new Dispatch security available to prevent Dispatchers from dispatching loads with no resources attached, for example no driver or truck assigned.
|

Many of the fields found on the Freight Bill Grid simply populate with information from the Customer Service program, but there are some fields that have very specific functions:
High Value
The High Value field is designed for the Intermodal environment where the focus is on shipping containers without concern for the contents. By flagging a container as High Value in the Container Inventory Control program a warning message on status change will indicate this container should be handled more carefully.
| The 'High Value Warning' option must be enabled in the Application Configurator program for this warning message to appear. |
Pickup At
This field is used when the Manufacturer is the 'Shipper' but the product needs to be picked up at the Manufacturer’s warehouse location. This is accomplished when the alternate client location is defined as the 'Care of Pickup' location for the Customer in the Customer & Vendor Profiles program > Contacts Tab. Then, the 'Care of Pickup' address, in this case the warehouse, is made available as the Shipper’s location in the Freight Bill grid.
Assign a Freight Bill to a Trip
Single Freight Bill
In most cases a double-click on a field in the Freight Bill Grid will assign the Freight Bill to the selected Trip. If there are multiple legs on the trip, the Freight Bill will be assigned by default to all legs subsequent to the leg currently selected in the Trip grid. A Freight Bill could have an equipment assigned to it.
|
If you assign a Freight Bill with assigned equipment to a trip that also has an assigned equipment of the same equipment class, and at the same time the application configuration option in Application Configurator > Dispatch > DISPATCH.EXE - Match Equipment from FB to Trip is set to True, TruckMate will warn you of the existence of the equipment on the trip. On the other hand, if the classes of the equipment on the freight bill and the trip don’t match, a different warning will be issued with a choice for you to proceed with the assignment or not. If the application configuration option in Application Configurator > Dispatch > DISPATCH.EXE - Match Equipment from FB to Trip is set to False, no warnings will be issued. If a Freight Bill is set to 'Entry' Status, it cannot be assigned to a Trip, as it has one or more Check List Items to be 'Completed' before it can be made available for Trips. For more information, see the 'Check List Items' Context Menu option below, or the Customer Service program > Check List Tab. |
Multiple Freight Bills
The User can assign multiple Freight Bills at once in a variety of different ways using the Assign Freight Bills window:
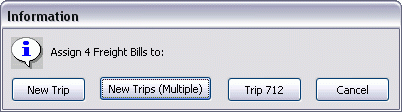
To New Trip (Single)
Simply hold the <Ctrl> key and select multiple Fright Bills with your mouse, then double click any field on one of the selected Bills. The Assign Freight Bills window will appear, where the User then selects the 'New Trip' option. All selected Freight Bills will then be assigned to a single new Trip, automatically.
To New Trips (Multiple)
Simply hold the <Ctrl> key and select multiple Fright Bills with your mouse, then double click any field on one of the selected Bills. The Assign Freight Bills window will appear, where the User then selects the 'New Trips (Multiple)' option. Each Freight Bill has a new Trip created and is automatically assigned to that Trip.
To a Defined Trip
Simply hold the <Ctrl> key and select multiple Fright Bills with your mouse, then double click any field on one of the selected Bills. The Assign Freight Bills window will appear, where the User then selects the 'Trip <#>' option. Each selected Freight Bill will be added on to the already defined Trip.
Update Fields
In a few cases the information in a field can be modified using a double-click in those fields, as follows:
-
Pick Up By: displays the calendar window to modify the date/time the load must be picked up by. These changes are written back to the freight bill record and available in Customer Service, Local Dispatch and CrossDock program.
-
Deliver By: displays the calendar window to modify the date/time the load must be delivered by. These changes are written back to the freight bill record and available in Customer Service, Local Dispatch and CrossDock program.
-
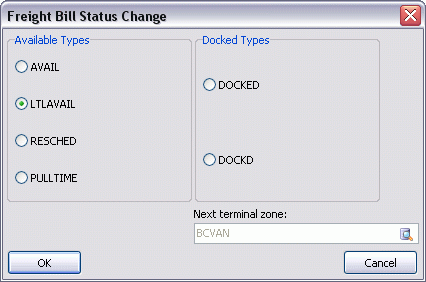
F/B Status: displays the Freight Bill Status Change window to select and assign a different status code to the freight bill.
-
Route Designation: displays the Route Designation window to enter a free format Route Designation. Route Designation is used by the CrossDock program for sorting and filtering freight bills. This value can also be viewed and edited in the Manifest Maintenance programs as well as viewed in the Local Dispatch program.
-
Operations Code: to modify the Operations Code, select the field in the grid, right click to display the context menu and select Change Operations Code.
Phone Number Lookup
If you select a Freight Bill detail record and type the <F4> key, the Phone Number Lookup window will appear, listing the contact information for all parties (Caller, Shipper, Consignee) attached to the Freight Bill (when available).
Context Menu
Full Screen
The Full Screen option will enlarge the selected grid so that it fills the whole screen which allows you to view many more records and columns than in the normal view. To return to the normal view, right mouse click and de-select the Full Screen option. While in Full Screen mode, you can switch from grid to grid by selecting the right and left arrow buttons at the bottom of the window.
Find Freight Bills Near / Find Driver For Load / Find Active Carrier Trip…
The Find Near option allows you to search for any driver, power unit, trailer, miscellaneous equipment, freight bill, or trip that is within a specified distance of the desired zone.
Planning
The Planning option provides a calendar view, by day, of trips for each driver and power unit. This view includes icons to indicate late pick-up, late delivery, hours violation, hazardous and temperature controlled.
Set / Clear Filter
The Set Filter option supports the ability to create and apply a filter to any grid, regardless of the grid you were in when you opened the window.
Clear Selection
In the Freight Bill grid, you can select multiple freight by holding down the <CTRL> key and clicking the desired bills with your left mouse button., this freight bills selected are indicated with a dark grey background in the row. After selecting, double-click to assign each Bill to a trip. To clear the selected bills without assigning to a trip, use the Clear Selection menu option.
View Freight Bill
The View Freight Bill option launches the Customer Service program and displays the selected freight bill.
View User Defined Fields
The View User Defined Fields option displays the User Defined Fields Entry window to add or edit data in these fields. This window can also be accessed in the Customer Service program and Quick Bill Entry program.
View Custom Defined Fields
The View Custom Defined Fields option displays the Custom Defined Fields window to display or edit these fields. These fields are created in the Codes Maintenance program and used to support fields that are necessary to your current business process but not currently available in the TruckMate Freight Bill. It is important to note that these fields do not display in the freight bill grid and must be viewed using this menu option.
View Client Profile For
This option allows the user to view the profile of any one of the following: Shipper, Consignee, Pickup At and Care Of. Selecting any of the sub-options will invoke the Customer Profile program and display the profile of the selected option.
Cancel Freight Bill
The Cancel Freight Bill function will cancel the selected freight bill and prompt for a cancellation reason on the Reason window. The freight bill no longer displays in the Freight Bill grid and the reason entered displays in the Status tab of the Customer Service program.
Find Freight Bill
The Find Freight Bill option is used to search for a freight bill in the grid. The Search for Freight Bill window displays with multiple search criteria including freight bill and trace number, bill of lading and customs number along with many others. On the Search for Freight Bill window simply select the radio button for the type of search then enter the details in the Number field and select Find. You will be positioned to the Freight Bill in the grid or notified with a message indicating the Freight Bill does not exist in the trips grid.
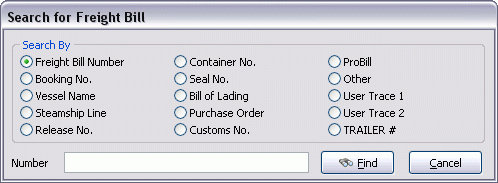
| When the Freight Bill cannot be found using the Find option, it may be of Docked status. Simply select to view both AVAIL and DOCKED freight bills and complete another search of the grid. |
Check List Items
Selecting this option will open the Check List Items window, which will populate with the Check List Items required for the selected Bill to be able to be set to 'Available' by the Dispatch program. The Check List Item requirements are defined in the Customer Profiles program > Freight Bill Check List Tab, and are attached to specific Client Codes. Normally, these Check List Codes would be set to 'Completed' in the Customer Service program > Check List Tab, but you can use this window to manually complete them from within the Dispatch program, simplifying the process.
Once the 'Mandatory' Checklist Items for the Freight Bill have been set to 'Complete', the Freight Bill can then be changed from its 'Entry' behavior status code to an 'Available' behavior status code by double-clicking its 'Status' field on the Available Freight Bill Grid in Dispatch.
Req. Equip / Commodity
The Req. Equip./Commodity is used to display requested equipment and commodities on the Requested Equipment / Commodity window that were requested for the Freight Bill on the Details tab of Customer Service program or Quick Bill Entry program.
Freight Bill Notes
The Freight Bill Notes option is used to display and enter any notes for the selected Freight Bill. The Freight Bill Notes window contains 6 Tabs to display notes associated with Billing, Container, Driver, OSD, Other & Write Off.
Set Via Zone
Selecting this option will open a window where you can select a new 'Via' Zone for the currently selected Freight Bill.
Intermodal
IM Dates / Details
The Intermodal Movements window provides a view of all of the information defined in the Customer Service program > Intermodal Tab for the Freight Bill, as well as the existing grid of the various freight bills/legs so you can change the pickup/deliver dates in a single screen.
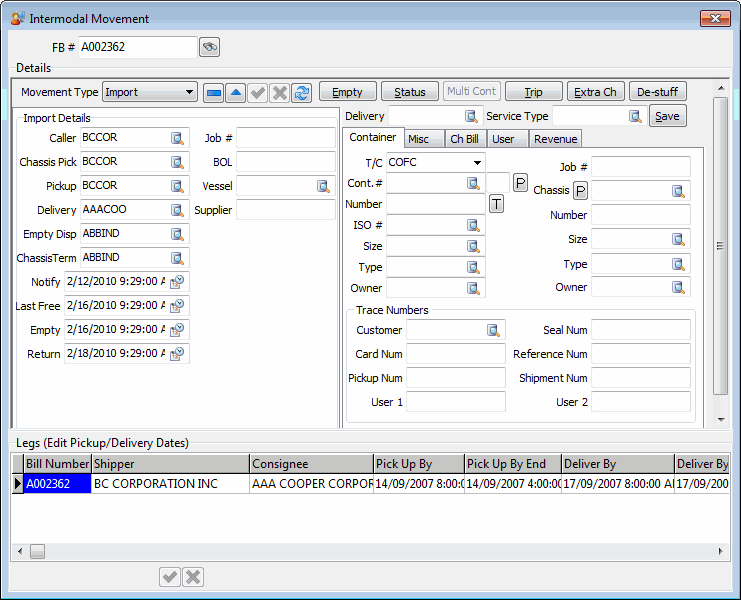
FB #
Displays the number of the Freight Bill that was selected from the Dispatch program’s Freight Bill / Trip Grid.
Search
Once you are in the Intermodal Movement screen, you can find another Intermodal Movement to view/update by simply clicking the search button (small button with binoculars to right of FB # box at top of screen).
Details
The entirety of the Details section mirrors the Customer Service program > Intermodal Tab, and includes all functions available from Customer Service.
This means you can do many things from dispatch that previously you could only do from CSERV.EXE, such as create empties, change trace number fields, change container info, etc. The dates available are specific to the Movement type, for example an Export movement requires a 'Load Date' and an Import movement requires an 'Empty Date'. Dates can also be modified here, simply select the calendar button to select the new date. The modified date becomes available in Customer Service.
IM User Fields
Selecting this option will open the Intermodal User Fields window, which allows you to enter data into the 25 configurable Intermodal User fields. For more information on this window, see the Customer Service program > Intermodal Tab > IM User Fields window.
IM Street Turn
This option is used to turn an Intermodal Import Trip into an Export Trip. If the selected Freight Bill is an 'Export' Bill and the current Trip is an 'Import' and current Leg is 'IM Spotted' at Customer Site, when the User selects this option, the Empty Import Bill will be set to 'Complete' and the Trip will be altered to take the Container to the Export Customer, and then to the delivery point (i.e. Port or Rail).
IM Empty
Selecting this option will immediately create an empty Intermodal Freight Bill based on the selected Freight Bill (the new FB will have the '-I' suffix). For more information on empty Freight Bills, see the Customer Service program > Intermodal Tab.
IM Status
Selecting this option will open the Intermodal Status Change window, which allows you to change the Freight Bill’s current status to the status code defined by the 'IM Avail Status' Application Configurator option for CSERV.EXE.
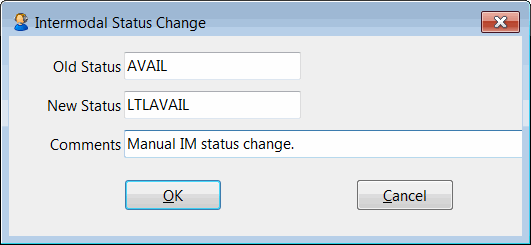
| The Application Configurator program > CSERV.EXE > 'IM Avail Status' config option must have a value for this option to work. |
IM Multi Container Update
Selecting this option will open the Multi Container Update window used for Intermodal purposes. This window will allow you to update the Status of multiple Freight Bills in Dispatch by different information (i.e., by vessel or scheduled rail shipment). You also the ability to do mass status update and mass updates of 'Notify' dates and 'Last Free' days (via the IM Dates form). This window will update the Vessel or Rail Shipment ETA and have it update all related containers automatically.
To select multiple Freight Bills to include in the Multi Container Update, simply select two or more Freight Bills from the Available Freight Bill Grid while holding the <Ctrl> key on your keyboard.
| Freight Bills are grouped by their 'Job Number' value for Intermodal purposes. |
IM Trip
Selecting this option will create an Intermodal Trip, similar to how the 'Create Trip' button functions on the Customer Service program > Intermodal Tab, which creates a Trip for a two-way move automatically. It creates a Leg going from the port to the Customer site, and a second leg going from the Customer back to the port.
IM Extra Ch
Selecting this option will apply the details entered on the Intermodal Movements window and create a new Accessorial Charge Freight Bill based on those details.
| You can also create more than one Extra Charge Freight Bill. A confirmation message will display if an Extra Charge Freight Bill already exists for the Intermodal record, asking if you want to create another. The first freight bill will have a bill number with '-X' added (same as current); additional bills with be '-X2', '-X3', etc. |
IM De-Stuff
Selecting this button opens the Create De-Stuff Freight Bill window, which give the User the ability to 'de-stuff' a Container at their own dock and then send the actual Freight to multiple Consignees.
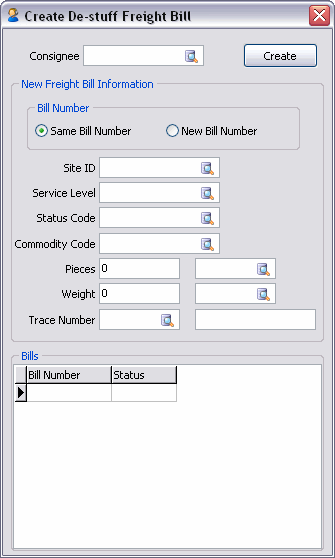
The Create De-Stuff Freight Bill window will create a Freight Bill that is similar to an Empty Origin/Destination bill. It will copy the Caller information from the loaded freight bill to the De-Stuff/Drayage bill (as well as the Consignee information from the loaded Freight Bill to the 'Shipper' field of the Drayage bill).
| Field | Definition |
|---|---|
Consignee |
Users are required to enter the Client ID for the final Consignee(s) via the 'Consignee' field at the top of the window. New Freight Bills are billed individually (not 'rolled up' as with Extra Stop bills). |
New Freight Bill Information The values you choose in this section will be applied to the De-Stuff Freight Bill that is created and delivered to the 'Consignee' chosen above. |
|
Bill Number |
You can choose to have the 'Same Bill Number' as the original Freight Bill, or give a 'New Bill Number' to the De-Stuff Bill. |
Site ID |
Select a Site ID for the De-Stuff bill. |
Service Level |
Select the appropriate Service Level for the De-Stuff bill. |
Status Code |
Select the Status Code that will be applied to the De-Stuff/Drayage Bill. Only those Status Codes of 'DOCKED' behaviour are selectable from the Database Search button. |
Commodity Code |
Enter the Commodity Code that will be applied to the Detail Line of the created De-Stuff Freight Bill. |
Pieces / Weight |
Enter the 'Pieces' and 'Weight' values of the Freight Bill, and select their respective units via the Database Search field. |
Trace Type / Number |
Enter a 'Trace Type' and 'Number' for the De-Stuff Freight Bill that will be created. |
Create |
Select this button to create the De-Stuff/Drayage Freight Bill based on the criteria you have specified in the De-Stuff window. |
| If using De-Stuff functionality, a 'Bill Size' value of '7' (or in certain cases, '6') is recommended. See the Codes Maintenance program > Site Setup Tab > 'Bill Size' field documentation for more information. |
Insert Truckload Bill
Selecting this option will allow the user to insert the selected Freight Bill into an already created Trip. When inserting a Freight Bill a Trip, the Bill’s 'Start/End Zone' will be compared with 'Leg From'/To Zone'. New legs will be split if the FB Start/End zones are not matched with Leg From/To Zones.
Attach / Open Related Files…
Selecting this option will open the Attach / Open Related Files window.
Freight Board Interface
The Freight Board Interface (FBI) is an application that runs in the system tray. It accepts requests (via TCP strings) from various TruckMate applications to post a Freight Bill load or equipment to various load matching websites (currently, only TransCore’s DAT format and PostEverywhere are supported).
Right-clicking in the Freight Bill Grid of the Dispatch program will allow you to access FBI functionality, provided you have installed the TMW FBI application, and have one of either License #36001 (or #36002) installed via the License Registration program. Once installed, just run the TMW FBI application (which will load into your system tray) and then access the right-click options in Dispatch:
Post FB
Selecting this option launches the FBI application, and attempts to create a posting for the Freight Bill data you right-clicked from. The first time you the FBI, you will need to fill out some setup info ('FTP site', etc.).
Copy
Select this option to copy the text from within the selected field.
Navigate
The Navigate option contains the standard TruckMate Navigation Bar, used to browse the records within this Grid.