AR Finance Charges

The AR Finance Charges program was set up so that you can calculate interest owing on overdue accounts. Prior to using the AR Finance Charges program, set up your Customer profile, Credit Info Tab, to allow interest charges to be calculated on overdue accounts, and then you can use the AR Finance Charges program to run a regular interest calculation on overdue accounts.
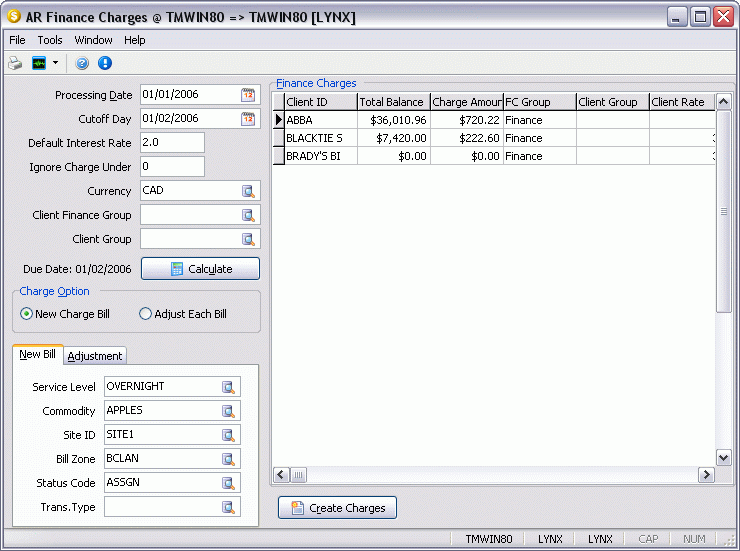
All of the program functions are contained on the main screen, which cannot be resized. Finance charges are processed through 3 areas of the screen: the customer and billing selection criteria, the list of customers and outstanding charges, and then the options to apply when generating interest billings.
To access AR Finance Charges:
| From this location | Go to |
|---|---|
TruckMate Menu and TruckMate Task List |
Accounting & Finance > Accounts Receivable > AR Finance Charges |
Windows Start Menu |
TruckMate 20xx > AR Finance Charges |
Windows Explorer |
C:\Program Files (x86) > TruckMate 20xx > ArFc.exe |
How Do I?
How do I Calculate Interest on an Overdue Account?
Use the A/R Finance Charges program to calculate the interest due on any overdue accounts, plus prepare a freight bill and/or an adjustment.
-
Open the A/R Finance Charges program (ARFC.EXE).
-
Prior to opening and using the A/R Finance Charges program, set up your Customer Profile in the Customer Profiles program’s 'Credit Info' Tab, to allow interest charges to be calculated on overdue accounts, and then you can use the A/R Finance Charges program to run a regular interest calculation on overdue accounts.
-
Using the A/R Finance Charges program requires certain checkboxes in other programs to be checked. Go into the Customer Profiles program, the 'Credit Info' Tab and make sure the finance charges checkbox is checked.
-
The processing date will default to today’s date and the cut-off date will default to 30 days prior to the processing date. Modify these dates as necessary.
-
Enter your rate of interest on overdue accounts.
-
Select Currency, Client Finance Group, and Client Group as needed.
-
Press the 'Calculate' button and customers with overdue accounts and their interest charges will appear in the grid on the right-hand side of the screen.
New Charge Bill Instructions:
-
Select 'New Charge Bill' radio buttons and tabs. Refer to the A/R Finance Charges documentation for further assistance in this area.
-
Highlight the customer in the right-hand grid. Use your right mouse menu and select 'Select'. Press the 'Create Charges' button at the bottom of the screen.
-
Two dialog boxes will appear, one asking for confirmation of your choice, and the second notifying you that your new charge bill has been created.
-
Go to the Customer Service program to locate your new charge bill starting with 'IN'. Use the 'Find' button to locate it, or scroll to the very front of your freight bills.
-
Update the GL Accounts by using the Billing Register.
Adjust Each Bill Instructions:
-
Select 'Adjust Each Bill' radio buttons and tabs. Refer to the A/R Finance Charges documentation for further assistance in this area.
-
Highlight the customer in the right-hand grid. Use your right mouse menu and select 'Select'. Press the 'Create Charges' button at the bottom of the screen.
-
Go to your A/R Adjustments program and search for the adjustment to this freight bill.
-
Run the A/R Adjustments Register program to post these bills.
AR Finance Charges setup and configuration
Enable Finance Charges for Customer
Using the A/R Finance Charges program requires certain checkboxes in other programs to be checked. Go into the Customer & Vendor Profiles program > Customer > Credit Info Tab, and make sure the 'Finance Charges' flag (at the top of the Tab) is checked.
Interest Commodity Code
It might be beneficial to go to the Codes Maintenance program and set up a new commodity code entitled 'Interest'.
To do this, go to Codes Maintenance program > Commodities Tab. Set up a 'Commodity Class' definition first (use the right hand screen) for 'Interest', and then set up a 'Commodity Code' definition (left-hand side of screen) for 'Interest'. Once you are back in the A/R Finance Charges program, select the search button beside the 'Commodity' field, and you’ll see your commodity choice of 'Interest' in amongst the available choices.
Menu Bar / Toolbar
File Menu
Print Reports
 Selecting the Print Reports button will bring up the report selection window, common to many TruckMate applications. Here, you will select a report file from those available in your system and a Crystal Report will be generated.
For more information on Report functionality in TruckMate, see the Crystal Reports Reference.
Exit
 Selecting this option will close the A/R Finance Charges program.
Multi-Company Menu
For more information on the Multi-Company options available from the Menu Bar, see the Multi-Company documentation.
Tools Menu
TruckMate Monitor
 Click the down arrow next to this button to access the various functions of the new TruckMate Monitor.
Remember Position / Size
Selecting this option will maintain the program window position and size upon close. When the program is re-opened, it will appear the same.
Window Menu
Customer Service
![]() Selecting this option will open an instance of the Customer Service program.
Selecting this option will open an instance of the Customer Service program.
Billing Register
 Selecting this option will open an instance of the Billing Register program.
A/R Adjustments Register
Selecting this option will open an instance of the A/R Adjustments Register program.
Help Menu
TruckMate Help
 Selecting this button will open the A/R Finance Charges topic in the TruckMate Online Help file (the page you are currently viewing).
Service Portal
 Selecting this button will open an instance of your default Internet browsing software, with the https://www.tmwcare.com login page displayed.
About
 Selecting this button will open the standard TruckMate About window, which contains important information about the application you are currently using, including its version number (important for support calls).
Customer & Billing Selection Criteria
Processing Date
Defaults to today’s date. To select another date, use the pull-down arrow, and scroll to the date of your choice.
Cutoff Date
Defaults to 30 days prior to today’s date To select another date, use the pull-down arrow, and scroll to the date of your choice. If you’ve just put invoices through today, and wish to calculate overdue amounts on those invoices, change your cutoff date to today’s date, and you’ll see the invoices in the grid shown at your right.
Default Interest Rate
Set this rate at your default rate for this customer. This field will be overridden by the rate set in the Customer profile, Credit Info Tab.
Ignore Charge Under
Some Companies don’t want to charge interest on amounts less than $100, others charge on all amounts, right down to zero. Enter your preference in the field provided. This is not the amount you charge interest on, but the amount of interest charged- the example should probably be somewhere between $1 and $10.
Currency
Select the search button and then choose your preferred currency. Currency Codes are configured in the Codes Maintenance program.
Client Finance Group
Select the search button to view all finance groups already set up. Leave this field blank if you know this client doesn’t have a finance group associated with it. To set up a new finance group, go to the Customer & Vendor Profiles program, Credit Info Tab, and enter in a name in the Group field. For example, if all new customers were offered interest free accounts for a period of 60 days, then you would create a new finance group called 'NoInterest'. (Only 10 characters are allowed in this descriptive field).
Client Group
Select the search button to view all groups already set up. To set up a new 'Group', go to the Customer & Vendor Profiles program, Group Tab, and enter in a name in the Group field. For example, if all BC customers were grouped together, then you could create a new group called 'BC'. (Only 10 characters are allowed in this descriptive field).
Calculate
Selecting this button will cause your interest calculations to appear in the grid at the right.
Processing Finance Charges
In order to process finance charges for those customers selected with outstanding balances, you must choose to process either a New Freight Bill or to process them as an Adjustment.
New Bill Tab
You may opt to create a new bill for each customer on the New Bill Tab, which shows their new finance charges against outstanding billings.
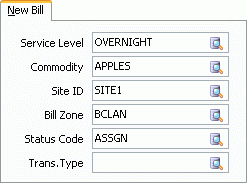
Service Level
Use the search button to select the appropriate service level. Service Level Codes are configured in the Codes Maintenance program.
Commodity
Use the search button to select the appropriate commodity. Commodity Codes are configured in the Codes Maintenance program.
Site ID
Use the search button to select the appropriate Site ID. It is recommended you set up a new site for 'Interest' charges. To do this go to the Codes Maintenance program > Site Codes Tab, select the '+' sign and enter in a new site name, say, Interest Charges'. Make the prefix 'IN' and set your bill size to your usual number. Set your default delivery zone, Terminal Zone, and Service Level to your usual settings. Set your availability status to 'AVAIL', your bill series to '5', and your Current Series Value to '1'.
You’ll see a sample bill in the space provided and it should look similar to 'IN0001'.
Save your settings. Once you are back in the A/R Finance Charges program, click the search button beside the Site ID field, and you’ll see your Site ID choice of 'Site4' (or whatever you named it) in amongst your choices.
Bill Zone
Use the search button to select the appropriate bill zone.
Status Code
Use the search button to select the appropriate status code. It is recommended to set this at 'Approved'.
Transaction Type
Use the search button to select the appropriate transaction type. It is recommended you set up a new transaction type for new bills called 'Interest'.
To do this, open the A/R Transaction Types program, select the '+' sign and add a new type called 'INTEREST'. Enter a description in the field provided and select the radio button for 'Freight Invoice'. Select the appropriate GL account and save your settings. Once you are back in the A/R Finance Charges program, select the search button beside the Transaction Type field, and you’ll see your transaction type of 'Interest' in amongst your choices.
Select the 'Create Charges' button when you are ready to create a new bill. First, you must highlight the customer’s information in the grid showing on the right-hand side of your screen. Then, use your context menu, and select the customer. Finally, select the 'Create Charges' button and dialog boxes will appear asking for confirmation of your choice, and then notifying you that a new item has been created. To view the new freight bill, go to your Customer Service program and use your 'Find' button to locate freight bills starting with 'IN'. Or, simply scroll to the very start of your freight bills and you’ll be able to locate freight bills starting with the 'IN' prefix.
Finally, post your charges to A/R and the GL via the Billing Register.
Adjustment Tab
You may opt to process your Finance Charges using the Adjustment Tab, which will add the charges as an Adjustment to an existing Freight Bill.
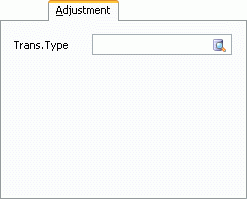
Transaction Type
Use the search button to select the appropriate transaction type. It is recommended you set up a new transaction type for adjustments called 'InterestADJ'.
To do this, open the A/R Transaction Types program, select the '+' sign and add a new type called 'INTERESTADJ'. Enter a description in the field provided and select the radio button for 'Adjustment'. Select the appropriate GL account and save your settings. Once you are back in the A/R Finance Charges program, select the search button beside the Transaction Type field, and you’ll see your transaction type of 'InterestADJ' in amongst your choices. Select 'Adjust Each Bill' radio buttons and tabs. Highlight the customer in the right-hand grid. Use your context menu and select 'Select'. Press the 'Create Charges' button at the bottom of the screen.
Go to your A/R Adjustments program and search for the adjustment to this freight bill. Run the A/R Adjustments Register program to post these bills.