Layout of the Trip Operation Planning window
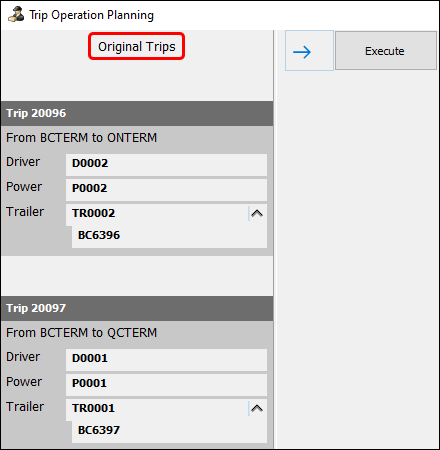
When you first open Trip Operation Planning, trips you selected appear in the Original Trips column.
This column shows:
-
The trip number, visible in the banner at the top of each trip panel.
-
The start zone and end zone of the trip. These are the zone code values for the locations in the trip grid which match the trip record.
-
Resource information, including:
-
Drivers
-
Power units
-
Trailers
-
Chassis
-
Containers
-
Miscellaneous equipment
-
Carriers
-
-
Freight bills, with special rules:
-
If a freight bill is nested under a resource using the linkage rules within TruckMate, it appears under that resource.
-
Freight bills can only nest under trailers, straight trucks, and containers.
-
If a freight bill is not nested under a resource using linkage rules, then it appears as a separate item under the trip.
-
The trip panels in the Original Trips column are read-only. However, the Trip Operation Planning window is non-modal, which means you can interact with the Dispatch or Multi Mode Dispatch grids behind it. You can drag more trips into the window at any time to add those trips to your plan.
When you have all the original trips you want in the column, select ![]() Add Operational Point to start the next column. New columns you create are in either Operation Point or Planning Point.
Add Operational Point to start the next column. New columns you create are in either Operation Point or Planning Point.
Operation Point Column
Actions executed in an Operation Point column (such as splits, merges, new trips) happen immediately.
When you first create a column, you select a point zone where the action will occur (in this case, BCTERM):
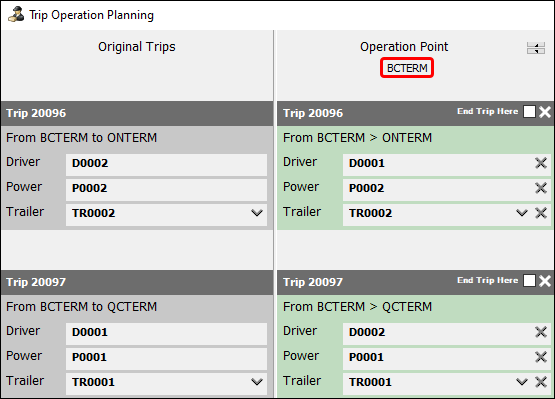
When you execute the operational plan, any actions in an Operation Point column are created immediately. If any trips are not currently at the point zone, the system forces them to this new location to complete the requested actions. The system then creates new legs to move the trips to these zones.
Planning Point Column
Actions executed in a Planning Point column happen in the future.
Just like with Operation Point columns, you select a point zone where the action will occur (in this case, ABTERM).
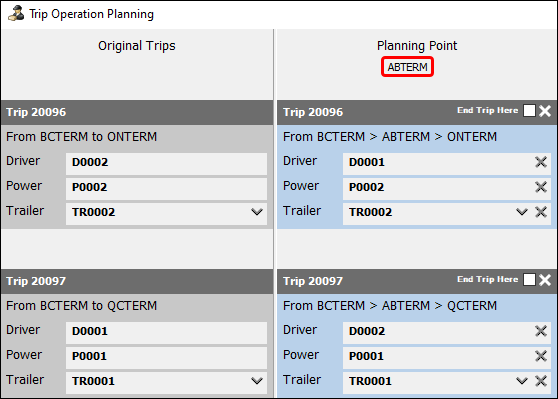
When you execute an operational plan, any actions are planned ahead of the current legs. The system adjusts the original trips to accommodate the new plans. Depending on the action, this can create new legs on original trips or entirely new trips.
Multiple Columns
You can only have one Operation Point column at a time. You can have as many Planning Point columns as you need to plan future legs.
You can change a column between Operation Point and Planning Point by selecting  Change Point Type.
| Depending on certain security settings, you may not be able to change from Planning Point to Operation Point. These situations are covered in the Merge trips, Split trips, and Merge and split topics. |
Add an operational point
-
Select
 Add Operational Point.
The Select the Point Zone window opens.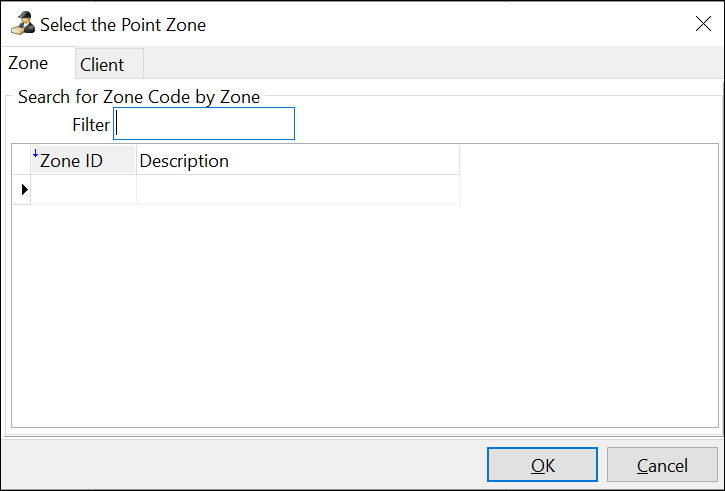
-
Select the Zone or Client tab.
-
Enter a value in the Filter field to populate the window with zone IDs.
This field is case-sensitive.
-
Select a zone ID.
-
Select OK.
An empty Planning Point column appears. -
Select
Change Point Type to switch between Operation Point and Planning point.Only one column in an operational plan can be in Operation Point. You can have as many Planning Point columns as you need.