Container Profiles

The Container Profiles program is used to create and edit Container records. Along with general information about the Container, this program is used to enter and view information about repairs and maintenance, asset information, miscellaneous information, jobs, and warranties, etc.
To enter the Container Profiles program from another resource maintenance program, or to open a different resource maintenance program from the Container Profiles program, select one of the Tabs located at the bottom of the screen.
The program will default to the Basic Info Tab that contains general information regarding the Container. Use the other available Tabs (or the 'View' menu) to view all the details available for the selected Container record.
Security Settings may limit the current Users access to any number of the Tabs listed below. See the Security Setup program > Security > Tabs Setting section for more information.
The Grid at the bottom of the screen is used to scroll quickly through the Container records. If you click on an item in the Grid, the complete record will be displayed above.
To access Container Profiles:
| From this location | Go to |
|---|---|
TruckMate Menu and TruckMate Task List |
Profiles > Container Profiles |
Windows Start Menu |
TruckMate 20xx > Container Profiles |
Windows Explorer |
C:\Program Files (x86) > TruckMate 20xx > Containers.exe |
Menu and toolbar options
This topic describes menu and toolbar options and functionality that are specific to the Container Profiles window.
For information about common menu and toolbar options (i.e. File menu, Refresh, Multi-Company, etc.), see General menu and toolbar options.
View Menu
The 'View' menu allows you an alternate way of accessing the variety of Tabs available in the Container Profiles program. The options available correspond to the variety of Tabs described below.
Remember Current View
If this is checked when you close the application, the Tab ("View") you are currently viewing (have selected) is remembered (written to registry), and the next time you open the application, that Tab will be automatically opened.
Note: This also applies when switching between companies in a Multi-Company implementation.
Window Menu
Driver Profiles
![]() Select this option to open an instance of the Driver Profiles program.
Select this option to open an instance of the Driver Profiles program.
Power Unit Profiles
![]() Select this option to open an instance of the Power Unit Profiles program.
Select this option to open an instance of the Power Unit Profiles program.
Container Profiles
![]() Select this option to re-focus the view within the Container Profiles program.
Select this option to re-focus the view within the Container Profiles program.
Trailer Profiles
![]() Select this option to open an instance of the Trailer Profiles program.
Select this option to open an instance of the Trailer Profiles program.
Miscellaneous Equipment Profiles
![]() Select this option to open an instance of the Miscellaneous Equipment Profiles program.
Select this option to open an instance of the Miscellaneous Equipment Profiles program.
Fleet Profiles
![]() Select this option to open an instance of the Fleet Profiles program.
Select this option to open an instance of the Fleet Profiles program.
Container Header
Container ID
This field displays the Container ID Code, which can be up to 10 characters in length. The Container ID code is used throughout the TruckMate system, wherever a specific Container is required for selection/assignment.
Digit
Enter the one-digit Check Digit value for this Container. The Check Digit value is based on a specific formula, and will be appended onto the end of the value you enter in the Container ID field.
Note: Depending on the option chosen in the Container Depot Setup program’s Config Settings Tab, you may or may not be able to enter an incorrect value in the 'Digit' field. The formula for creating a check digit is listed at:
Number
Displays the combined Digit and Container ID, which becomes the Container Number.
Length
Enter the length of the Container and use the search button menu to select a unit of measurement from those available on your system.
Active
If the box is checked, the Container will be available for assignment to trips in the Dispatch program. If the box is not checked, the unit will not be displayed in the Dispatch program.
Asset Info Tab
The Asset Tab is used to record information about the Container’s value for the purpose of asset management and reporting. These fields are for information and reporting purposes only.
Acquisition Date
Double-click to open the calendar, and then scroll to the acquisition date.
Purchase Price
Enter the purchase price.
Expected Life
Enter the expected life (in months) of this acquisition.
Current Age
Enter the current age (in months) of this acquisition.
Lease Term
Enter the lease term (in months), if applicable.
Residual Amount
Depends on the type of leasing arrangement you have set up but often at the beginning of a lease you negotiate a Residual Amount that will be used to determine monthly payments. Usually, a higher Residual Amount = lower monthly payments = higher purchase options. Alternatively, a lower Residual Amount = higher monthly payments = lower purchase options. When you terminate the lease for this asset you usually have the following options: purchase the asset for the Residual Amount, trade in the asset for a replacement asset, or turn in the asset and be eligible for a cash rebate/deficiency of sale proceeds over/under the Residual Amount (if applicable).
Estimate Selling Amount
Enter the estimated selling amount for this acquisition.
Fair Market Amount
Enter the fair market amount for this acquisition.
Leasing Company
Enter the Leasing Company name, if applicable.
Lease Payment Amount
Enter the lease payment amount, if applicable.
Net Book Amount
Enter the Net Book Amount for this asset.
Audit Tab
The Audit Tab displays read only data concerning the creation details of the selected Container record. The data displayed here is for informational purposes only.
Created / By
Pre-populates with the Date and Time this entry was created, as well as the Username of the User who created the entry.
Modified / By
Pre-populates with the date and time this entry was modified, as well as the Username of the User who modified this entry.
Basic Info Tab
The left-hand side of the page allows the User to enter information regarding this particular Container, which, once entered as a record, will appear in the Grid. The right-hand top part of the screen will display the creation and modification dates and the relevant User.
Make
Enter the manufacturer of the Container. The value entered here will display in the Container Type column in the Container Grid in the Dispatch program.
Year
Enter the year of manufacture of the Container. This field is for information and reporting purposes only, and is not used elsewhere in the system.
ISO Number
Enter the ISO Number for this Container, or click the search button to select an ISO Number from those available on your system. ISO Numbers are setup on the 'ISO Code' Tab of the Intermodal Setup program. See the Intermodal Setup documentation for more information.
Class
Can be assigned to Containers. Equipment Classes are configured in the Codes Maintenance program. Enter the equipment class code or click the search button for a search form. If a Windows Bitmap image has been assigned to the equipment class, it will be displayed in the field on the right. The Requested Equipment field in the Details section of the Customer Service program uses Equipment Classes; freight bills and resources can be matched based on a comparison of these fields. The Equipment Class is displayed in the Container Class column in the Container Grid in the Dispatch program.
Size Code
Click the search button to bring up a dialog box where you can search by 'Size Code' or 'Description'. The 'Size Code' is entered in the Intermodal Setup program > Size Tab.
Serial Number
Enter the Container’s serial number.
Insurance Exp.
Enter the expiry date for this Container’s insurance. Double-click for a calendar selection form. This field is for information purposes only, and is not used elsewhere in the system. You can create a Special Event based on a Container’s insurance expiry date that will generate a warning in the Dispatch program when insurance renewal is pending or overdue. See the Special Events program for further information.
Max. Cube
Is the cubic dimension of the Container. This value is used by the CrossDock program to determine the remaining space in a Container as it is being loaded. In the second field on the right, click the search button to select a Unit Type for the Container’s cubic dimension. Units are configured in the Codes Maintenance program.
Empty Weight
Is the weight of the Container when it is unloaded. This field is for reporting and information purposes only. In the second field on the right, click the search button to select a Unit Type for the Container’s empty weight. Units are configured in the Codes Maintenance program.
Cargo Weight
Is the maximum allowable weight that can be loaded on this Container.
The value entered in this field is displayed in the Container Grid in the Dispatch program, and is used by the CrossDock program to determine the remaining weight allowable in a Container as it is being loaded. In the second field on the right, click the search button to select a Unit Type for the Container’s maximum cargo weight. Units are configured in the Codes Maintenance program.
Max Pallets
Enter the maximum number of pallets that the selected container/chassis can hold.
Description
Is a free-format field used to enter a general description about the Container.
Current Zone
This field is only available when you are adding a new record. It is used to record the current location of the Container, for the purpose of subsequent location updates in the Dispatch program.
Location
Enter a more specific location.
Loaded
This option specifies if the Container is currently loaded. Place a checkmark in the field if the Container is indeed loaded.
Container Grid
The Container Grid is pre-populated based on the Container records entered into the system. Use the scroll bar to scroll to the desired record, and modify as needed. Click the checkmark button to save when you’ve completed your changes.
Exclude Inactive
If a Container is no longer part of your equipment, you can unselect this box to make it Inactive, and then, if you are scrolling through the Container or using the search box, these Containers will not show up.
Search
Selecting this button will bring up a 'Select Container' dialog box where you can search for a Container by Container ID, Type, Class, and Year.
Selecting this button brings up the report selection dialog box where you select the 'CONTAINERLIST.RPT' and print out a list of all Containers on the system.
Context Menu
This context menu is also available from most of the Tabs listed below.
Copy Container
Selecting this option brings up a copy dialog box where you can specify your copy options, and provide a new Container ID that will contain the copied information.
Open Diary
Selecting this toolbar button will open the Diary window. You can also access the Diary by using the <CTRL><D> hotkey combination.
Attach / Open Related Files
Select this option to attach an additional file (image or document) to this Container record, using the Attach / Open Related Files component.
Custom Defined Fields Tab
This Tab will display any Custom Definitions that have been modified for the Container Profiles program. These modifications are made within the Application Configurator program.
Damage Tab
The Damage Tab allows the User to record any damage that has been done to a Container, as well as some details regarding the cause of the damage.
The Damage Tab works with the DAMAGE TruckMate Table. To create a new record, select the '+' button on the TruckMate Navigation bar. Existing records cannot be edited, so ensure that you take care when entering the details.
Damage Cause
Double click this field to select a value that best represents the cause of the Container damage. Choose from one of the three available options: 'Customer', 'Driver' or 'Terminal'.
Damage Type
Double click this field to select a value that best represents the type of damage that was done to the Container. Choose from one of the three available options: 'Cut', 'Dent' or 'Rust'.
Damage Location
Double click this field to select a value that best represents the primary location of damage to the Container. Choose from one of the available options in your system (use the 'Location Description' field for clarification).
Damage Description
Enter a short description of the damage done to the Container using your keyboard.
Signature On File
This field designates if the party referenced in the 'Damage Cause' field has signed a statement regarding the details of the damage to the Container. This field displays "True" when a signature is received via the truck mounted devices. It cannot be modified.
Trip Number
This field will populate with a Trip number if it the Freight Bill selected in the 'Bill Number' field was attached to a Trip.
Bill Number
Double click this field to select the Freight Bill that the Container was attached to when the damage occurred.
Created Time / Created By
These two fields will automatically populate when a new record is saved, and will contain the 'Date/Time' and the 'User ID' of the User who added the record.
Maintenance Jobs Tab
The Container Profiles program’s Jobs Tab is used to record any maintenance jobs occurring for this Container.
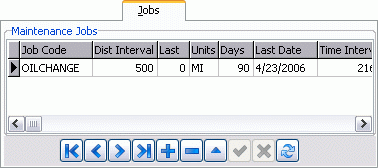
Maintenance Jobs
This Grid adds Maintenance Jobs to Containers. Double click on the Job Code field to select a Job Code. Jobs are predefined codes that contain parts and labour details for a maintenance task. Job codes are configured in the R&M Configuration program. Adding a maintenance job to a Container on this Tab is the same as adding the Job in the R&M Maintenance program.
Miscellaneous Info Tab
The Container Profiles program’s Miscellaneous Tab is used to record the date the asset starting and ended (if applicable) service, to note the Cost Centre involved, and to note a particular Client Code (if applicable).
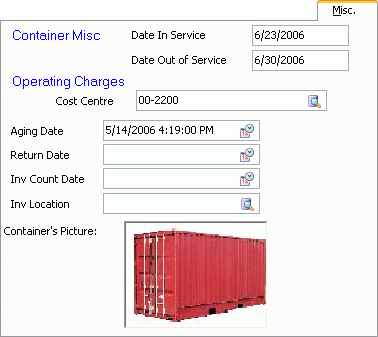
Date In Service
Double-click in the field to bring up a calendar, then scroll to the date this asset began service.
Date Out of Service
Double-click in the field to bring up a calendar, then scroll to the date this asset ended service.
Cost Centre
Click the search button to bring up the Account Code search dialog box where you can search by Account Number, or Description.
Aging Date / Return Date / Inv Count Date
Click the Calendar button to select a date for these fields from a Calendar menu.
Inv Location
Click the search button to specify the Zone Code where the inventory for this Container is located.
Container’s Picture
Displays the image associated with the currently selected Container. Right-click the image to access the Context Menu.
Ownership Tab
The Container Ownership Tab allows you to specify who owns the currently selected Container.

Select the option that applies to the currently displayed Container, either: 'Company', 'Owner Operator', 'Rental', 'Interliner', 'Carrier', or 'Lease'.
Repairs and Maintenance Tab
The Container Profiles R&M Tab is used to record repairs and maintenance that occur on this Container.
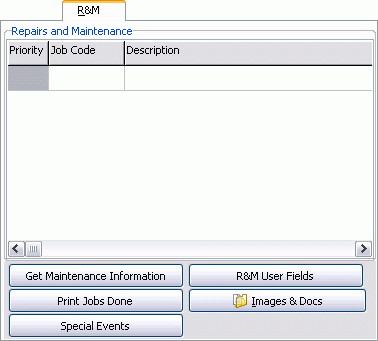
Get Maintenance Information
Select this button to retrieve outstanding maintenance jobs for the unit. These will display in the Grid. Maintenance jobs are configured in the R&M Configuration program, and are assigned to Containers on the Jobs Tab or in the R&M Maintenance program.
Print Jobs Done
Select this button to view (and / or print) a report of completed maintenance jobs for this Container.
R&M User Fields
Clicking the 'User Fields' button will display a new window, asking you to input new labels for the fields labelled 'User 1' to 'User 10' in the main Container program grid. You may enter new labels simply by typing them in the text fields. You may also specify a 'Shop Code' by using the search button, and may enter an 'Accounting Group' name in the appropriate field. Click 'OK' to save your changes. You can change the text names of these fields from within the Application Configurator program.
Images & Docs
For more information on the Images & Docs window, see the R&M Configuration program.
Special Events
The Special Events button displays the Special Events window. Existing special events that have been assigned to this Container are displayed in the Grid. You can add a special event to the Container record. Special events are configured in the Special Events program.
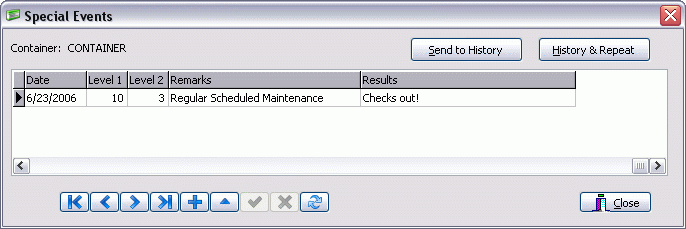
Send to History
You can archive the special event that is currently selected in the Grid by clicking the Send to History button. If the Req Results field for the special event code in the Special Events program is set to 'True', the special event cannot be sent to history until you have entered something in the Results field in the Grid.
History and Repeat
Will archive the Special Event that is currently selected in the Grid, and create a new Special Event of the same type. You will be required to enter a date for the new event.
Special Event Grid
Special Event
Select a Special Event Code description from the drop down list. The values listed here are configured in the Special Events program.
Date
Specify the date that the Special Event comes due. Double click for a calendar selection form.
Level 1 / Level 2
The Level 1 and Level 2 values configured in the special event code setup will default here. You can change them if you like.
Remarks
Enter Remarks that will display in the Special Events column in the Container Grid in the Dispatch program. If you set the Copy Descr field to 'True' in the Special Events program, the description will appear in the Remarks field.
Results
You can enter text in the Results field before you send the item to history. If you set the 'Req Results' field to 'True' in the Special Events program, you must enter Results before you archive the event.
Rentals Tab
The Rentals Tab of the Container Profiles program exactly mirrors the Rentals Tab found within the Miscellaneous Equipment Profiles program.
User-Defined Fields Tab
The User-Defined Fields Tab allows you to enter data into any one of the 10 User-Defined fields available to the Container Profiles program. The labels of these fields can be changed using the 'User Field 1 - User Field 10' options from the Application Configurator program > CONTAINERS.EXE section. You may use the <Ctrl><U> hot key combination to access this Tab.
Warranty Info Tab
The Warranty Tab is used to record warranty information that covers the entire Container (such as the original manufacturer’s warranty). This information is for reference purposes only. Warranty information for specific components, such as starter motors or batteries, is recorded on the Warranty Tab of the R&M Maintenance program.
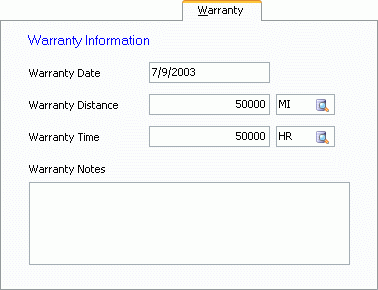
Warranty Date
Is used to store the date that the warranty began. Double click for a calendar selection form.
Warranty Distance / Unit
If the warranty is valid for a specific distance, enter the distance in the field on the left. Double click in the field on the right to select the distance unit (as configured in the Codes Maintenance program).
Warranty Time / Unit
If the warranty is valid for a specific time period, enter the amount of time in the field on the left. Double click in the field on the right to select the time unit (as configured in the Codes Maintenance program).
Warranty Notes
Is a free format field where general Notes about the warranty can be entered.