R&M Maintenance

The Repair and Maintenance Module encompasses several main programs within TruckMate. Below will follow a brief explanation of what the functions of each of these programs are:
The R&M Inventory Adjustments program is used to make changes in inventory levels without processing a stock receipt. For example, inventory adjustments made on the basis of physical inventory counts would be entered here. Also, opening inventory levels are entered here. Entries of stock received from vendors are processed through the Stock Receipts program. After entering a detail line, you must post the line item using the right mouse Post menu option before you can use the stock with other programs in the Repairs & Maintenance module.
The R&M Inventory Adjustment Register program is used to update inventory entries made to the Stock Adjustments Program. Enter the inventory information into the R&M Inventory Adjustments Program and then open and process the entry in the R&M Inventory Adjustment Register program. These entries are then available for updating through the General Ledger Journal Entries Register program.
The R&M Maintenance program is used to record mileage or hour readings, assign maintenance jobs to equipment, schedule maintenance, enter warranty and core return information, and record driver complaints. Many of these functions can also be performed in the R&M Work Order program, the Stock Receipts program and the Stock Adjustments program.
The R&M Configuration program is used to define the codes used throughout the Repairs & Maintenance module. Use this program to set up part codes, components, transaction codes, and other code categories.
When stock is received from vendors, add it to inventory using the R&M Stock Receipts program. Note that this is not the place to make inventory adjustments, such as starting inventory balances and periodic inventory-count adjustments. Use the Stock Adjustments program for those tasks. After entering a detail line, you must Post the line item using the right mouse menu option before you can use the stock elsewhere in the Repairs & Maintenance module.
The R&M Stock Receipts Register program is used to update stock receipt entries made to the Stock Receipts Program. Enter the stock receipt information into the R&M Stock Receipts Program and then open and process the entries in the R&M Stock Receipts Register program. These entries are now available for updating through the General Ledger Journal Entries Register program.
The R&M Work Orders program is used to create records of maintenance and repairs performed on equipment. They are used for scheduled maintenance and repair work, updating odometer readings, billing for outside work, and most other day-to-day shop administration functions. There are two kinds of work orders (although both kinds can be combined on one work order): scheduled maintenance, and repairs. With repair work orders, you must manually enter details on the parts and labour tabs, and you are not required to enter odometer/hourmeter readings (although you can if you want to). Scheduled maintenance work orders, however, require an odometer/hourmeter reading before you select and apply the scheduled maintenance jobs (although you may override the requirement). Scheduled maintenance jobs will automatically enter parts and labour details for you, based on your job codes.
The R&M Work Order Register program is used to update work order entries made to the R&M Work Order Program. Enter the work order information into the R&M Work Order Program and then open and process the entry in the R&M Work Order Register program. These entries are now available for updating through the General Ledger Journal Entries Register program.
Licensing
The Repairs and Maintenance module requires that a separate License is purchased before its programs can be used. None of the applications listed below will load without the License Registration key inputted into the TruckMate system. Contact the Trimble TruckMate Sales department for more information on obtaining R&M License Keys for your company.
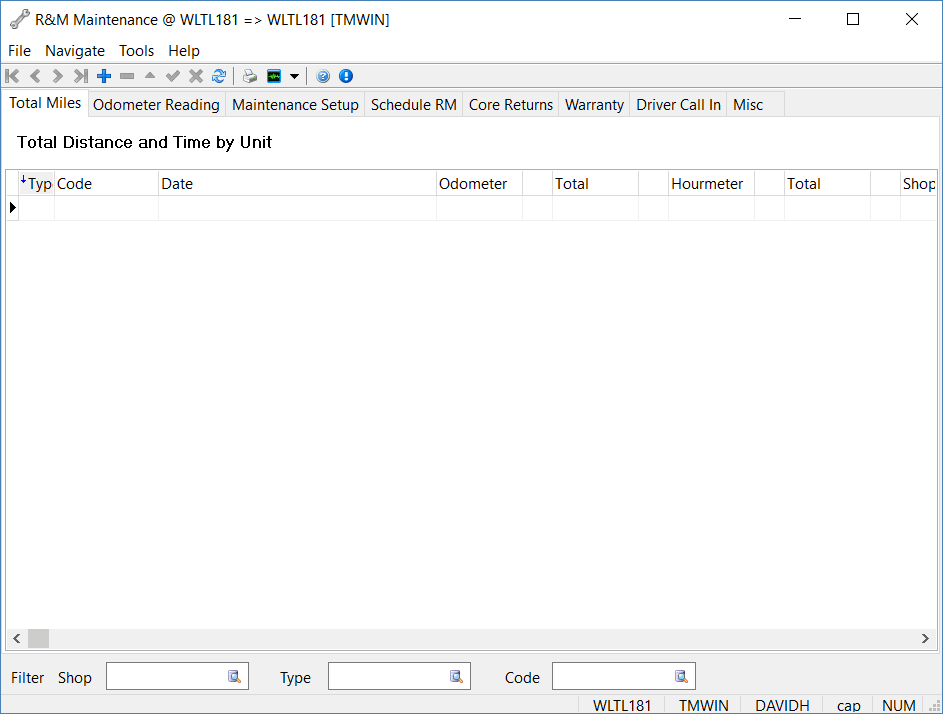
To access the R&M Maintenance program:
| From this location | Go to |
|---|---|
TruckMate Menu and TruckMate Task List |
Repair & Maintenance > R&M Maintenance |
Windows Start Menu |
TruckMate 20xx > R&M Maintenance |
Windows Explorer |
C:\Program Files (x86) > TruckMate 20xx > RMMaint.exe |
How Do I?
How do I use the R&M Maintenance program?
The R&M Maintenance program is used to record mileage or hour readings, assign maintenance jobs to equipment, schedule maintenance, enter warranty and core return information, and record driver complaints. Many of these functions can also be performed in the R&M Work Order program, the Stock Receipts program and the Stock Adjustments program.
-
To open the R&M Maintenance program (RMMAINT.EXE), click: Start Programs TruckMate Repair & Maintenance R&M Maintenance
-
Before offering step-by-step instructions, it is dependent on what you want to do in the R&M Maintenance program.
-
To record mileage, go to the Total Miles or Odometer Readings Tabs.
-
To assign maintenance jobs to equipment, go to the Maintenance Setup Tab.
-
To schedule maintenance, go to the Schedule RM Tab.
-
To enter warranty and core return information, go to the appropriate tabs.
-
To record driver complaints, go to the Driver Record Tab.
-
To print a report on issues such as: Work Order Report, Maintenance Report, Cost Report, Job History, Inventory Report, Back Dated Inventory, and Re-stocking Report, go to the Reports tab.
Menu and toolbar options
There are no menu and toolbar options and functionality that are specific to the R&M Maintenance window.
For information about common menu and toolbar options (i.e. File menu, Refresh, Multi-Company, etc.), see General menu and toolbar options.
Filtering Criteria
At the bottom of the R&M Maintenance program window, you’ll see three fields that can be used to Filter the records displayed by any of the program Tabs. When you enter text into one of these filters, the program will filter the records automatically as you type. These Filters correspond to:
Shop
Enter a 'Shop' code you would like to Filter the displayed records by- the data will be filtered as you type. You can select the Database Search button to select a R&M Shop from those available in your system, as defined by the R&M Configuration > Shops Tab.
Type
Enter a 'Type' value that you would like to Filter the displayed records by- the data will be filtered as you type. The 'Type' value allows you to choose the Resource that will be filtered on (Power Units, Trailers, Misc. Equip, etc.,) and also determines which ID values can be selected in the 'Code' Filter field.
Code
Enter a 'Code' ID value (dependant on the 'Type' of resource used) you would like to Filter the displayed records by- the data will be filtered as you type. You can select the Database Search button to select a Power Unit ID Code, as defined by the Power Unit Profiles program.
Total Miles Tab
The Total Miles Tab displays the current mileage and hour entries for all units. This tab contains the opening mileage and hour values entries for your equipment. Subsequently, ongoing entries are made on the Odometer Reading Tab. Note that mileage and hour entries can also be made in the R&M Work Orders program.
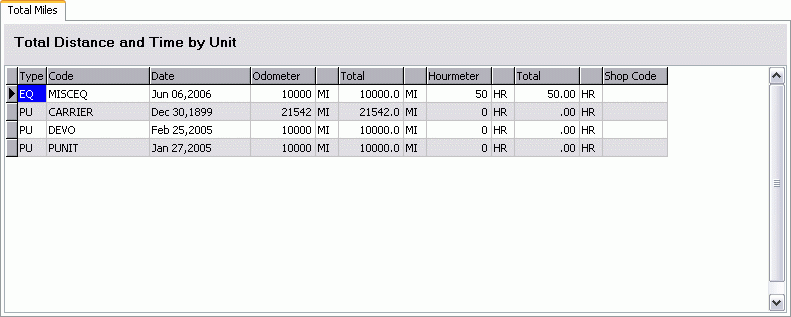
Type
Double-click in the Type field and select an equipment type from the selection box. The options are 'EQ' (Miscellaneous Equipment), 'PU' (Power Unit) or 'TR' (Trailer).
Code
Double-click in the Code field to select a specific piece of equipment. Equipment codes are configured in the Power Unit Profiles program, the Trailer Profiles program, and the Misc Equipment Profiles program.
Date
The Date field will default to the current date. Double-click in the Date field to bring up a calendar selection box, and select the entry date you wish to use.
Odometer
The Odometer field is the actual reading on the unit’s odometer, as opposed to the Total mileage on the unit. If the unit’s odometer is in kilometres, for example, and your base unit is miles, you can enter the kilometre reading here. Also, the odometer field would vary from the total mileage field if the unit’s odometer had been replaced.
Odometer Unit
Double-click to select the distance unit of the odometer. Distance units are configured in the Codes Maintenance program.
Total
Enter the Total unit mileage in this field. If your odometer readings are taken in a different distance unit than your base unit, you must convert the figure to the base unit. Distance units are configured in the Codes Maintenance program.
Total Unit
The Total mileage unit will default based on the base unit specified in the Codes Maintenance program.
Hourmeter / Hourmeter Units / Total Hours / Total Unit
These fields follow the same convention as the Odometer and Total fields (see above). The Hourmeter figure is the current meter reading; the Total Hours is the actual unit hours. Double-click in the Hourmeter units field for a list of defined time units configured in the Codes Maintenance program. The base unit for time will default into the hours Total Unit field.
Shop Code
Double-click to select the 'Shop Code' for this piece of equipment.
Odometer Reading Tab
Use the Odometer Reading Tab to enter mileage and hour readings on an ongoing basis. Note, mileage and hours can also be entered in the R&M Work Orders program.
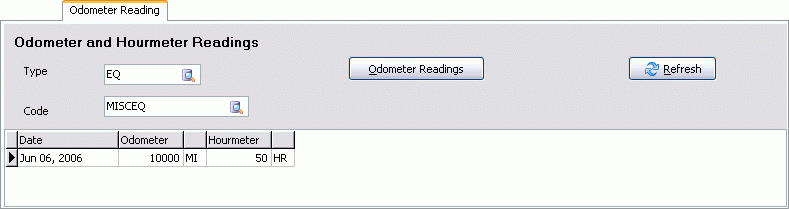
Type
Double-click to display and select equipment types. The options are 'EQ' (Miscellaneous Equipment), 'PU' (Power Unit) or 'TR' (Trailer). Select the search for more choices.
Code
Double-click on the Code field to display and select an equipment code within the type selected. Equipment codes are configured in the Power Unit Profiles program, the Trailer Profiles program, and the Misc Equipment Profiles program. Previous mileage and hour readings for the unit will be displayed as a list of transactions in the grid. Select the search for more choices.
Odometer Readings
Click on the Odometer Readings button to bring up the Enter Odometer window, used for entering mileage and hour readings. Previous mileage and hourmeter readings for the unit will display in the grid.
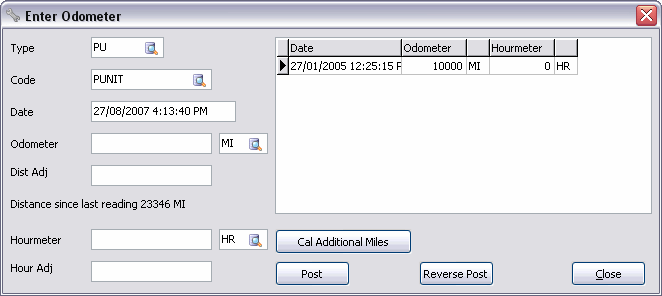
Type
Will default to the unit type selected in the main screen. Select the search for more choices.
Code
Will default to the equipment code selected in the main screen. Select the search for more choices.
Date
The Date field will default to the current date. Double-click in the Date field to bring up a calendar selection box, and select the entry date you wish to use. Depending on the date entered, it will be processed in different ways:
If the date that you entered falls before any existing odometer entries, the program will warn the user that the date entered is not valid. In this case, the user must reverse all existing entries to re-set the opening entry. The program will then disable the 'Post' button until the user changes the date value and the program confirms it as a valid date.
If the entered Date falls after the existing entries, the program will proceed as usual, immediately adding the Odometer reading to the Grid.
If the date falls between any existing entries, the program will attempt to insert the record within the range defined by two existing records. If the odometer value as entered does not fall into the range between the existing odometer entries before and after the Date indicated, the program will warn the user the that the odometer entered is not valid.
In such a case, the 'Post' button will be disabled until the user changes the odometer value and the program confirms the odometer value is valid.
Odometer
Enter the current odometer reading for the unit. After the Calculate Additional Miles button is clicked, the field below the Odometer field will display the distance since the last odometer reading.
Odometer Unit
If the odometer is a different distance unit than the base unit, double-click to select the applicable distance unit code.
Hourmeter
Enter the current hourmeter reading for the unit. After the Calculate Additional Miles button is clicked, the field below the Hourmeter field will display the hours since the last hourmeter reading.
Hourmeter Unit
If the hourmeter is a different time unit than the base unit, double-click to select the applicable time unit code.
Cal Additional Miles
This button will calculate the distance or time since the unit’s last odometer reading, and display the values in the fields under the Odometer and Hourmeter fields. This number is the difference between the current odometer reading (on the Total Miles tab) and the reading that you just entered. Note that if your odometer readings are taken in a different distance unit than the base unit; when you Post the entry the amount will be converted based on the unit’s conversion factor before being added to the Total on the Total Miles tab. The unit’s conversion factor is specified in the Codes Maintenance program.
Post
To add the record and recalculate the values displayed on the Total Miles tab, click on the Post button.
Reverse Post
To reverse a prior mileage / hourmeter posting, select the item in the grid then click Reverse Post. This will delete the entry and recalculate the values displayed on the Total Miles Tab.
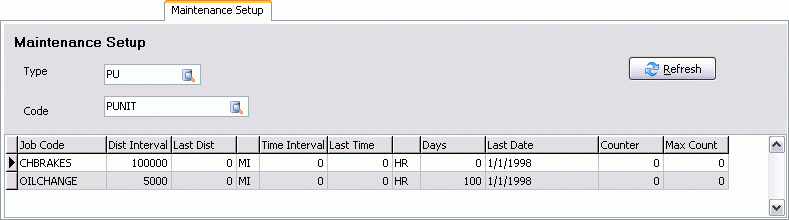
Maintenance Setup Tab
Scheduled maintenance jobs are defined on the Maintenance Tab. Job Codes are attached to units, and the interval at which the Job Codes should be executed is specified. Job Codes are defined in the R&M Configuration program. This is also a reference screen for viewing the maintenance history of your equipment.
To schedule upcoming maintenance tasks, view the Schedule RM Tab. Before adding jobs to units, select the unit using the Type and Code fields. Equipment codes are configured in the Power Unit Profiles program, the Trailer Profiles program, and the Misc Equipment Profiles program. Jobs can be scheduled by distance, by time (ie, hours recorded from an hourmeter) or by date.
Type
Double-click to display and select an equipment type. The options are 'EQ' (Miscellaneous Equipment), 'PU' (Power Unit) or 'TR' (Trailer). Select the search for more choices.
Code
Double-click to display and select an equipment code within the type selected. Equipment codes are configured in the Power Unit Profiles program, the Trailer Profiles program, and the Misc Equipment Profiles program. Maintenance jobs assigned to the selected unit will display in the grid. Select the search for more choices.
Maintenance Setup Grid
Job Code
Double click for a list of defined job codes. These are defined in the R&M Configuration program.
Dist Interval
Is the number of distance units that elapse between each performance of this job code. Enter this value in the form of the base distance unit.
Last Dist
Is the mileage at the time of the last performance of this job code. Enter this value in the form of the base distance unit.
Distance Unit
Defaults to the Base Unit for distance as configured in the Codes Maintenance program.
Time Interval
Is the number of time units that elapse between each performance of this job code. Enter this value in the form of the base time unit.
Last Time
Is the time of the last performance of this job code. Enter this value in the form of the base time unit.
Time Unit
Defaults to the Base Unit for time as configured in the Codes Maintenance program.
Days
Enter the number of days between scheduled maintenance jobs in the Days field.
Last Date
Double-click on the Last Date field to display a calendar selection form. Enter the date when this maintenance job was last performed.
Counter
Will increment each time the maintenance job is performed. It is updated when the work order is set to the status of 'Complete'. Work orders are created in the R&M Work Orders program.
Max Count
If the job is only to be performed a certain number of times, enter the number in the Max Count field. When the Counter matches the number in the Max Count field, the job will be removed from the unit’s Maintenance Setup.
Schedule RM Tab
Use the Schedule RM Tab to schedule outstanding maintenance jobs. The grid at the top shows equipment that has a high priority for maintenance (see the description below for an explanation of how the program determines priority). Assign jobs from the top grid to date slots in the bottom calendar grid by drag-and-drop, or by double clicking in a calendar grid cell when the desired job is highlighted in the top grid.
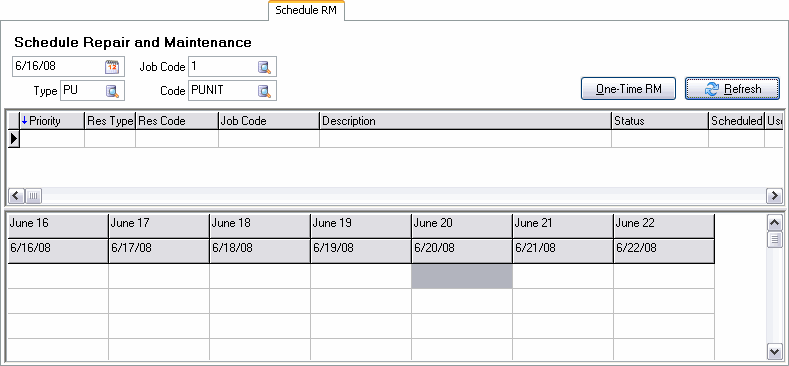
Date
The date selected will determine the dates displayed in the Calendar section at the bottom of the screen. The date does not affect the priority of the jobs.
Job Code
Select the Database Search icon to choose a Job Code for the scheduled repairs and/or maintenance. The Job Codes available in your system are configured on the R&M Configuration program > Jobs Tab, and are assigned to specific Equipment on the Maintenance Tab.
Type
Use this field to set the Equipment Type of the Equipment being repaired or serviced. Available options are 'CO' (Containers), 'EQ' (Miscellaneous Equipment), 'OS' (Outside Equipment), 'PU' (Power Units) or 'TR' (Trailers).
Code
Select the Equipment Code of the Equipment that requires repairs/maintenance. When double-clicking in this field, the records that display in the Database Search window are determined by the 'Type' value selected (i.e. if 'PU' (Power Unit) is selected, only Power Unit records will be pulled by the search).
One-Time RM
When you require completing a one-time Job, such as a repair, or inspection, you can use this button. Selecting this button will change the view to the One-Time Repair & Maintenance section, where you can create a new single-use Job with a specific 'Job Code' and then assign it to one Power Unit, or a group of Power Units (or other equipment) at one the same time. This makes maintenance Jobs much more usable in the case of group Jobs or recalls.
When complete, select the 'Return to Schedule RM' button to see your one-time Job added to the Schedule RM Tab.
Refresh
After making changes to the header options, select the Refresh button to apply them to the Job Grid.
Job Grid
Displays all jobs with a priority greater than 50. A priority level of 100 indicates that the job is due; less than 100 indicates that the job is coming due soon; greater than 100 indicates that the job is overdue. If you double click on an item, all scheduled jobs for the same unit will be displayed, regardless of their priority. Double click again to return to the original display.
Priority
For jobs scheduled by distance, the program determines the current distance by adding miles accumulated in the Dispatch program to the last odometer reading. Then, the mileage reading at the last maintenance is subtracted. The result is divided by the Dist Interval (set on the Maintenance Tab) then multiplied by 100. The priority of jobs scheduled by hour or by date is calculated in a similar manner, except that dispatch activity is not taken into account.
Res Type
Displays the equipment ('resource') type. The options are 'EQ' (Miscellaneous Equipment), 'PU' (Power Unit) or 'TR' (Trailer).
Res Code
Displays the equipment code, as configured in the in the Power Unit Profiles program, the Trailer Profiles program, and the Misc Equipment Profiles program.
Job Code
Job Codes are configured in the R&M Configuration program, and assigned to equipment on the Maintenance Tab of the R&M Maintenance program.
Description
Displays the maintenance interval followed by the distance traveled or the elapsed time since the job was last performed. The maintenance interval is set on the Maintenance Tab.
Status
Displays the current dispatch status of the equipment, followed by the zone code of the equipment’s current location. This information is updated by the Dispatch program and Driver Call In program.
Scheduled
If the maintenance job has been assigned to a date slot in the calendar grid, the schedule field will be 'TRUE' and the item will turn green.
User 1 / User 2 / User 3
These fields allow you to specify the User information of the person scheduling the Maintenance. These fields can be turned off from within the Application Configurator program by turning the 'R&M User for Maint' option to 'False'.
Distance Left
Displays the remaining Distance on a piece of equipment before its next Maintenance is due.
Time Left
Displays the remaining Time on a piece of equipment before its next Maintenance is due.
Days Left
Displays the remaining Days on a piece of equipment before its next Maintenance is due.
Calendar Grid
Jobs are scheduled by clicking and dragging them from the job grid (see above) into a slot in the Calendar Grid. You may also highlight the record in the job grid, then double click in a schedule cell in the calendar grid to assign a job to a date. When you release the mouse button (or confirm the schedule application), the Special Event form will appear.
Special Events
The Special Event form will display when a maintenance job is scheduled. Special events are not specific to the Repairs & Maintenance module, they are used in numerous circumstances throughout the system to record special resource events and prompt when those events are due. See the Special Events program for further information. In this case, the special event is the maintenance job.
When the maintenance job has been scheduled, the record in the top grid will turn green. When the mouse pointer hovers over the scheduled job in the bottom grid, the remarks from the Special Events form will display in the top right of the Schedule RM screen. The scheduled maintenance will show in the bottom grid. Note that this does not automatically create a work order. Nor does this entry disappear when a work order is created and/or completed. The scheduling grid is simply used as a reference for making work orders. To remove a scheduled job, double click on the entry in the schedule grid, then enter remarks ('Completed' or 'Cancelled') in the Special Events form, and click on the 'Send to History' button.
Core Returns Tab
Core Returns are for tracking parts that can be returned to vendors for core return rebates (not warranty refunds). By entering the returns on the Core Returns Tab, the transaction can be tracked from the time the part is received to the time the part is shipped back to the vendor and the credit is received. When the credit is received from the vendor, the entry can be deleted from the Core Return screen. Core Return information can also be entered in the Stock Receipts program. When the screen is first displayed, all returns are displayed in the grid. To narrow down the display, double-click on one or more of the header fields and select the values by which you wish to filter the record display.
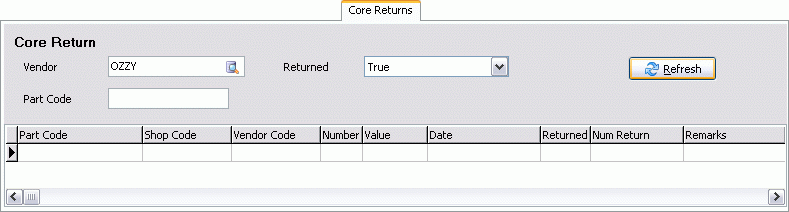
Shop
To display only core returns from a specific shop, enter the shop code here (or double click for a shop selection form). Select the search for more choices.
Vendor
To display only core returns for a specific vendor, enter the vendor code here (or double click for a vendor selection form). Select the search for more choices.
Part Code
To display only core returns of a specific part code, enter the part code here (or double click for a part code selection form). Select the search for more choices.
Returned
You can display core returns that have been returned, core returns that have not yet been returned, or both. Select a value from the drop down list box.
Core Returns Grid
Part Code
Enter a part code, or double click for a selection form. Part Codes are configured in the R&M Configuration program.
Shop Code
Enter the shop which has the part in stock. Double click for a selection form. Shop Codes are configured in the R&M Configuration program.
Vendor Code
Enter the code of the vendor to which the part can be returned. Double click for a selection form. Vendors are configured in the Customer & Vendor Profiles program.
Number
This is the total number of parts of this code that you can return to the vendor.
Value
Enter the amount that you will receive from the vendor when you return the part.
Date
Will default to today’s date. You can use this field to store the entry date of the core return, and then update the date to display the return date when the part is returned to the vendor. Double click for a calendar selection form.
Returned
The Returned status will default to 'False'. If you have already returned the part when you make the entry, double-click to toggle the status to 'True'.
Num Return
As you return parts, you can increment this number.
Remarks
Enter free format remarks about this core return. This is for reference and reporting purposes only.
Warranty Tab
The Warranty Tab is used to record warranty information about specific parts. These items must have serial numbers. Items can be searched by part code, serial number, or vendor code. General warranties for equipment, rather than for interchangeable parts, are stored with the unit record in the Power Unit Profiles program, the Trailer Profiles program, and the Misc Equipment Profiles program. Warranty details can also be entered in the Stock Receipts program and viewed in the R&M Work Orders program.
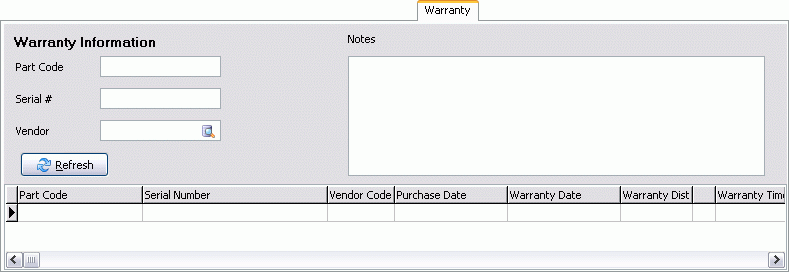
Part Code
To display warranties for a specific part code, enter the part code here (or double click for a part code selection form). Part Codes are configured in the R&M Configuration program. Select the search for more choices.
Serial #
To find warranty information for a specific part, enter the serial number here.
Vendor
Enter the vendor code here. Select the search for more choices.
Driver Call In Tab
The Driver Call In Tab is used for recording the driver’s reports on required repairs and maintenance. These reports can be recalled in the R&M Work Orders program.
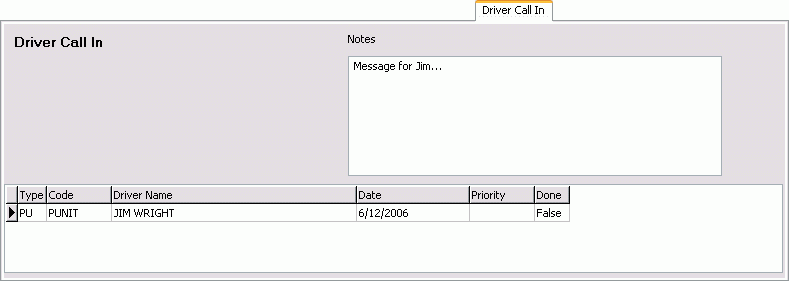
Notes
Enter the nature of the driver’s report in the free format field at the top right-hand side of the screen.
Driver Call In Grid
Type
Double-click to display and select an equipment type. The options are 'EQ' (Miscellaneous Equipment), 'PU' (Power Unit) or 'TR' (Trailer).
Code
Double-click to display and select an equipment code within the type selected. Equipment codes are configured in the Power Unit Profiles program, the Trailer Profiles program, and the Misc Equipment Profiles program.
Driver Name
Enter the name of the driver who is reporting the problem.
Date
Double-click for a calendar selection form. Today’s date will default.
Priority
Use the Priority field to enter a numerical priority value, if you wish. This is only for your own reference and not used elsewhere.
Done
Double-click to toggle the 'Done' value from 'False' to 'True'. When the value is 'True', the record will no longer display on the Driver Call In grid or in the R&M Work Orders program. You can also mark a complaint as 'Done' in the R&M Work Orders program.
Miscellaneous Tab
The Miscellaneous Tab offers options for printing reports, checking inventory, and reviewing the repairs and maintenance history.
Reports
Select the 'Report' button to view all available reports on the R&M Reports Selection window.
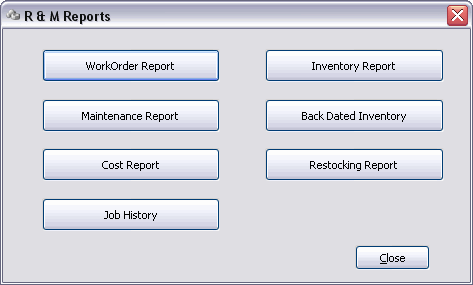
Work Order Report
Will display the Report Selection form. The Crystal Report template supplied with the TruckMate system is called 'RMWO.RPT'. You will be prompted to enter a work order number. The report will preview to the screen. Click the printer icon at the top of the screen to send the report to the printer that is configured as the default printer for your workstation.
See the Crystal Reports Reference for more information on report functions.
Maintenance Report
Will display the Report Selection form. The Crystal Report template supplied with the TruckMate system is called 'RMMAINT.RPT'. The report will preview to the screen. Click the printer icon at the top of the screen to send the report to the printer that is configured as the default printer for your workstation.
See the Crystal Reports Reference for more information on report functions.
Cost Report
Will display the Report Selection form. The Crystal Report template supplied with the TruckMate system is called 'RMCOST.RPT'. The report will preview to the screen. Click the printer icon at the top of the screen to send the report to the printer that is configured as the default printer for your workstation.
See the Crystal Reports Reference for more information on report functions.
Job History
Will display the Report Selection form. The Crystal Report template supplied with the TruckMate system is called 'RMJOBS.RPT'. You will be prompted to enter the resource type. The report will preview to the screen. Click the printer icon at the top of the screen to send the report to the printer that is configured as the default printer for your workstation.
See the Crystal Reports Reference for more information on report functions.
Inventory Report
Will display the Report Selection form. The Crystal Report template supplied with the TruckMate system is called 'RMINV.RPT'. You will be prompted to enter the shop code. The report will preview to the screen. Click the printer icon at the top of the screen to send the report to the printer that is configured as the default printer for your workstation.
See the Crystal Reports Reference for more information on report functions.
Back Dated Inventory
Will display the Report Selection form. The Crystal Report template supplied with the TruckMate system is called 'RMBDINV.RPT'. The report will preview to the screen. Click the printer icon at the top of the screen to send the report to the printer that is configured as the default printer for your workstation.
See the Crystal Reports Reference for more information on report functions.
Restocking Report
Will display the Report Selection form. The Crystal Report template supplied with the TruckMate system is called 'RMMINST.RPT'. The report will preview to the screen. Click the printer icon at the top of the screen to send the report to the printer that is configured as the default printer for your workstation.
See the Crystal Reports Reference for more information on report functions.