Unassigned Resources tab


The Multi Mode Dispatch > Resources tab has several sub-tabs that list all of the available/unassigned resources that can be assigned to trips (planned or active) throughout the Multi Mode Dispatch program. Users can drag and drop any of the resources from the available tabs to assign drivers, power units, trailers, chassis and/or containers to their trips.
Each of the resource sub-tab grids lists the details for each resource record (from their respective Profiles Module application). See the tab descriptions below for grid-specific information and/or right-click shortcut menu options that are available (only those right-click options unique to each tab will be documented).
| Multi Mode Dispatch can associate barcodes with a freight bill. For example, if a shipment has 10 pallets, users can print out 10 barcodes. To utilize this functionality, the user can double-click in the Items column it to display where items are located in the warehouse. The user can also look at a door and see what items are associated with it. |
Header - Resources tab

A set of standard features common to each of the Resource sub-tabs is available in the header section.
| Icon/Keybd | Menu Option | Definition |
|---|---|---|
|
Refresh |
Select the Refresh button to refresh the data on the chosen tab. This will bring the details of any newly created/edited resource into its respective sub-tab, for example. |
|
Set Filter |
Opens a Filter window, allowing you to create field-specific or SQL-based custom filters for the grid. This option is also available in the shortcut menu on the sub-tab grids. |
|
Clear Filter |
Clears the applied filter from the currently viewed sub-tab. |
Search |
Simply begin typing characters into the Search field to have the cursor move to the appropriate record. |
|
Filter |
The Filter field is a text entry field that will filter the records based on the currently selected grid column header. Select one of the grid column labels to filter, enter text into the 'Filter' field and press the <Enter> key to filter the resource records. |
Shortcut Menu - All Resources tabs
The following generic context menu options are available within most of the resource tabs:
| Icon/Keybd | Menu Option | Definition |
|---|---|---|
<Shift+Ctrl+D> |
Toggle Design Mode |
Allows those with security permission, access to the Screen Design mode where you can create and save different layouts. See Custom Screen Design Mode and the Security Configuration program > Security > Business Events > Screen Design section. |
<Ctrl+F> |
Full Screen |
Expands this grid to fill the whole screen view. Use <Ctrl+F> as a toggle to return to the previous view. |
|
Set Filter |
Opens a Filter window, allowing you to create field-specific or SQL-based custom filters for the grid. This option is also available in the shortcut menu on the sub-tab grids. |
|
Clear Filter |
Clears the applied filter from the currently viewed sub-tab. |
Anchored Columns |
To keep the columns on the far left of the grid from disappearing when you scroll the grid to the right, use the Anchored Columns menu option by entering the number of columns you wish to anchor. When you scroll the grid to the right, these columns will still be displayed. Set the value back to zero to remove the anchors. |
|
Reposition |
Opens the standard Trip Status Change and Equipment Repositioning window, which will allow you to create a trip that will reposition the resource to a new location. |
|
Status Change |
Opens the standard Trip Status Change and Equipment Repositioning window allowing you to change the status of the selected resource. |
|
View Location History |
Opens the Location History* window displaying a list of recent activity for this resource. |
|
Find "Resource" Near |
Opens the standard Find Near window, with the active tab pre-selected based on the kind of resource you are attempting to locate. |
|
Find Trips Near |
Opens the standard Find Near window, with the active tab pre-selected to the Trip tab. |
|
New |
Opens an instance of the resources respective Profiles Module application, with a new blank record pre-inserted for the user. |
|
View "Resource" Profile |
Opens the resource’s respective Profile program’s module application showing the chosen resource’s details. |
|
Special Events |
Opens the Special Events window, detailing any up and coming special event records for the selected resource. |
See Common Shortcut Menu Options in the Active Trips section for descriptions for these shortcut menu options common to many of the grids on the Multi Mode Dispatch window. (The Call Command Center option is not always available in every menu.)
Drivers tab
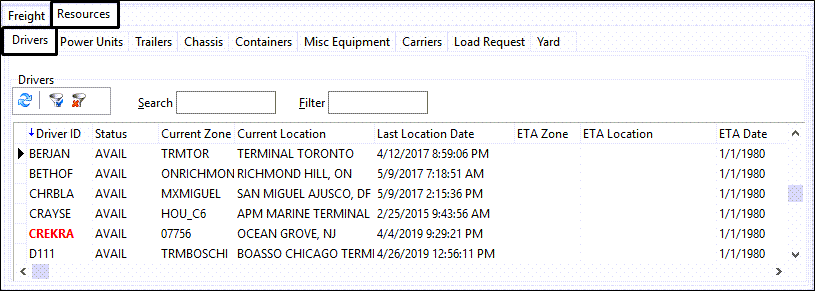
The Drivers tab lists all driver codes that are currently available for use in the Multi Mode Dispatch program. (Driver codes must have their 'Active Dispatch' checkbox selected on the Driver Profiles program top header area to appear in this list.)
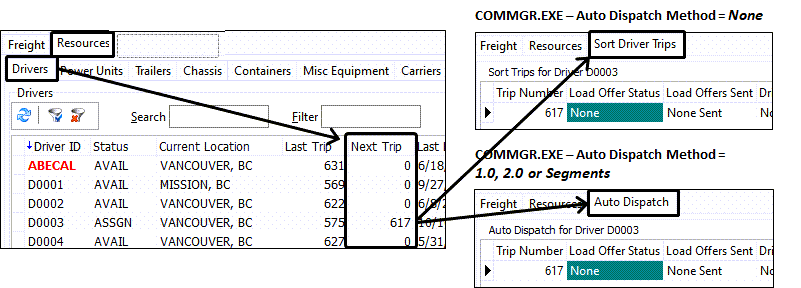
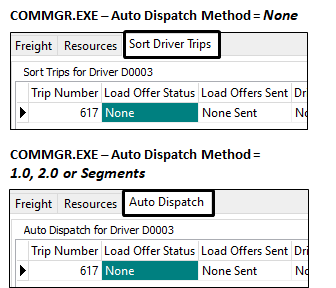
Auto Dispatch / Sort Driver Trips
If you double-click anywhere in the Drivers grid > Next Trip column, the Auto Dispatch (or Sort Driver Trips) tab will display. (This is the same Auto Dispatch tab described in the regular Dispatch program.)
Shortcut Menu (Driver Specific)
Some of the right-click shortcut menu options are unique to the Resources > Drivers tab.
See Shortcut Menu - All Resources tabs for the options common to all the Resources tabs.
| Icon/Keybd | Menu Option | Definition |
|---|---|---|
Find Load for Driver |
Allows you to search for available freight either in the driver’s current or final zone using the Find <Resources> Near window for freight. You can search within a specified distance of the desired zone and filter the results using other frames of reference. |
|
View Driver Logbook |
Selecting this option will open the Logbook window, which pulls information from the Logbooks program for the selected Driver. |
|
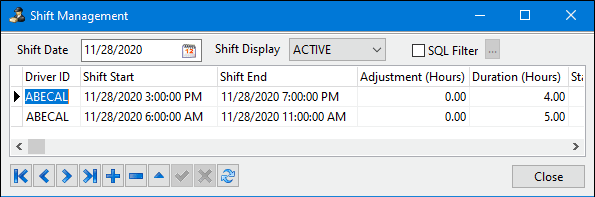
Shift Management |
Opens the Shift Management window displaying the same driver shift information as the Driver Shifts grid on the Profiles > Driver Profiles program > Shift Management tab.
You can create a new shift for any driver and manage the shift information using the navigation tools.
Warning messages are displayed at the bottom of the Shift Creation window to assist you while you create new shifts. |
|
Driver Diary |
Allows you to access the Diary window for the selected Driver. You can also use the <Ctrl><Alt><D> hot-key to access the Diary. Access to this option is controlled by the Security Setup program. |
|
<Ctrl+Alt+C> |
Driver Call-In |
Opens the Driver Call-in program. |
Manage Driver’s Fuel/Credit Cards |
Opens the Cards for Driver <x> window displaying just the Cards tab from the Fuel Management > Fuel Card Management program > Cards tab. |
|
Manage Driver’s Fuel/Credit Child Accounts |
Opens the Child window displaying just the Child tab from the Fuel Management > Fuel Card Management program > Child tab. |
|
Sort Planned Trips |
@ Displays the Auto Dispatch (or Sort Driver Trips) tab depending on your Auto Dispatch Method app. config. setting. (This is the same Auto Dispatch tab described in the regular Dispatch program.)
|
|
View Images via <vendor> |
Opens any images or documents associated with this driver using whatever imaging vendor you have configured to work with Truckmate. |
|
Call Command Center> |
Opens the TruckMate Command Center program and provides links to specific relevant pages. |

Power Units tab
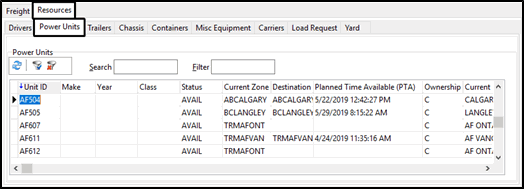
The Power Units tab lists all power units that are currently available for use in the Multi Mode Dispatch program.
Shortcut Menu (Power Units Specific)
Some of the right-click shortcut menu options are unique to the Resources > Power Units tab.
See Shortcut Menu - All Resources tabs for the options common to all the Resources tabs.
| Icon/Keybd | Menu Option | Definition |
|---|---|---|
Manage Punit’s Fuel/Credit Cards |
Opens the Cards for Power Unit <x> window displaying just the Cards tab from the Fuel Management > Fuel Card Management program > Cards tab. |
|
<Ctrl+H> |
Vehicle Health Score |
For TruckMate customers who are also running Trimble TMT Fleet Maintenance, the TMT Vehicle Health Score has been integrated into several areas of TruckMate to show the VIN-based Remote Diagnostics window and other predictive metrics information. This information can also be accessed from the Power Unit Profiles program > TMT Information tab > Vehicle Health Score button. |
Reefer Monitor Settings |
Selecting this option will open the Reefer Monitoring window, which allows the user to setup the scheduled ReeferTracs Monitoring for the selected trailer associated with this power unit if the trailer is refrigerated. |
|
|
Select All |
Selects every record in the grid. |
|
Clear Multi-Row Selection |
Clears all the selected records. (You can use Ctrl+Click to select multiple records.) |
Trailers tab
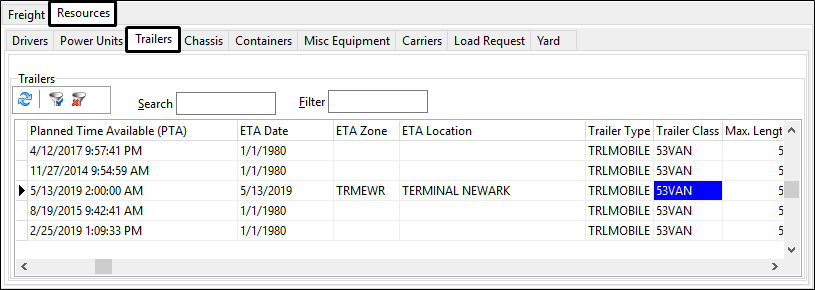
The Trailers tab lists all trailers that are currently available for use in the Multi Mode Dispatch program.
Shortcut Menu (Trailers Specific)
Some of the right-click shortcut menu options are unique to the Resources > Trailers tab.
See Shortcut Menu - All Resources tabs for the options common to all the Resources tabs.
| Icon/Keybd | Menu Option | Definition |
|---|---|---|
Reefer Monitor Settings |
Selecting this option will open the Reefer Monitoring window, which allows the user to setup the scheduled ReeferTracs Monitoring for the selected trailer. See Reefer Monitor Settings under Power Units tab for details. |
|
View Reefer Events |
Opens the Reefer Events for Trailer <x> window to display any historical reefer events and alarms associated with this trailer. |
Chassis tab
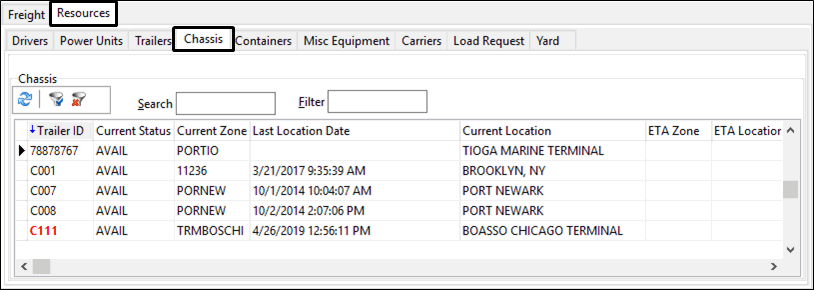
The Chassis tab lists all chassis that are currently available for use in the Multi Mode Dispatch program.
Shortcut Menu (Chassis Specific)
Some of the right-click shortcut menu options are unique to the Resources > Chassis tab.
See Shortcut Menu - All Resources tabs for the options common to all the Resources tabs.
| Icon/Keybd | Menu Option | Definition |
|---|---|---|
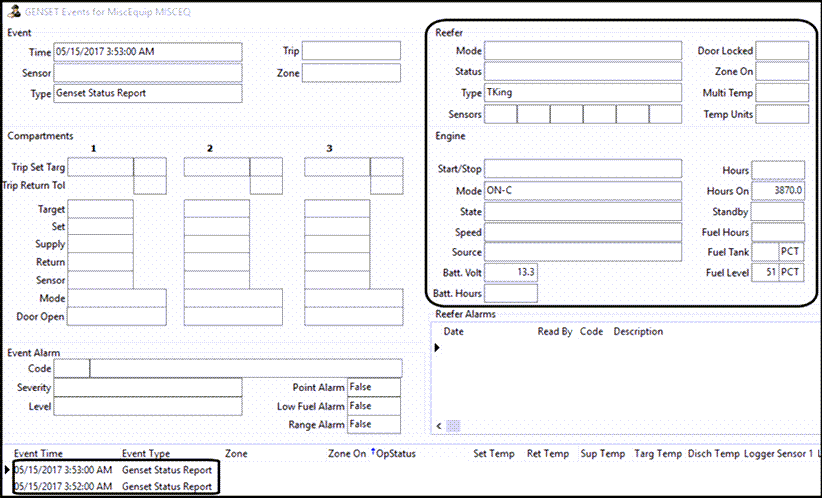
View Genset Events |
Opens the Genset Events for Chassis <x> window to display any historical reefer events and alarms associated with this chassis.
|
Containers tab
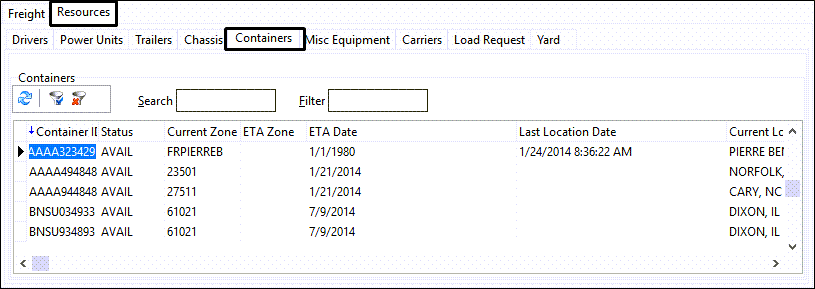
The Containers tab lists all containers that are currently available for use in the Multi Mode Dispatch program.
Shortcut Menu (Containers Specific)
Some of the right-click shortcut menu options are unique to the Resources > Containers tab.
See Shortcut Menu - All Resources tabs for the options common to all the Resources tabs..
| Icon/Keybd | Menu Option | Definition |
|---|---|---|
Quick New |
The Quick New option provides the ability to add a new container with the minimum required information on the Quick Container Entry window.
Refer to Profiles > Trailer Profiles for more information. |
|
Set Container Inactive |
Selecting this option will set the currently selected container to 'Inactive' status. |
|
View IM Trace |
This feature launches the Intermodal Trace program. |
|
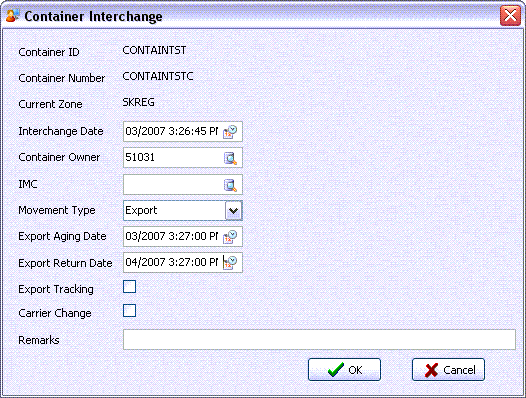
Inter Change Form |
Selecting this option will open the Container Interchange window. The user cannot access this window if the selected container is not set to 'Available' status.
+
|

Misc Equipment tab
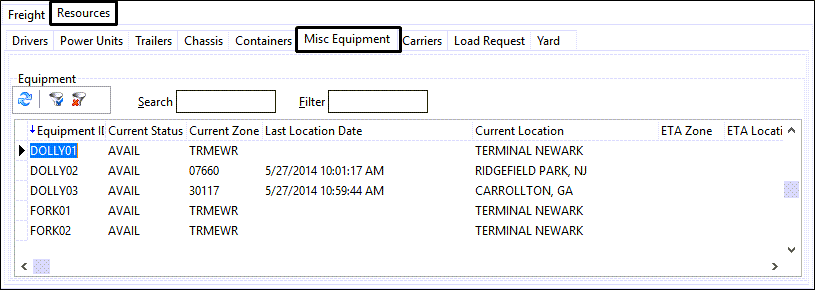
Lists all miscellaneous equipment currently available for use in the Multi Mode Dispatch program.
Shortcut Menu (Misc Equipment Specific)
Some of the right-click shortcut menu options are unique to the Resources > Misc Equipment tab.
See Shortcut Menu - All Resources tabs for the options common to all the Resources tabs.
| Icon/Keybd | Menu Option | Definition |
|---|---|---|
View Genset Events |
Opens the Genset Events for MiscEquip <x> window to display any historical reefer events and alarms associated with this equipment item. |
Carriers tab
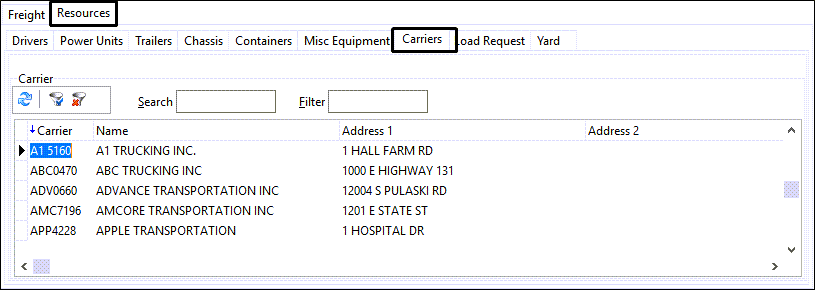
The Carriers tab lists all carriers available for transporting freight.
Shortcut Menu (Carriers Specific)
Some of the right-click shortcut menu options are unique to the Resources > Carriers tab.
See Shortcut Menu - All Resources tabs for the options common to all the Resources tabs.
| Icon/Keybd | Menu Option | Definition |
|---|---|---|
View Carrier Profile |
Opens the Customer & Vendor Profiles program and displays the details for this carrier. |
Load Request tab

Lists all outstanding load requests that have not been dealt with yet.
Shortcut Menu (Load Request Specific)
Some of the right-click shortcut menu options are unique to the Resources > Load Request tab.
See Shortcut Menu - All Resources tabs for the options common to all the Resources tabs.
| Icon/Keybd | Menu Option | Definition |
|---|---|---|
Delete |
Deletes the selected Load Request detail line. You will be asked to confirm. |
Yard tab
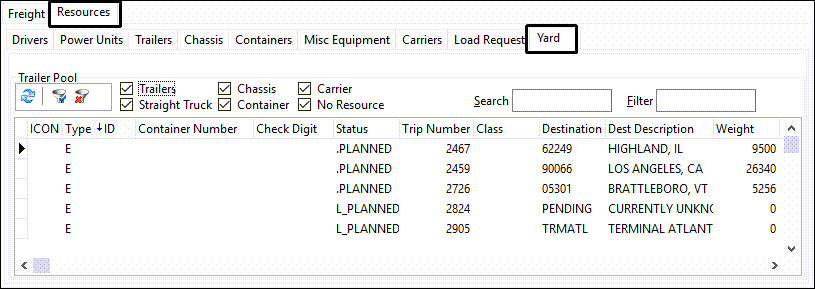
The Yard tab displays trailers, containers and chassis with a status of the 'Availability' behavior category (as configured in the Codes Maintenance program) whose current zone matches the Terminal Zone, as specified in the Terminal Setup. The user can drag trailers/containers/etc. to match them to a trip in the Doors tab.
When the user selects the 'Park in Yard' option, the trailer, container or chassis record will be displayed in the Yard.
Be sure to use the 'Refresh' button frequently to update the display of the available equipment in the Trailer Pool.
Trailer Pool Filters (Trailers, Straight Truck, Chassis, Container, Carrier, No Resource, and At Door)
These checkboxes filter the results being displayed in the Yard. Please note that the following have specific functions:
Carrier: When checked, this will show trips that have been parked in the yard with only an Interliner attached to them.
No Resource: When checked, this will show trips that have been parked in the yard without any resources attached. This can be useful for brokerage/non-asset based companies.
At Door: When checked, this will show resources at a door will show in the grid. This flag can be toggled so it does not appear via a setting in the Application Configurator program > Dispatch > Multi Mode Dispatch.
Shortcut Menu (Yard Specific)
Some of the right-click shortcut menu options are unique to the Resources > Yard tab.
See Shortcut Menu - All Resources tabs for the options common to all the Resources tabs.
| Icon/Keybd | Menu Option | Definition |
|---|---|---|
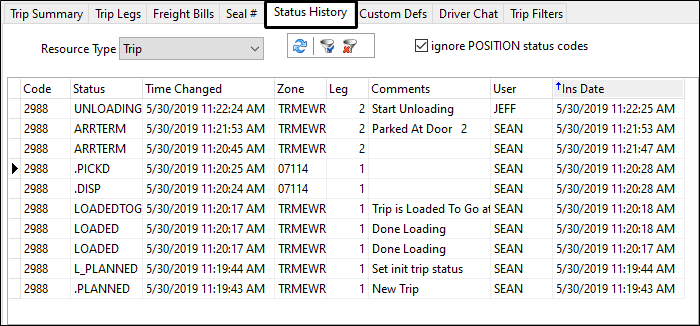
Show Trip Status |
Displays the same grid information as the Trip Details section > *Status History tab * listing the sequential status events that have occurred so far for this trip.
|
|
Merge Trips |
@ |
|
* Loaded To Go |
Sets the trip’s status to the "Loaded to Go" status code defined for the current working terminal. |
|
Barcode Item Details |
Opens the Barcode Item Details window, in which the user can add, delete, and view barcode information. |