Carrier411 Interface
| As of TruckMate 2022.4, the Carrier411 Interface is no longer available. |

The Carrier411 Interface program is used to allow TruckMate to interact with the Carrier411 system and will update the registered Carrier411 account as well as the data stored inside the TruckMate database. The application can accomplish the following functions:
-
View Carrier411 data stored in local database
-
Link and De-link Carrier411 vendor information with local database vendors
-
Start/Stop/Check Monitoring functions which call Carrier411 web services:
-
wsStartMonitoring
-
wsStopMonitoring
-
wsGet411Status
-
-
Perform manual synchronization of Carrier411 data with local database
-
Setup Carrier411.WinService.dll parameters and Carrier411 credentials, install Carrier411Service, and start/stop installed service (additional parameters for service can be setup using the standard 'Services' control panel applet accessed from the Windows Start Menu > Administrative Tools window).
There are also several options in the Application Configurator program > Dispatch and Carrier411 for the Carrier411 Interface program.
| Carrier411 is a Web Service interface that uses SOAP protocols to provide the ability for a system to make live remote procedure calls directly to the Carrier411 database. The Carrier411 database contains up-to-date information regarding carrier insurance, operating authority, safety ratings, SafeStat SEA scores and census data. Carrier411 supplies potential integration partners with 16 function calls that can be used to access a specific registered Carrier411 account and to obtain information about registered and monitored carriers within the account. (Refer to Appendix A for detailed information regarding Carrier411 function calls). |
To access Carrier411:
| From this location | Go to |
|---|---|
TruckMate Menu and TruckMate Task List |
Safety & Compliance > Carrier411 Interface |
Windows Start Menu |
TruckMate 20xx > Carrier411 Interface |
Windows Explorer |
C:\Program Files (x86) > TruckMate 20xx > Carrier411.UI.exe |
How Do I?
How do I use Carrier411?
-
Open the Application Configurator program and change the value of the DISPATCH.EXE > 'Carrier Insurance Information Vendor' config option to 'Carrier411'.
-
Go to Safety & Compliance > Carrier411 Interface.
-
Go to the Tools menu and select Options. Enter your TruckMate login credentials and click OK.
The Carrier411 Setup window will be displayed.
-
Enter your Carrier411 'User Name' and 'Password'. These credentials will be given to you by Carrier411 when you sign up with their web site.
-
Enter the database connection information and use the Test button to verify the connection.
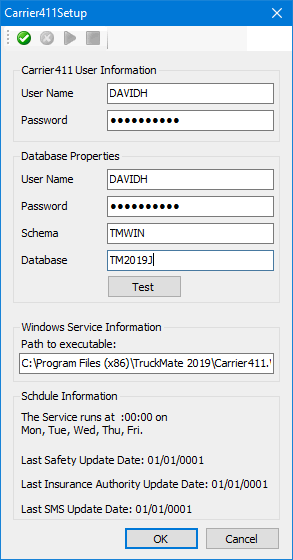
The setup screen will allow for the user to supply the Carrier411 system 'User Name' and 'Password' to allow the service to sign-on to the Carrier411 system automatically. The Carrier411 system username and password are also very important as they will be used on sign-on to the application to connect to the Carrier411 system. Inputting the correct data in this screen is crucial to the proper functioning of this application.
The user will be able to control the Windows Service ('Start', 'Stop') from within the setup screen. In addition, the user will be able to supply the TruckMate 'Database Properties' to connect the service to the appropriate database and schema.
If the connection to the Carrier411 system is lost at any point while the TruckMate system is being used, the system will try to resign-on the user the next time a Carrier411 procedure is invoked. If the sign-on process fails for any reason, an error message will be returned to the user informing them of the inaccessibility of the Carrier411 account. Note that the Carrier411 system automatically expires a signed on user session at midnight.
Once the Carrier Information application receives a successful sign-on, the 'SessionUUID' will be stored inside the CARRIER411_INFO table and will be required and used for any subsequent Carrier411 procedure calls.
In addition, once the Windows Service or the application are started successfully, each will force a synchronize request to the Carrier411 system to sync the carrier411 data stored inside the TruckMate database with the Carrier411 account and system.
-
Click the 'Install Service' button. After you receive the message "Service installed successfully", click the blue 'Play' button to start the service. Click the 'OK' button, and you can close the Carrier411Setup window.
-
Select the 'Tools Menu > Check Updates' option. After a moment, docket numbers from your Carrier411 web site account will show up on the left-side menu with up-to-date information.
-
Optional: if one of your docket numbers did not appear, you can use the 'Tools Menu > Monitoring > Start' option to manually add a docket number to the monitored list.
-
Select the 'Tools Menu > Link Profiles' option, then select an Interliner in the lower grid. Click the top grid to select a docket, then, on the toolbar, select the 'Link Vendor to Docket' icon (
 ). The interliner can be linked to the docket and the Interliner will disappear from the lower grid. Selecting the 'De-link Vendor from Docket' icon (
 ) will remove an Interliner from a previously linked docket, making it available in the lower grid again.
 -
If you would like to change the default safety score thresholds that will be used to accept/reject your linked Interliners during Carrier Assignment in the Dispatch program, modify the following Application Configurator program > DISPATCH.EXE options:
-
CarrierDriverSafeStatScore (defaults to '75')
-
CarrierSafetySafeStatScore (defaults to '75')
-
CarrierVehicleSafeStatScore (defaults to '75')
-
CarrierSafety* ('Unsatisfactory', 'Satisfactory' or 'Conditional').
-
-
-
Optional: if you would like to configure an administrative user that can override Carrier411 rejection notices (i.e. when attempting to assign a Carrier in the Dispatch program), open the Security Setup program > Security > Allow Changes tab and flag the 'DISPATCH - Allow Carrier Assignment when Safety Rating Limit Exceeded' for a particular user.
Notes:
-
In the Carrier411 program, you can only view docket info; you cannot save any changes you made to the docket info.
-
In the Carrier Info tab > Other Information, there is a filed 'Vendor ID' added. This shows which vendor is attached to the docket.
Menu and toolbar options
This topic describes menu and toolbar options and functionality that are specific to the System Integrity Checker window.
For information about common menu and toolbar options (i.e. File menu, Refresh, Multi-Company, etc.), see General menu and toolbar options.
Tools Menu
Options
Selecting this option will open the Carrier411 Setup window which allows the User to setup the Carrier411 Windows Service (CARRIER411.WINSERVICE.EXE).
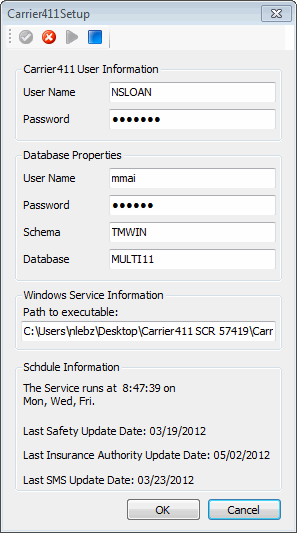
The setup screen will allow the user to supply the Carrier411 system 'User Name' and 'Password' to allow the service to sign-on to the Carrier411 system automatically. The Carrier411 system username and password are also very important as they will be used on sign-on to the application to connect to the Carrier411 system. Inputting the correct data in this screen is crucial to the proper functioning of this application.
The user will be able to control the Windows Service ('Start', 'Stop') from within the setup screen. In addition, the user will be able to supply the TruckMate 'Database Properties' to connect the service to the appropriate database and schema.
A schedule can be defined to run the service on specific times and dates. However, the schedule cannot be controlled by the normal user, and is only set through SQL statements. The user can still see the scheduled timing for running the service.
If the connection to the Carrier411 system is lost at any point while the TruckMate system is being used, the system will try to resign-on the user the next time a Carrier411 procedure is invoked. If the sign-on process fails for any reason, an error message will be returned to the user informing them of the inaccessibility of the Carrier411 account. Note that the Carrier411 system automatically expires a signed on user session at midnight.
Once the Windows Service or the application are started successfully, each will force a synchronize request to the Carrier411 system to sync the carrier411 data stored inside the TruckMate database with the Carrier411 account and system.
Monitoring
The options under the 'Monitoring' heading allow you to control the behavior of the Carrier411 Windows Service:
Start
Toggles the service on (wsStartMonitoring.cfc). You will need to specify a company docket number as a parameter. For input of the Docket Number, it is restricted to 8 characters, 2 of which are provided in the combo-box as 'MC', 'FF', and 'MX'. The next field provides for entry of a number up to 6 digits (integers only), for a total of 8 characters. The user cannot select 'OK' unless a 6 digit number is entered. The 'Cancel' button must be used to exit the screen if a valid number cannot be entered.
Note: Once a Carrier has been successfully added to the Carrier411 account, by default the new CarrierInformation application will make a call to the following two functions: wsGetCompany.cfc and wsGetInsPolicy.cfc. This is to ensure that once a Carrier has been added to the account, the entire set of Carrier411 system data is copied and populated into the TruckMate tables.
After the Carrier is added to the account and the data has been copied into the TruckMate database, the application will call the 'Link Profiles' option (see below). This is to allow the user to link the newly added Carrier411 carrier with a TruckMate Vendor ID in the Database.
Stop
Toggles the service off. You will need to specify a company docket number as a parameter. The Docket Number will default to the docket number of the currently selected carrier (same restrictions as with the 'Start' option above).
Get Status
This option allows you to get the current status of a particular Docket in real-time from the Carrier411 Database. On the Docket Input window that appear, select a prefix and enter the Docket Number (same restrictions as with the 'Start' option above), then select the 'OK' button to check the status.
Check Updates
Select this option to check for any Carrier411 updates that are available for your Carriers. If any information needs, updating, the program will do so automatically.
Link Profiles
This menu option will be used to synchronize the data inside the TruckMate database tables, specifically between the Carrier411 and the TruckMate VENDOR table. Basically, once a link is created, a new entry will be inserted into the CARRIER411_VENDOR table. Once this function is selected, a new grid will be added to the left side of the Carrier411 program, listing the TruckMate Vendor IDs that are not linked to Carrier411 dockets.
Once the user selects a Carrier from the first list, the CARRIER411_VENDOR.VENDOR_ID column will be used to populate the 'Vendor ID' as well as the 'Vendor Name' fields in the VENDOR table. The user will have access to changing the 'Vendor ID' field (and with it the 'Vendor Name' field) via the Customer & Vendor Profiles program if this is required at some point in time. Once a 'Vendor ID' (and 'Vendor Name') are selected, the user must click 'Apply' to commit the changes into the CARRIER411_VENDOR table in the TruckMate database.
Furthermore, if the user selects a Carrier from the second list, (since the link between a 'VENDOR_ID' and a docket number still does not exist) the 'Vendor ID' and 'Vendor Name' fields will be left empty. The user will have the capability to select the Vendor ID to be linked to the carrier. Once a 'Vendor ID' (and 'Vendor Name') are selected, the user must again click 'Apply' to commit the changes into the CARRIER411_VENDOR table.
Notes:
-
The 'Vendor Name' field will be auto-populated depending on the 'Vendor ID' field and will not be editable.
-
If required, you can link multiple TruckMate Carriers with a single Carrier411 docket.
Refresh
This option if selected, will re-fetch and then will re-display the latest information in the Carrier411 Interface window.
Toolbar
Link Vendor to Docket / De-Link Vendor from Docket
After selecting the 'Link Profiles' option, these two icons will be added to the Carrier411 program toolbar. Click the top grid to select a docket, then, on the toolbar, select the 'Link Vendor to Docket' icon (![]() ) to link that Interliner vendor to the docket.
) to link that Interliner vendor to the docket.
Selecting the 'De-link Vendor from Docket' icon (![]() ) will remove an Interliner from a previously linked docket, making it available in the lower grid again.
) will remove an Interliner from a previously linked docket, making it available in the lower grid again.
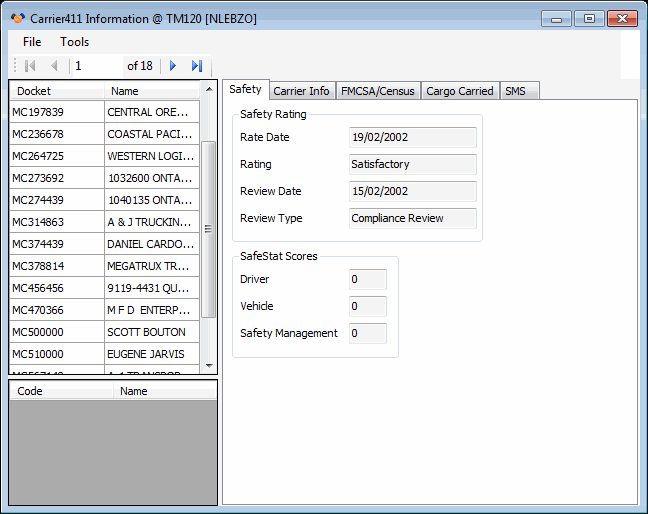
Main Window

The left side of the application contains 3 lists:
-
Monitored Docket Numbers: the top list on the left side of the screen lists all the docket numbers currently being monitored under your Carrier411 account.
-
Carrier411 Registered/Linked Carriers: This is the list of TruckMate carriers that have been attached to the monitored dockets from the Carrier411 account. You can attach multiple TruckMate Vendor records to a single docket number, if required.
-
TruckMate Carriers Not Registered: This is the list of carriers (Vendors) that are defined and used in TruckMate but are not registered and monitored inside the Carrier411 account.
Note: This section is not displayed in above screen shot, but can be accessed by the 'Tools Menu > Link Profiles' option.
Once a docket number record is selected from the topmost grid, all the Carrier411 information from the website is displayed inside the fields on the various tabs of the Carrier411 Interface application:
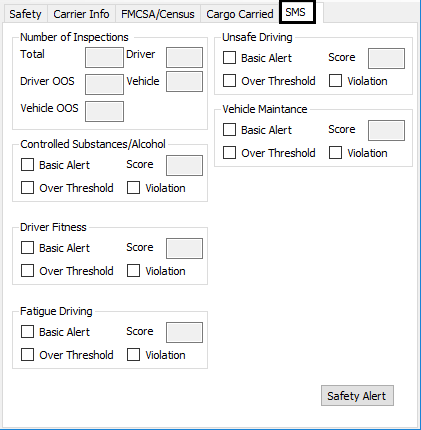
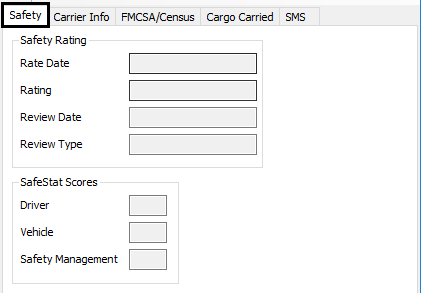
Safety tab
The Safety tab displays the Carrier411 Safety Rating and SafeStat Scores for the selected Carrier. These fields will automatically populate when a Docket is selected and the Carrier411 Windows Service is started / updated. All fields are read-only.
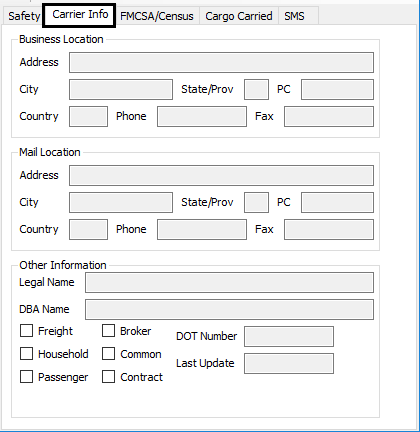
Carrier Info tab
The Carrier Info tab displays some general information regarding the selected Carrier from the Carrier411 Database, such as 'Business Location', 'Mail Location', and 'Other Information'. These fields will automatically populate when a Docket is selected and the Carrier411 Windows Service is started / updated. All fields are read-only.
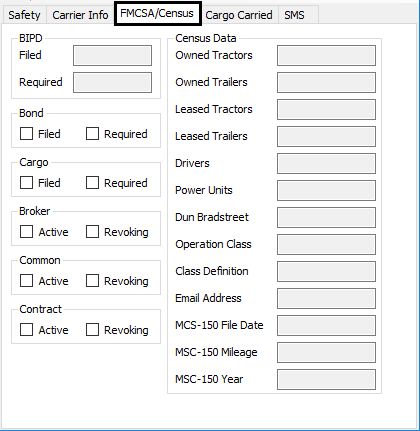
FMCSA / Census tab
The FMCSA / Census tab displays various information pulled from the Federal Motor Carrier Safety Administration (FMCSA) by the Carrier411 system, as well as some Census data collected for the specific Carrier.