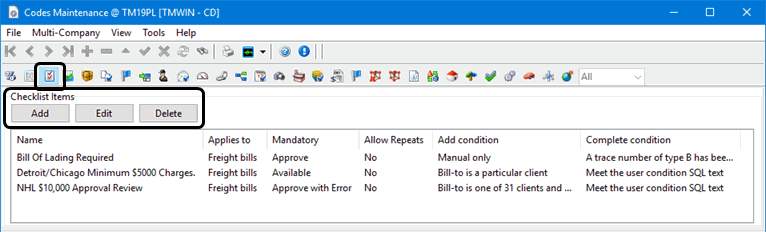
Checklist Items

The Codes Maintenance > Checklist Items tab uses a wizard to create a set of checkboxes associated with processing freight bills to ensure certain procedures are followed and required documents are collected. Checklists can also be associated with claims, clients and vendors.
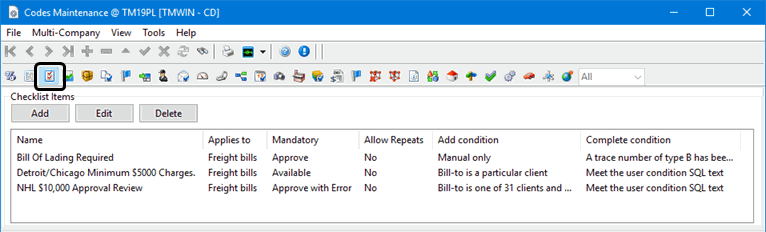
Checklists are used primarily in the Customer Service and Dispatch programs as a means of restricting freight bill processing until certain conditions have been met, such as requiring associated document images to be submitted to a user’s imaging system, or requiring a specific trace number be attached to a freight bill.
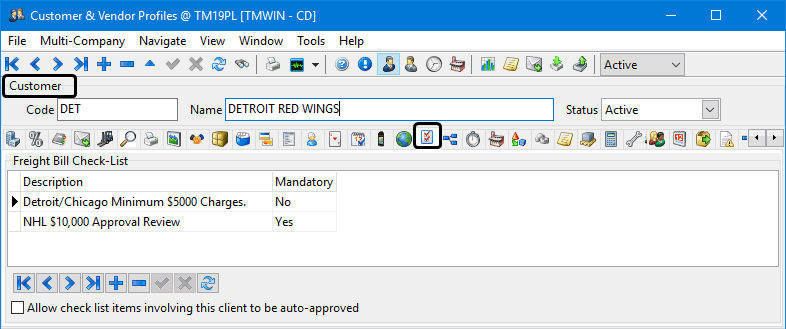
When the Bill-To Customer of a freight bill has checklist item tasks defined in the Customer & Vendor Profiles program > Customer > Freight Bill Check-List tab, the user will have to go through each associated mandatory checklist item (on the Customer Service program > Checklist tab) and set them to 'Completed = True' before the freight bill will be allowed to be set from a behavior status code of 'Entry' to a status code of 'Availability'.
The logic behind the Checklist process is fired when a freight bill’s status moves from a Status Code of 'Entry' behavior to one of 'Availability' behavior. To correctly implement the Checklist functionality, some steps must be completed:
-
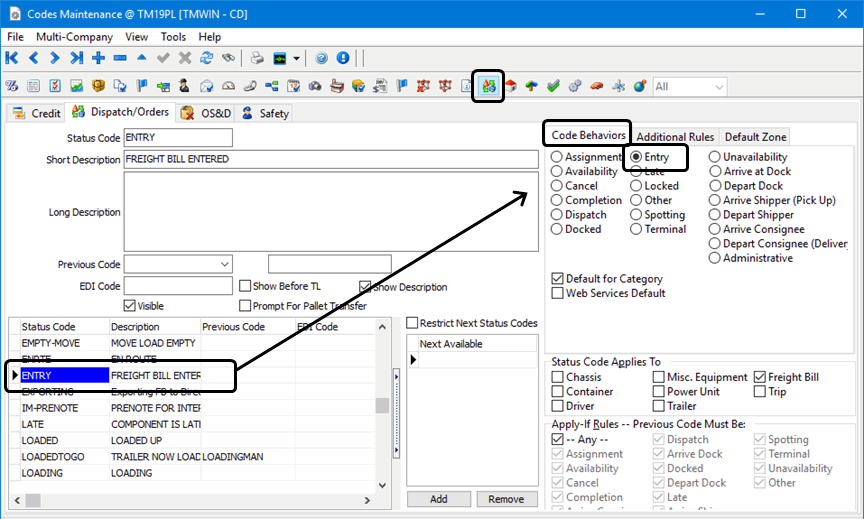
A new Status Code must already exist or be created on the Codes Maintenance program > Status Code tab with a 'Status Code Behavior Category' value of 'Entry'.
You have the option of creating a new Status Code that better reflects your order entry process rather than using the default 'ENTRY' Status Code created when TruckMate is installed.
-
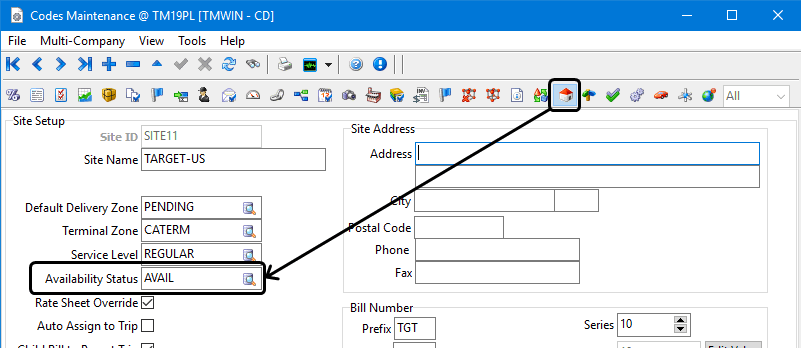
A behavior code must be set as the default 'Availability Status' code value on the Codes Maintenance program > Site Setup tab for the intended Site ID. Once the checklist has been satisfied for a freight bill created for this site, this 'Availability Status' is the status that will be assigned to the freight bill (if it is the Default for this Category).
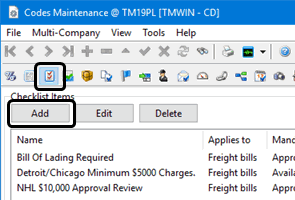
Once you have setup the backround statuses for each site, Click Add to create a new checklist.
Selecting the Add or Edit button opens the Checklist Item Wizard which guides you through the process of setting up a new Check List code or modifying an existing one.
Delete
Selecting this button deletes the selected checklist item in the below grid.
Grid Details
Name / Applies To / Mandatory / Allow Repeats / Add Condition / Complete Condition
These fields will all automatically populate based on the information supplied during the Add / Edit Check List Item Wizard process.
Shortcut Menu
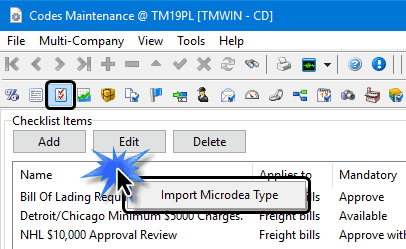
Import Microdea Types
Selecting this right-click shortcut menu option will automatically populate the Check List Item tab with checklist items that match the configured Microdea Imaging Types in the system (as configured on the Codes Maintenance > Imaging tab).
Note: This import will only work on machines that have the Synergize Viewer installed and correctly configured.
Adding a checklist using the Checklist Item wizard
This wizard determines the behavior and characteristics of the checklist item.
-
Go to Profiles > Codes Maintenance > Checklist Items tab.
-
Click Add.
-
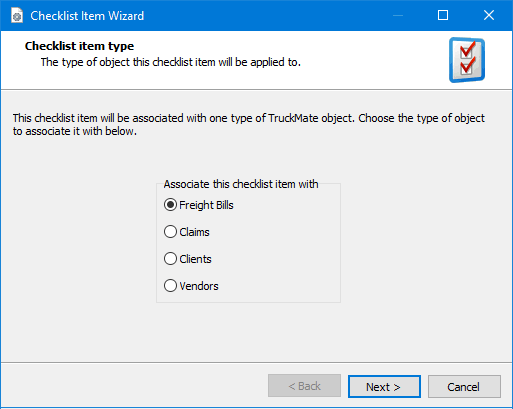
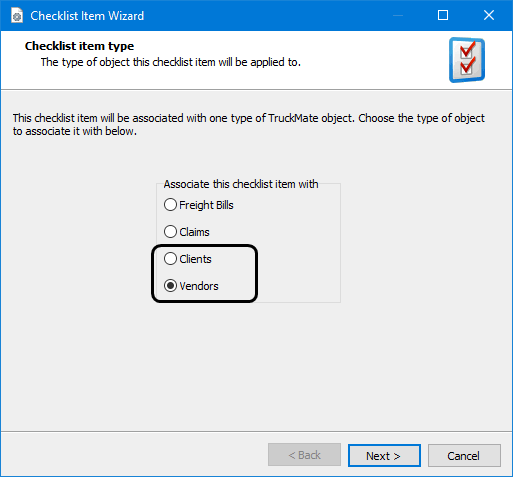
On the first page of the wizard, use the options to associate this checklist item with 'Freight Bills' (processed in the Customer Service program), with 'Claims' (processed in the Claims program), with 'Clients' (processed in Customer Profiles) or you can select to associate it with 'Vendors' (processed in Vendor Profiles).
-
Click Next to continue.
The options displayed on the second page of the wizard depend on the Check List type.
Checklist Items - Freight Bill
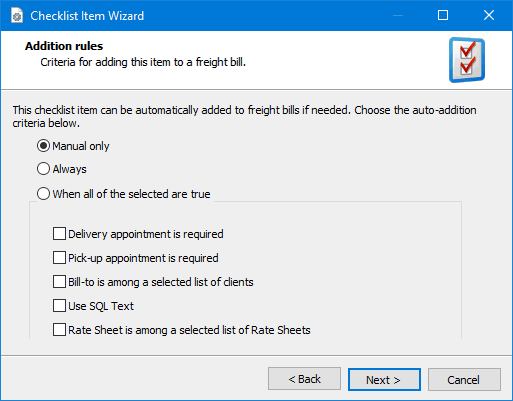
For the 'Freight Bill' checklist type, the following options are used to define the criteria controlling when the checklist will be assigned to a freight bill.
-
Manual Only: the Manual Only' option specifies that this Checklist item can only be added to Freight Bills manually. You will need to use the Customer Service program > Checklist tab to add the Checklist item manually.
-
Always: when the 'Always' option is selected, the Checklist item will always be added to Freight Bills created in the Customer Service program.
-
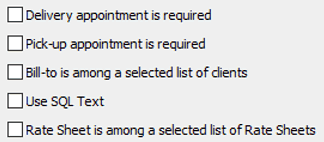
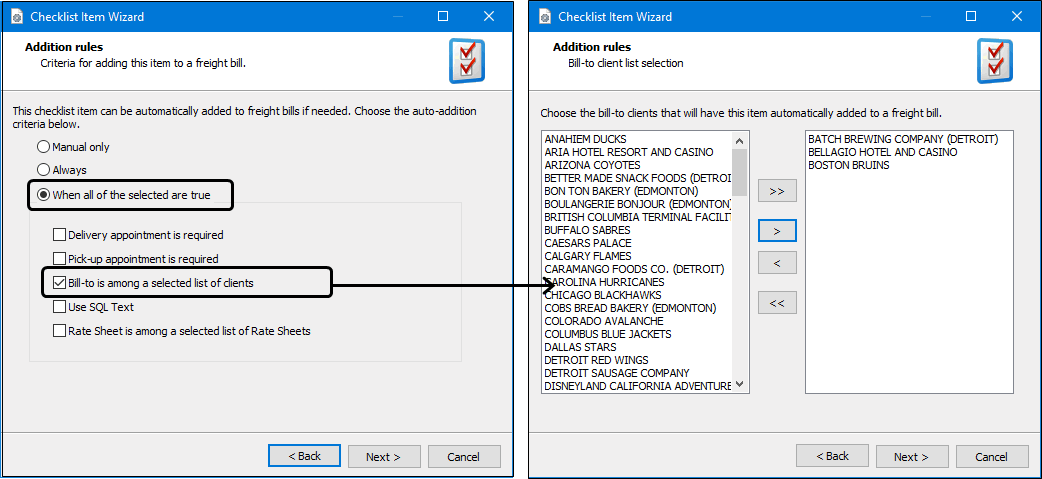
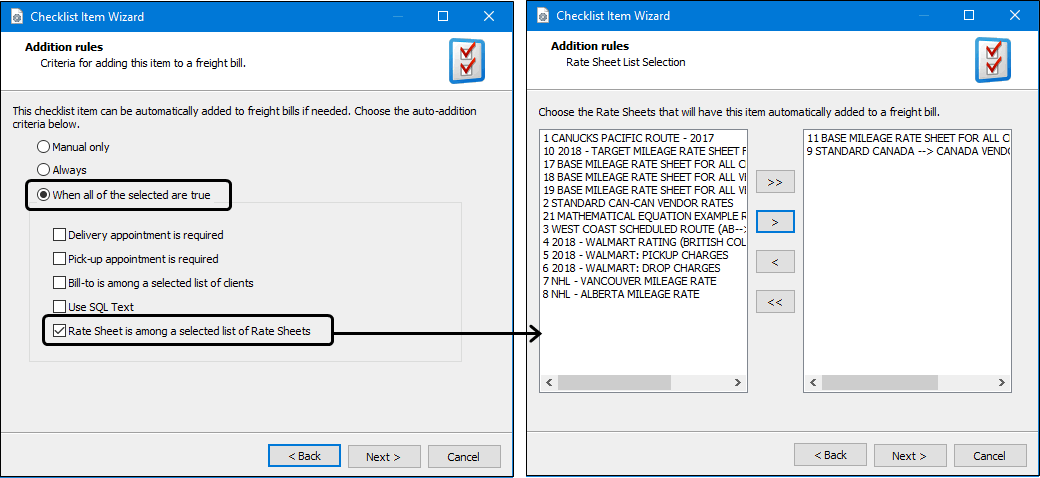
When all of the selected are true: selecting this flag allows you to specify any one (or a combination of all five) of the following options: 'Delivery appointment is required', 'Pick-up appointment is required', 'Bill-To is among a selected list of clients', 'Use SQL Text' and/or 'Rate Sheet is among a selected list of Rate Sheets'.
-
If you select the '*Bill-To is among a selected list of clients' option, the next screen will require you to choose one (or more) clients from your system. Note that this option may require a lot of processing depending on the number of Clients that exist in your Database. If you have many clients, expect some delay when processing the check-list item. In this case it is recommended that you complete this task when other users are not connected to the database.
-
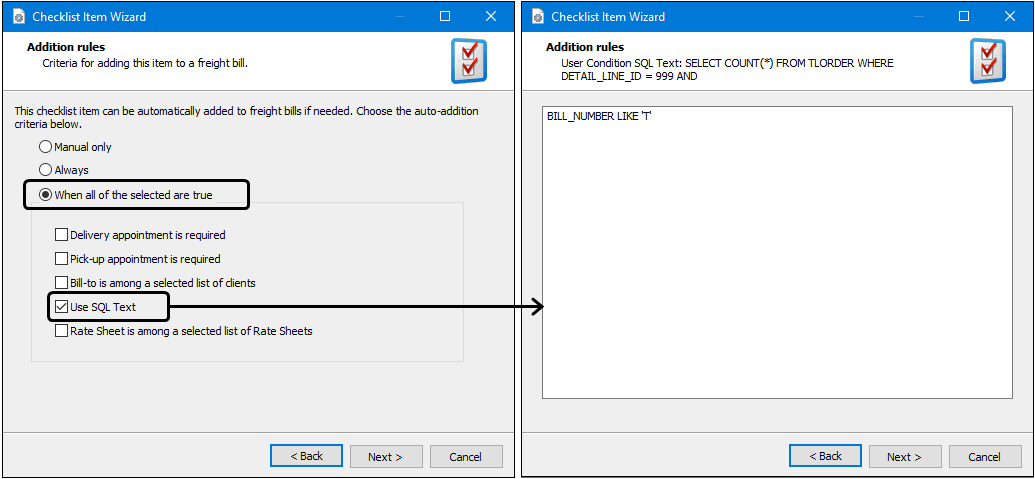
If you select the 'Use SQL Text' option, the next screen will be used to define the SQL query that will need to be satisfied in order for the checklist item to be applied to the freight bill.
-
If you select the '*Rate Sheet is among a selected list of Rate Sheets' option, the next screen will allow you to choose which rate sheets will need to be applied to freight bill detail lines in order for the checklist item to be applied. Note that checklist items that are associated with Rate Sheets can be viewed on the Rates Maintenance program.
-
Select Next to move onto the third page of the wizard. (The options in the following screens will vary depending on the options selected.)
-
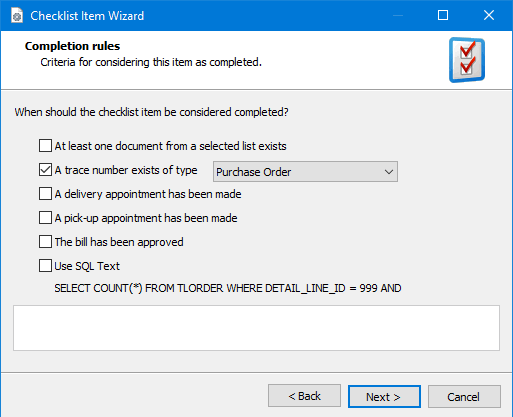
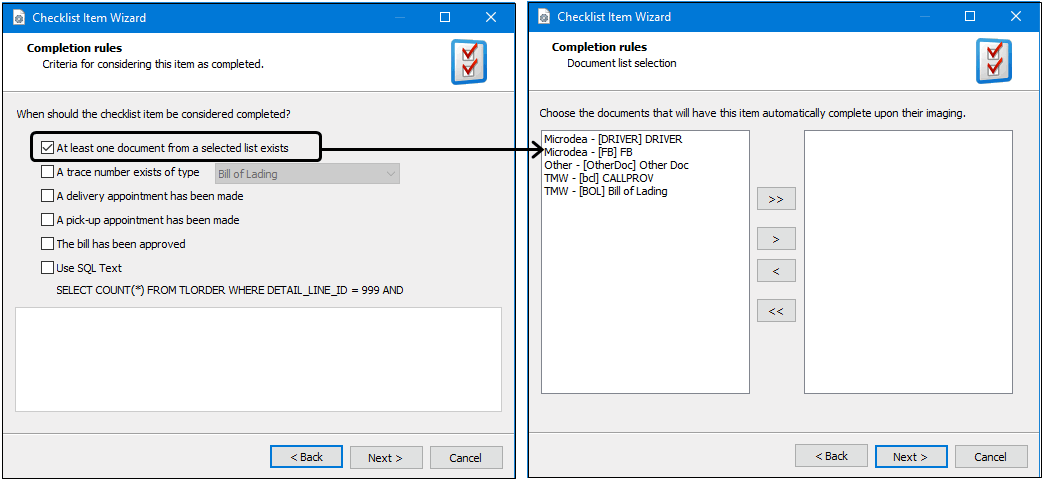
Use the checkboxes to define the checklist’s 'Completion' characteristics. You can select any number of criteria that will be used to determine when the checklist item will be deemed "completed":
-
At least one document from a selected list exists.
-
A trace number exists of type. For this option, select a trace number type from the dropdown list.
-
A delivery appointment has been made.
-
A pick-up appointment has been made.
-
The bill has been approved.
-
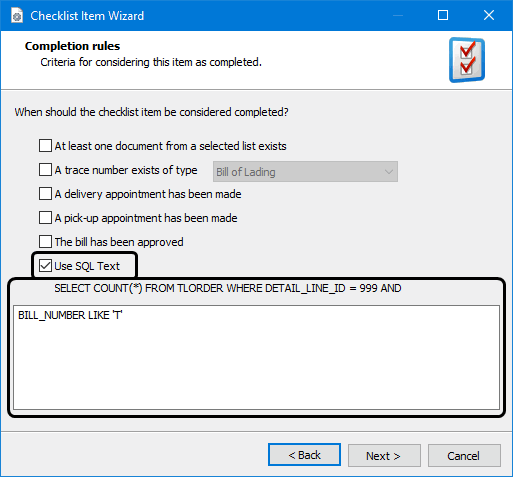
Use SQL text. For this option, you must supply a SQL text in the provided text box. If this option is selected, the checklist item will be deemed completed if the condition specified by the SQL statement is true.
-
-
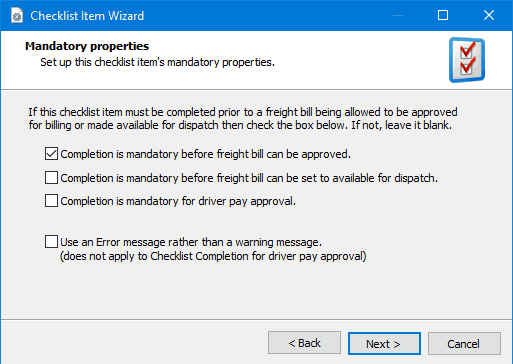
For the Freight Bill checklist type, select 'Next' to move onto the fourth page of the wizard, which allows you to specify the following options concerning Checklist completion:
-
Completion is mandatory before freight bill can be approved*: when checked, Freight Bills that have Checklist Items with a 'Complete' value of 'False' will throw an error when the user attempts to use the 'Approve' button on the Customer Service program > Billing tab.
-
Completion is mandatory before freight bill can be set to available for dispatch*: when checked, Freight Bills that are set to an 'Entry' behavior status code will not be allowed to be changed to an 'Availability' behavior status code (from either the Dispatch program > Available Freight Bill Grid or the Customer Service program > Status tab) until that Freight Bills mandatory Checklist Items are 'Completed = True'.
Note that users have the ability to view (and edit) Checklist Item status from within the Dispatch program > Available Freight Bill Grid by selecting the right-mouse Context Menu option 'Checklist Items', which will open the Checklist Items window. However, the same status constraint applies, when attempting to change the status to an 'Availability' behavior status code manually before the mandatory check list item is complete, a warning will be generated and the change of status will be prevented.
Note that the status changing constraint applies only to attempts to change the status to an 'Availability' behavior status code but it doesn’t apply to changing the status to 'Docked' status behavior.
-
Use an Error message rather than a warning message. Affects the appearance of the message box presented to the users.
-
-
-
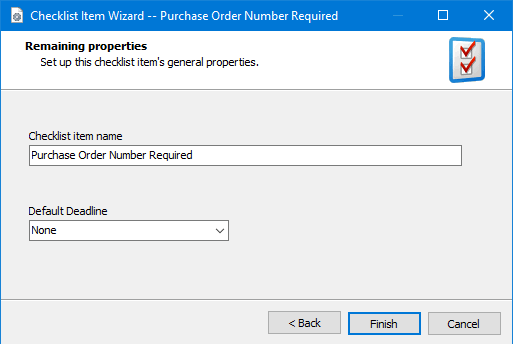
Select Next to access the final page of the wizard.
-
Enter a 'Checklist Item Name' for your newly created checklist item.
-
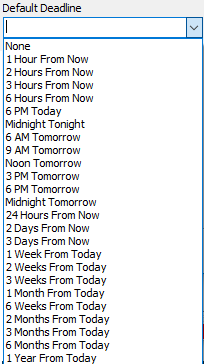
Use the drop-down list to select a value for the default deadline.
-
-
Select Finish to complete the process.
The new checklist item will appear in the list.
Checklist Items - Claims
A claims checklist can require you to satisfy a checkbox requirement to allow the claim to proceed. It provides a way to ensure that each of the claims are reviewed first.
-
Go to Profiles > Codes Maintenance > Checklist Items tab and click Add.
-
Select Claims.
-
Click Next to continue.
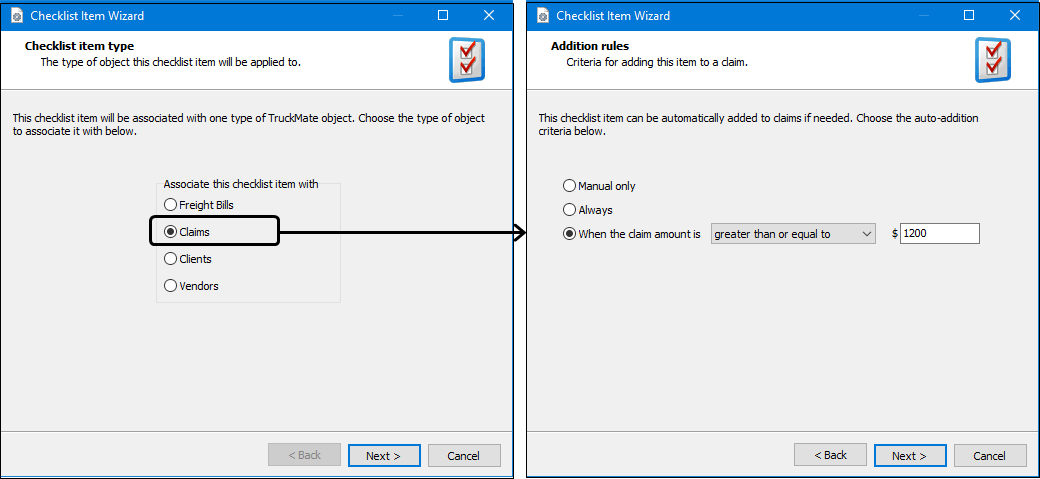
For Claims, the next wizard window displays the following options:
-
Manual Only: the Manual Only' option specifies that this Checklist item can only be added to claims manually.
-
Always: when the 'Always' option is selected, the Checklist item will always be added to any claim created.
-
When the claim amount is: This radio button, if selected, allows the user to restrict this check list by the monetary value of the claim. The user can select a condition ('Greater than or equal' or 'Less than or equal') and then select the value that should satisfy the condition. In other words, this checklist item will only be added to claims that satisfy the monetary value condition specified.
-
-
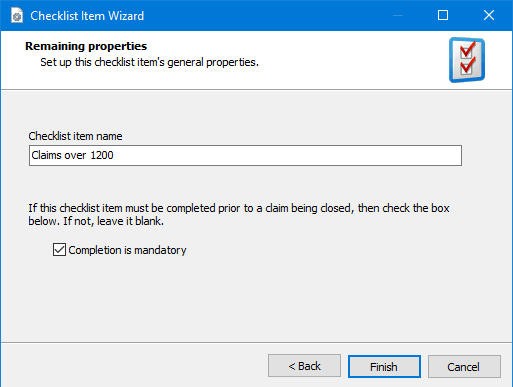
Click Next to display the final wizard window.
-
Select the 'Completion is Mandatory' checkbox if you want the system to enforce the completion of this item before closing the claim.
-
Click Finish to create the item and exit the wizard.
Checklist Items - Clients / Vendors
-
Go to Profiles > Codes Maintenance > Checklist Items tab and click Add.
-
Select Claims.
-
Click Next to continue.
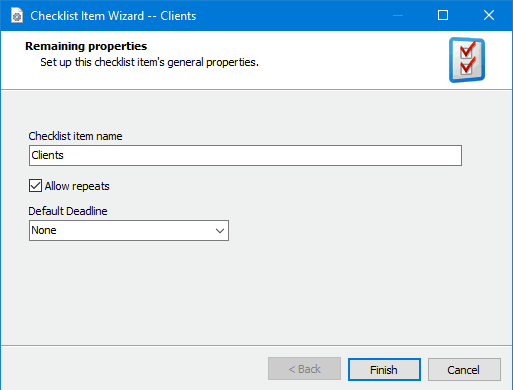
For the 'Client' or 'Vendor' checklist types, there is only one wizard window
-
Enter a descriptive name for the checklist.
-
Select the Allow repeats checkbox if you want to repeat the item for the same Customer/Vendor. For example, if you want a vendor to renew the insurance every year and submit a copy.
-
Click Finish to create the item and exit the wizard.