CrossDock Traffic Lanes
| As of TruckMate 2022.4, CrossDock is no longer available. If you are upgrading from an earlier version of TruckMate, use Multi Mode Dispatch for those tasks that you performed using CrossDock. For details, see the 2022.4 New Features Guide. |

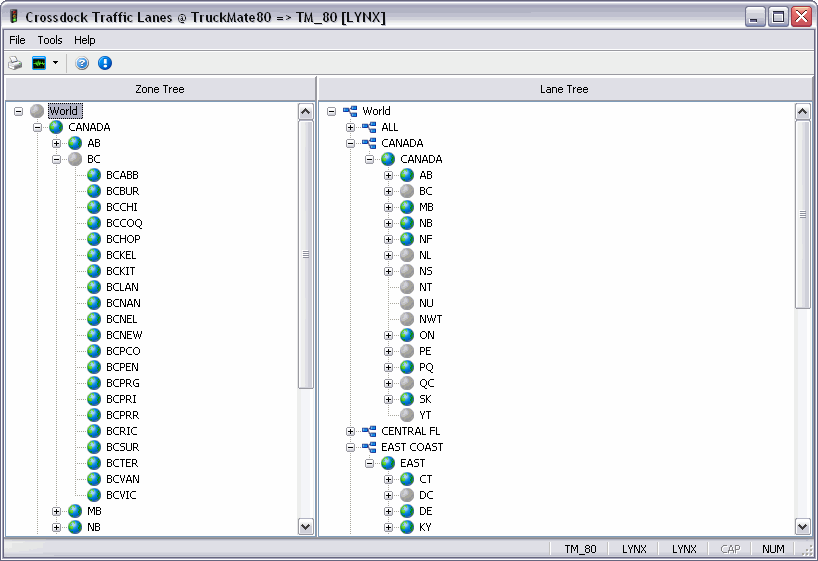
The CrossDock Traffic Lanes program is used to define "lanes" that are used to filter freight bills in the CrossDock program and "routes" that are used similarly in the City Dispatch program:
-
Lane: a collection of zone codes that form a single region you service from the currently selected terminal in the CrossDock program. In the CrossDock program, you can select a lane for the purpose of filtering freight bills. When a lane is selected as a filter, only freight bills whose end zone matches one of the zone codes included in the lane are displayed. The lane tree hierarchy is similar to the zone code hierarchy; however, unlike the zone code tree, the same zone code can be included in multiple lanes in the lane tree.
-
Route: a route is a collection of zone codes serviced together for pickup and delivery from the currently selected terminal in the City Dispatch program. When multiple routes are defined for a terminal, the filter can be applied to show those Trips which will be picking up or delivering freight to those zone codes which are part of the route definition. For example: the North Seattle Terminal services the 5 main regions on the north side of the city. All zip codes in the Downtown district, Denny Regrade, Eastlake, Magnolia, Pioneer Square, Pike Place Market, Queen Anne Hill, Lower Queen Avenue, Sodo, and South Lake Union neighborhoods are grouped into a 'Central' route.
The right side of the screen displays the Lane/Route Tree. Click the right mouse button in the Lane Tree area of the screen to invoke a menu of options. The 'World' lane is created by default when you create your database, and cannot be deleted or renamed.
To access CrossDock Traffic Lanes:
| From this location | Go to |
|---|---|
TruckMate Menu and TruckMate Task List |
|
Windows Start Menu |
TruckMate 20xx > CrossDock Traffic Lanes |
Windows Explorer |
C:\Program Files (x86) > TruckMate 20xx > Lanetree.exe |
Menu and toolbar options
There are no unique menu and toolbar options and functionality specific to the Crossdock Traffic Lanes window.
For information about common menu and toolbar options (i.e. File menu, Refresh, Multi-Company, etc.), see General menu and toolbar options.
Zone Tree
The left side section of the CrossDock Traffic Lanes program displays the zone code hierarchy ("Zone Tree"). Zone codes and zone hierarchies are setup and maintained in the Codes Maintenance program > Zones Codes Tab.
| This section of the program cannot be edited in any way. If you require new zone codes or need to adjust the position of a zone in the zone tree, do so via the Codes Maintenance program > Zones Codes Tab. |
Lane Tree
The right side section of the CrossDock Traffic Lanes program is where most of the work takes place. In the Lane Tree section, the user has access to a right-click context menu that will allow them to create/edit/delete CrossDock program 'lanes' and City Dispatch program 'routes'.
| The 'World' item at the top of the lane/route hierarchy is created by default when you create your database, and cannot be deleted or renamed. |
To move an existing lane/route into a different position in the lane tree, use the left mouse button to click and drag the new lane/route into the desired position in the hierarchy. The Lane Tree can be expanded and collapsed by clicking on the '+' and '-' symbols displayed to the left of the lane/route names.
To add a Zone to a lane/route, use the left mouse button to click and drag the zone from the Zone Tree area on the left side of screen to the lane name. You can also add zones to lanes/routes by clicking and dragging zones already assigned to existing lanes/routes. This will not 'move' the zone from the original lane/route to the new lane/route; it will copy the zone to the new lane/route, so that the zone will be assigned to both lanes/routes.
Context Menu
Delete
To Delete a lane, highlight the lane you wish to delete in the Lane Tree, then click the right mouse button and select the 'Delete' option from the menu. Alternatively, you can highlight the lane you wish to delete and hit the <Delete> key on your keyboard to delete the lane.
Edit Lane / Route Properties
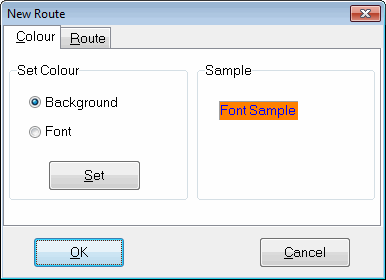
Right-clicking an existing lane or route and selecting this option will open the Lane / Route Properties window, which allows you to determine the font and background color for the selected lane or route when it is used in either the CrossDock or City Dispatch programs.
Tab |
Definition |
Colour |
Select either the 'Background' or 'Font' radio option and then click the 'Set' button to choose the colour. The 'Sample' section will update based on your choices. The colour chosen for the route will be used when the route is displayed in the Lane Tree section but is not the selected route, and the text colour value will be used in the City Dispatch program > Active Trips/Routes List when it is not selected. |
Route |
The Route Tab contains a single flag, labelled 'Is Route' that will be checked if the current record is a route (i.e. used in City Dispatch) or un-checked if the record is a lane (i.e. used in CrossDock). |
New Lane
Select this option to create a new lane record (used in the CrossDock program). The new lane will be created beneath the currently highlighted record in the Lane Tree hierarchy.
New Route
Select this option to create a new route record (used in the City Dispatch program). The new route will be created beneath the currently highlighted record in the Lane Tree hierarchy.
Rename Lane / Route
To rename a lane or route, highlight the record you wish to rename in the Lane Tree, then click the right mouse button and select this option. In the Rename Lane / Route window, enter the new name, and then click 'OK'.
Rebuild Lane Tree
When you Create or Edit lanes and routes, the Lane Tree automatically rebuilds itself. However, should the Lane Tree hierarchy become corrupted, click the right mouse button in the Lane Tree section and select 'Rebuild Lane Tree' option. This will force a manual rebuild of the Lane Tree.