Rates Maintenance

The Rates Maintenance program is used to configure Automatic Rating. On the Details tab of the Customer Service program and in the Quick Bill Entry program, charges will automatically be calculated based on the shipment details you enter, in combination with the origin and destination zones specified in the bill header. You can set up as many Rate Tables as you need; they can be configured to apply to all your Customers and Interliners, or only to those Customers and Interliners you specify. In this program, you can also generate and print quotes, generate printed rate proposals and confirmations, and view expired Rate Tables assigned to Customers and Interliners.
How Do I?
How do I configure my rate tables?
-
On the Rate Sheet Tab of the Rates Maintenance program (RATES.EXE), enter the header details for the Rate Table. These fields include the currency of the Rate Sheet, the commodity class to which the Rate Table applies, the effective dates for the Rate Table, etc. See the Rate Sheet - Header section for details.
-
On the Rate Sheet Tab, enter the break values, zones and charges for the Rate Table. See the Rate Sheet Tab’s Grid section for details.
-
Assign the Customers to the Rate Sheet using the Attachments section of the Rate Sheet header. Either click the 'C' button in the Attachments section, or use the F6 function key, to invoke the form. You can also assign Interliners to the Rate Sheet using the 'V' button or the F7 function key.
-
On the Client Info Tab, Approve the Rate Sheet. See the Client Info Tab’s Proposals section for further information.
-
On the Simulation Tab, test the Rate Sheet and, if desired, generate quotes for the Customer based on the simulation. See the Simulation section for further information.
How do I configure automatic rating?
Follow these steps for a basic point-to-point rate sheet:
-
Open the Rates Maintenance program (RATES.EXE).
-
On the Rate Sheet Tab, enter the header details for the rate table. Select a 'Sheet Type' of 'Pnt', the 'Allow 'As' Rating', and the Service Level. In the Units section, enter the rates per information (in this example you could enter 100 in the 'Rates per' field, and select LB as the unit. Select LB in the Break Units field. Set the currency field to the appropriate one. In the Start Zone area, check 'Allow 'Between' Rating', and enter a Start Zone. In the Attachments area, select the 'C' for Clients and add in the appropriate clients for this rate sheet. Place a checkmark in the 'Approved' area on the far right-hand side of the screen. Now you’re ready to enter in the end zone or drop-off destinations in the grid.
-
Place your cursor on the grey area in the grid and use your context menu to select 'Adjust To-Zone'. Enter the label information. In this instance, we’ll enter 'Burnaby'.
-
Now, place your cursor in the title area of the grid and using your context menu again select 'Adjust Break'. Enter the label information, in this instance 'Regular Charges'.
-
Enter a charge amount in the cell.
-
Repeat steps 3 through 5 as necessary.
-
Save your rate sheet. If this option is disabled, select the 'Edit' button, and then the 'Save' button.
-
Go to the Rates Maintenance, Client Info Tab. You should see your rate sheet entry in the grid. Place your cursor in the grid and using your Context Menu (right-click), and select 'Approve'.
-
Now, go to the Client Info, Confirmations Tab and you should see your rate sheet entry in the grid.
-
To test the rate sheet, go to the Simulation Tab, and, if desired, generate quotes for the customer based on the simulation. See the Simulation Section documentation for further information.
-
Open the Customer Service program (CSERV.EXE).
-
Enter in a Freight Bill where this rate sheet would be used. (i.e., the Client information is the same, the start zone is the same, etc.,). On the Details Tab, enter in the following as per this example: Pieces (1), Pcs Units (LD), Weight (40,000), and Wgt Units (LB) as per the example. Click the 'Save/checkmark' button. Post the Freight Bill by clicking the 'Post' button.
-
You should notice that your rate sheet name and ID will appear in the Customer Service program, Details Tab if you’ve completed this process correctly. As well, the rating amounts as specified will appear correct on the Details tab.
How do I setup detention rating?
-
Open the Application Configurator program (CONFIGEXPLORER.EXE), click: Start > Programs >TruckMate > Utilities > Application Configurator
-
Click on 'RATES.EXE' and set the value for 'Use Detention' to 'True'.
-
Open the Codes Maintenance program (CODES.EXE).
-
If not already created, you must add four new Dispatch Status Codes (done on the Status Tab of Codes Maintenance):
-
ARRSHIP (with 'Behaviour Category' of 'Arrive Shipper').
-
DEPSHIP (with 'Behaviour Category' of 'Depart Shipper').
-
ARRCONS (with 'Behaviour Category' of 'Arrive Consignee').
-
DEPCONS (with 'Behaviour Category' of 'Depart Consignee').
-
-
Create an Accessorial Charge Code for Detention Billing purposes (done on the Acc Charges Tab of Codes Maintenance):
-
Name the Accessorial Charge 'DETENTION'.
-
Assign it as a 'Flat Charge' and select both 'Custom Code Only' and 'Interliner Charges' as options.
-
Now, you must crate a 'Base Rate' for your Detention Billing purposes. To accomplish this, open the Rates Maintenance program (RATES.EXE).
-
Select the Detention Tab and give the Rate Sheet a name like 'BASE DETENTION RATE'. Complete all the required fields on the Detention Tab for your new Base Rate. For more information on these fields, see the Detention Tab help page.
-
You must now create three separate types of Billing Options in Rates Maintenance:
-
ACC CHARGES (this will create the Detention Billing on the current Freight Bill).
-
INVOICE (this will create a separate Invoice for Detention Billing).
-
REPORTING (this will create information for tracking purposes only).
-
Detention Billing is now ready to be used in your other TruckMate programs. See the online documentation for the TruckMate Service Host program > Scheduler Detention Service to see how to setup automatic Detention Billing Warnings for your Clients.
How do I set up multi-point rating?
Multi-Point Rating is a new concept in rating that greatly enhances the LTL functionality of TruckMate. In a Multi-Point scenario, an LTL movement can be rated differently depending on which kind of movement is taking place. Instead of using a single rate sheet for the pick, linehaul and delivery, you can specify a rating sequence and apply different rate sheets for each leg in the sequence. Multi-Point rating is a powerful new way to enhance your LTL rating.
Multi-Point rating is however quite complex. There are several new concepts one must understand before attempting to setup a Multi-Point Routing Code and all the information it requires to successfully rate.
Key Concepts
Field |
Definition |
Terminal Plans |
For Multi-Point Rating to be successful, you must have a well-defined terminal plan. This means that your zone codes and your terminal codes must be tied together correctly. The Terminal Maintenance program is a good place to start when defining your terminal codes so that any zone codes attached to them will correctly pull the terminal when the terminal plan is created. |
Travel Modes |
Travel Modes are codes that outline the various ways your LTL operation ships freight (i.e. 'MAINLAND', 'OCEAN', etc.). Travel Modes are setup via the Codes Maintenance program > Travel Modes Tab. |
Rate Modes |
In Multi-Point Rating, Rate Modes can be assigned to each leg of a Routing Code, and then have rate sheets apply based on the Rate Mode for each leg of the specified route. |
Routing Codes |
Routing Codes are the single component that ties together a Multi-Point Rating setup. A single Routing Code contains any number of 'Rules', which will be used to build out the legs of a Multi-Point Rating movement, and tell the system which rate sheets to apply for those legs (as determined by the 'Rate Mode' attached to the leg sequence and any rate sheet that has the same 'Rate Mode'). For more information on Routing Codes, click here. |
Setup Steps
Setup of a Multi-Point Rating scenario is quite complex, but is easier if your LTL operations have a very specific routing sequence. You may want to schedule some implementation time with TMW Systems to make this setup process as easy as possible. Contact Trimble Transportation Support to schedule implementation time.
-
Use the Codes Maintenance program > Travel Modes Tab to configure the Travel Modes that your company requires for its LTL operations. These are specific to your company, but could include Travel Modes such as 'MAINLAND' (for pickup up freight from a terminal), 'OCEAN' (for shipping said freight over the ocean) or 'AIR' (shipping via airline carrier) and 'ISLAND' (for delivery at an island location), for example.
The Terminal Maintenance program should also be used to tie specific Travel Modes to the Terminals that should be using them.
-
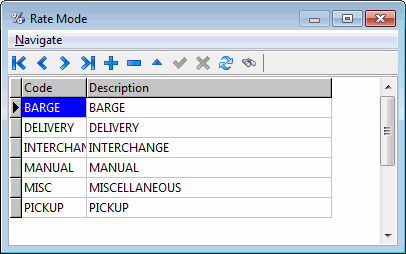
Use the Rates Maintenance program > Setup menu > 'Rate Mode Setup' option to setup your Rate Mode codes. Rate Mode codes should differ in name from the Travel Modes that they will be associated with. You can also setup multiple Rate Modes for a single Travel Mode (i.e. in the following example, there is an 'Interchange' code and a 'Barge' code that will be tied to the 'Ocean' Travel Mode. One will apply to cross-ocean legs, while the other will apply to shorter island to island legs).
This illustration displays sample Rate Modes.
-
Use the Rates Maintenance program > Setup menu > 'Routing Codes' option to setup the Routing Codes that will tell the system how to build out the Multi-Point Rating legs. See the Routing Config Codes window for more information on how to setup Routing Codes.
-
Assign the Routing Code you have created to any number of your Client codes. This can be done from the Routing Config Codes window > Assignment Tab or from the Rates Maintenance program > Client Tab > Routing Tab.
-
Create the various rate sheets that will be used for each leg of the Routing Code. When creating the rate sheets, ensure that the Rate Mode for each leg in the Routing Code has been entered into a specific rate sheet (via the Misc Tab > 'Rate Mode' field).
For each leg of the Routing Code (Pickup, Interchange and Delivery, for example), you should have a matching rate sheet with the provided Rate Mode of the Routing Code leg.
-
Once the rate sheets are created, you should be ready to begin initial testing of your Multi-Point rating scenario. Close out of all applications and then change the Application Configurator program > CSERV.EXE > 'Show Multi Point Rating' config option to 'True'.
-
Open the Customer Service program and enter a test freight bill for the client you attached to the Routing Code. When you enter a detail line on the Details tab, you should see the new Multi Point Rating grids populate with the leg information from the Routing Code (left grid) and the Rate Sheets tied to each of the legs by their Rate Modes (right grid).
On the Customer Service program > LTL/Routing Tab, you’ll also see a new lower grid that outlines some further details from the Routing Code legs.
How do I add an accessorial charge to my rate sheet?
The ability to tie Accessorial Charges to your Rate Sheets is configured using the Rates Maintenance and Codes Maintenance programs.
-
Open the Rates Maintenance program (RATES.EXE).
-
Setup a new Rate Sheet.
-
Open the Codes Maintenance program (CODES.EXE).
-
Select the Accessorial Charges Tab. Here, create an Accessorial Charge code as desired, and in the Charge Grid, double click the 'Rate Sheet ID' field and choose the Rate Sheet you created in steps '1' and '2'. Save this Acc. Charge code by clicking the 'checkmark' button.
-
Back in the Rates Maintenance program, find the Rate Sheet you have been using and click on the 'A' button. A new window, for Accessorial Charges, will appear. Inside this window you will see the Accessorial Charge code you created and attached to this Rate Sheet. You may select it by double clicking, or you can right click to access the Context Menu options. Choosing the 'Edit Acc Charge Codes' option will take you back to the Codes Maintenance program, with the selected Acc. Charge code’s details displayed.
How do I apply a discount to a minimum rate for one of my customers?
-
Open the Rates Maintenance program (RATES.EXE).
-
Setup a new Rate Sheet that includes a 'Minimum' amount value as the first column. Save the Rate Sheet by clicking the 'checkmark' button.
-
Open the Customer & Vendor Profiles program (PROFILES.EXE).
-
Browse for the Customer Code you would like to use for the Discounted Minimum Rate Sheet. Once you have found the Customer you would like to use, select the Rating Tab.
-
Enter the percentage value you would like to grant the client in the '% Discount' field and save the record by clicking the 'checkmark' button on this form.
-
Open the Customer Service program (CSERV.EXE).
-
Apply the Rate Sheet you created in step '2' to the Freight Bill and select the Customer with the '% Discount' you altered in step 5.
-
Enter the details of the Freight Bill, making sure that the Freight Bill’s charges to do not exceed the 'Minimum Amount' defined in the Rate Sheet. Save the Freight Bill using the 'checkmark' button at the bottom of the Customer Service window.
-
The Sub-Total field should populate with the Discounted Minimum Rate.
How do I calculate a split-rate on a rate sheet?
A Split Rate Sheet is used to calculate what percentage of the total Freight Bill revenue each Intermodal Carrier will receive. The percentage is determined by subtracting the total miles traveled by an outside carrier (interliner) from the total miles calculated on the Freight Bill (based on the start zone and end zone) and the difference in miles NOT traveled by the outside carrier.
Calculation of split-rate:
-
Determine the total miles traveled by the outside carrier
-
Determine the total miles NOT traveled by the outside carrier (total Freight Bill mileage minus total outside carrier mileage)
-
If the total outside carrier miles is greater than the total miles NOT traveled by the outside carrier, locate the outside carrier mileage in the rows, then locate the mileage NOT traveled by the outside carrier in the columns
Total miles NOT traveled by outside carrier:
-
If the total outside carrier miles is less than the total miles NOT traveled by the outside carrier, locate the outside carrier mileage in the columns, then locate the mileage NOT traveled by the outside carrier in the rows.
-
The number at the intersection of the two (row/column) is the Short-Line Carrier’s percentage split.
-
If the total outside carrier miles are greater than the total miles NOT traveled by the outside carrier, then the percentage of the Freight Bill revenue that the outside carrier would receive is calculated as follows:
-
(100 - (Short-Line Carrier’s percentage)) = percentage of the Freight Bill, (revenue to outside carrier) for example:
-
100
-
100 - 41 = 59
-
-41
-
The outside carrier would receive 51% of the total Freight Bill revenue.
-
=59
-
-
If the total outside carrier miles are less than the total miles NOT traveled by the outside carrier, then the percentage of the Freight Bill revenue that the outside carrier would receive is calculated as follows:
-
Short-Line Carrier’s percentage =
-
percentage of the Freight Bill
-
revenue to outside carrier
-
-
How do I use the D83 functions within Rates Maintenance?
-
Open the D83 Tariff Import program (D83IMPORT.EXE).
-
Follow the instructions outlined in the D83 Tariff Import documentation to complete the Import of the D83 Rates. After the Rates are imported, you must set up a new Rate for D83
-
Open the Rates Maintenance program (RATES.EXE).
-
On the Rate Sheets Tab, setup your Rate Sheet using the 'Split' Type and specifying the 'Rate Tariff' as 'D83'
-
Once the Rate Sheet is created, you can then apply it to your Vendors. Do so by using the 'F7' key of your keyboard or by clicking the 'V' button in the Attachments Section of the Rate Sheets Tab. It is a good idea to apply it to at least one Vendor for testing.
-
Go to the Vendor Info Tab and filter on the Vendor ID you attached to your new D83 Rate Sheet and make sure the Rate Sheet is under the Confirmations Tab.
-
The D83 Tab will be blank; it normally does NOT need any additional configuration. Now, to test your new D83 Rates.
-
Open the Customer Service program (CSERV.EXE).
-
Create a new Freight Bill and then add the Vendor that is attached to the D83 Rate Sheet in to the I/P Tab.
-
Click the 'Rate' button and a rate should auto-generate.
How do I Group Zone Codes together for specific Customers for the purposes of Automatic Rating?
You can do this for customers or vendors now.
-
Open the Rates Maintenance program (RATES.EXE).
-
Click the Rate Base tab.
-
Use the '+' in the navigational bar to add a new record.
-
If this zone code is specific to one client, enter their Client ID. If not, leave the Client ID field blank.
-
Enter the Lowest Zone or partial zone that you want included in the Rating Zone. Enter the highest zone you want included in the range (you might want to end it with 'zzzz' to be sure you get it all of them).
-
Enter the Rate Base Zone code that should be used for rating when the Delivery Zone (or, if blank, the Postal / Zip code for the consignee) on the freight bill falls into the range configured in the From Range and To Range fields. For example, you could select all of BC and use the zone code 'BC'.
-
Enter a Vendor Code if this is to be specific to a vendor, otherwise leave the Vendor Code field blank.
-
Enter a 'B', 'C' or 'V' - which means that this zone code will apply to B(oth), C(lient) or V(endor).