Active Trips section

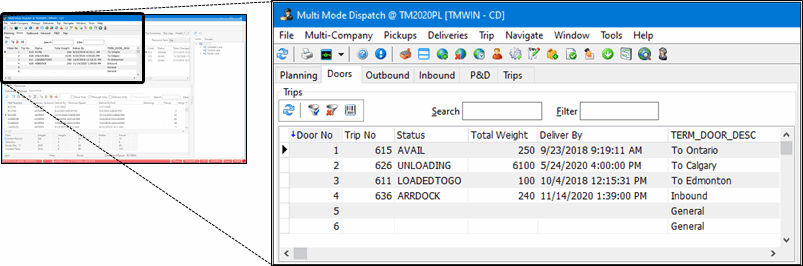
The Active Trips section of the Multi Mode Dispatch program, located in the upper left corner of the screen, includes six tabs:
-
Planning
-
Doors
-
Outbound
-
Inbound
-
P&D
-
Trips
The user can assign resources to trips in any of these tabs by either using the right-click shortcut menu option, or by dragging and dropping resources from the Resources tab in the Unassigned Freight / Resources section at the bottom of the window.
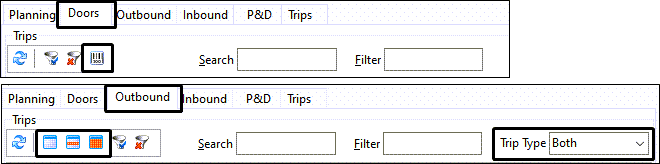
Toolbar - Active Trips
The Toolbar differs slightly as demonstrated by comparing the Doors tab with teh Outbound tab but all tabs in the Active Trips setion will contain some combination of the following.
| Icon/Keybd | Menu Option | Definition |
|---|---|---|
|
Refresh |
Refreshes the data on the chosen tab and bring the details of any newly created/edited resource into its respective sub-tab. |
|
Clear Selection |
Clears any selected records. |
|
Select/Unselect this Record |
Toggles selection of the individual record. You can also use <Ctrl+Click> to use your mouse to select and deselect records. |
|
Select All |
Select all records in the grid. |
|
Set Filter |
Opens the standard Dispatch Filter Trips window, which allows the user to create field-specific or SQL-based custom filters for the Trip grid. A default filter can be set for each of the 'Active Trips Section' grids in Security Setup > Security > Business Events > Filters. |
|
Clear Filter |
Clears any custom filters currently being applied to the currently viewed sub-tab. |
Search |
The user can type characters into the Search field to have the cursor move to the appropriate record. |
|
Filter |
The Filter field will filter the records based on the currently selected grid column header. Select one of the grid column labels to filter on it, enter text into the Filter field, then press the <Enter> key to filter the resource records. |
|
Trip Type |
This field is only available in the 'Planning', 'Outbound' and 'Inbound' tabs, the values available in the drop down list are 'Terminal' which means the freight is going through a terminal, 'Direct' which means the freight goes directly from the customer and 'Both' which means the trip has both types of freight. |
Special Grid Features
Here is a brief description for some of the specialty columns available in some of the Active Trips grids.
Auditing Column (Bill Changes)
This column is available in the Planning, Doors and Outbound grids. With some customized stored procedures, this column can be configured to audit and display changes to Freight Bills after they have been assigned to Trips. Double-clicking the field will display a list of all changes, and allow you to indicate if they have been reviewed.
FB Late Status
This column is available in the Trips grid of each of the Planning, Doors and P&D tabs. If the status code behavior of any of the freight bills assigned to the selected trip is 'Late', the value of this field will be 'True'. If there are no freight bills on the selected trip with a status code behavior of 'Late', the value of this column will be false.
Matching Pickup Freight Bills to Trips
To add more efficiency to dispatching a new feature was added to TruckMate in 2012. To facilitate this feature a new field 'New Pickups' was added to each of the following tabs: Planning, Doors and Outbound. Another new field was added to the Pickups sub-tab in the 'Unassigned Freight and Resources' section. The new feature is a matching mechanism performed when the Pickups sub-tab in the 'Unassigned Freight and Resources' section is refreshed. TruckMate will allocate any trips with matching pickup location (if any exists). The 'New Pickups' field for the allocated matching record will be set to 'True' in the 'Trip grid' of any of the Planning, Doors or Outbound tabs (based on where the trip was allocated). In addition to that, the trip number of the allocated trip will be displayed in the 'Existing Trip' field in the Pickups sub-tab. The user can then easily assign the freight bill to the desired trip (which has a matching pickup location).
| The user can assign a pickup with no terminal return leg. A popup message box will you to confirm if this is a direct delivery. For this process to work, an the Application Configurator Program > MMDISP.EXE > Multi Leg Trips application configuration option must be set to 'True'. (The default value for this option is 'False'.) |
Context Menu - Active Trips
The following options are available from all tabs in the Active Trips section. Most options are common to all of the tabs and an asterisk indicates this option is only available on some of the tabs as described.
| Icon/Keybd | Menu Option | Definition |
|---|---|---|
<Shift+Ctrl+D> |
Toggle Design Mode |
Allows those with security permission, access to the Screen Design mode where you can create and save different layouts. See Custom Screen Design Mode and the Security Configuration program > Security > Business Events > Screen Design section. |
New Trip |
Although this same New Trip option appears in each tab, the trip will be created specifically for LTL or Linehaul type trips depending on which tab you are on when the trip is created. For example, Planning vs P&D vs Trips. For this reason, this menu option is described separately for each of the Active Trips tabs. |
|
Cancel Trip |
Removes the trip from the grid. You typically would not cancel active trips since they are no longer being planned but are actually in existence. To cancel an active trip, you need to have the Security Configuration program > Security > Business Events > Allow Changes > Dispatch - Allow Cancellation of Active Trip option enabled. |
|
Find Trips Near |
Opens the Find <Resources> Near window and goes to the Trip tab. |
|
Set Origin |
This option prompts the user to select the origin zone (MMDISP_TRIP_SESSION.ORIGIN_ZONE) for the trip. |
|
Set Destination |
This option prompts the user to select the destination zone (MMDISP_TRIP_SESSION.DESTINATION_ZONE) for the trip. |
|
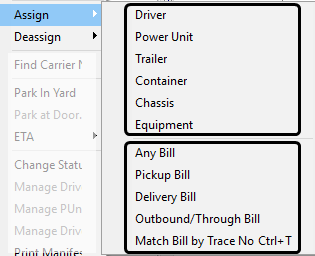
Assign |
If you select this option, two groups of sub-options appear. The firs group is a set of resources that you can assign to the trip. The second group is a set of options on how to match Freight Bills to the trip.
|
|
Options for Matching Freight Bills to Trips |
Selecting an option from the first three options (Pickup Bill, Delivery Bill or Outbound/Through Bill) in this group pops up a small dialog window, allowing the quick entry of Freight Bill numbers. Selecting 'OK' will keep the window open, allowing you to enter multiple Bills immediately. When Cancel is selected, the dialog will close and the Freight Bills will be added to the selected Trip in the order they were entered. If you select Match Bill by Trace Number option, a different window will open, which allows you to enter a trace number type and a trace number and then match a freight bill based on the entered Trace number.
|
|
Deassign |
This option allows the user to unassign and remove an assigned resource from the trip. |
|
Find Carrier Near |
Opens the Find <Resources> Near window and goes to the Carriers tab. |
|
* Move Back to Planning |
(* Doors tab only). This option will move the trip back to the Planning tab, removing it from the Doors tab. |
|
* Dock Activity |
(* Doors tab only). There are several options available from the Dock Activity menu, which are used to update the status of a shipment while it remains on the dock. These options can also be used to track the performance of dock workers using the CrossDock Wireless Device (WCD) to see how long it takes to unload/load shipments (i.e. these options mimic the options available on the handheld device). The options available from this menu are dynamically set based on the status (WCD_PRODUCTIVITY.STATUS) of the trip, so only certain options are available to the user at certain times. The user can set a trip to the following status codes, as defined on a terminal-by-terminal basis in the Terminal Maintenance program: |
|
* Loaded To Go |
(* Doors tab only). This will set the trip’s status to the "Loaded to Go" status code defined for the current working terminal (TERMINAL.LOADEDTOGO_STATUS). |
|
NEW |
* Leave Empty |
(* Doors tab only). |
NEW |
* Park in Yard |
(* Doors, Outbound, Inbound and P&D tabs only.) |
* Park at Door |
(* Planning and Inbound tabs only.) This option will set the trip as being parked at the door. |
|
ETA |
Recalculates and displays the Trip Leg ETA values. |
|
Change Status |
Clicking this will open the Trip Status Change window, where the user can update the trip’s status (MMDISP_TRIP_SESSION.STATUS). The user can click the Reposition tab on this window to change the location of a resource. For most statuses, the client is populated automatically by using the destination client. But for the 'Dock' and the 'Arrive Dock' statuses, in those particular cases the terminal setup is used instead based on the 'To Zone' field set for the leg. NOTE: If any of the selected bills are not in a status of available, docked, or late, then the status change will not be allowed. |
|
Manage Driver’s Fuel/Credit Cards |
||
Manage PUnit’s Fuel/Credit Cards |
||
Manage Driver’s Fuel/Credit Child Accounts |
||
Print Manifest |
This option will open the Report Selection window common to many TruckMate applications. For more information on Report Functionality in TruckMate, see the Crystal Reports Reference page. |
|
Optimize |
This option will open the Load Optimizer window, allowing users to edit trip legs and assign Freight Bills to be picked or dropped in whatever order required. |
|
Mobile Messaging |
Accesses mobile device messaging functions. Sub-menu includes:
|
|
Round Trip |
The Round Trip options provide the ability to: |
|
|
||
|
||
|
||
|
||
Trip Operation Planning |
First added in 2021, it replaced the Resource Linkage window as a tool for merging and switching resources. |
|
Merge/Switch Resources |
Transfer resources such as freight bills, drivers and / or equipment from one trip to another. |
|
* Fuel Optimization |
(* Outbound, Inbound, and Trips tabs.) Opens the Fuel Optimization Query window.
|
|
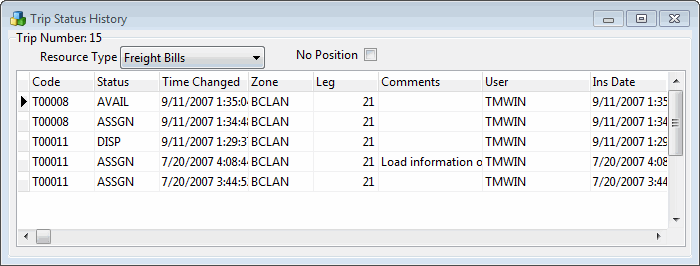
Show Productivity |
This option invokes the Productivity Details window. This window shows an activity history for the selected trip, displayed in a grid format. The following columns are displayed on the grid: * Terminal ID * Door * Status * Date * Unit ID * Unit Type * Leg Sequence * User ID |
|
Trip Notes Summary |
Opens the Trip Notes Summary window that displays a summary of all trip notes including trip-related notes, freight bill-related notes, and freight bill shipping information. |
|
View Custom Defined Fields |
Opens the Custom Defined Fields window to display and information entered into any custom fields. |
|
Intermodal |
Access the Intermodal windows and functions. |
|
Swap Delivery Legs |
Allows you to see the various trip legs and re-order them. Only available in merged trips. |
|
Trip Reefer Monitor Settings |
Opens the Trip Reefer Monitor window where you can set the 3 target temperatures and their allowed tolerance for the assigned trailer/reefer. |
|
Override Deliver By |
Opens the Override Appointment Data and Time window where you can update appointment times for all freight bills on the trip. When "Override Delivery Appointment" checkbox is selected, you can select the "Delivery Appointment Required" and "Delivery Appointment Made" options. Otherwise it will only update the deliver by date for the bills on the trip. |
|
<Ctrl+F> |
Full Screen |
Expands this grid to fill the whole screen view. Use <Ctrl+F> as a toggle to return to the previous view. |
Attach/Open Related Files |
This option allows you to either open an attached file to this trip or attach a file by defining a file description and a path to the file location. |
Common Shortcut Menu Options
See Grid Controls in TruckMate Basics for more information regarding standard grid features.
| Icon/Keybd | Menu Option | Definition |
|---|---|---|
Attach/Open Related Files |
This option allows you to either open an attached file to this trip or attach a file by defining a file description and a path to the file location |
|
Call Command Center |
Opens the TruckMate Command Center program and provides links to specific relevant pages. |
|
|
Copy |
Copies the details of the selected entry. |
|
Save Grid Contents to File |
Saves the text contents of the grid as a text file (.TXT) viewable in a text editor like Notepad or comma delimited (.CSV) file you can view with Excel or some other spreadsheet application. |
|
Copy Grid Contents to Clipboard |
Copies the grid contents to the workstation clipboard so it can be pasted into a spreadsheet program like MS Excel. |
|
Find/Locate Text |
Provides an easy way to locate a specific record in a busy grid full of data. |
|
Show Grid’s SQL |
Displays the SQL query used to populate the grid. |
|
Navigate |
Contains standard functions used to move between data records. |
|
Layout |
Provides access to the Grid Customizer features used to change column header labels, remove columns from the grid, and make changes to the column order. See Creating custom grid profiles for details. |
Planning tab
The Planning tab allows the user to prearrange a trip and pre-assign equipment and freight. When the trip is ready to go, users can select 'Park at Door' from the context menu; this signifies that the trip is no longer planned, but that the truck is actually physically occupying the door (or is positioned in the yard). This way, users can have an infinite number of trips being planned, and have multiple trips planned at the same door (although a door can only be physically occupied by one at any time).
| When creating trips on the Planning tab, you may be prompted to enter a Destination Zone and/or a Door Number. For more information on these prompts, see the Application Configurator program > MMDISP.EXE > 'Specify Destination for New OB Trips' config. |
Context Menu - Planning tab specific
The list of available right-click shortcut menu options and the labels will change to reflect the specific location of the mouse pointer. Some important menu options available on the planning tab include:
New Trip
Selecting the 'New Trip' option from the Planning tab context menu will bring up the LTL Terminal Door Information window. Here, the user will see a list of doors and the status of any active and planned trips set for each door. This allows the user to be fully aware of the activities occurring at each door.
Doors tab
The Doors tab is similar to the vertical Doors/Trips grid in the CrossDock program. It shows a terminal’s doors (listed with one line per door), and displays any associated trip information (including trip number, description, destination, equipment, resources, etc.). While the Planning tab is used for organizing trips that have not yet arrived or do not yet exist, the Doors tab shows what trips are actually physically docked at the doors.
The user can use this tab to assign and de-assign resources, make status changes, and create/cancel trips.
| When creating trips on the Doors tab, you may be prompted to enter a Destination Zone. For more information on these prompts, see the Application Configurator program > MMDISP.EXE > 'Specify Destination for New OB Trips' config. |
Context Menu - Doors tab specific
New Trip
This option allows the user to plan a new trip. The user will be prompted to enter a door number from which the trip will be planned. When accessed from the Doors tab, the user can choose either Outbound (if it is leaving the terminal) or To Be Unloaded (which will create the trip directly at the door, ready to be unloaded).
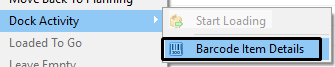
Dock Activity
(Doors tab only). There are several options available from the Dock Activity menu, which are used to update the status of a shipment while it remains on the dock. These options can also be used to track the performance of dock workers using the CrossDock Wireless Device (WCD) to see how long it takes to unload/load shipments (i.e. these options mimic the options available on the handheld device). The options available from this menu are dynamically set based on the status (WCD_PRODUCTIVITY.STATUS) of the trip, so only certain options are available to the user at certain times. The user can set a trip to the following status codes, as defined on a terminal-by-terminal basis in the Terminal Maintenance program:
-
Start Loading: will update the trip to the status set in the 'Loading Status' field (TERMINAL.LOADING_STATUS).
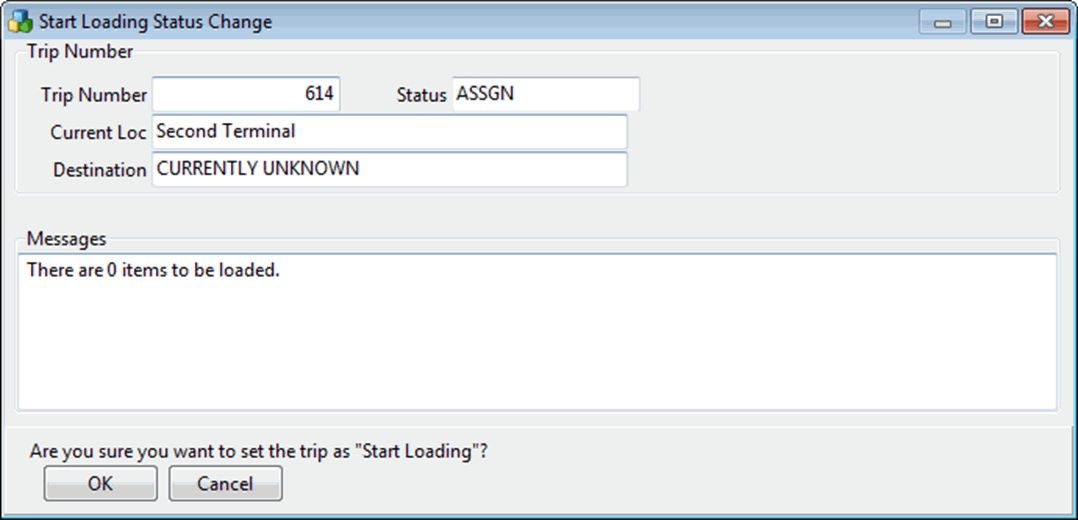
Note: Based on the value of the configuration item 'Prompt for Dock Worker on Load / Unload' which can be set in the Configuration Explorer program > Dispatch > MMDIAP.EXE; if the value is 'True' the system will ask the user to select a dock worker from a list. If the value is 'False' the user will not be asked to select a dock worker.
-
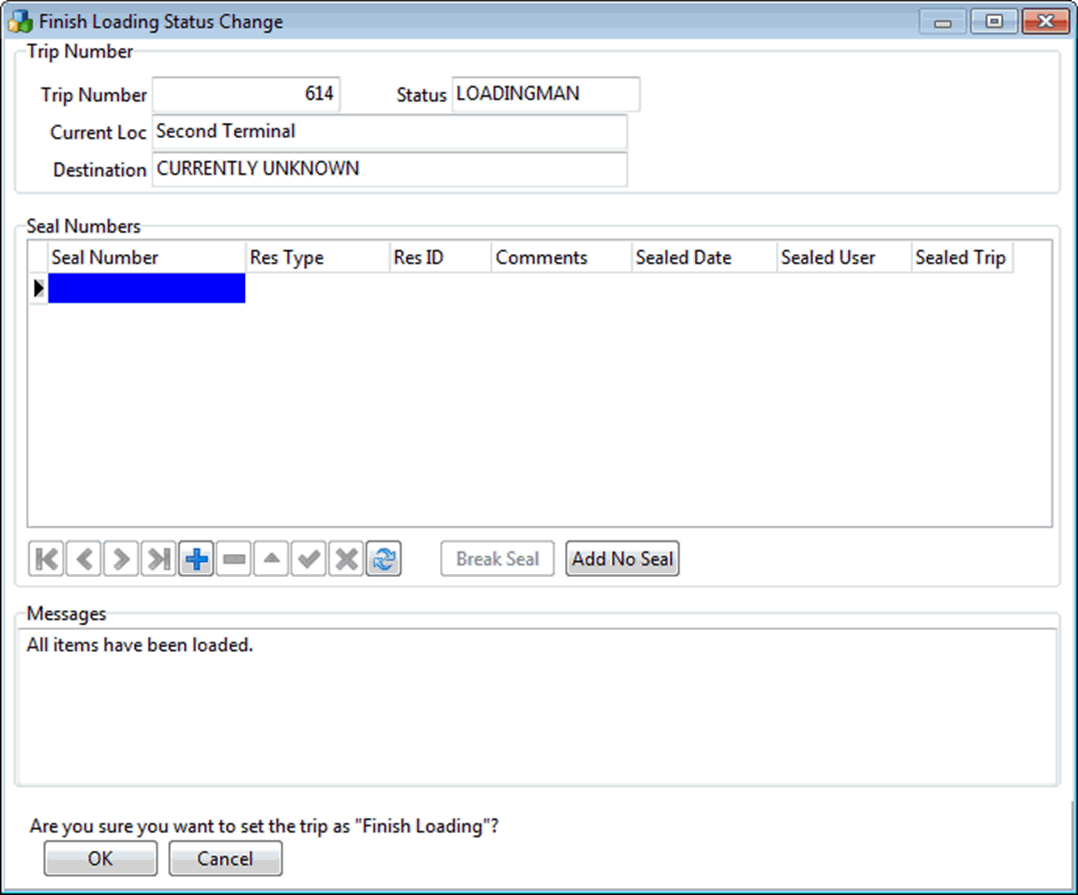
Finished Loading: will update the trip to the status set in the 'Loaded Status' field (TERMINAL.LOADED_STATUS).
-
Start Unloading: will update the trip to the status set in the 'Unloading Status' field (TERMINAL.UNLOADING_STATUS).
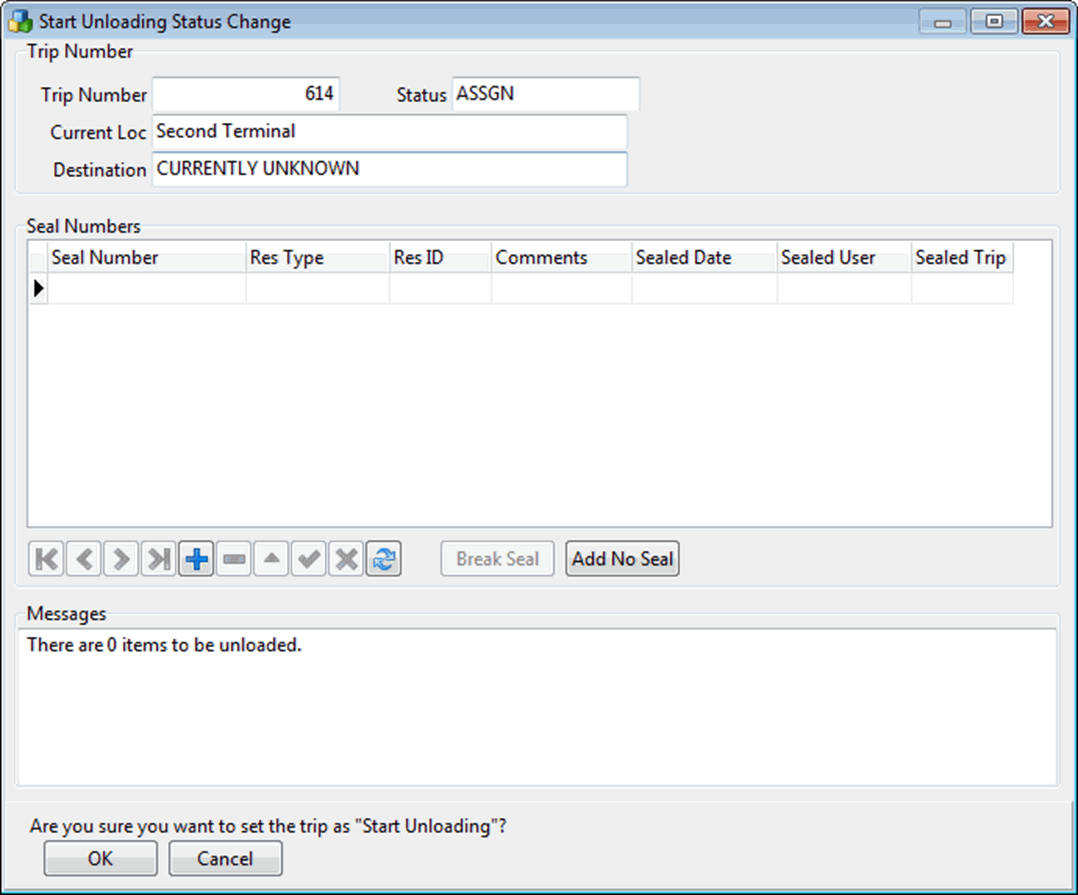
Note: Based on the value of the configuration item 'Prompt for Dock Worker on Load / Unload' which can be set in the Configuration Explorer program > Dispatch > MMDIAP.EXE; if the value is 'True' the system will ask the user to select a dock worker from a list. If the value is 'False' the user will not be asked to select a dock worker.
-
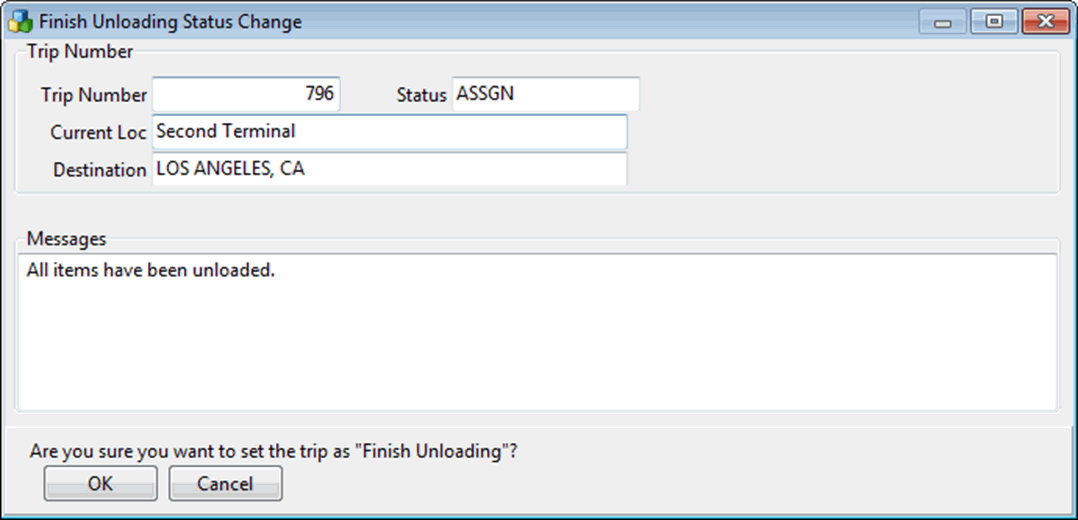
Finished Unloading: will update the trip to the status set in the 'Dock Status' field (TERMINAL.DOCK_STATUS).
-
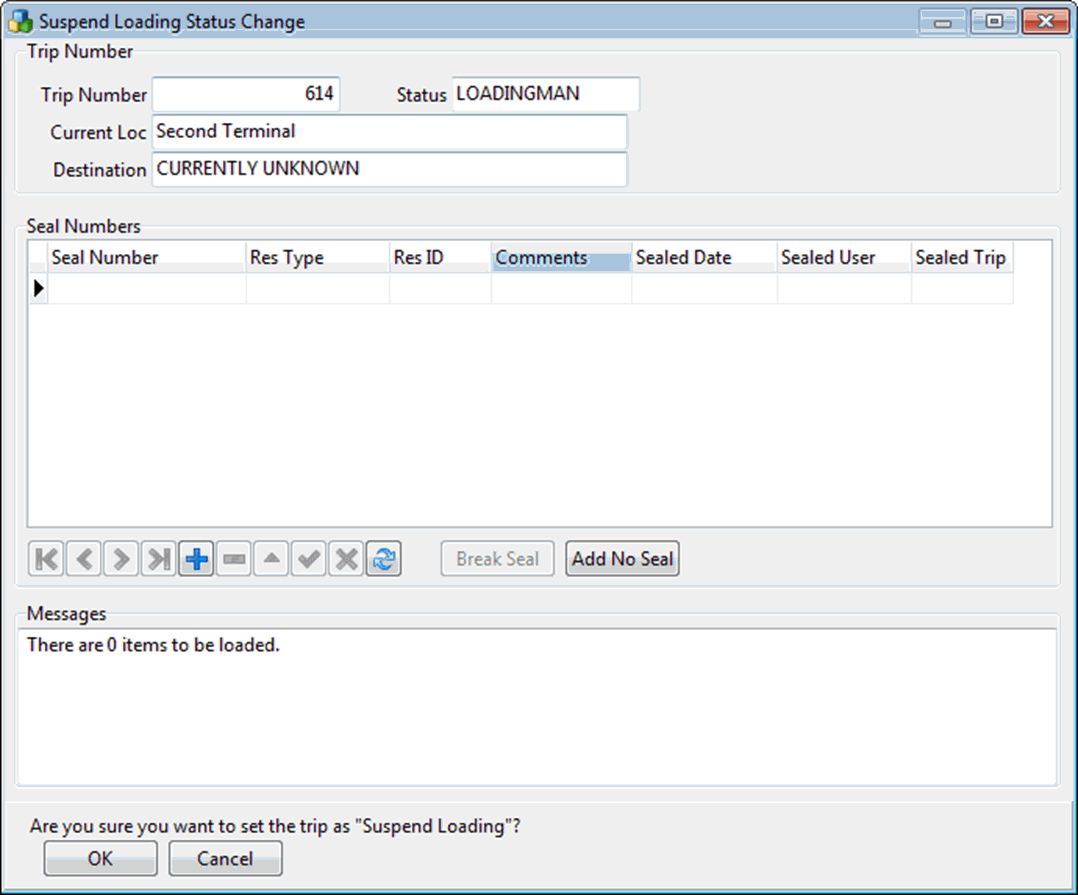
Suspend Loading: will update the trip to the status set in the 'Suspend Loading' field (TERMINAL.SUSPEND_LOAD_STATUS).
-
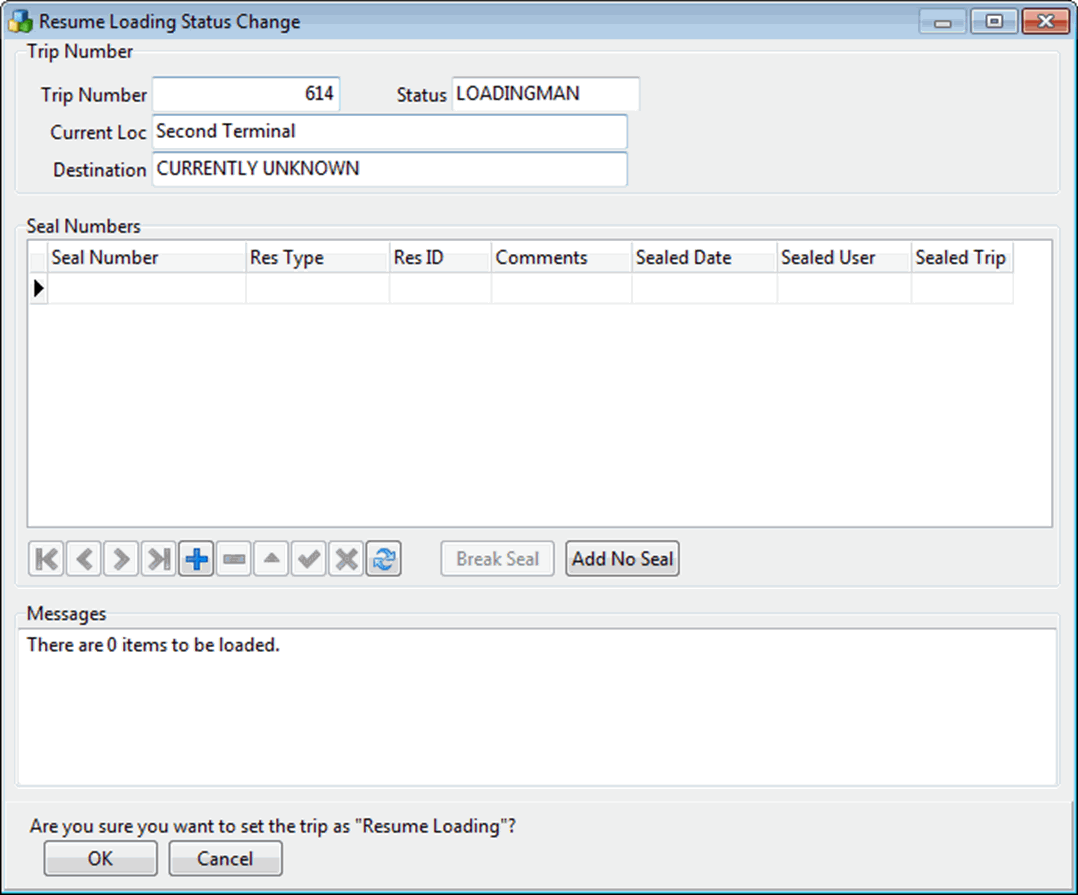
Resume Loading: will update the trip to the status set in the 'Loading Status' field (TERMINAL.LOADING_STATUS).
-
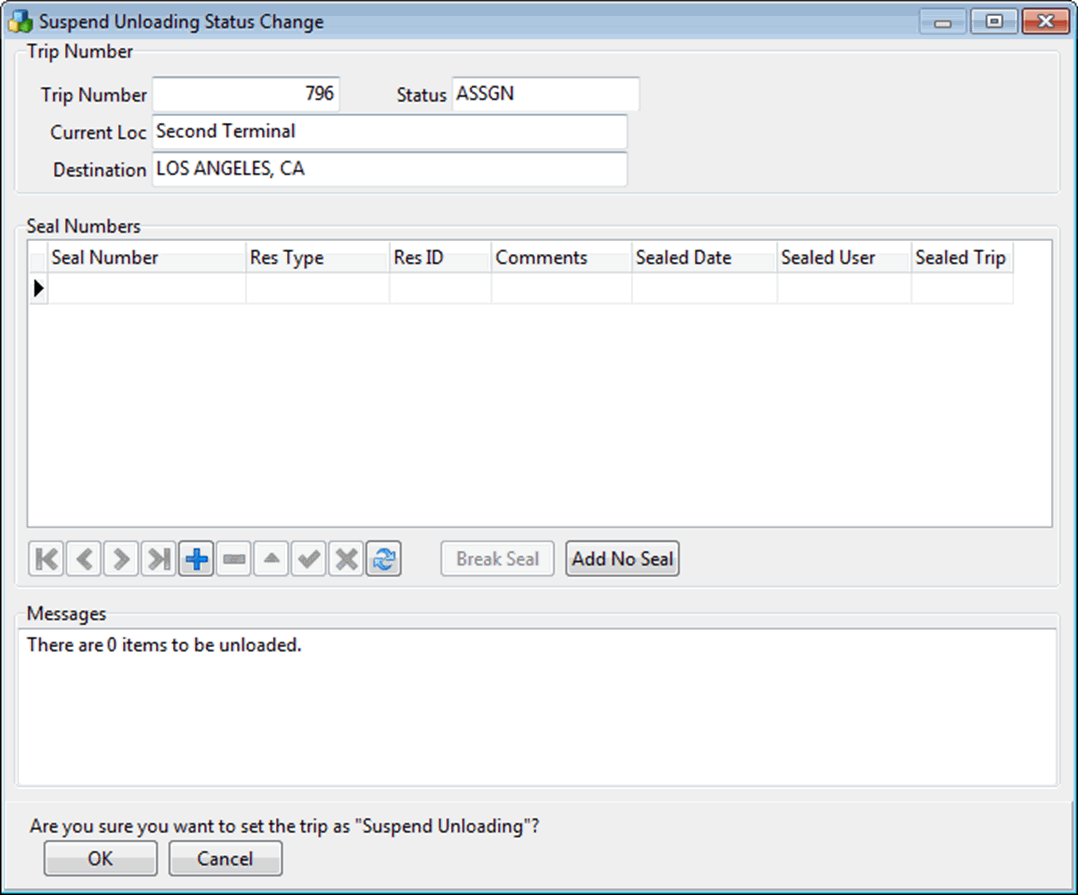
Suspend Unloading: will update the trip to the status set in the 'Suspend Unloading' field (TERMINAL.SUSPEND_UNLOAD_STATUS).
-
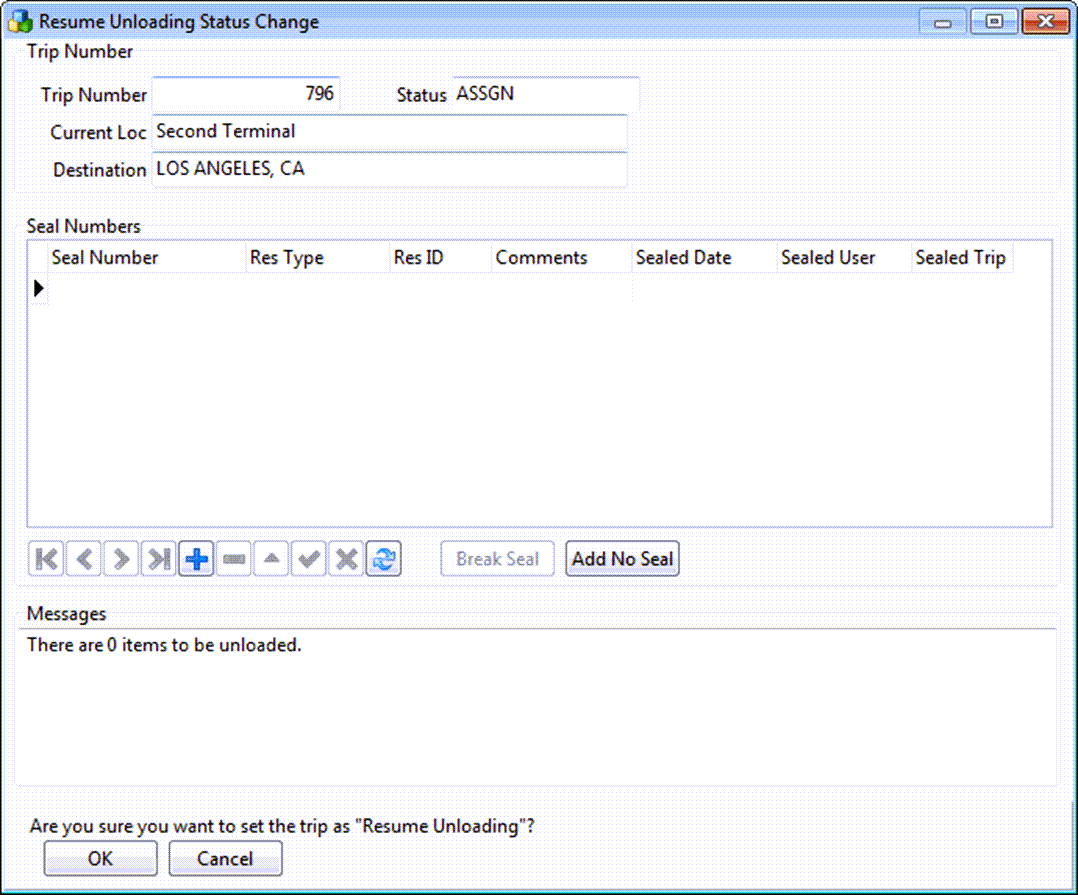
Resume Unloading: will update the trip to the status set in the 'Unloading Status' field (TERMINAL.UNLOADING_STATUS).
Selecting any of the Dock Activity options will open a Confirmation window to confirm the user’s choice to change the current activity, and allow / enforce the entry of a Seal Number based on the combination of the current and the new selected activity.
-
Barcode Item Details: Opens the Trip Item Details window, which will show the details of any barcoded item on the trip (i.e. those freight bills that have had a value entered into the Customer Service program > Details tab > 'Items' field [TLDTL.ITEMS]), and 'Reconcile Items' to open the Reconcile Items window, which displays any barcoded items that have not been completely loaded.
Leave Empty
This menu option is only available if the 'Custom Dock Activity Menu' configuration option in 'MMDISP.EXE' is set to 'True', in which case selecting this option will set the status of the trip as 'Leave Empty' which means the freight can leave the terminal without having to 'Start Loading' or 'Finish Loading'.
Park In Yard
This option will set the trip as being parked in the yard.
Outbound tab
The Outbound tab displays all trips that have departed from doors. That is, trips in this grid are leaving the terminal on the way to their destination.
P&D tab
The P&D tab is basically the equivalent of the City Dispatch program functionality. P&D trips can have a route assigned to them, e.g. that drivers take every day. The user can create a trip by dragging a route from the Routes tab into the P&D tab.
Trips tab
The Trips tab displays all trips in the TruckMate system including trips that have no relationship to the terminal that is being viewed. This can be very useful if the user is trying to find a trip but is not sure where it can be found (e.g. if it is in the Planning stage or if it is set to Outbound).
The Trips tab includes additional columns for Carrier Resources. Those columns include 'Carrier Driver Name', 'Carrier Driver Name 2', 'Carrier Trailer 1', 'Carrier Trailer 2', 'Carrier Power Unit', and 'Carrier Container 1'. For each trip, you can have more than one driver, more than one trailer and more than one container.
Context Menu - Trips tab specific
Merge / Switch
The Merge / Switch Resources option is used to transfer resources such as freight bills, drivers and / or equipment from one trip to another. To use the option, both trips must be active and only the resources assigned to the trip’s active leg will be available for merging and switching. Need to know how?