Submitting and printing forms

Submitting forms electronically (Magnetic Media Filing)
If you need to submit forms electronically, the TruckMate Payroll and Returns Generator program allows you to transmit your data using the Magnetic Media Filing system.
-
Once you have retrieved and reviewed your data for a specified payroll form, click the Create magnetic media file icon (
 ) on the toolbar. The Magnetic Media window appears.
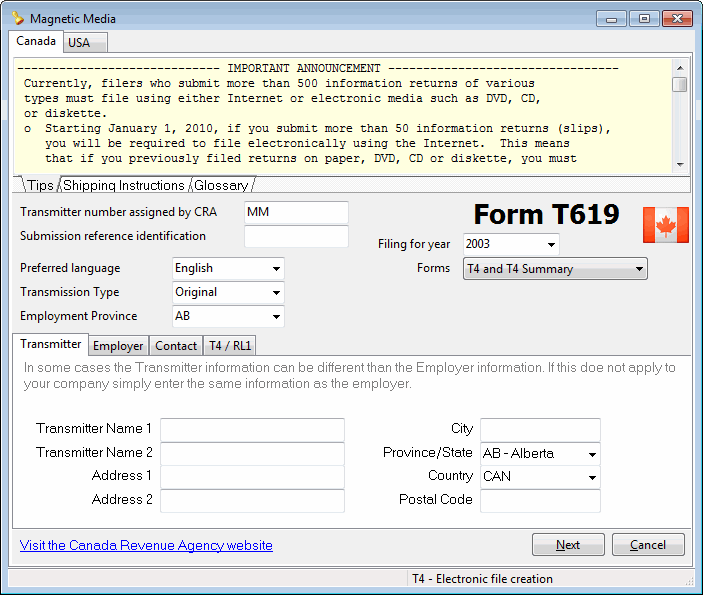
-
Click the appropriate Country tab (Canada or USA) to access the section you need.
-
Navigate through the screens entering applicable details where required.
-
Click Save to return to the Main Window.
Canada tab
This tab displays the Canadian options for payroll forms. It provides 'Tips', 'Shipping Instructions', and a 'Glossary' in the upper portion of the window. In the lower portion, the tabs available are 'Transmitter', 'Employer', 'T4/RL1', and 'TMW Contacts'.
USA tab
This tab displays the American options for payroll forms. It provides 'Tips', 'Shipping Instructions', and a 'Glossary' in the upper portion of the window. In the lower portion, the tabs available are 'Transmitter', 'Employer/Payer', and 'Contact'.
There is an allowance for cases where you find a mistake in the Payroll data while you are in the process of generating your returns. In these situations, you can edit the source records, then return to the Payroll and Returns Generator program and Retrieve them once again. Doing this will over-write the previous information in the Database.
| When preparing 1099 data for magnetic media filing, ensure you save as '.CSV' file type or it will not function correctly in the Payroll and Returns Generator program. |
Printing payroll forms
If you would like to generate your forms onto paper returns, follow the steps to generate data (W2, 1099, 940/941, RL1 or T4) and click the Select Reports icon (![]() ) from the toolbar. The Report Selection window appears. Select the Report(s) you would like to view, email or fax and click the appropriate action button when ready.
) from the toolbar. The Report Selection window appears. Select the Report(s) you would like to view, email or fax and click the appropriate action button when ready.
| For more information on printing Crystal Reports, see the Crystal Reports Reference. |
Depending on which report you choose to run, you may be presented with the Select Parameters window.
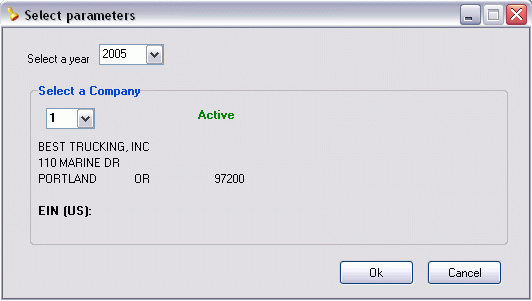
After you have selected a year and a company, click the OK button to generate the report from the records you stored in your database.
The Report Print Preview appears, and the data is positioned on the page in the areas where the boxes on your form will be. If the alignment is incorrect, you may need to adjust either the Crystal report or your printer. Repeat the procedure outlined here as often as you need until the returns print correctly.