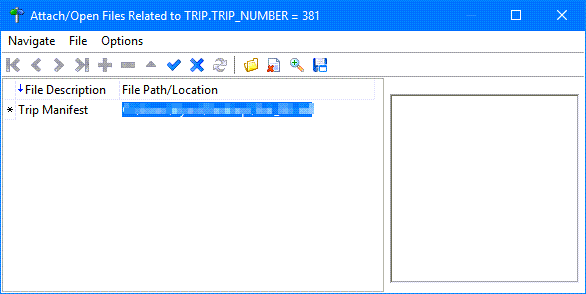
Trip Tracer
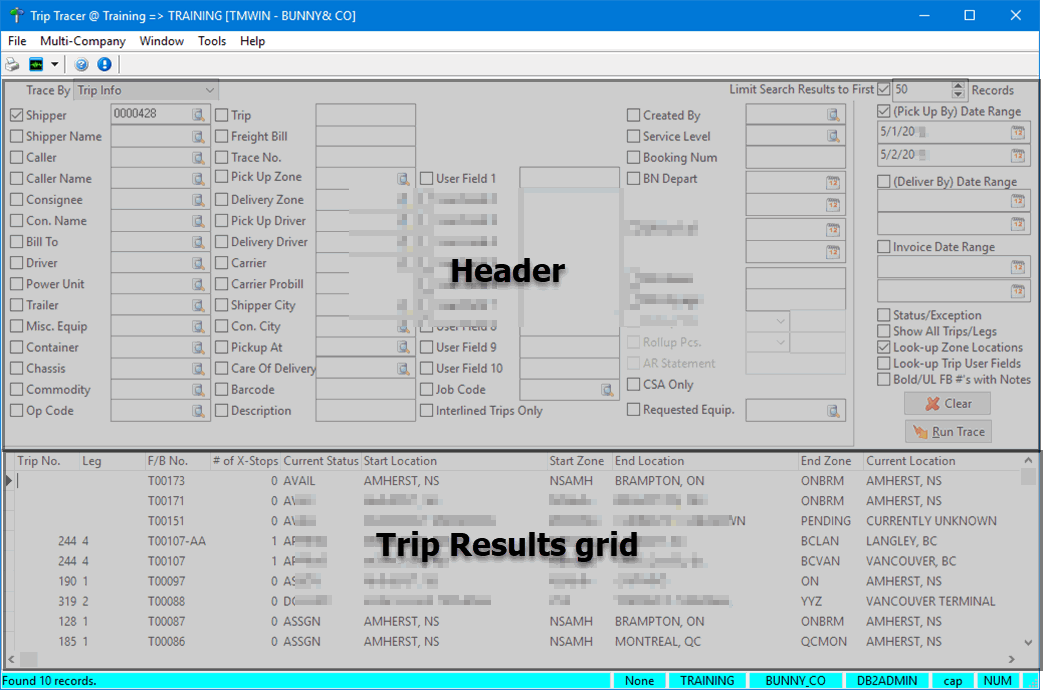
The Trip Tracer program is used to search for freight bills and trips. You can search by multiple criteria. The Trip Tracer program is useful for viewing historical trip information for trips that no longer appear in the Dispatch program because they are complete, and for quickly finding freight bills.
| Searching in Trip Tracer may cause database performance issues. If you plan to use multiple search criteria, including date ranges, you may want to use Trip Tracer during non-peak hours. |
To access Trip Tracer:
| From this location | Go to |
|---|---|
TruckMate Menu and TruckMate Task List |
|
Windows Start Menu |
TruckMate 20xx > Trip Tracer |
Windows Explorer |
C:\Program Files (x86) > TruckMate 20xx > Trace.exe |
Setting up Trip Tracer
Setting up Application Configurator for Trip Tracer
Configure Trip Tracer using the options found under Configuration Options > TRACE.EXE.
Configuring header field behavior
Trace By |
Determines the default value in the Trace By field. Options are: * 0 (default) * 1 |
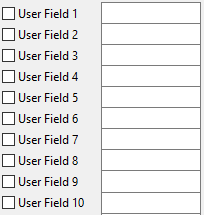
Remember User Field Checkbox Status |
When set to True, the user’s selections for all user-defined field checkboxes are saved. The next time the user opens Trip Tracer, the selections are preserved. The default value is False.
|
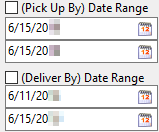
Pickup Date |
By default, the (Pick Up By) Date Range checkbox is selected when a user opens Trip Tracer. To change this behavior, set this option to False. |
Initial Delivery By Range Days / Initial Pickup By Range Days |
The values in these options determine the default date range for the (Deliver By) Date Range and (Pick Up By) Date Range criterion fields. Both default to 1. For example, suppose you set Initial Delivery By Range Days to 5 and leave Initial Pickup By Range Days at 1. The first time the user opens Trip Tracer for the day, the values in the criterion fields reflect the date range you specify.
Notes:
|
Configuring search performance
Max Query Cost |
If you enter an integer in this field, the system will query DB2 for a cost evaluation when the user clicks Run Trace. If the cost returned by DB2 is higher than the value in this field, a message displays asking the user to provide more trace criteria. |
Configuring Trip Results grid display and behavior
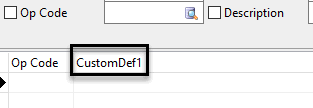
Custom Def 1 LABEL |
Text to appear in the Trip Results grid (replacing CustomDef1)
|
Custom Def 1 TABLE |
Database table containing the data you want to appear in the CustomDef1 column |
Date Change |
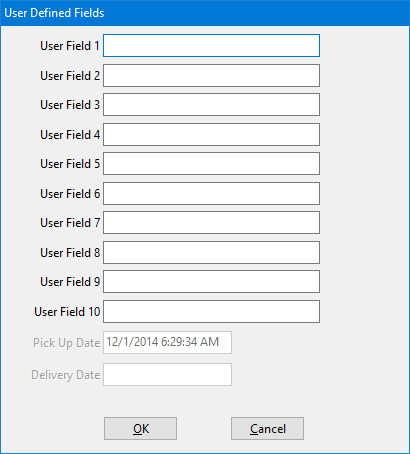
When set to True, the user can edit the Pick Up Date and Delivery Date fields on the User Defined Fields window for a specific freight bill. The default value is False. |
Repos to Start Zone |
If this option and the Trip Status Change option are both set to True, the Reposition Resources to Start Zone on Trip Completion option is available in the Trip Status Change window. The default value is False. |
Trip Status Updates |
When set to True, the Trip Status Change option is available in the Trip Results grid context menu. The default value is False. |
Trip Trace Info |
When set to True, the View Trace Info option is available in the Trip Results grid context menu. The default value is False. |
Setting up Security Configuration for Trip Tracer
Each of the following options is available in the Security > Business Events section of Security Configuration.
Limiting search results
The Limit Search Results To First field allows the user to limit the number of Trip Tracer search results to a value they specify. For example, if they enter 50 in the field, Trip Tracer returns the first 50 records that meet the search criteria.
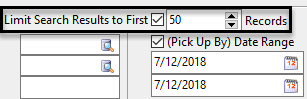
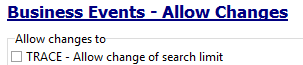
This field is available when you select TRACE - Allow change of search limit option for a user. The option is available under Security > Business Events > Allow Changes.
To prevent a user from accessing this field, deselect this option.
Restricting clients included in searches
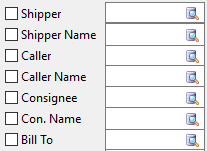
By default, a user can run a search on all clients in your database or on a single client specified in the company fields shown in this illustration.
If you want to restrict a user’s searches to a subset of clients, you can enter them in the Restricted Clients section. It is located under Security > Business Events > Misc > Trip Tracer.
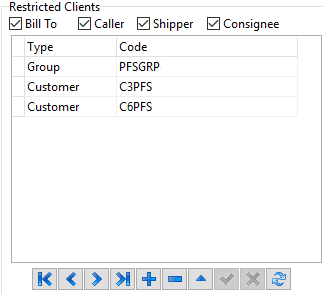
You can specify an individual client or a group of clients by entering the client or group code.
By default, all match criteria - Bill To, Caller, Shipper, and Consignee - are selected. The user can only specify these client(s) in the corresponding Trip Tracer fields. To remove the restriction for one or more fields, deselect the appropriate checkbox(es).
Improving performance when searching
The Performance Restrictions options, located under Security > Business Events > Misc > Trip Tracer, allow you to prevent users from conducting searches that could result in degraded performance on your system.
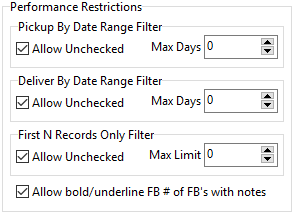
| Allow Unchecked | When deselected (or unchecked), a user must enter a value or values in the corresponding Trip Tracer filter(s): * (Pick Up By) Date Range * (Deliver By) Date Range * Limit Search Results to First |
|---|---|
Max Days |
Enter a value greater than 0 in the field to determine the maximum number of days in the specified date range ((Pick Up By) Date Range, (Deliver By) Date Range). |
Max Limit |
Enter a value greater than 0 in the field to determine the maximum number of records that can be returned (Limit Search Results to First). |
Allow bold/underline FB # of FB’s with notes |
When selected, freight bill numbers in the Trip Results grid will display with bold and underline font if notes are attached. Depending on your database, this type of search could cause degraded performance. If you have many notes included, you may want to deselect this option. |
Searching for trips or freight bills
| Searching in Trip Tracer may cause database performance issues. If you plan to use multiple search criteria, including date ranges, you may want to use Trip Tracer during non-peak hours. |
-
In the Trace By field in Trip Tracer, select an option.
-
To search for trips, select Trip Info.
The system will search using dispatch data. -
To search for freight bills, select Bill Info.
The system will search using customer service data.
-
-
Enter your search criteria in one or more header fields.
-
Select the checkbox next to the criterion.
-
In the related field, enter the value on which you want to search.
-
If available, you can click
 Pick List to search for and select a value in the window that appears.
Note: If there are more than 1000 records for the selected criterion, you must use the filter feature to reduce the number of options.
-
For any field except date fields, you can use the percent character (%) as a wildcard character. For example, to retrieve all freight bills with trace numbers that begin with PO, enter PO% in the Trace No. field.
-
For date fields, you can click
 Calendar to select a date.
-
-
-
If you want, do any of the following.
-
If your system allows, you can restrict the number of records retrieved. Select Limit Search Results to First and enter a value in the field.
-
To select or exclude freight bills or trips based on the freight bill status, select Status/Exception. The Choose Multiple Status window opens.
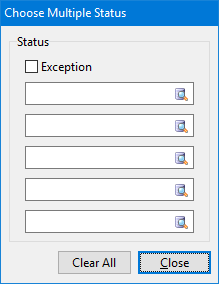
Choose up to five freight bill statuses in the fields provided. If you want, click
Pick List to search for and select a status.To retrieve freight bills or trips that do not have the freight bill status(es) you chose, select Exception. To retrieve only freight bills or trips that have the status(es) you chose, leave Exception deselected.
To clear the status fields and start over, click Clear All.
-
To retrieve all of the individual legs that make up a trip, select Show All Trips/Legs. This option is available only for trips.
-
To retrieve zone-based location data with each record, select Look-up Zone Locations. If your database is large, not selecting this option may help with performance.
-
To retrieve user information with each record, select Look-up Trip User Fields. If your database contains trip user information, not selecting this option may help with performance.
-
If your system allows, you can have the system highlight freight bills or trips that have notes attached to them. Select Bold/UL FB #'s with Notes.
-
-
Click Run Trace.
Records that meet your criteria appear in the grid.-
If you did not select Look-Up Zone Locations, the message "Look up zones is turned off" appears in the location columns.

-
If you did not select Look-up Trip User Fields, the message "Look up trip user fields is turned off" appears in the trip user columns.

-
If your system allows, and you selected Bold/UL FB #'s with Notes, records with notes appear with bold and underline formatting.
-
To expand the grid and hide the header, right-click in the grid and select Full Screen. To restore the header, repeat this step.
-
To clear all search fields, click Clear.
-
Viewing information about an individual trip
You can use Trip Tracer to view information about a single trip. It is especially useful for viewing historical information about completed trips, since such trips do not appear in Dispatch.
-
Retrieve a trip.
-
In the grid, right-click on the trip record and select an option from the context menu.
Viewing freight bill information
The following Trip Tracer context menu options allow you to view information about the freight bill associated with the trip.
Viewing a freight bill in Customer Service
Selecting View Freight Bill opens the freight bill in an instance of Customer Service.
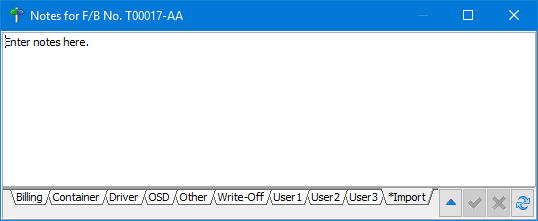
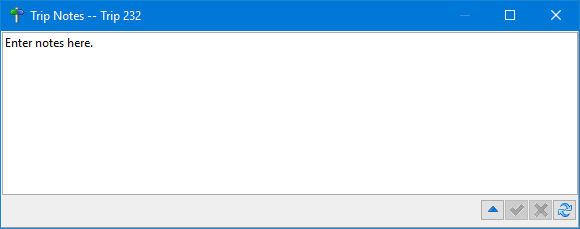
Viewing freight bill notes
Selecting Freight Bill Notes opens the Notes window. Click the appropriate tab at the bottom of the window to see notes that are associated with the freight bill.
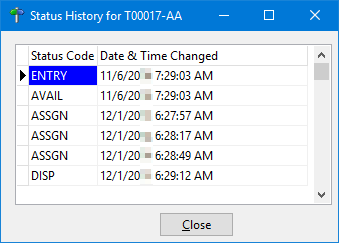
Viewing a freight bill’s status history
Selecting View Status History displays the Status History window. It displays every status assigned to the freight bill, along with the date and time for each.
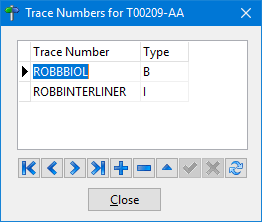
Viewing a freight bill’s trace information
Selecting View Trace Numbers opens the Trace Numbers window. It displays all trace numbers associated with the freight bill.
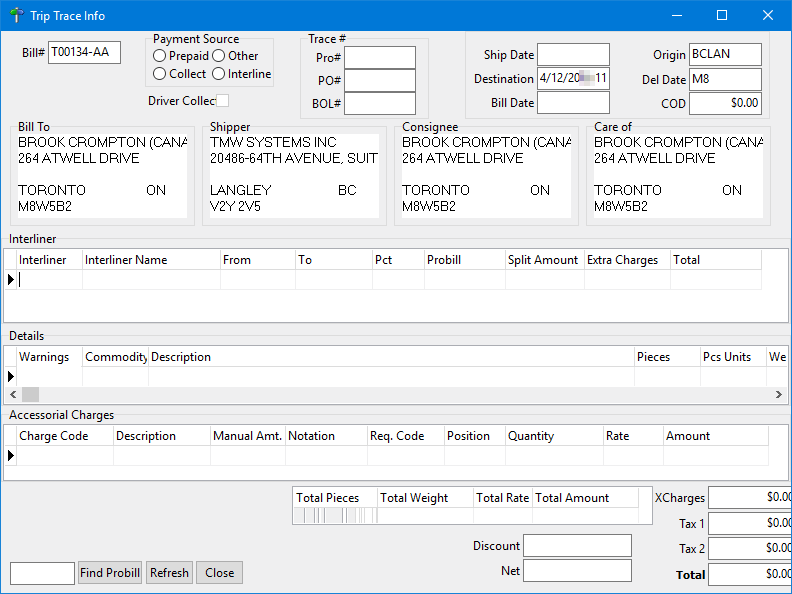
If your system allows, you can view additional trace information by selecting View Trace Info. The Trip Trace Info window opens.
Viewing trip information
The following Trip Tracer context menu options allow you to view information about the trip.
Viewing all trip legs and resources
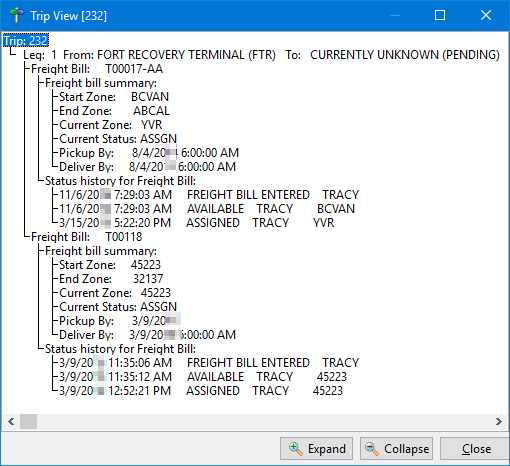
Selecting Trip View opens the Trip View window. It displays a tree list of each leg of the trip, along with resource and status history.
Double-click on a line to expand or collapse the branches underneath it.
The Expand and Collapse buttons open and close the entire tree list.
Changing the status of a freight bill or trip
The following Trip Tracer context menu options allow you to change the status of a freight bill or trip.
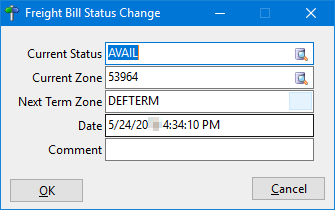
Selecting Order Status Change opens the Freight Bill Status Change window. In this window, make changes as appropriate and click OK.
By default, Trip Status Change is not available. If it is available, selecting it opens the Trip Status Change window with the Status Change tab selected.
