Using the 1099 Wizard

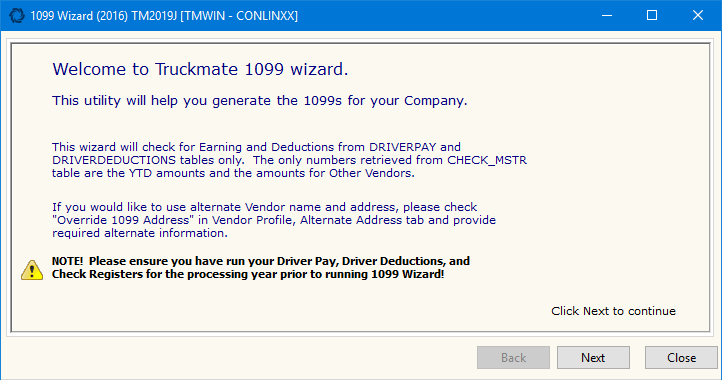
The 1099 Wizard has been created to make configuring your 1099 forms simpler and faster. This Wizard will check for 'Earning' and 'Deduction' records from the DRIVERPAY and DRIVERDEDUCTIONS TruckMate tables only. The only values retrieved from the CHECK_MSTR table are the Year-To-Date (YTD) amounts and the amounts for 'Other' Vendors.
If you would like to use an alternate Vendor Name or Address, please flag the 'Override 1099 Address' option on the Vendor Profiles program > Alternate Address tab, and provide the required alternate information in the fields provided.
| Please ensure you have run your Driver Pay, Driver Deductions, and Check Registers for the processing year prior to running 1099 Wizard! |
-
Select form 1099 and click Retrieve.
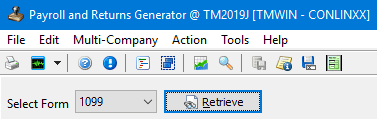
The first page of the 1099 Wizard is displayed.
-
Click Next.
-
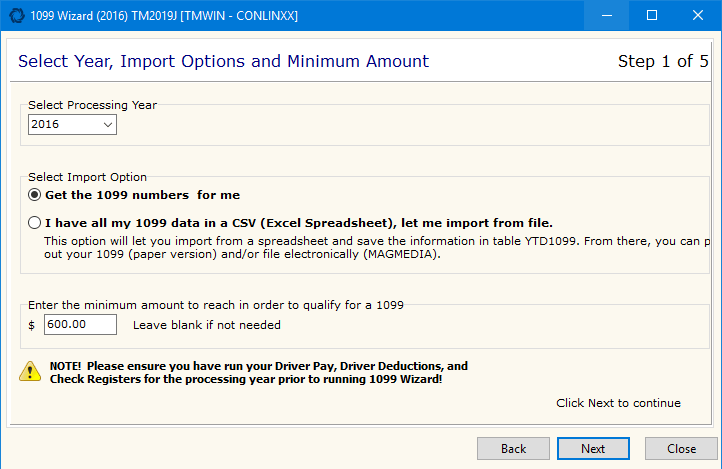
Select the current taxation year using the Select Processing Year drop-down menu,
-
Indicate how you would like to go forward with the 1099 process by selecting a radio button in the 'Select Import Option' section. You can allow the TruckMate application to pull the data from the Database ('Get the 1099 Numbers for me' - Manual 1099), or by supplying an external file ('I have all my 1099 data in a CSV (Excel Spreadsheet), let me import from file' - Automatic 1099). The process is different for each option.
-
Enter the minimum net dollar amount that must be reached for a Driver to qualify for a 1099 in the field near the bottom of the screen.
-
Click Next.
-
Do one of the following:
-
If you chose 'Get the 1099 Numbers for me' in step 2 above, proceed to Manual 1099.
-
If you chose 'I have all my 1099 data in a CSV (Excel Spreadsheet), let me import from file', proceed to Automatic 1099.
-
Manual 1099s
Identify Your Company
Use the TruckMate Navigation Bar to go to the Company record you would like to use when processing 1099s. These records are pulled from the Company Profiles program data, and can be edited here if required. If you would like to add a Company Logo, select the 'Load' button to the right of the Company information fields.
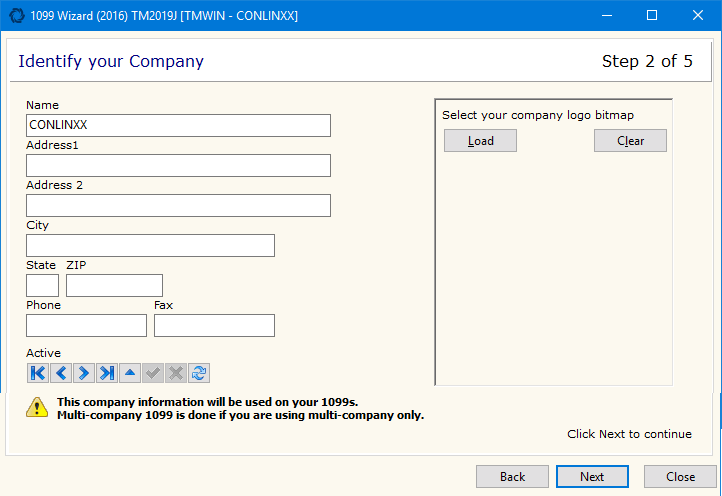
| Multi-Company 1099s are only available if you are working on a multi-schema Database. |
Select Next.
Select Processing and Taxable Options
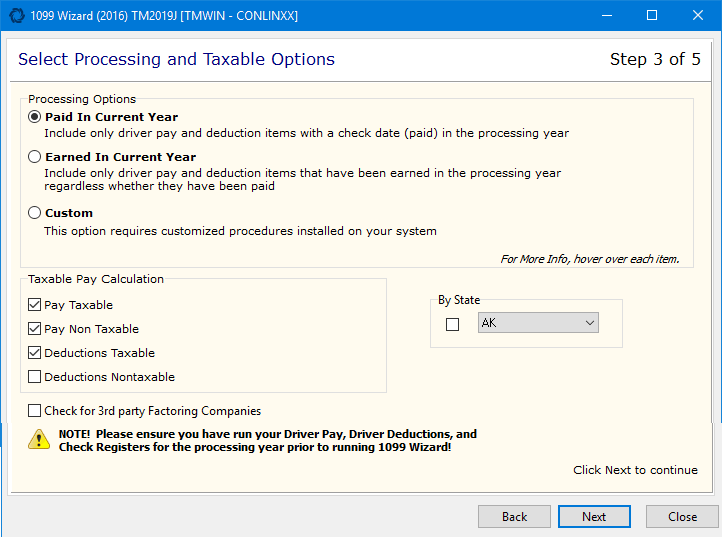
The options on this page control which amounts are included in the 1099 calculations. Ensure that you understand the following before proceeding:
Check for 3rd party Factoring Companies
This checkbox is to instruct the system whether to user a Third Party factoring data or not. If this checkbox is selected, the system will show factoring data (if available) in Drill Down form for 'All Other Vendors'. The 'Drill Down form' is available by double clicking an amount field in the results grid.
Processing Options
Select the radio option that represents the taxation scenario you require:
-
Paid in Current Year
Selecting this radio option includes only those Driver Pay and Deduction records that have a check date (paid) in the selected processing year. -
Earned in Current Year
Selecting this radio option includes all Driver Pay and Deduction records that have been earned in the selected processing year, regardless of whether they have been paid or not. -
Custom
Select this option if you have customized taxation procedures installed on your system by TMW Systems Inc.
Taxable Pay Calculation
Select which records you would like to have included in the 1099 calculations.
| There are two ways to make Owed (PMT_STATE = O) amounts visible. First, you can make them non-'O' by making them zero-statements; if user runs them through registers, these will get a CHECK_DETE (in DP or DD tables) and will be picked by "Paid in Current Year" option. The second way is to choose "Earned in Current Year" option in Step 3. That option will pick ANY PMT_STATE that was earned in processing year including O records. |
Select Next.
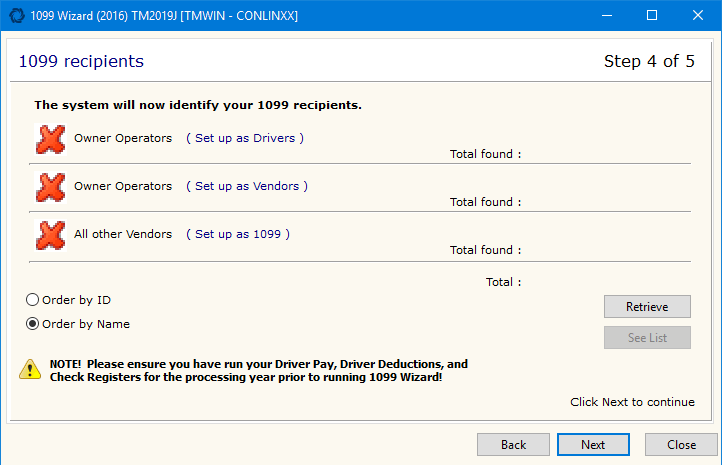
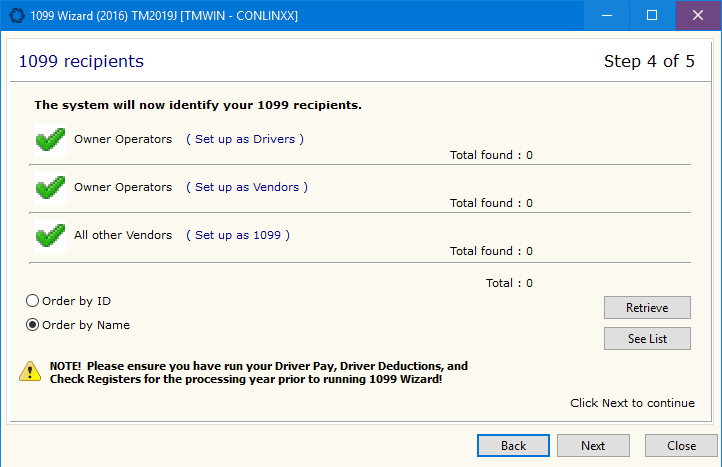
1099 Recipients
The system is now ready to identify which of the existing Driver / Vendor records will have 1099s created for the selected processing year.
-
Choose either the 'Order by ID' or 'Order by Name' radio option depending on how you wish the result list to be sorted.
-
Select the 'Retrieve' button. The system will go through the existing records to determine which of them require 1099s.
-
When the system has finished searching, select the 'See List' button. The 'Your list of 1099 recipients' window displays.
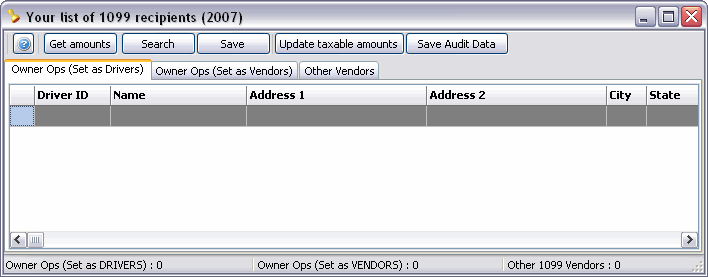
Owner Ops (Set as Drivers) tab
The list of Owner Operators (set as DRIVERS) is composed of all the following (configured in the Driver Profiles program):
Drivers setup as Type 'O' (Owner Operators)
Drivers that have a Pay Type of 'D' (Driver Check)
Drivers set as '1099 Recipients'
Drivers that have DRIVERPAY records for the selected processing year
Owner Ops (Set as Vendors) tab
The list of Owner Operators (set as VENDORS) is composed of the various Vendors used in the 'Vendor Code' field of the Driver Profiles program, and those Vendors that are set as '1099 Recipients' in the Vendor Profiles program.
The Drivers working for Vendors have a Pay Type of 'V' (Vendor Check) and have DRIVERPAY records for the selected processing year.
Other Vendors tab
The list of Other Vendors is composed of the various Vendors set as '1099 Recipients' in the Vendor Profiles program that have received a check in the selected processing year.
1099 Recipients Process:
-
Select the 'Get Amounts' button to populate the available data, which the user can then adjust by removing/adding items.
-
Double-clicking the 'Amount' field in this window will drill-down on the selected record, showing how the deductions were applied, etc.
Above each grid on the drill-down screen you will see a title (either 'NET', 'Non-Taxable Deductions', 'Deductions Starting with OWE-', 'Non-Taxable Earnings', etc.).
Above and to the right of each grid, you will see a 'Sum' amount of all the values in the grid.
Step 5 Box
The 'Step 5 Box' column in the middle grid will contains the letters 'A', 'C', 'E', or 'H' to hint from which part of the 1099 Calculation Formula the amounts are coming from.
In front of each letter is sign ('-' or '+') as a hint on how this amount is added (or subtracted) from the total.
View Created Adjustment
Selecting this button will open a form that shows any adjustments created for your Drivers and Vendors. This window appears exactly like the Update Taxable Amounts Tool > Adjustments tab, but no modification is allowed (read-only).
-
When you are happy with the totals, select the 'Save' button. This saves the values to the Database in the YTD1099 table and then clears this screen.
-
Selecting the 'Update Taxable Amounts' button will open the Update Taxable Amounts window, which allows the user to see Deduction and Pay Code amounts and insert adjustment amounts into the ADJUSTMENTS_1099 table, allowing you to fix incorrectly entered taxable codes.
-
See the Update Taxable Amounts window section below for more information on this process.
-
You can also select the 'Save Audit Data' button, which saves data from all 3 of the 'Amount' drill-down grids to following tables:
RPT_1099_DEDUCTIONS: regular deductions data from middle grid (those not starting with 'OWE' as white fields, selected in step 6 of 1099 New Wizard) and deductions starting with 'OWE-' (red rows, deductions starting with 'OWE-').
Context Menu
Save as .txt
This option will export the records on the screen to a (fixed width) text file ('.TXT') with the file location and name you specify.
Save as .csv
This will export the records to a file format that can be opened in Microsoft Excel ('.CSV')
Save as .html
This exports the records to an '.HTML' formatted file that can be viewed in a browser program.
Save as .doc
This exports the records to a '.DOC' file that can be opened in Microsoft Word.
Remove this Recipient from list
Selecting this option will remove the Vendor ID on the selected detail line from the 1099 Form.
Remove All
Selecting this option will remove all the Vendor IDs and all the detail lines from the 1099 Form.
Manually Add a New Recipient
This option allows you to add detail lines to your 1099 Form manually, in the event of having an individual that has been paid by your company but that is not necessarily an Employee.
To close this window and continue the process, press the red X in the top right corner of the screen, then select the 'Next' button to proceed to printing and filing options.
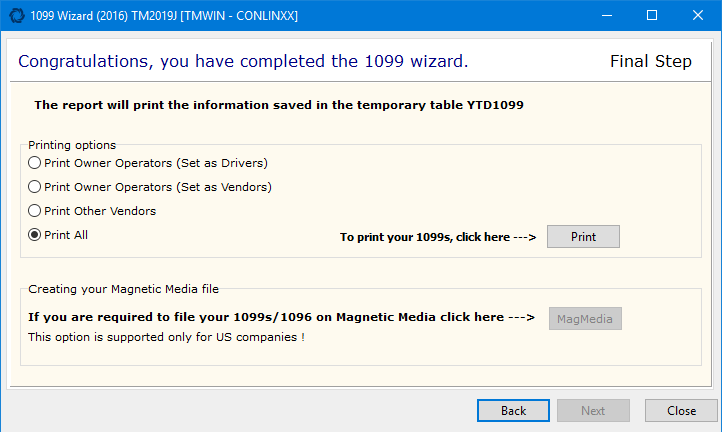
You can now print a report or submit this information electronically (create a magnetic media file).
| When preparing 1099 data for magnetic media filing, ensure you save as '.csv' file type or it will not function correctly in the Payroll and Returns Generator program. |
Automatic 1099s
Import from .CSV (Continue)
-
On the Import from CSV screen, click the 'Import File' button and browse to find your .CSV file containing your Company’s 1099 information.
-
Once the File is loaded into the grid, you can edit the values as you see fit.
-
Select the 'Save File' button when done, and then select the 'Done' button.
-
You can use the 'Export to DB' button to save the 1099 Data from the external file into your TruckMate Database.
You can now print a report or submit this information electronically (create a magnetic media file).
Note: When preparing 1099 data for magnetic media filing, ensure you save as '.csv' file type or it will not function correctly in the Payroll and Returns Generator program.
Update Taxable Amounts Tool
| It is recommended that users not run more than one instance of UTA at the same time. |
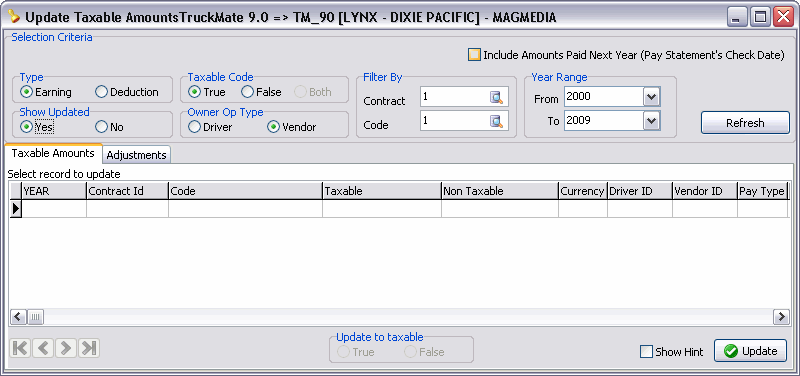
Selection Criteria
Use the various radio options in this section to filter the displayed records. Select 'Refresh' to apply the newly selected Filtering criteria against the database information.
Include Amounts Paid Next Year (Pay Statement’s Check Date)
When this field is un-checked, the Update Taxable Amounts tool will only adjust amounts that were paid in the current processing year (by "paid", meaning CHECK_MSTR.TX_DATE is in the current processing year). When this field is checked, the Update Taxable Amounts tool will also update amounts paid in following year. For example:
For Example:
| PAY_ID | PAY_CODE | DRIVER_ID | TOTAL_ PAY_AMT |
TAXABLE | LEG_DATE | PAID_DATE | TX_DATE |
|---|---|---|---|---|---|---|---|
32382 |
HOUR1 |
1099-3 |
600 |
True |
12/13/2019 |
12/13/2019 |
12/13/2019 |
32579 |
HOUR1 |
1099-3 |
750 |
True |
12/20/2019 |
12/20/2019 |
1/7/2019 |
32578 |
HOUR1 |
1099-3 |
600 |
True |
12/20/2019 |
12/20/2019 |
1/7/2019 |
-
If 'Include Amounts Paid Next Year…' is not checked (by default), this option will result in $600.
-
If 'Include Amounts Paid Next Year…' is checked, this option will result in $1950.
Type
Select the Type of record that should be updated: 'Earning' (records within the DRIVERPAY table) or 'Deduction' (records within the DRIVERDEDUCTIONS table).
Show Updated
If the No option is selected here, records with 'Adjustment ID' values that are not set to '0' will be hidden from the Adjustments grid. Otherwise, (Yes), they will be shown.
Taxable Code
The options in this section ('True', 'False' or 'Both') allow the user to specify if the 'Type' of records they are updating are Taxable or Not (or a combination both Taxable and Non-Taxable amounts).
Owner Op Type
Choose the Owner Operator Type of the amounts to be updated: 'Driver' ('PayType=D) or 'Vendor' (PayType=V).
Filter By
The User can choose either a Driver 'Contract ID' or 'Payable Code' (or both) from those configured in the database to filter the displayed results by.
Year Range
Select the Accounting year range for which you would like to update the taxable amounts. The 'From' value must be either equal to the 'To' year, must be set to the year previous to the 'To' year.
Refresh
Selecting the 'Refresh' button Updates Taxable Amounts grid based on Filtering selections provided.
Taxable Amounts tab
The Taxable Amounts tab and grid shows all taxable records based on selected Filtering options in the above 'Selection Criteria' section. The grid will sort by the record’s 'CONTACT_ID'.
| When working in the Taxable Amounts grid, you can select multiple records at once by holding the <Ctrl> key and selecting with your mouse. |
Update To Taxable
If any of the records that appear in the 'Taxable Amounts tab grid' have been incorrectly set to 'Taxable' or 'Non Taxable' throughout the year, you can select the record in question and then choose 'True' or 'False' radio option in this section to update the record to its correct Taxation status.
Show Hint
If this flag is checked, the user can click on the Taxable Amount grid to show a hint explaining the use of the 'Include Amounts Paid Next Year…' field (see above). If unchecked, no hint will show.
Update Button
Select the 'Update' button when finished changing all required records. The program will then insert adjustment entries for each Driver into the ADJUSTMENTS_1099 table. TruckMate does not allow for duplicate entries, so if a user tries to 'Update' twice for the same records, the program will prompt the user if they would like to overwrite the previous records for this code. Specifically, selecting this button will:
-
Generate an 'Adjustment ID' for the selected record in Taxable Amounts grid. Records with an 'Adjustment ID' will be visible only if you select the 'Yes' radio option for the 'Show Updated' option in the Selection Criteria section and then select the 'Refresh' button.
-
At this point, the CHECK_MSTR, DRIVERPAY and DRIVERDEDUCTIONS tables are not updated; they will be when the 'Create Adjustments' button on the Adjustments tab is selected.
Adjustments tab
The Adjustments tab allows you to adjust the dollar amounts scheduled to be included in the 1099 calculations for your Drivers. Once you have selected the 'Update Button' after choosing the Taxable/Non-Taxable status of your records, select this tab to see the breakdown of charges for all of the applicable Drivers. You can then alter the values in the 'Taxable Amount' and 'Non-Taxable Amount' fields as necessary.
| When working in the Adjustments grid, you can select multiple records at once by holding the <Ctrl> key and selecting with your mouse. You can also click on a grid column’s title to sort the displayed records by that column’s values. |
Create Adjustments
When satisfied with the changes you have specified, select the 'Create Adjustments' button to make the changes. This will make updates to the CHECK_MSTR, DRIVERPAY and DRIVERDEDUCTIONS tables for each adjustment found in ADJUSTMENTS_1099 table for the selected 'Year'; it will not modify records for already updated pay records in previous Accounting periods.
Delete Adjustments
If you do not wish to apply the changes you have made on this tab, select the 'Delete Adjustments' button. This will delete all adjustments for selected Accounting 'Year' by doing the following:
-
Delete all records in the CHECK_MSTR table with 'TX_REFERENCE' = '1099 Adjustment' and 'TX_DATE' in the selected 'Year'.
-
Update all CHECK_MSTR.ADJ_ID values to '0' (zero) for 'TX_DATE' in selected 'Year'.
-
Delete all DRIVERPAY records where 'PAY_CODE' = '1099Adj' and 'LEG_DATE' in selected 'Year'.
-
Update all DRIVERPAY.ADJ_ID values to '0' (zero) for 'LEG_DATE' in selected 'Year'.
-
Delete all DRIVERDEDUCTIONS records where 'DEDUCTION_CODE' = '1099Adj' and 'DED_DATE' in selected 'Year'.
-
Update all DRIVERDEDUCTIONS.ADJ_ID values to '0' (zero) for 'DED_DATE' in selected 'Year'.
-
Update all records from ADJUSTMENTS_1099 table and set 'DELETED' = 'False' and 'ADJ_CRAETED' = 'False' where 'YEAR' in selected 'Year'.
-
Delete all records from TMP_ADJ1099_DPDD with 'Adjustments IDs' from selected 'Year'.
| The 'Delete' button on the TruckMate Navigation Bar ('- ') will do the same as the 'Delete Adjustments' button, but only for the selected record/'Adjustment ID', not the entire list. The user will be prompted to confirm before any adjustments are deleted. |