TruckMate 2023.1 New Features: Back Office
Codes Maintenance
AR Transaction Types tab added (TM-166608)
As of this version of TruckMate, the standalone AR Transaction Types (ARATX.EXE) application is no longer available.
All fields that were originally in AR Transaction Types now exist in an AR Transaction Types tab.
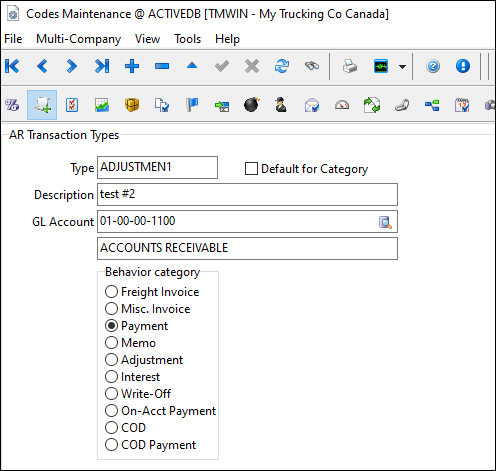
The tab has been added as an option on the Tabs Setting - Codes window in Security Configuration.
| By default, tab settings that control access to AR Transaction Types features in Codes Maintenance are disabled. After upgrading to TruckMate 2023.1, you must enable these settings in Security Configuration for the appropriate users. |
Customer Service
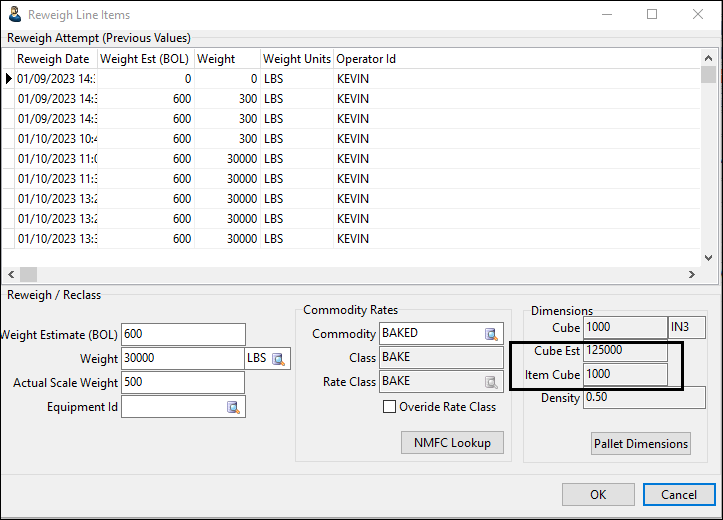
Reweigh Line Items cube dimensions (TM-165138)
To improve TruckMate’s handling of cube dimensions in the Reweigh Line Items window, these changes were made:
-
A CSERV.EXE Application Configurator option was added that determines the location of the calculated cube value (as defined in the Skid Dimensions window) in the TLDTL table.
Option Definition Save calculated Cube value to
Determines the TLDTL column in which TruckMate stores calculated cube values. Valid values are:
-
Actual (default)
Store cube value in TLDTL.CUBE column -
Item
Store cube value in TLDTL.ITEM_CUBE column -
Estimate
Store cube value in TLDTL.CUBE_EST column
-
-
Two new fields, Cube Est and Item Cube, were added to the Reweigh Line Items window.
Added ability to edit interline payable information for a non-active vendor (TM-167069)
In Security Configuration, a new CSERV - Allow Edit of IP Info for a Non-Active Vendor option has been added to the Security tab on the Business Events - Allow Changes window. By default, it is deselected.
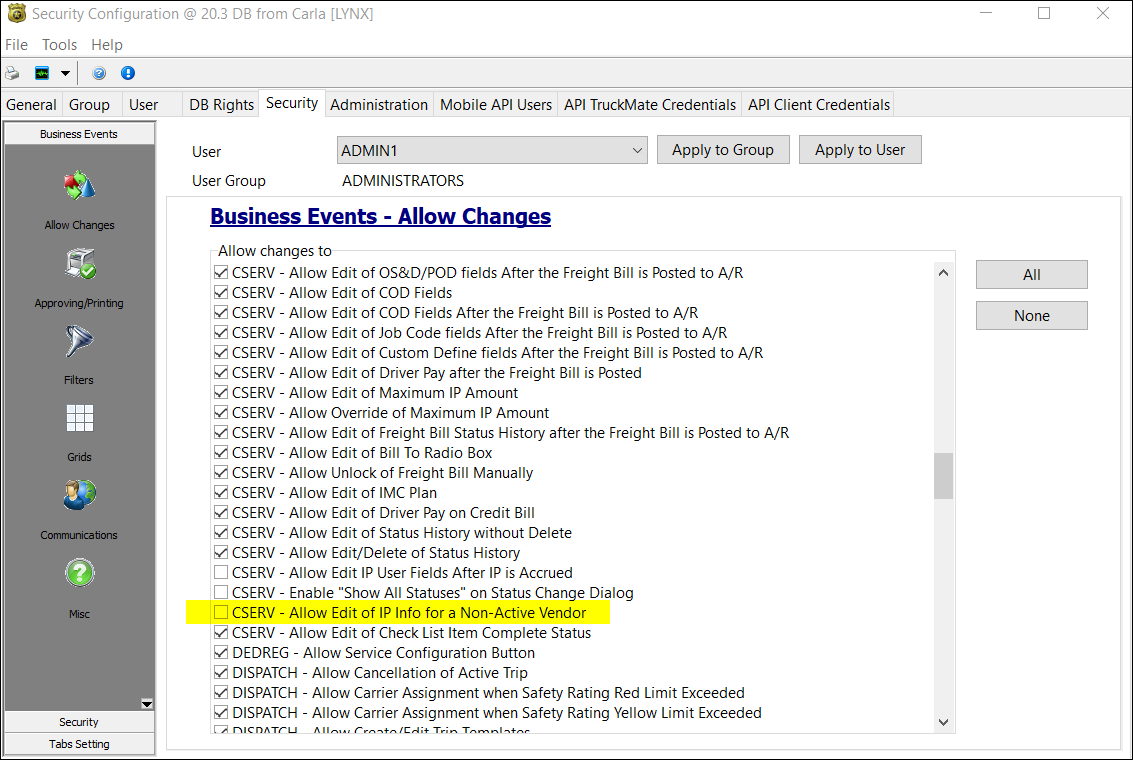
When selected, users can edit any information (that is not read-only by default) on the I/P tab for a non-active vendor.
| Even if this option is selected, users cannot make changes to approved IP records. |
Assigning pre-pull bills to intermodal trips (TM-167178)
On the InterModal tab, you can now include pre-pull bills when creating an intermodal trip. A pre-pull bill represents a movement that occurs between two points.
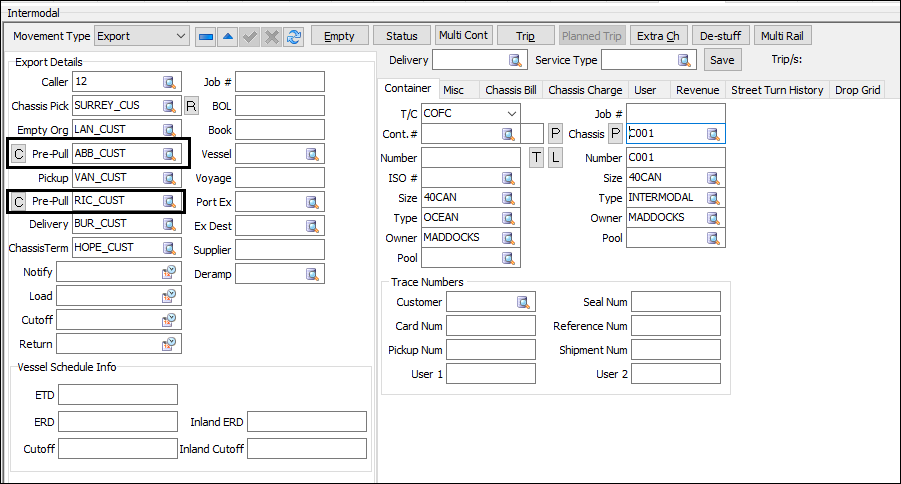
In addition, if the CSERV.EXE Application Configurator option Copy IM Other is set to All, associated pre-pull bills are copied when copying an intermodal bill.
In this Load Optimizer illustration, the highlighted pre-pull bills were assigned to an intermodal trip when the trip was created in Customer Service.
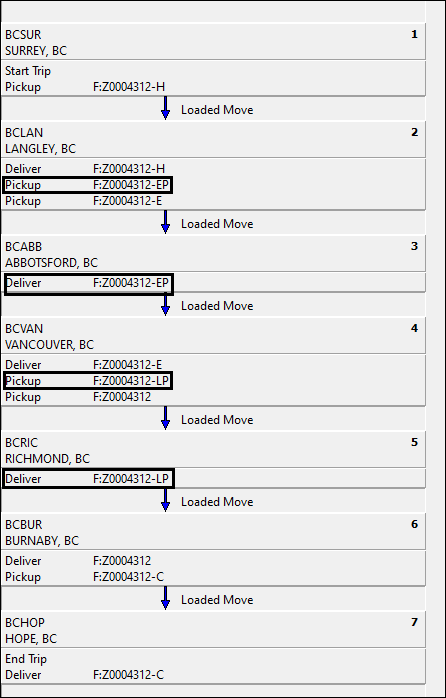
Customer Service, Trip Envelope Processing
Editing checklist item completion status (TM-167188)
In Security Configuration, a new CSERV - Allow Edit of Check List Item Complete Status has been added to the Security tab on the Business Events - Allow Changes window. By default, it is selected.
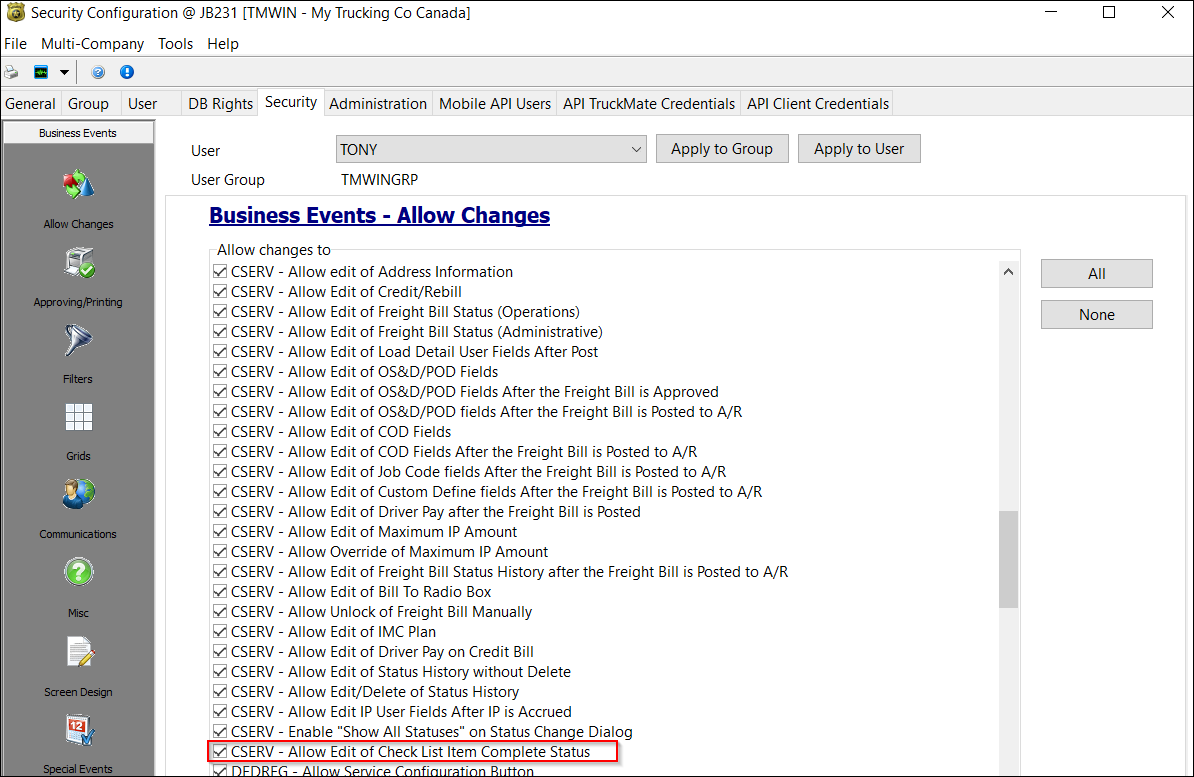
With it selected, users can now change checklist item completion statuses in Customer Service and Trip Envelope Processing.
If a user without this permission attempts to change an item’s status, an error message appears.
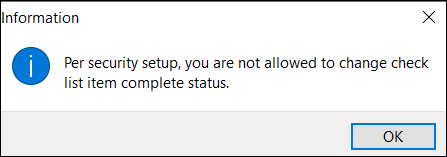
In the Imaging API, an error is returned if a user does not have permission to change item statuses.
Direct Deposit
Chase Bank NACHA format added (TM-167418)
On the Export to Direct Deposit window, selecting NACHA in the Transfer Format field displays the NACHA Return Account Information tab. On this tab, you can now select CHA (Chase Bank) in the NACHA Type field. When you select this value, a new Comp. Discret. Data field appears.
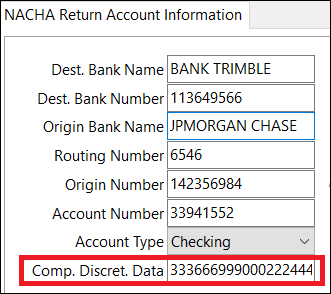
For more information on the data required in this tab, see the NACHA file specifications available on the Chase Bank website.
| For Chase Bank, Debit Segment Required is ignored. |
Dispatch
Carrier costs prorated for intercompany configurations (TM-164367)
If the DISPATCH.EXE Carrier IC Option Application Configurator option is set to One bill per bill (Yes), a single intercompany bill is created for each bill on a trip.
Previously, for intercompany configurations, charges were prorated to a single bill regardless of the cost rule selected in the Carrier Information window (aside from One Bill).
Now, charges are prorated across all bills if the Cost Rule value is:
-
Weight
-
Pallet
-
Pieces
-
Charges
-
Ton Mile
-
Cube
Driver Pay Audit
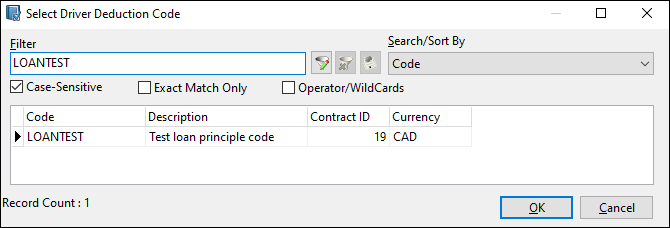
Contract ID, Currency columns available in Select Driver Deduction Code grid (TM-167974)
On the Driver Loans window, you can choose deduction codes by clicking  Pick List in the appropriate field.
In the Select Driver Deduction Code window, new columns display a code’s contract ID and/or currency.
Driver Pay Contracts
Percentage-based driver pay rules (TM-164880)
TruckMate now provides features to make it easier for you to use rules in which drivers are paid a percentage of revenue for each freight bill.
Percent tab
Four new columns have been added to the grid.
| Column name | Description | Valid values |
|---|---|---|
Percentage Of |
Type of charges used to define the base amount used to calculate percentage pay |
|
Min Number |
Minimum number of pickups/drops per stop needed for the pay rule’s percentage rate to apply |
|
Max Number |
Maximum number of pickups/drops per stop needed for the pay rule’s percentage rate to apply |
|
Count Logic |
Method by which freight bills at a particular stop are counted for pay purposes |
|
Application Configurator
Occasionally, if percentage driver pay is based on the stop number, and the calculation is done when a freight bill or picked up or delivered, the results may not be correct if the stop numbers are incorrect.
To help with this, a new PAYCON.EXE Calculate FB Driver Pay When Driver Finish Duty On Trip option has been added.
When set to True, TruckMate only calculates driver pay after the driver completes a trip or is de-assigned from a trip. This helps ensure that all stop information is correct when the calculation takes place.
Example
This illustration shows two pay rules. Rule 3 applies when the number of stops is 1 or 2. Rule 9 applies when the number of stops is between 3 and 99.

This illustration shows trip 1288.
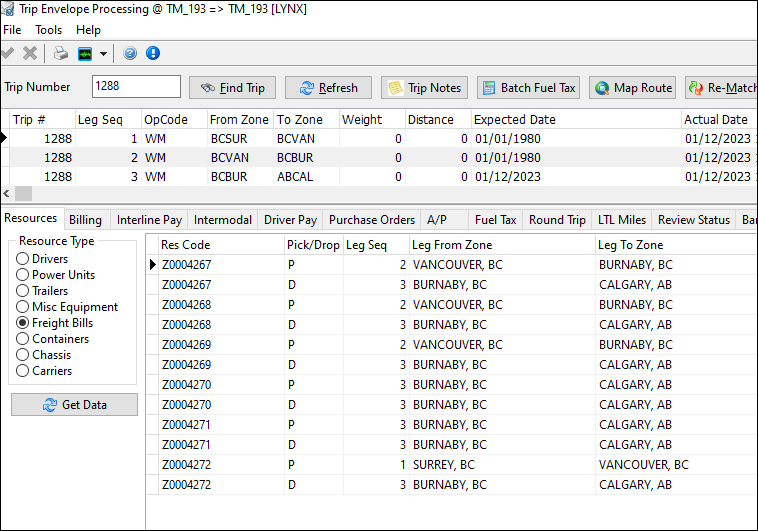
The leg sequence is as follows:
| Leg seq | Freight bill number(s) | Pickup stop |
|---|---|---|
1 |
Z0004272 |
BCSUR |
2 |
Z0004267, Z0004268, Z0004269 |
BCVAN |
3 |
Z0004270, Z0004271 |
BCBUR |
All freight bills were dropped off at ABCAL.
Rule 3 applies to the freight bills at leg 1 (1 bill) and leg 3 (2 bills). Rule 9 applies to the freight bills at leg 2 (3 bills).
This illustration shows the pay records that were generated. Note that a credit/rebill was applied to one bill (Z00004272).

Export Wizard
Customizing trailer-related fields in DISPATCH.CSV (TM-167462)
The TCG LTL/Traffic Costing Info > Linehaul Dispatch Data - DISPATCH subtype (DISPATCH.CSV) currently exports data for all leg(s) on linehaul trips (including empty legs) with trip status changes occurring within the selected date range.
The freight bill count on linehaul trip legs, along with the summary of the actual bills' weight, etc. is calculated regardless of the resource the freight is being hauled on, and the results are all in relation to Trailer1, even though there could be more than one trailer on the trip.
Now, customers can request customization for calculating values in trailer-related fields.
Exporting stop time based on trips vs. stops (TM-167762)
Previously, the TCL LTL/Traffic Costing Info > Actual P&D Trips - ALL subtype exported data with incorrect terminal times. In some cases, the departure terminal may not be the first point of departure for the trip, and/or the arrival terminal may not be the final destination.
Now, customers can export stop time based on the trip instead of the individual stop.
Imaging, Codes Maintenance
Entering Synergize Web Service credentials (TM-167558)
If users log into TruckMate via single sign-on and the original authentication method fails, they can now specify Synergize Web Service credentials manually in Codes Maintenance by going to Imaging > Workflow > Server and entering data in the Server Credentials section.
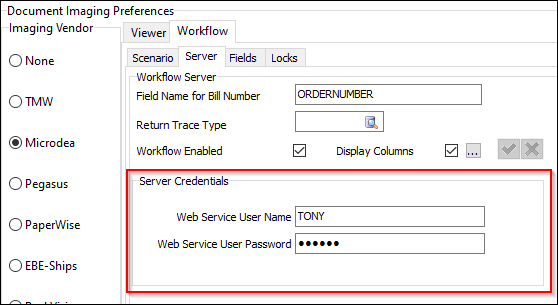
If users do not use single sign-on to log into TruckMate, these fields are optional.
Payroll and Returns Generator
Improved printing of year-end tax forms (TM-155721)
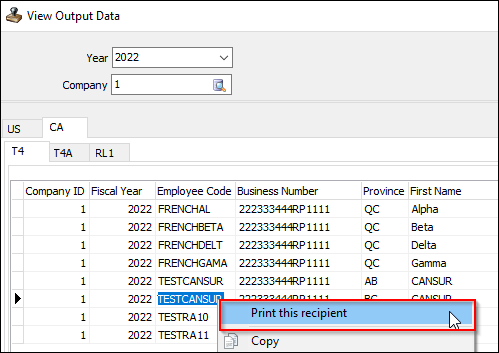
A new View Data button is available that, when clicked, opens the View Output Data window.
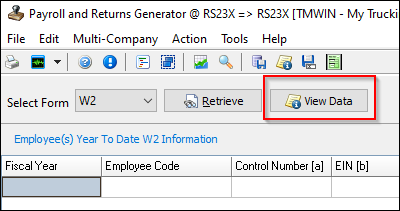
In this window, you can now print an individual form.
-
In the grid, right-click the form you want to print.
-
Select Print this recipient.
-
In the window that opens, select the appropriate report template and print the form.
