Add and remove attachments
You can attach supporting documents to master records and orders using the Upload Attachments window. These file types are supported: JPG, BMP, GIF, TIF, PDF, RTF, TXT.

Adding attachments to records
To add attachments to records:
-
Retrieve the record that needs the attachment.
-
Depending on the type of record you opened, do one of the following
-
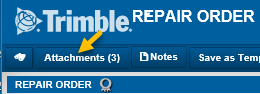
Click Attachments.
-
Click
 Images.
The Upload Attachments window opens.
-
-
Do one of the following:
Select files-
Click Select Files.
If you use Google Chrome as your browser, the Open window is displayed.
If you use Microsoft Internet Explorer as your browser, the Choose File to Upload window opens.Note: The window name might be different if you are using a browser other than the two listed above.
-
Select the file you want to attach.
-
Click Open.
-
Repeat to add more attachments.
Use the drag-and-drop method.-
Open Windows File Explorer.
-
Go to the folder that contains the attachments.
-
Drag the file you want to attach to the Upload Files window.
-
Repeat to add more attachments.
-
-
After you have added all the attachments you want, click Close.
|
If you clicked Attachments to add files to the record, the Attachments button displays the number of files attached to it.
|
Removing attachments from records
To remove attachments from a record:
-
Retrieve the record that needs the attachment removed.
-
Depending on the type of record you have open, do one of the following
-
Click Attachments.
-
Click
 Images.
The Upload Attachments window opens.
-
-
For each attachment you want to remove, click its x to remove it.
Show me
-
Click Save.
-
Click Close.