Assigning parts to a task assignment
You use the Task Parts sub tab on the Job Code Definitions page to assign parts to task assignments. When you assign parts to task assignments, the system adds them to the invoice automatically. You determine if these parts include Fixed Pricing and/or if they are required.
|
You must complete the steps listed in Working with tasks and Job Code Assignments before associating parts with task assignments. |
To assign parts to task assignments:
-
Go to Menu > Setup > Order Setup > Job Code Definitions.
For versions earlier than V. 2020.2, go to Menu > Setup > Repair Order Setup > Job Code Definitions.
The Job Code Definition page opens. -
Select the Assignments tab.
By default, the Job Code Assignment sub tab is selected and the Job Code Assignments section is displayed. -
Select the Task Parts tab.
The Task Part, Parts Catalog, and the Job Code Tasks sections are displayed.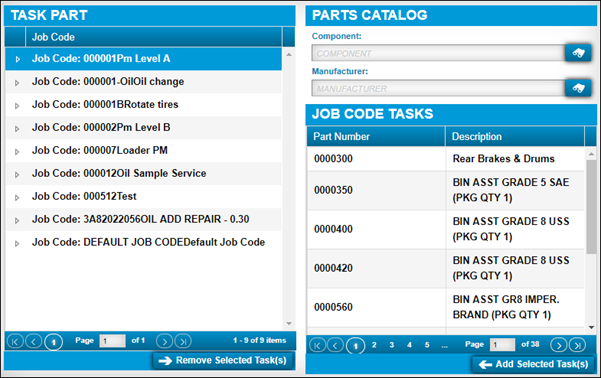
-
In the Task Part section, expand the needed Job Code.
Associated task assignments are displayed under the Job Code. -
Select the needed task.
-
In the Job Code Tasks section, select the part or parts that you want to associate with this task.
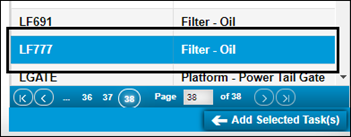
Note: You can use the Parts Catalog filters to reduce the parts listed in the Job Code Tasks section or the Data Navigator in the Job Code Tasks section to search for the needed parts.
-
Click Add Selected Task(s).
The selected part(s) are added to the task.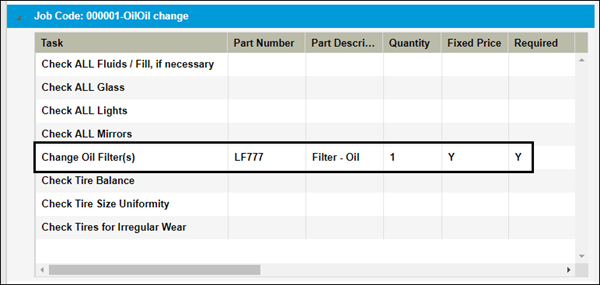
Specifying part details for a selected task
After you have associated parts with a task, you can specify the following:
-
Part quantity
-
Toggle fixed pricing on or off
-
Toggle Required on or off
|
If you toggle the Required option to YES, the system verifies that you have the part in stock and that you have sufficient quantities. |
To specify part details:
-
Go to Menu > Setup > Order Setup > Job Code Definitions.
For versions earlier than V. 2020.2, go to Menu > Setup > Repair Order Setup > Job Code Definitions.
The Job Code Definition page opens. -
Select the Assignments tab.
By default, the Job Code Assignment sub tab is selected and the Job Code Assignments section is displayed. -
Select the Task Parts tab.
The Task Part, Parts Catalog, and the Job Code Tasks sections are displayed. -
In the Task Part section, expand the needed Job Code.
Associated tasks are displayed under the Job Code. -
Select the task that contains the part you want to modify.
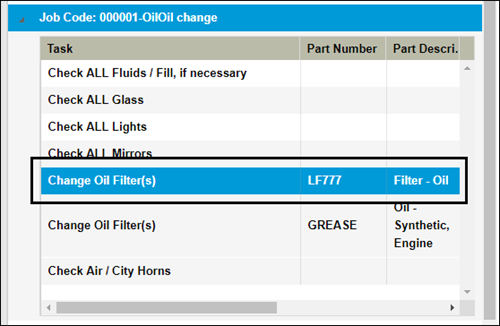
Note: The system generates a new row for each part number associated with a task.
-
Right-click on the selected task and select Edit TaskPart Assignment.
The Task Parts Assignment - Editing window opens.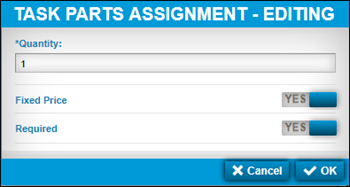
-
Make changes as needed.
-
Click OK.
To close this window without saving your changes, click Cancel.
Removing a part from a selected task
To remove a part from a selected task:
-
Go to Menu > Setup > Order Setup > Job Code Definitions.
For versions earlier than V. 2020.2, go to Menu > Setup > Repair Order Setup > Job Code Definitions.
The Job Code Definition page opens. -
Select the Assignments tab.
By default, the Job Code Assignment sub tab is selected and the Job Code Assignments section is displayed. -
Select the Task Parts tab.
The Task Part, Parts Catalog, and the Job Code Tasks sections are displayed. -
In the Task Part section, expand the needed Job Code.
Associated tasks are displayed under the Job Code. -
Select the task that contains the part you want to remove.
-
Click Remove Selected Task(s).
The part is removed from the task.