User fields
With User Fields, you can record additional information on records (such as master records or orders) that may not be available with the default fields. You use the User Fields page or the User Fields window to create, edit, or remove these fields.
|
The only difference between the User Fields page and the User Fields window is how you access the information. If you are working with a record (such as the Customer master record), the system opens the User Fields window instead of the User Fields page. |
-
Create or load a record.
-
Enter the record’s ID.
-
Click on the User Fields tab.
-
Click Define Fields.
The User Fields window appears.

-
The User Fields tab is available on these pages:
-
Company master record
-
Customer master record
-
Employees master record
-
Shop Inventory master record
-
Shops master record
-
Units master record
-
Vendors master record
-
Campaigns
-
Estimate Order
-
Invoices
-
Purchase Order
-
Repair Order
To open the User Fields page, go to Menu > Setup > User Fields.
The User Fields page opens.
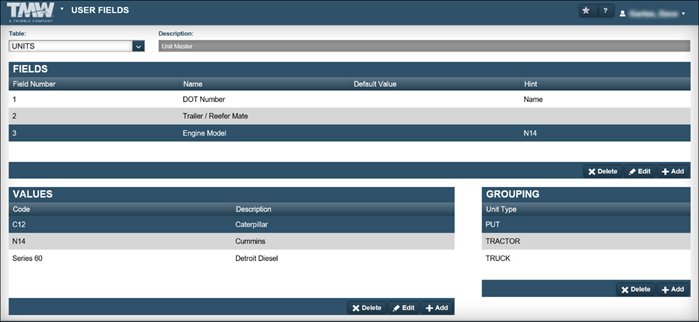
Regardless of which method you use, the system displays the same information. The User Fields page/window contains the following sections:
-
Fields
This section displays existing fields. -
Values
If the user field requires drop-down options, this section displays those values. -
Grouping
Note: This section is available on the Unit master record only.
This section displays which unit types have the selected user field.
| Field | Definition |
|---|---|
Field Number |
Order of sequence for user fields |
Name |
User field name |
Default Value |
Default field name |
Hint |
User field pop-up hint, when present |
Values |
|
Code |
User field value code |
Description |
User field value description |
Grouping (Unit master only) |
|
Unit Type |
Unit type |
Creating user fields
With User Fields, you can record additional information on records (such as master records or repair orders) that may not be available with the default fields. You use the User Fields page or the User Fields window to create, edit, or remove these fields. This information may be industry specific or specific to your company.
|
The only difference between the User Fields page and the User Fields window is how you access the information. If you are working with a record (such as the Customer master record), the system opens the User Fields window instead of the User Fields page. |
To create a user field:
-
Do one of the following:
-
Open the User Fields window.
-
Load the User Fields page.
For details on how to load the User Fields information, see User fields.
-
-
In the Table field, select the record where you want to add this user field.
Note: If you opened the User Fields window from a record, this field defaults to that record. For example, opening the User Fields window from the Customer master record displays Customer.
-
In the Fields section, click Add.
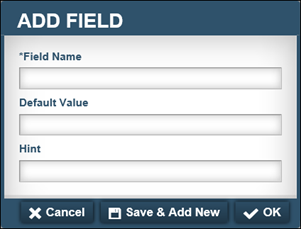
The Add Field window appears.
-
Enter a name for the user field in the Field Name field.
-
If needed, enter a default value for the field in the Default Value field.
-
If needed, enter a hint in the Hint field.
Entering a value in this field displays an example when you hover your cursor over the field.
-
Do one of the following:
-
To save the user field, click OK.
The system saves the user field. The window closes.
-
To save and add another user field, click Save & Add New.
The system saves the user field. The window remains open to allow you to add another user field.
-
To close the window without saving your changes, click Cancel.
Working with user fields
You use the User Fields page or the User Fields window to edit or remove user fields, user field values, or unit type groupings.
|
The only difference between the User Fields page and the User Fields window is how you access the information. If you are working with a record (such as the Customer master record), the system opens the User Fields window instead of the User Fields page. |
Adding values to user fields
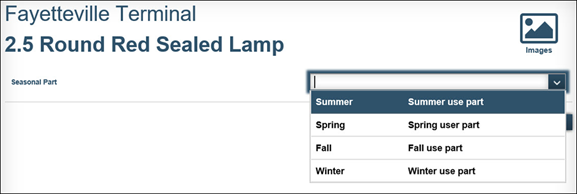
When you add values to a user field, the system converts that field to a drop-down list where users can select an option.
To add values to a user field:
-
Do one of the following:
-
Follow Steps 1-7 in Creating user fields.
-
Load the User Field window or the User Field page.
For details on how to load the User Fields information, see User fields.
-
-
In the Fields section, select the needed user field
-
In the Values section, click Add.
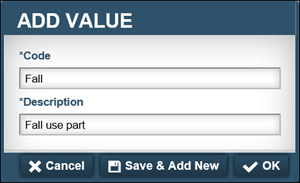
The Add Value window appears.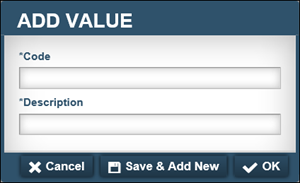
-
In the Code field, enter the drop-down option.
-
In the Description field, enter the value’s description.
-
Do one of the following:
-
To save the value, click OK.
The system saves the user field value. The window closes.
-
To save and add another value, click Save & Add New.
The system saves the user field value. The window remains open to allow you to add another user field value.
-
To close the window without saving your changes, click Cancel.
This illustration shows an example of user field values.
Adding unit type groupings to user fields
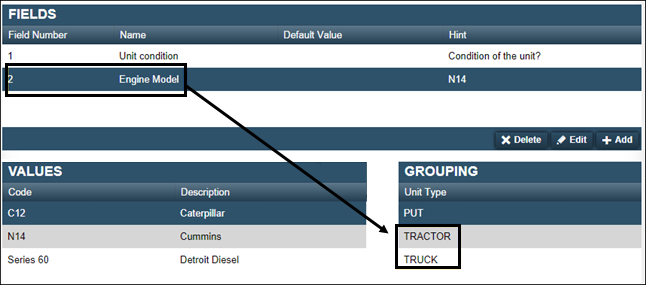
If you select Units (Unit master record) in the Table field, the system displays the Grouping section. In this section you associate user fields with specific unit types.
In this example, the Engine Model user field will display on Unit master records where the unit type is PUT. It will not display on Unit master records where the unit type is Tractor or Truck.
To add a unit type grouping to a user field:
-
Do one of the following:
-
Follow Steps 1-7 in Creating user fields.
-
Load the User Field window or the User Field page.
For details on how to load the User Fields information, see User fields.
-
-
In the Fields section, select the needed user field.
-
In the Grouping section, click Add.
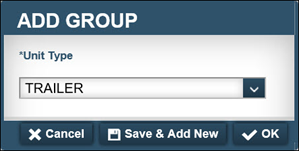
The Add Group window appears.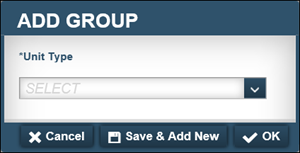
-
In the Unit Type field, select the needed Unit Type.
-
Do one of the following:
-
To save the grouping, click OK.
The system saves the grouping. The window closes.
-
To save and add another grouping, click Save & Add New.
The system saves the grouping. The window remains open to allow you to add another grouping
-
To close the window without saving your changes, click Cancel.
Editing user fields or user field values
Editing a user field will change the header for all records associated with that user field. It will not have an effect on values or groupings.
Editing a user field value will change that value for all records associated with that user field value. It will not have an effect on the user field or associated groupings.
-
Do one of the following:
-
Follow Steps 1-7 in Creating user fields.
-
Load the User Field window or the User Field page. For details on how to load the User Fields information, see User fields.
-
-
Do one of the following:
Edit a user field-
In the Fields section, select the needed user field.
-
Click Edit.
The Edit Field window appears.
-
Make changes as needed.
-
Select a save option:
-
Click OK.
The system saves your changes and exits the Edit Field window. -
Click Save & Add New.
The system saves your changes and a new Add Field window appears. -
Click Cancel.
Exits the Edit Field window with no changes.
-
Edit a user field values-
In the Fields section, select the needed user field.
-
In the Values section, select the needed value.
-
Click Edit.
The Edit Value window appears.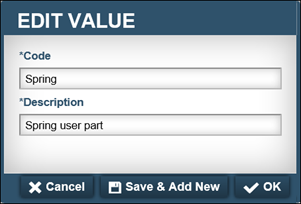
-
Make changes as needed.
-
Select a save option:
-
Click OK.
The system saves your changes and exits the Edit Value window. -
Click Save & Add New.
The system saves your changes and a new Add Value window appears. -
Click Cancel.
Exits the Edit Value window with no changes.
-
-
Deleting user fields, use field values, or unit type groupings
When you delete an existing user field, the system deletes all associated values and groupings for that user field.
If you delete a user field value, that value is removed from that user field system-wide.
If you delete a unit type grouping, grouping is removed from that user field system-wide. If it was the only grouping in the system for that user field, the other unit user fields become visible for every unit. See the Note in Adding unit type groupings to user fields.
|
You CANNOT undo deleting a user field, user field value, or a unit type grouping. Trimble recommends that your system administrator perform these steps. |
-
Do one of the following:
-
Follow Steps 1-7 in Creating user fields.
-
Load the User Field window or the User Field page.
For details on how to load the User Fields information, see User fields.
-
-
Do one of the following:
Delete a user field.-
In the Fields section, select the needed user field.
-
Click Delete.
The Delete Record window appears. It asks, "Are you sure you want to delete the selected Fields record?" -
Click Yes to remove the user field from the Fields section and exit the Delete Record window.
Clicking No exits the Delete Record window without making any changes.
Delete a user field value.-
In the Fields section, select the needed user field.
-
In the Values section, select the needed value.
-
Click Delete.
The Delete Record window appears. It asks, "Are you sure you want to delete the selected Values record?" -
Click Yes.
The user field value is removed from the Values section and the Delete Record window closes.
Clicking No exits the Delete Record window without making any changes.
Delete a unit grouping.-
In the Fields section, select the needed user field.
-
In the Groupings section, select the needed grouping.
-
Click Delete.
The Delete Record window appears. It asks, "Are you sure you want to delete the selected Grouping record?" -
Click Yes.
The user grouping is removed from the Groupings section and the Delete Record window closes.
Clicking No exits the Delete Record window without making any changes.
-