Customer master records
The Customer master record is an important part of the invoicing system. When you create an invoice, you must associate it with a customer. Before you begin a repair order, that customer must have an existing customer master record in your system.
You use the Customers page to:
-
Create customer records
-
Update customer information
-
Remove customer records
Go to Menu > Masters > Customers to open the Customers page.
Layout of the Customers page
This illustration shows the Customers page.

1 |
The Application Menu lists application menu items. |
2 |
Page Name |
3 |
Help opens online Help in a separate window. |
4 |
The User menu lists user-specific menu items. |
5 |
Command buttons let you delete, add, reset, and save customer records. |
6 |
The Navigation pane includes the Customer lookup field and the Search icon. The identification number used to look up a customer is user defined. You can enter up to 12 alphanumeric characters in this field.
The Navigation pane also includes the Customer page tabs. |
7 |
The Content pane is where you enter information into the program. |

| Pages are designed so that menus and functionality areas appear the same way throughout the application. While some elements are not part of every page, the basic layout of the page is consistent. |
The Customer page tabs
The Customer page has eight tabs:
-
The Definition tab contains basic details about the customer.
-
The Contacts tab contains contact details for people at the customer’s company.
-
The Units tab shows all units currently assigned to the customer.
-
The Taxes tab lets you view, set up, or change a customer’s tax method and/or tax rate.
-
The Pricing tab lets you view and specify pricing based on unit type and/or repair site.
-
The Hierarchy tab lets you see and set up parent/child relationships between customer sections, such as a corporate office (parent) and a division (child).
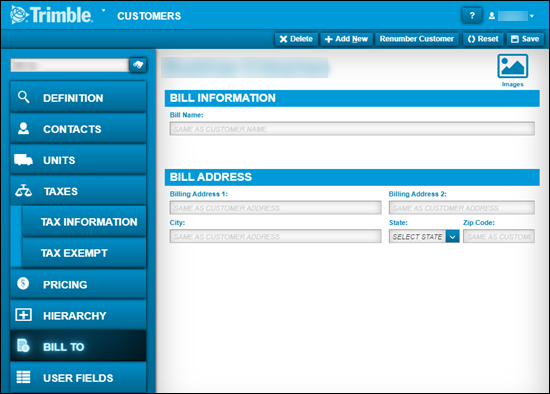
-
The Bill To tab lets you set up a separate billing name and/or address, if it is different from the physical address on the Definition tab.
-
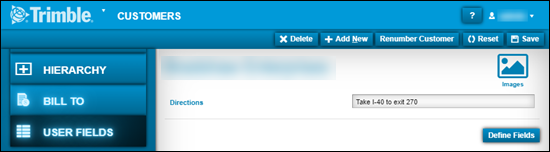
The User Fields tab lets you see and define custom fields
Definition tab
The Definition tab shows five sections:
This illustration shows the Definition tab sections.

By default, the credit limit feature is disabled. To enable it, toggle Enforce Credit Limit to YES. When you do, the page shows two new fields:
-
Credit Limit
The entry in this field sets the maximum amount of credit the customer is allowed. A field entry of $0.00 indicates that no limit applies. -
Invoice Limit
The entry in this field sets the maximum amount of credit the customer is allowed on a single invoice. A field entry of $0.00 indicates that no limit applies.
If the customer’s total balance due exceeds its credit limit, the system:
-
Issues an error message indicating the credit limit
-
Does not allow you to create the repair order
Contacts tab
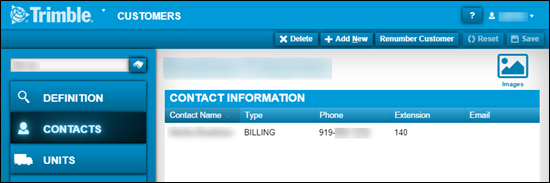
The Contacts tab shows the Contact Information section. You use it to record multiple contacts for the customer. You use the section’s command buttons to delete, edit, or add a contact.
This illustration shows the Contact Information tab section.
Units tab
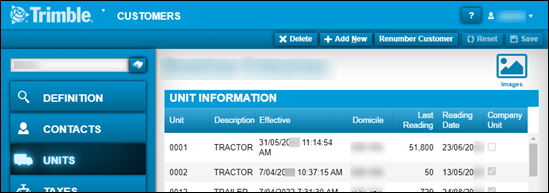
The Units tab shows all the units currently assigned to a customer. You use the section’s command buttons to Assign, Unassign, or Reassign customer units.
This illustration shows the Unit Information tab section.
Taxes tab
The Taxes tab shows the Tax Information section. This section allows you to set up or change a customer’s tax method and/or tax rates. If you do not enter tax information in this section, the system applies the shop-level tax method and tax rates to the customer.
The system supports two tax methods:
-
Standard
Taxes are calculated separately, and then added together for a total. -
Tax On Tax
Taxes are calculated in a sequential method, based on the value in the Sequence field. The tax rate with a one (1) in the Sequence field is calculated first and is added to any rate with a two (2) in the Sequence field. The system continues adding tax rates together for all sequences.
Pricing tab
The Pricing tab shows the Pricing Information section. This section allows you to specify specific pricing based on a unit type and/or a repair site. When you create unit-type pricing for a customer, the system references that pricing instead of the price table assigned to the customer master record.
Hierarchy tab
The Hierarchy tab displays the Customer Hierarchy section. This section allows you to establish a hierarchy of parent/child relationships between customer entities, such as a corporate office and a division.
Benefits of setting up a customer hierarchy include:
-
Displays a chart that shows how the customer’s entities (for example, corporate office, distribution center, shop, etc.) are associated with each other.
-
Allows you to set up Bill To information based on the customer hierarchy.
By default, the system disables this section. If you want to enable customer hierarchies, toggle the This customer has a parent option to YES.