Setting up Contract Maintenance
First available in TMT Fleet Maintenance: 2018.2
As of V.2020.1, this functionality is no longer supported.
You must set up your system before you can use Contract Maintenance.
-
Enable the Master Service Agreement (MSA) feature for each customer who has a contract.
-
Specify approval levels.
Enabling Contract Maintenance for a customer
To create contracts for a customer you must enable the Master Service Agreement feature on that customer’s master record.
| You enable the Master Service Agreement feature on a customer-by-customer basis. |
To enable Contract Maintenance for a customer:
-
Go to Menu > Masters > Customers.
The Customers page opens.Show me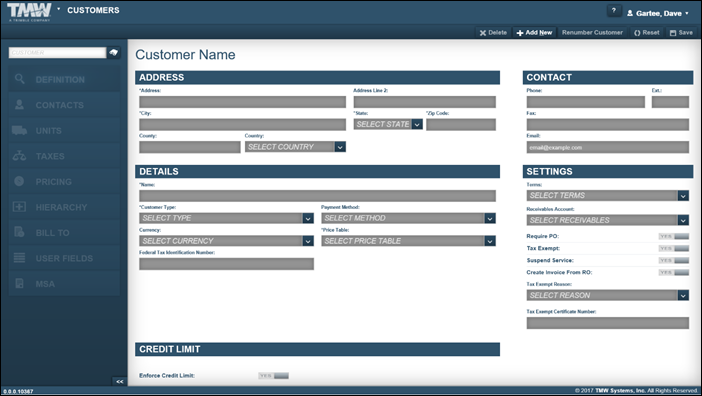
-
In the Customer field, enter the customer ID and press ENTER.
The page refreshes to display basic customer information. -
Click the MSA tab.
The MSA Settings and Full Service Lease Settings sections are displayed.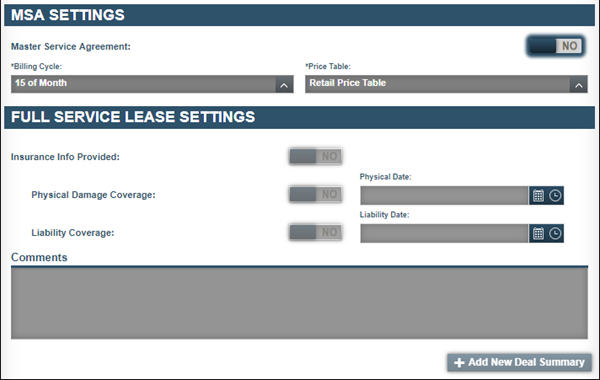
-
Toggle the Master Service Agreement option to YES.
The Billing Cycle and Price Table fields are enabled.
Show me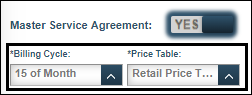
-
In the Billing Cycle field, select the billing cycle for this customer.
Note: Your company determines the values in these fields.
-
In the Price Table field, select the customer’s price table.
-
Do one of the following:
-
If the customer has insurance:
Note: The Full Service Lease Settings section and the Comments section are informational only. They do not interact with other Contract Maintenance functions.
-
Toggle the Insurance Info Provided option to YES.
The Physical Damage Coverage and Liability Coverage options are enabled.
Show me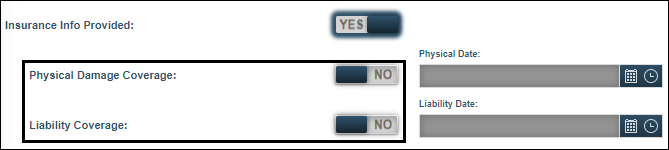
Note: You must toggle the Physical Damage Coverage and Liability Coverage options to YES to make entries in the date fields.
-
Toggle the options and enter the dates as needed.
-
If needed, enter comments about the contract in the Comments section.
-
Click Save.
-
-
If you are not tracking insurance, click Save.
-
Specifying rate sheet approval levels
When you create a deal with a customer, you associate a single rate sheet or multiple rate sheets with it. Each rate sheet must go through the approval process.
This table identifies the different rate sheet approval levels.
| Approval status | Description |
|---|---|
Submitted |
Default status for submitted rate sheets |
Assessment |
Review and make adjustments to the rate sheet |
Approval |
Rate sheet is approved, but not associated with a deal |
Active |
Rate sheet active and associated with a deal Note: Once a rate sheet is active, you cannot make changes to that rate sheet. |
Closed |
Rate sheet is inactive, all billing/invoicing stops |
Canceled |
Rate sheet is canceled |
This illustration shows the rate sheet approval workflow.

| You can cancel a rate sheet anytime during the process. However, you cannot skip steps in the process. For example, you cannot move a rate sheet from the Assessment status to the Closed status. |
You can specify which user or users may approve a rate sheet for a specific status.
To specify rate sheet approval levels:
-
Go to Menu > Security > Contract Maintenance > Approval Security.
The Approval Security page opens.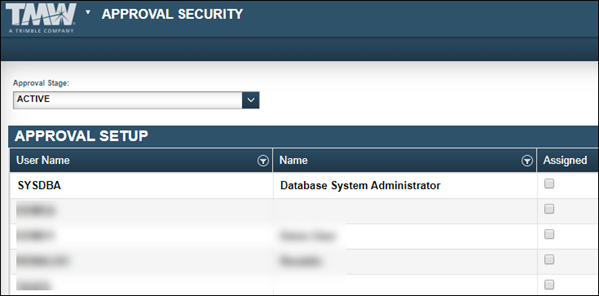
-
In the Approval Stage field, select the approval status.
-
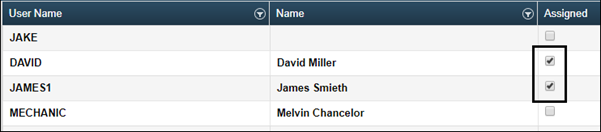
In the Approval Setup section, select the Assigned checkbox next to each user who has authority to approve rate sheets for this status.
-
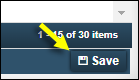
Click Save.
-
Repeat Steps 1-4 as needed.