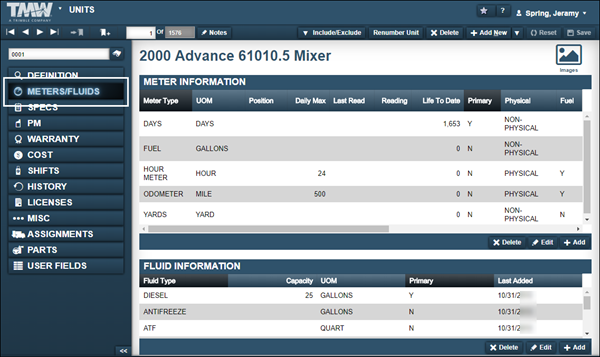
Meters and fluids
You use the Meters/Fluids tab on the Units page to add, edit, or remove a unit’s meters and fluids.
|
This illustration shows the Meters/Fluids tab.
Working with a unit’s meters
To track unit use or set up preventive maintenance schedules, you must first add meters to unit records. Meters allow you to track specific information (such as the odometer reading) for that unit.
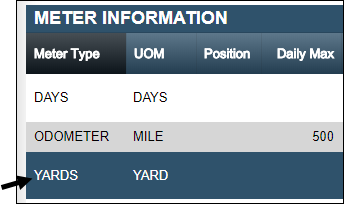
There are two types of meter readings:
-
Physical meters (such as odometer reading or engine hours)
-
Non-physical meters (such as days)
You use the Meter/Fluids tab on the Units page to add, update, or remove a unit’s meters.

Adding a meter to a unit
Before you can add meters to units, you must verify that they exist in your system.
To add a meter to a unit:
-
Select the Meters/Fluids tab.
The Meter Information section is displayed.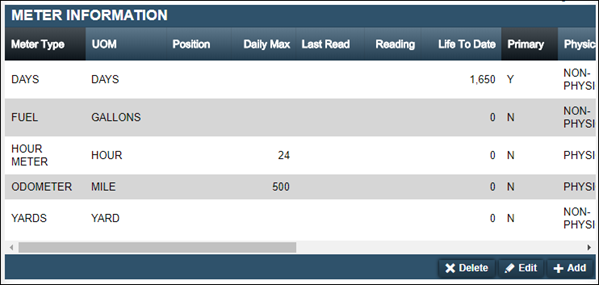
-
Click Add.
The Add Unit Meter window opens.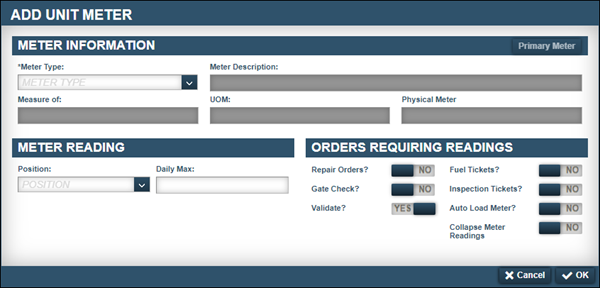
You use this window to add meters to a unit and specify when a meter reading is required.
-
In the Meter Type field, select the type of meter you want to add to this unit.
When you select a meter type, the system updates the Meter Description, Measure of, UOM, and Physical Meter fields automatically.
Notes:
-
A physical meter (such as the odometer reading) is the most common primary meter.
-
If the unit does not have a physical meter, you should use the Days meter as the primary meter.
-
Trimble recommends adding the Days meter to all equipment, even if it is not the primary meter.
-
-
Make entries as needed.
For information on individual fields, see Meters/Fluids tab - Meter Information.
When making entries in the following fields, review the guidelines listed.
-
Position
Unit meters cannot occupy the same position on a unit.If you are adding a physical meter, you can specify a position in the Position field. You only need to make this entry if more than one of the same meter type is present on the unit.
If you are adding a non-physical meter, you can ignore the Position field.
-
Daily Max
The system uses this field to limit the utilization that can be entered daily. The Daily Max entry can create a flag if a driver exceeds legal limits for utilization per day or to prevent a keystroke error during entry. -
Orders Requiring Readings section fields
You can specify when the system requires a user to enter meter readings by toggling the following options to YES:-
Repair order?
-
Fuel tickets?
-
Gate check?
-
Inspection tickets?
-
Validate?
If you are adding a physical meter, the Validate option is set to YES by default. Trimble recommends leaving this option set to YES. This means that the system looks at each new meter reading and verifies that it is greater than or equal to the previous reading. -
Auto Load Meter?
If your company uses a third-party interface to track unit meters, you can set up the system to update meter readings automatically. When you toggle this option to YES, you activate the Read Only? field. -
Read Only?
When you toggle this option to YES, the system disables the Manual Meter Reading Entry feature. As a result, the system does not allow you to enter meter readings manually.
-
-
-
If this meter is your primary meter, click Primary Meter.
Note: You can add one primary meter to a unit.
-
Click OK.
The system adds the meter record to the Meter Information section.
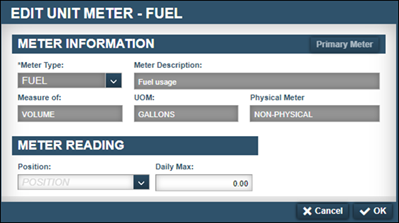
Updating a unit’s meter
To update a unit’s meter:
-
Select the Meters/Fluids tab.
The Meter Information section is displayed. -
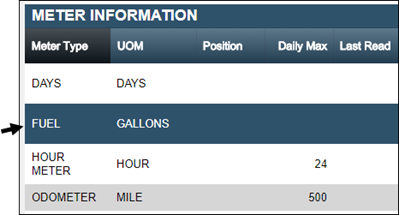
Select the row that you want to update and click Edit.
The Edit Unit Meter window opens.
-
Make changes as needed.
-
Click OK.
The system updates the meter record.
Removing a meter from a unit
To remove a unit’s meter:
-
Select the Meters/Fluids tab.
The Meter Information section is displayed. -
Select the row that you want to delete and click Delete.
The Delete Meter system message window opens. It asks "Are you sure you want to delete meter Meter Type Name?"
-
Click Delete Meter.
The meter record is removed from the Meter Information section.
Working with a unit’s fluids
Most units (such as tractors, vans, trucks, or farm equipment) require fluids, such as diesel fuel, transmission fluid, or hydraulic oil.
| If your company creates fuel tickets, you must add fluids to the Unit master records. |
You use the Meter/Fluids tab on the Units page to add, update, or remove a unit’s fluids.
Adding a fluid to a unit
Before you can add fluids to units, you must verify that they exist in your system.
To add a fluid to a unit:
-
Select the Meters/Fluids tab.
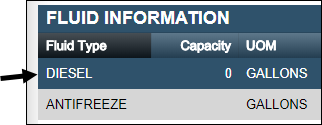
The Fluid Information section is displayed.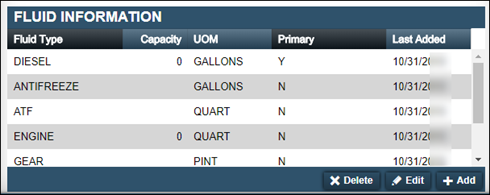
-
Click Add.
The Add Unit Fluid window opens.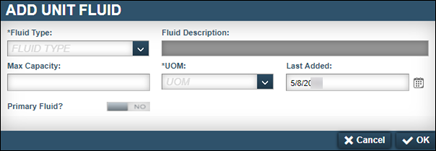
-
In the Fluid Type field, select a fluid type.
The Fluid Description field fills automatically. -
Make entries as needed.
For information on individual fields, see Meters/Fluids tab - Fluid Information.When you enter an amount in the Max Capacity field, your entry limits the amount of fluid the system allows you to add to a Fuel Ticket.
-
If this is the primary fluid, toggle the Primary Fluid? option to YES.
Trimble recommends that you flag the unit’s fuel as the primary fluid.
Note: You can assign one primary fluid per unit. If you have already set a fluid as the primary fluid, this option is not available.
-
Click OK.
The fluid is displayed to the Fluid Information section.
Updating a unit’s fluid
To update a unit’s fluid:
-
Select the Meters/Fluids tab.
The Fluid Information section is displayed. -
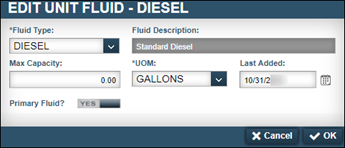
Select the row that you want to update and click Edit.
The Edit Unit Fluid window opens.
-
Make changes as needed.
-
Click OK.
The system updates the fluid record.
Removing fluids from a unit
To remove a fluid from a unit:
-
Select the Meters/Fluids tab.
The Fluid Information section is displayed. -
Select the row that you want to delete and click Delete.

The Delete Fluid system message window opens. It asks, "Are you sure you want to delete fluid Fluid Type Name?"
-
Click Delete Fluid.
The fluid record is removed.