Working with Job Codes
You use Job Codes to establish a baseline for activities, such as an oil change or a front brake repair. You establish a Job Code for a component code.
|
Job Codes are also known as Standard Jobs or Standard Repair Times. |
Creating Job Codes
-
Go to Menu > Setup > Order Setup > Job Code Definitions.
For versions earlier than V. 2020.2, go to Menu > Setup > Repair Order Setup > Job Code Definitions.
The Job Code Definition page opens. -
Select the Job Code tab.
-
Click Add.
The Job Code - Inserting window opens.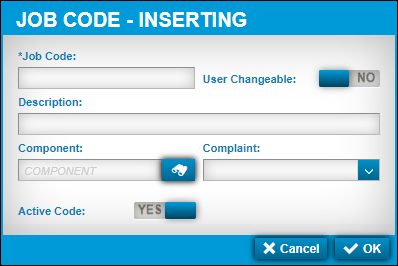
-
Make entries in the fields as needed.
For details about individual fields, see Job Code tab.
-
Click OK.
The new Job Code is added to the Job Code Grid. -
Repeat Steps 3-5 to add more Job Codes.
If you want to close this window without saving your changes, click Cancel.
Editing Job Codes
You can edit an existing Job Code. The system updates all assignments associated with that Job Code.
To edit Job Codes:
-
Go to Menu > Setup > Order Setup > Job Code Definitions.
For versions earlier than V. 2020.2, go to Menu > Setup > Repair Order Setup > Job Code Definitions.
The Job Code Definition page opens. -
Select the Job Code tab.
-
In the Job Code Grid section, select the Job Code that you want to edit.
-
Click Edit.
The Job Code-Editing window opens.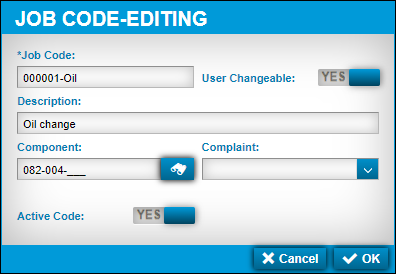
-
Make changes as needed.
-
Click OK.
The window closes and the page refreshes to display your changes.
If you want to close this window without saving your changes, click Cancel.
Deleting Job Codes
You can delete an existing Job Code. When you do, the system deletes all assignments associated with it.
The system does not allow you to delete a Job Code with assignment history or time recorded against the Job Code. Instead, you must mark the Job Code as inactive.
To delete Job Codes:
-
Go to Menu > Setup > Order Setup > Job Code Definitions.
For versions earlier than V. 2020.2, go to Menu > Setup > Repair Order Setup > Job Code Definitions.
The Job Code Definition page opens. -
Select the Job Code tab.
-
In the Job Code Grid section, select the Job Code that you want to delete.
-
Click Delete.
The Delete Job Code message window opens. It asks, "Are you sure you want to delete Job Code?" -
Click Delete.
The Job Code is removed from your system.
If you want to close this window without saving your changes, click Cancel.
Marking Job Codes as inactive
When a Job Code is no longer being used, you can mark it as Inactive. When you do this, the system removes that Job Code from the list of available Job Codes. It does not remove the Job Code from your system.
To mark Job Codes as inactive:
-
Go to Menu > Setup > Order Setup > Job Code Definitions.
For versions earlier than V. 2020.2, go to Menu > Setup > Repair Order Setup > Job Code Definitions.
The Job Code Definition page opens. -
Select the Job Code tab.
-
In the Job Code Grid section, select the Job Code that you want mark as inactive.
-
Click Edit.
The Job Code-Editing window opens. -
Toggle the Active Code option to NO.
-
Click OK.
The Job Code is removed from the Job Code Grid.
If you want to close this window without saving your changes, click Cancel.