Creating an employee record
Before new employees can log into the system, work on repair orders, or perform indirect charges, you must create their employee master records. You create a new employee master record in the Add New Employee window. You access the window from the Employees page.

To create an employee master record:
-
Go to Menu > Masters > Employees.
The Employees page opens.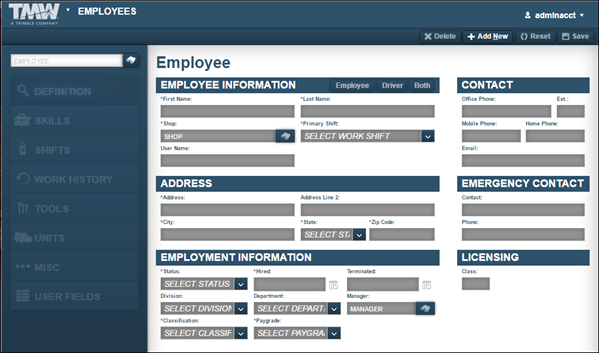
-
Click Add New in the upper-right corner of the page.
The Add New Employee window opens.Show me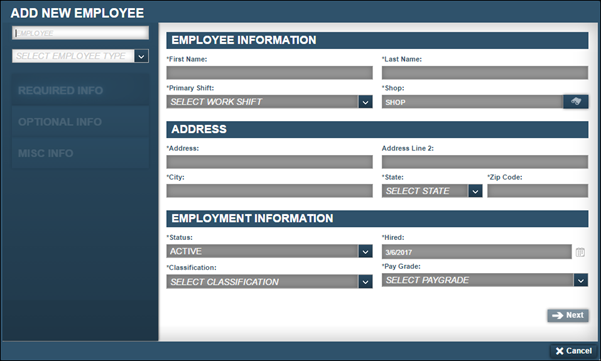
-
In the Employee field, enter the new employee’s identification number (ID) and press TAB.
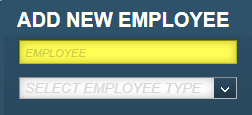
The ID must be unique for each employee. It may include up to 12 alphanumeric characters.
-
In the Select Employee Type field, select the employee type and press TAB.

-
Driver
An employee who has a license to drive units at the shop location. Typically, this employee has an active Commercial Driver’s License (CDL). -
Employee
An employee who works in a position other than a driver, such as a mechanic or office worker. -
Employee/Driver
An employee who performs a job at the shop and is licensed to drive units on the shop.
Note: Your selection determines which tabs appear on the Employees page. You use these tabs to record additional information about the employee. For details on the different tabs, see Understanding employee types.
The Employee Information, Address, and Employment Information sections are enabled.
-
-
On the Required Info tab, make entries in all required fields in the Employee Information, Address, and Employment Information sections.
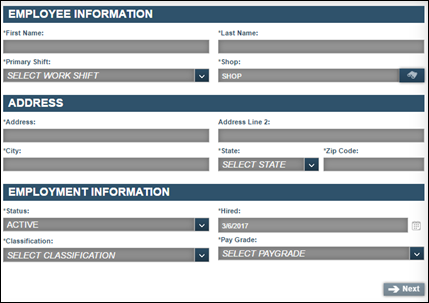
For details about individual fields, see Definition tab.
-
When you are finished, click Next.
The system selects the Optional Info tab. It includes the Employee Information, Contact Information, Emergency, and Licensing & Employment Information sections.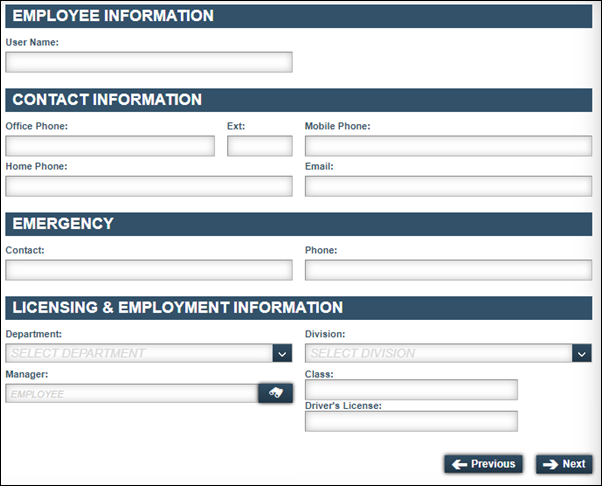
-
Make entries in the fields as needed.
For details about individual fields, see Definition tab.
-
When you are finished, click Next.
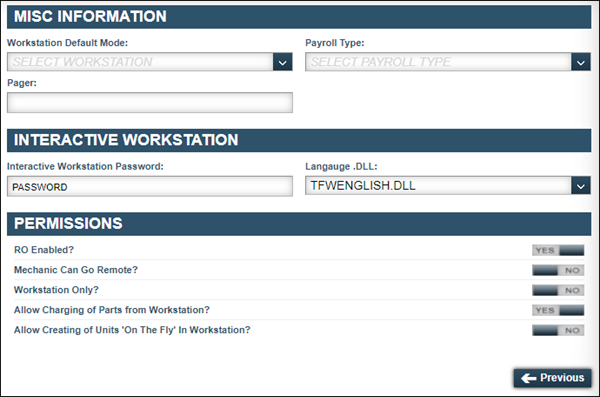
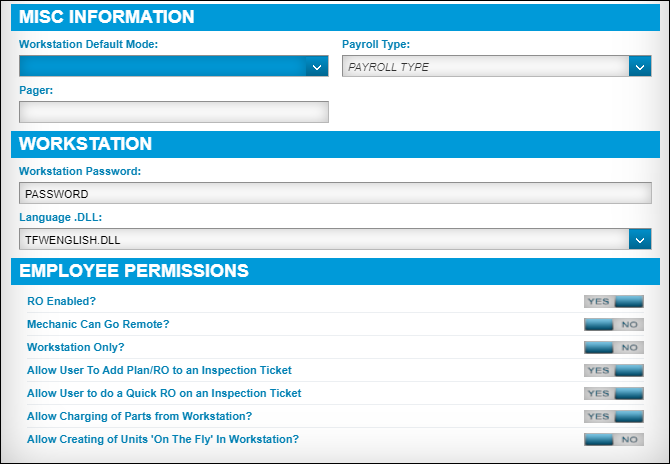
The Misc Info tab is displayed. What you see depends on what version you are using.-
If you are using V.2022.2.2 or earlier, the Misc Info tab includes the Misc Information, Interactive Workstation, and Permissions sections.
-
If you are using V.2022.3 or later, the Misc Info tab includes the Misc Information, Workstation, and Permissions sections.
-
-
Make entries in the following fields as needed.
For details about individual fields, see Misc tab. -
When you are finished, click Save.
The system creates the new record and returns you to the Employees page. The page displays the new employee’s record.