Working with the Job Activity page in MWS
|
Interactive Workstation (IWS) and Mechanics Workstation (MWS) are available only in V.2022.2.2 and earlier. As of V.2022.3, IWS and MWS have been replaced with Trimble Technician Portal (TTP). |
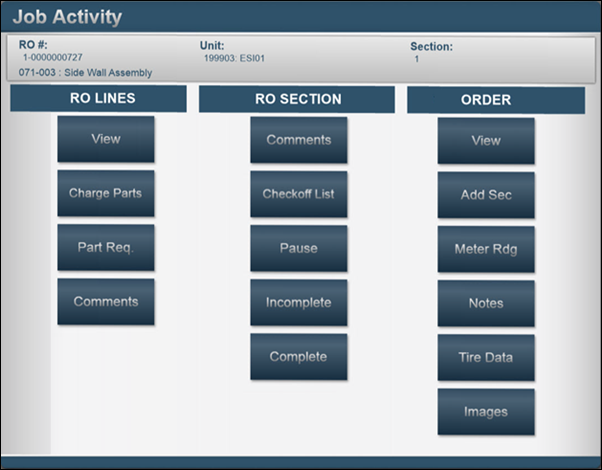
On the Interactive Workstation page, you use the Job Activity section to manage activities on an order. The page has three sections:
-
RO Lines
-
On an Indirect Charge, the RO Lines section displays as Ind. Charge Lines.
-
The Parts Req feature is not available on the Indirect Charges Job Activity page.
-
-
RO Section
-
On an Indirect Charge, the RO Section section is named Ind. Charge Section.
-
The Checkoff List feature is not available on the Indirect Charges Job Activity page.
-
-
Order
The Order section is not available on the Indirect Charges Job Activity page.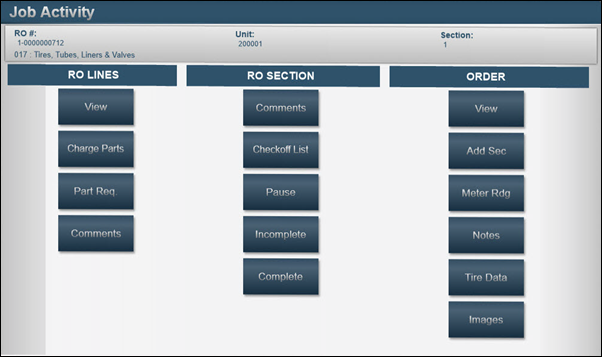
Working with repair order and indirect charge lines in MWS Job Activity
Once you are logged onto an order, you use the RO Lines/Ind. Charge Lines column to enter parts and comments, place items on order, and view current lines on a Repair Order (RO Lines) or an Indirect Charge (Ind. Charge Lines). The actions include:
| Field | Definition |
|---|---|
View |
View existing charge lines and comments |
Change Part |
Charge parts to the order section |
Part Req |
Place part requests for the order section Note: Parts requests are not available for Indirect Charges. |
Comments |
Add repair-related comments (employee’s comments) to the order section |
Viewing lines in MWS Job Activity
All line types are view only except Part lines. To view charge lines:
-
Log in to Interactive Workstation.
The Job Activity page opens. -
On the Job Activity page, in RO Lines/Ind. Charge Lines, click View.
The Sections and Lines panes appear.-
The Sections pane lists all the sections on the order.
Note: Indirect Charges have only one section. -
The Lines pane shows the lines on the repair order.
The lines you see correspond with the section selected in the Sections pane. For example, if you select section 1, you see all the lines pertaining to section 1.
Sections field definitionsField Definition Section Number
Repair order section number
Priority
Priority level for the section
Complaint
The problem that prompted the repair
Component
Component code and description of the section
Repair Reason
How the problem was reported
Warranty Type
Displays the type of warranty in effect for the section
Section Status
Status of the section
Billable
Indicates if the section can be invoiced
-
True
Section can be invoiced -
False
Section cannot be invoiced
Opened
Date the section was created
Complete
Displays the last labor line date
-
-
Select the section.
Line items are shown in the Lines pane.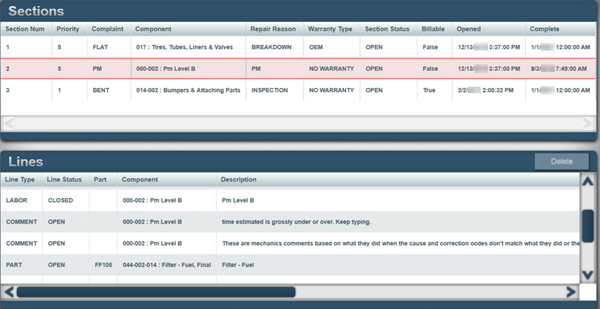 Lines field definitions
Field Definition Line Type
Type of line item
Line Status
Status of the line item
Part
If the Line Type is Part, shows the user defined part identification number
Component
Component code and description of the line item
Description
Line description
Mechanic
User defined employee identification number
Vendor Line
Indicates of the line is vendor supplied
-
N
Not vendor supplied -
Y
Vendor supplied
Hours
If the Line Type is Labor, labor hours are displayed.
Qty. Charged
If the Line Type is Part, lists the quantity charged.
Qty. UOM
Unit of measure for the line charged
Charge Category
Displays the charge or part category for the line
Acct. Type
For part transactions to be reflected with period close, all parts must have an account type selected.
Shop ID
User defined repair shop identification number
-
Deleting a part from a repair order in MWS Job Activity

To delete a part from a repair order:
-
Highlight a Part line in the Lines pane.
The Delete button becomes active. -
Click Delete.
Any associated fees, taxes, etc., are also removed.
| If the Tire Module is licensed, you cannot delete Tire part lines through MWS. |
Charging parts in MWS Job Activity
To charge out parts:
-
Log in to Interactive Workstation.
The Job Activity section opens. -
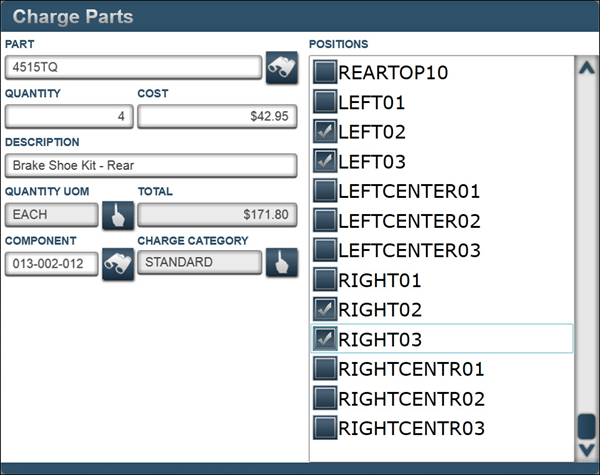
From the Job Activity section, in the RO Lines/Ind. Charge Lines column, click Charge Parts.
The Charge Parts page opens. -
Enter the Part number.
-
Enter the Quantity.
-
The Component field defaults to the component code assigned to the part record.
Note: You can edit this field when needed. -
Assign Position codes, if needed.
Note: Position codes must be divisible by the quantity entered.Acceptable position assignmentsQuantity Position(s) 1
1
2
1 or 2
3
1 or 3
4
1, 2 or 4
Unacceptable position assignmentsQuantity Position(s) 3
2
4
3
5
2, 3 or 4
7
2, 3, 4, 5 or 6
Note: If the positions are not divisible by the quantity, you must enter separate part lines to accommodate an acceptable position assignment.
-
Click Post.
A new Charge Parts page opens. -
Do one of the following:
-
Charge out additional parts, as needed
-
Click Escape to exit the charge parts page.
The Job Activity section opens.
-
Requesting parts in MWS Job Activity
To request parts:
-
Log in to Interactive Workstation.
The Job Activity section opens. -
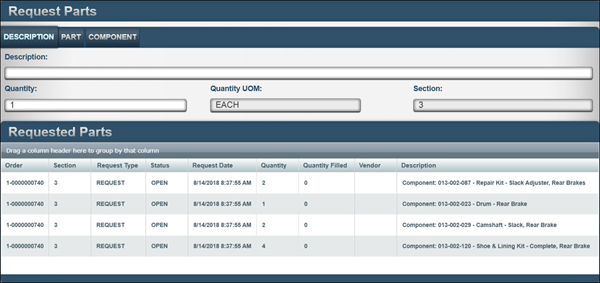
From the Job Activity section, in the RO Lines column, click Part Req.
The Request Parts page opens. The window has two sections:-
The Request Part section is where new part requests are created.
-
The Requested Parts section is where existing part requests are listed and reviewed.
By default, the Description tab is selected.
Note: You cannot request parts on Indirect Charges.
-
-
You can create parts requests in three different ways, described below:
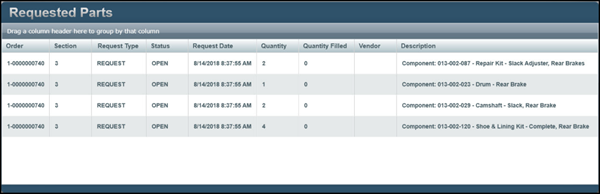
The Parts Requested section displays the items requested and the status of the request.
| Field | Definition |
|---|---|
Order |
Repair order number |
Section |
RO section number |
Request Type |
Part request type |
Status |
Status of the part request Statuses include:
|
Request Date |
Date of the initial request |
Quantity |
Quantity requested |
Quantity Filled |
Quantity charged to the repair order section by the part department. Note: This column will be blank until the part request is filled. |
Vendor |
If the part requested is placed on a purchase order, the vendor ID will appear in this column |
Description |
The component code and part description |
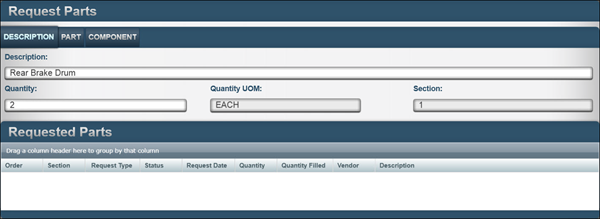
Description
You request the part by description only.
| Field | Definition |
|---|---|
Description |
General description of item being requested |
Quantity |
Quantity of item being requested |
Quantity UOM |
Unit of Measure used for the item being requested |
Section |
Section of the RO Note: The section you logged on to provides the information in this field. |
-
Enter the Description of the part needed.
-
Enter the Quantity.
-
Click Post.
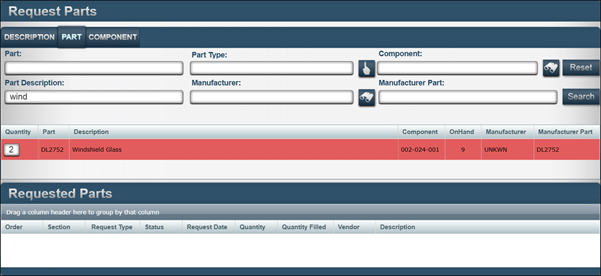
Part
You create the part requests using part numbers already in the system.
| Part numbers must be part of the Shop Inventory. |
| Field | Definition |
|---|---|
Part |
Part number of the requested item |
Part Type |
Part category of the requested item |
Component |
Component code of the requested item |
Part Description |
Description of the requested item |
Manufacturer |
Manufacturer code of the requested item |
Manufacturer Part |
Manufacturer’s part number of the requested item |
-
Use the filter fields to limit the part numbers viewed.
It is common to search with a partial description, like brake. -
Click Search.
-
Select each part number needed and enter the Quantity required.
-
Click Post.
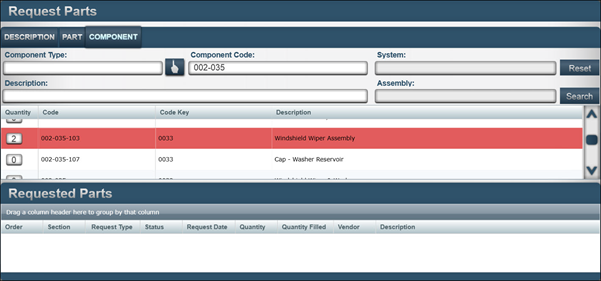
Component
You create the part request by component code.
| Field | Definition |
|---|---|
Component Type |
Component category of requested item If you leave the field blank, the system searches for all component types. Options include:
|
Component |
Component code of requested item |
System |
This field is currently disabled. |
Description |
Description of the component code |
Assembly |
This field is currently disabled. |
-
Use the filter fields to limit the part numbers viewed.
It is common to use the component code of the section. For example, 013-002. -
Click Search.
-
Select each part number needed and enter the Quantity required.
-
Click Post.
Adding comments in MWS Job Activity
To add repair-related comments:
-
Log in to Interactive Workstation.
The Job Activity page opens. -
From the Job Activity section, in the RO Lines/Ind. Charge Lines column, click Comments.
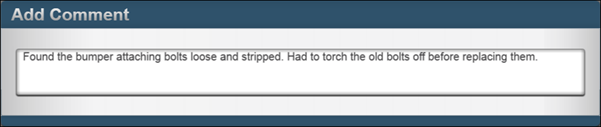
The Add Comment page opens. -
Enter comments.
-
Click Post.
Working with repair order and indirect charge sections in MWS Job Activity
You use the RO Section/Ind. Charge Section column to perform actions to the order section on a Repair Order (RO Section) or an Indirect Charge (Ind. Charge Section). The actions include:
| Field | Definition |
|---|---|
Comments |
View and edit order section comments (instructions) Note: Not available on Indirect Charges. |
Checkoff List |
View and complete tasks associated with the order section Note: Not available on Indirect Charges. |
Pause |
Temporarily suspend your time tracking on an activity For example, when you need to assist someone with a different activity or to perform a rush job |
Incomplete |
Log off the order section as incomplete |
Complete |
Log off the order section as Complete |
Viewing/Editing section comments in MWS Job Activity
To view or edit the section comments:
-
From the Job Activity page, under RO Section, click Comments.
The Section Comment page opens. -
Enter or edit the comment(s).
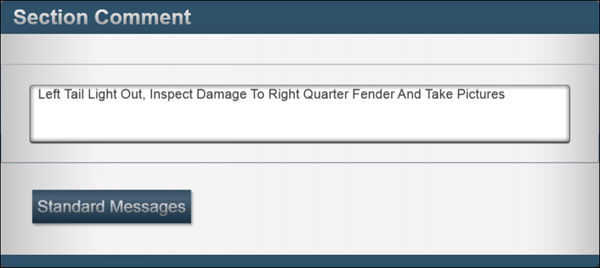
Note: The Standard Messages button allows a predefined Job Code message to be added to the comments page, if available.
To use a Standard Message:
-
Click Standard Messages.
The Standard Messages page opens.
The Job Code field will auto-populate with the Job Code assigned to the RO section.
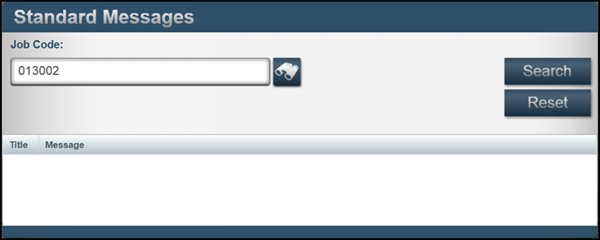
-
Click Search.
If messages are available, the list appears.
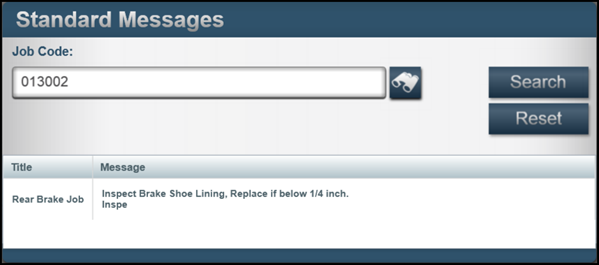
-
Select the message you want to add.
-
Click Post.
-
The standard message details are added to the Comments page.
-
-
Click Post.
Managing the checkoff list in MWS Job Activity
Checkoff lists are not available on Indirect Charges.
To view or complete checkoff list tasks:
-
From the Job Activity section, under RO Section column, click Checkoff List.
The Checklist page opens.
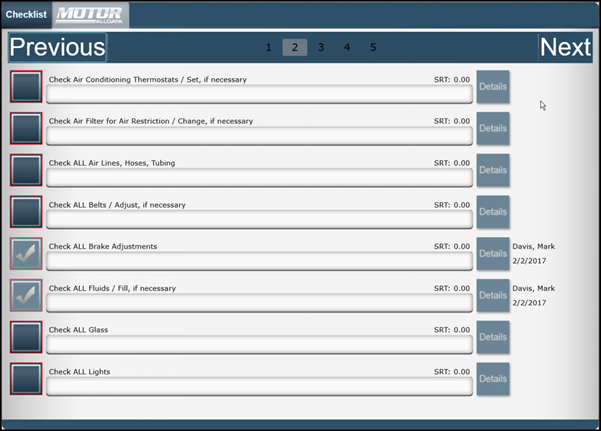 Checklist features:
Field Definition Previous
When multiple pages of tasks are present, the Previous button displays the previous page of tasks
The button is enabled from page 2 forward to the last page.
When there is only one page of tasks, or the first page of tasks is displayed, the button is not enabled.
Pages
Page numbers
When multiple pages of tasks are present, clicking on a page number displays that page’s tasks.
Next
When multiple pages of tasks are present, the Next button displays the next page of tasks.
When there is only one page of tasks, or you have reached the last page of tasks, the button is not enabled.
Checkbox
The checkbox determines if the item has been completed.
-
Checked
Completed

-
Cleared
Incomplete

If the checkbox has a red border, the task is required and must be marked as completed before logging off the repair order section as complete.

Task Comment
The task Comment field
A red border indicates the task comment is required.

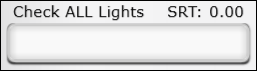
Standard Repair Time (SRT)
User defined estimated time for completion of the task

-
-
Select the checkbox to mark the task as complete.
Note: Tasks can be marked as complete at any point during the repair process. -
Repeat for additional tasks.
Note: Click the page numbers to view additional pages of tasks. -
Click Post.
The Job Activity section appears.
Pausing an activity in MWS Job Activity
To pause an activity:
-
From the Job Activity section, in the RO Section (Ind. Charge Section) column, click Pause.
The Log In page appears.Your user icon shows your status as Paused.

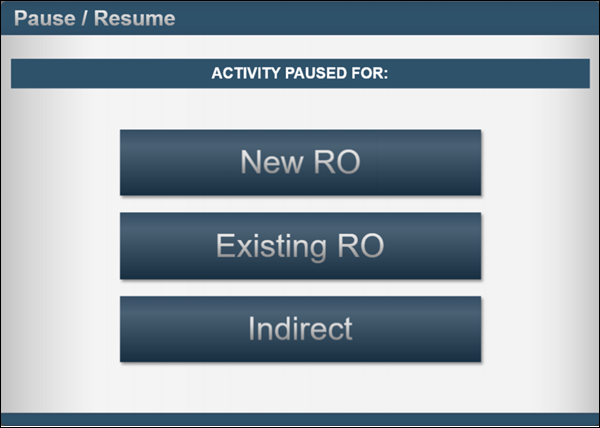
When you log back in, the Pause/Resume pane appears.
-
Use one of these methods to resume work:
-
New RO
Applies paused time to a newly created repair order-
If you click New RO, you are prompted to create a new repair order. See Creating Repair Orders (ROs) from the in MWS Job Logon page for details.
-
Enter the section information. See Working with the Job Activity section in MWS for details.
-
Click Post.
-
-
Existing RO
Applies paused time to an existing repair order-
If you click Existing RO, the Pause RO List opens.
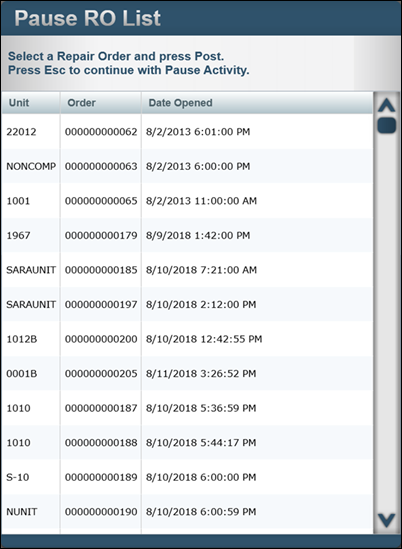
Select the repair order and click Post.
The Pause Section List page opens.
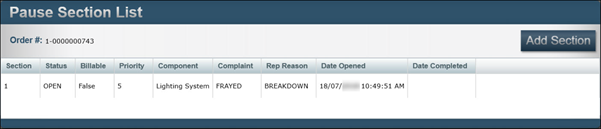
-
Select the section and click Post.
The Job Activity page opens.
-
Enter the section information. See Working with the Job Activity section in MWS for details.
-
Click Post.
-
-
Indirect
Applies paused time to an indirect charge
-
If you click the Indirect button, the Select Indirect page opens.
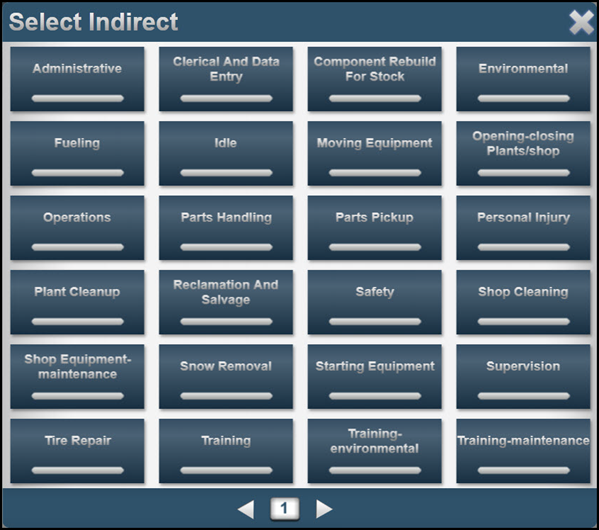
-
Select the Indirect code.
The Job Activity section opens.
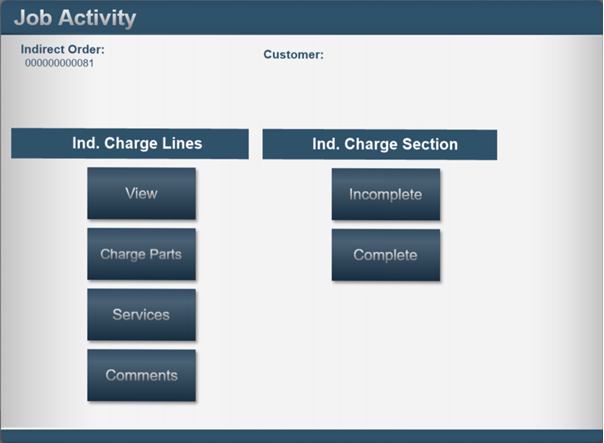
-
Enter the indirect information. See Working with the Job Activity section in MWS for details.
-
Click Post.
-
Once the pause activity has been completed, you are logged back on the activity you were on before.
-
Logging off the order in MWS Job Activity
There are two ways to log off an order:
-
Incomplete
Logs off the order as incomplete -
Complete
Logs off the order as complete
To log off the order:
-
From the Job Activity section, in the RO Section (Ind. Charge Section) column, click Incomplete or Complete.
The Section Status page opens. -
Select the primary Cause.
-
Select the primary Correction.
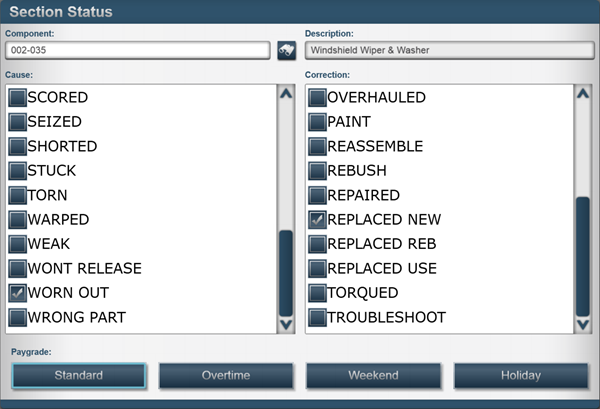
-
Click Post.
The Job Activity section, Assigned tab opens.
Working with repair orders
The Order section allows you to perform actions on a repair order. You can:
| Field | Definition |
|---|---|
View |
View the order |
Add Sec |
Add a new section to the order Note: Adding a new section adds the section to the employee’s Assigned RO section listing. |
Meter Rdg |
Manage the meter reading(s) for the unit identified on the order |
Notes |
Add comments for the order |
Tire Data |
Perform Tire Module functions in MWS Note: If your company is not licensed for the Tire Module, this button is unavailable. |
Images |
Manage images assigned to the order |
Viewing order details in MWS Job Activity
To view the order:
-
From the Job Activity section, in the Order column, click View.
**Information is displayed on five tabs. -
Select the tab to view the contents.
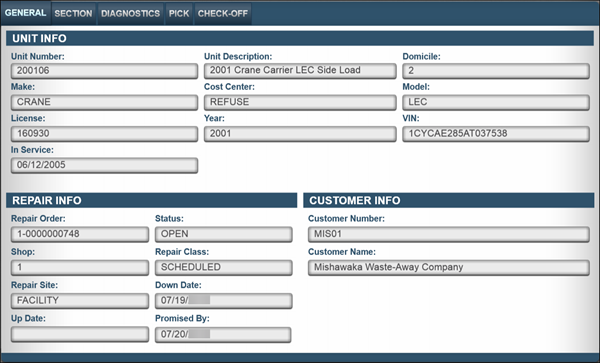
General
The General tab is the initial view. It displays repair order (RO) header information in three panes:
| Field | Definition |
|---|---|
Unit Number |
User defined unit identification number |
Unit Description |
The description of the unit |
Domicile |
Unit’s default shop location |
Make |
Equipment manufacturer code |
Cost Center |
Equipment’s cost center |
Model |
Manufacturer’s model number |
License |
License plate number or other identification |
Year |
Year the equipment was manufactured |
VIN |
Serial number or vehicle identification number |
In Service |
Date equipment was placed in service |
Unit Number |
User defined unit identification number |
| Field | Definition |
|---|---|
Repair Order |
Repair order number |
Status |
Repair order status |
Shop |
Repair shop ID |
Repair Class |
Repair order class |
Repair Site |
Repair order site |
Down Date |
Date the repair order was recorded |
Up Date |
Date the repair order was completed |
Promised By |
Date the repair is expected to be completed |
| Field | Definition |
|---|---|
Customer Number |
User defined customer identification number |
Customer Name |
Customer’s name |
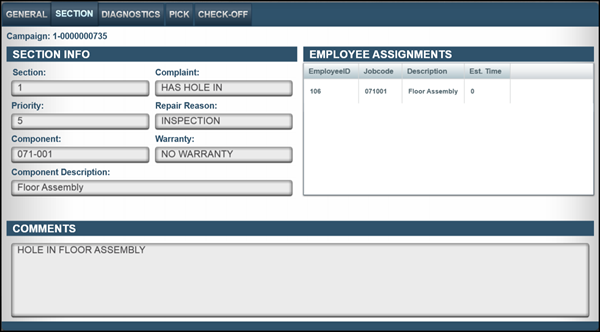
Section
The Section tab displays the repair order section information. It has three panes:
| Field | Definition |
|---|---|
Section |
Repair order section number |
Complaint |
Reported issue condition |
Priority |
Order of section work |
Repair Reason |
How issue was reported |
Component |
Component code defining area of concern |
Warranty |
Unit status of component |
Component Description |
Component code description |
| Field | Definition |
|---|---|
EmployeeID |
User defined employee identification number |
Jobcode |
Job Code assignment, if present |
Description |
Job Code description |
Est. Time |
Estimated time to complete the process |
The Comments pane represents the instructions for the repair order section issue(s).
Pick
The Pick tab displays a pick list of parts for the process, if present.
| Pick list parts are not charged to the repair order section. The pick list represents a potential list of parts for the process. |
| Field | Definition |
|---|---|
Part No. |
Part number |
Quantity |
Quantity that is needed, if used |
Description |
Combination of the component code assigned to the part record and the part record description |
Bin Loc |
Primary bin location of the part in the shop |

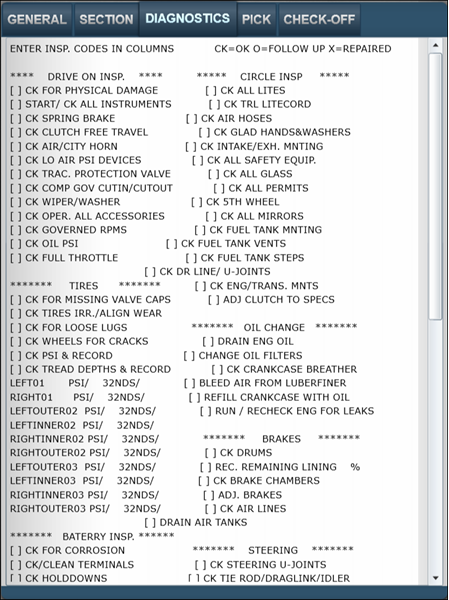
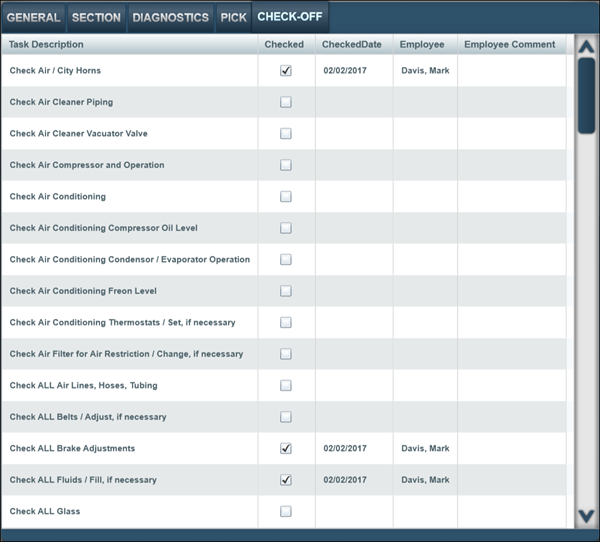
Check-Off
The Check-Off tab displays the interactive checklist for the repair order section, if present including any tasks that are completed.
| Field | Definition |
|---|---|
Task Description |
Description of the task |
Checked |
This is a checkbox:
|
CheckedDate |
Date the task was completed Note: This field will be blank if the task is incomplete. |
Employee |
Employee that completed the task Note: This field will be blank if the task is incomplete. |
Employee Comment |
Comment entered on the task, if present Note: This field will be blank if the task is incomplete. |
Adding a section in MWS Job Activity
The Add Sec feature allows adding a new repair order section to the repair order without logging off the repair order section currently in process.
To add a new repair order section to the order, see Adding Section in MWS Job Logon page for details.
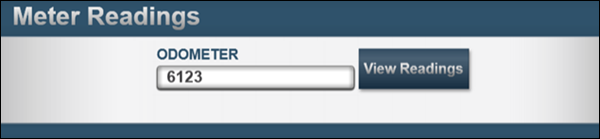
Entering meter readings in MWS Job Activity
To enter or edit the meter reading:
-
From the Job Activity section, in the Order column, click Meter Rdg.
The Meter Readings page opens. -
Enter/Edit the meter reading(s).
-
Click Post.
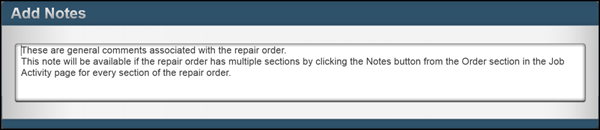
Viewing/Editing order notes in MWS Job Activity
To view or edit Notes for the order:
-
From the Job Activity section, in the Order column, click Notes.
The Add Notes page opens. -
View or edit the comments as needed.
-
Click Post.
Viewing/Editing images in MWS Job Activity
The Images feature requires the device have a camera/webcam. The IWS application must be granted access to the camera/webcam. For details, see your device’s operating system for permissions.
To add an Image:
-
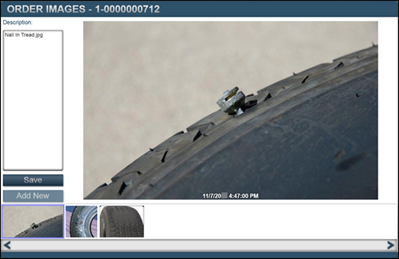
From the Job Activity section, under the Order column, click Images.
The Order Images page opens.
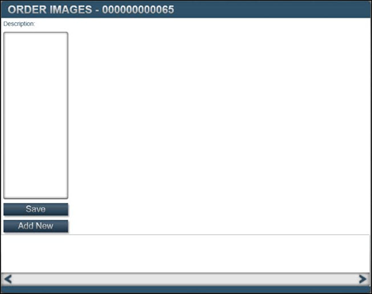
-
Click Add New.
The Take Photo window appears.
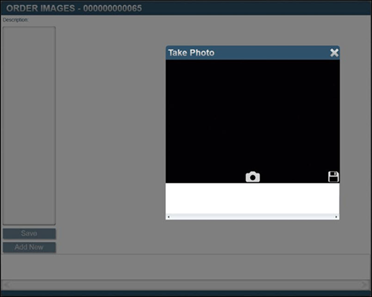
-
Click the camera icon to take the photo.
-
Highlight the image.
-
Click the Save.
-
Enter the Description.
-
Click Save.
-
Repeat Steps 2-7 for additional images.
All images attached to the order section are displayed.
-
Click Escape when you are done.
The Job Activity section appears.