Preventive maintenance schedules
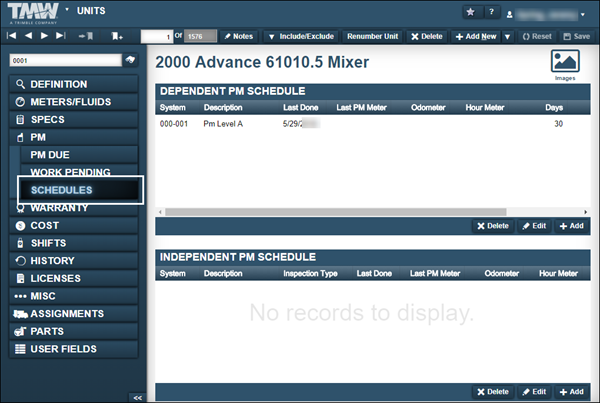
A Preventive Maintenance (PM) schedule is maintenance performed on a unit at regularly scheduled intervals (such as an oil change). You use the Schedules sub tab on the PM tab to add, edit, or remove PM schedules.
The system supports two types of PM schedules:
-
Dependent schedule
-
Independent schedule
The PM tab on the Units page allows you to use the Schedules sub tab to add a dependent or independent preventive maintenance schedule for a unit.
Working with dependent preventive maintenance schedules
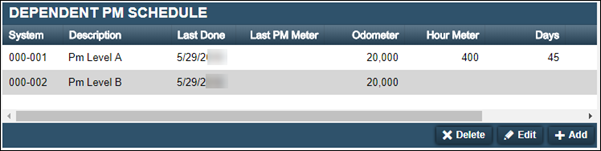
When you set up dependent PM schedules, you can link lower interval levels to higher interval levels. When you complete the higher interval level on a repair order, the system completes all lower level intervals automatically. You can add one dependent PM schedule per unit.

This illustration shows an example of a dependent PM schedule with two interval levels. If you complete Level B, the system completes Level A automatically. It updates Level A’s completion date with the same date as Level B.
Before you can set up a dependent PM schedule, you must verify that the meter types are listed in that unit’s Meter Information section. If they are not listed, you must add them before you set up the schedule.
Setting up a dependent schedule
To set up a dependent schedule:
| Enter the PMs from the lowest interval level to the highest interval level for the system to update the schedule correctly. |
-
Select the PM tab and then select the Schedules sub tab.
The page refreshes and displays the Dependent PM Schedule section.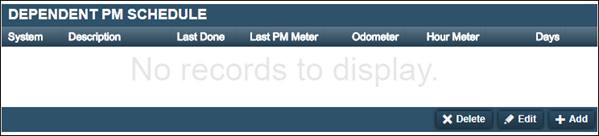
-
Click Add.
The Add Dependent PM window opens and displays the PM Information and Meter Intervals sections.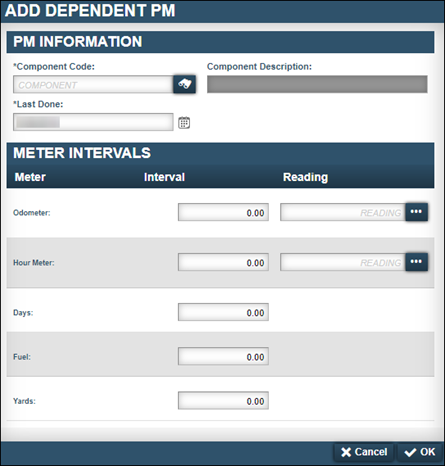
-
Enter the preventive maintenance component code in the Component Code field and press ENTER.
The system updates the Component Description field. -
In the Last Done field, change the date to the last date the service was performed.
Note: If the service has never been performed, leave the default value in this field.
-
In the Meter Intervals section, identify the meter types you want to track.
-
Make an entry in the appropriate Interval fields.
-
-
Enter values in the Reading fields as needed.
If you are not tracking a meter type, you do not have to enter a value. However, one advantage of tracking multiple meter intervals is that you receive notifications earlier. For example, if you enter an odometer reading, an interval in hours, and an interval in days, the first one met triggers the notification.-
When you are finished, click OK.
The window closes and the dependent schedule is displayed in the Dependent PM Schedule section.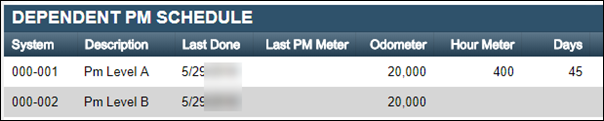
To close the window without saving your changes, click Cancel.
-
Repeat Steps 1-7 to create additional levels.
-
Editing dependent interval levels
To edit dependent interval levels:
-
Select the PM tab and then select the Schedules sub tab.
The page refreshes and displays the Dependent PM Schedule section.
-
Select the interval level that you want to edit.
-
Click Edit.
The Edit Dependent PM window opens.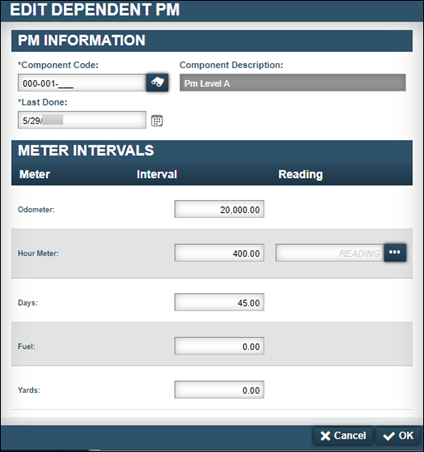
-
Make changes as needed.
-
Click OK.
Your changes are displayed in the Dependent PM Schedule section.
Removing dependent interval levels
To remove dependent interval levels:
-
Select the PM tab and then select the Schedules sub tab.
The page refreshes and displays the Dependent PM Schedule section.
-
Select the interval that level you want to remove.
-
Click Delete.
The Delete PM system message window opens. It asks, "Are you sure you want to delete PM PM Description?" -
Click Delete PM.
The interval level is removed from the Dependent PM Schedule section.
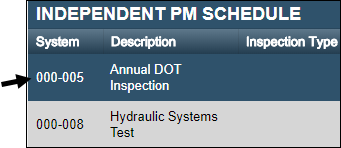
Working with independent preventive maintenance schedules
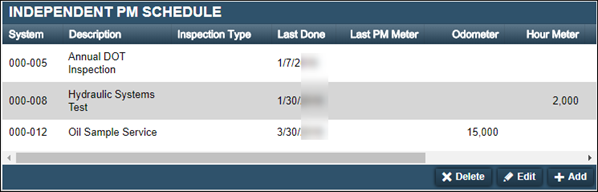
An independent PM schedule is a list of maintenance that can be performed on a unit independently of each other. The maintenance list typically includes various types of inspections, such as Department of Transportation (DOT) inspections or state inspections.
This illustration shows an example of an independent PM schedule.
Before you can set up an independent PM schedule, PM Component Codes must be present. If they are not present, you must add them before you set up the schedule. On the unit, you must verify that the meter types are listed in that unit’s Meter Information section. If they are not listed, you must add them before you set up the schedule.
Setting up an independent schedule
To set up an independent schedule:
-
Select the PM tab and then select the Schedules sub tab.
The page refreshes and displays the Independent PM Schedule section.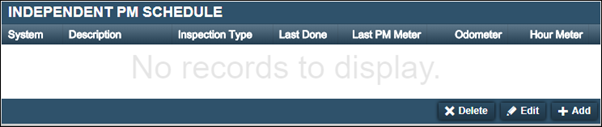
-
Click Add.
The Add Independent PM window opens and displays the PM Information and Meter Intervals sections.
-
Enter the preventive maintenance component code in the Component Code field and press ENTER.
The system updates the Component Description field. -
In the Last Done field, change the date to the last date the service was performed.
Note: If the service has never been performed, leave the default value in this field.
-
Select the type of inspection in the Inspection Type field.
You can have only one inspection type per PM. If you select STANDARD as the inspection type for a PM, you cannot use that inspection type on other PM schedules.
-
In the Meter Intervals section, identify the meter types you want to track.
-
Make an entry in the appropriate Interval fields.
-
-
Enter values in the Reading fields as needed.
If you are not tracking a meter type, you do not have to enter a value. However, one advantage of tracking multiple meter intervals is that you receive notifications earlier. For example, if you enter an odometer reading, an interval in hours, and an interval in days the first one met triggers the notification.-
When you are finished making entries, click OK.
The window closes and the dependent schedule is displayed in the Independent PM Schedule section. -
Repeat Steps 1-8 to create additional levels.
-
Editing independent interval levels
To edit independent interval levels:
-
Select the PM tab and then select the Schedules sub tab.
The page refreshes and displays the Independent PM Schedule section. -
Select the interval level that you want to edit.
-
Click Edit.
The Edit Independent PM window opens.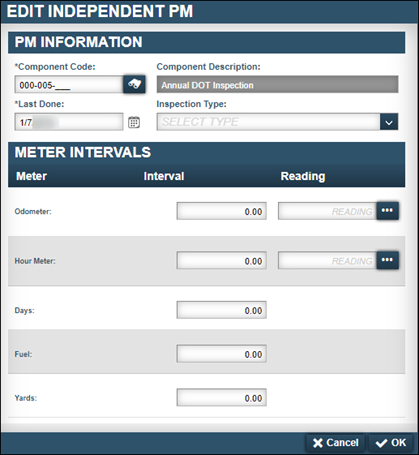
-
Make changes as needed.
-
Click OK.
Your changes are displayed in the Independent PM Schedule section.
Removing independent interval levels
To remove independent interval levels:
-
Select the PM tab and then select the Schedules sub tab.
The page refreshes and displays the Independent PM Schedule section. -
Select the interval level that you want to remove.
-
Click Delete.
The Delete PM system message window opens. It asks, "Are you sure you want to delete PM PM Description?" -
Click Delete PM.
The interval level is removed from the Independent PM Schedule section.