Working with employee records
The Employees page allows you to:
-
Add or remove an employee’s skills or tools
-
View an employee’s shift history/work history
-
Assign units to the employee
-
Change the employee type
-
Change the employee’s ID
-
Manage the employee’s Interactive Workstation/Mechanic Workstation password (for V.2022.2.2 and earlier)
-
Manage the employee’s Trimble Technician Portal password (for V.2022.3 and later)

Opening an employee’s record
To look up an employee’s record:
-
Go to Menu > Masters > Employees.
The Employees page opens. -
In the Employee field, enter the employee’s ID and press ENTER.
Notes:
-
If you enter an invalid employee ID, an error message window opens. It states, "ABC is not a valid employee." Click OK to close the message.
-
The shop an employee is in can affect whether you can see and work with their record. For details, see How Application options affect shop restrictions.
-
Viewing an employee’s work history
To view an employee’s work history:
-
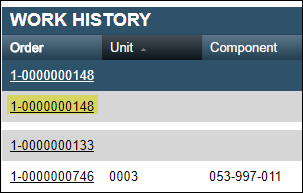
Click the Work History tab.
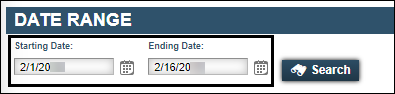
The page shows the Date Range and Work History sections. -
In the Date Range section, do one of the following:
-
Select
 Calendar and then select a date.
 -
Enter the start date or end date in the Starting Date/Ending Date fields.
-
-
Click Search.
The Work History section displays the results.
Generating a work history SSRS report
If your company enabled the SSRS report feature, you can generate a report from the Work History section.
| Before you can print a work history SSRS report, you must open the employee’s record and view the work history. |
To generate a work history SSRS report:
-
In the Order or Invoice fields, select an order number or an invoice number.
The system opens an SSRS report in the AMS Report Viewer window.
-
Repair orders
The Repair Order Detail SSRS report opens. -
Indirect charges
The Indirect Charge Detail SSRS report opens. -
Invoices
The Invoice Detail SSRS report opens.
Show meThis illustration shows a sample of the Repair Order Detail SSRS report.

-
-
Do one of the following:
-
Click Print to generate a PDF file of the report.
-
Click Email to send the report in an email.
-
-
When you are finished, close the SSRS report window.
Managing a driver’s units
You use the Units tab on the Employees page to assign, unassign, or reassign units to your drivers.
The following SSRS reports display units assigned to employees.
| If your company uses the Road Call module, the system manages the units assigned to your drivers automatically. |
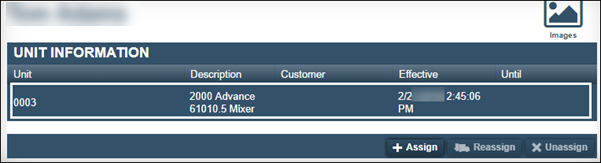
This illustration shows an example of a unit assigned to a driver.
Assigning a driver to a unit
To assign units to a driver:
-
Click the Units tab.
The Unit Information section appears. -
Click Assign.
The Assign Unit window opens.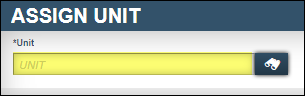
-
Enter the unit’s ID in the Unit field.
Note: If you enter an invalid unit ID, the system displays an error message. It states, "ABC is not a valid unit." Click OK to close the message.
-
Do one of the following:
-
To assign this unit to the driver, click OK.
The system assigns the unit to the driver. The window closes. -
To assign multiple units to this driver, click Save & Add New.
The system assigns the unit to the driver without closing the window. -
To close the window without saving your changes, click Cancel.
The system adds the unit to the Unit Information section and updates the Effective field.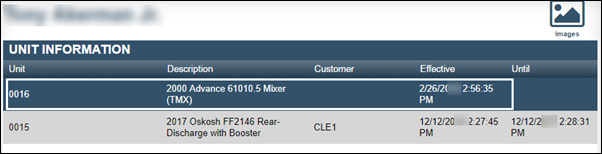
-
Reassigning a unit to a different driver
To reassign a unit to a different driver:
-
Click the Units tab.
The Unit Information section appears. -
Select the unit that you want to reassign.
-
Click Reassign.
The Reassign Unit window opens.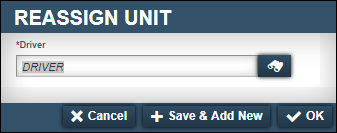
-
Enter the new driver’s ID in the Driver field.
Note: If you enter an invalid driver ID, the system displays an error message. It states, "ABC is not a valid driver." Click OK to close the message.
-
Do one of the following:
-
To reassign this unit to the new driver, click OK.
The system updates the Until field with the date you reassigned the unit to a different driver. The window closes. -
To reassign multiple units to this new driver, click Save & Add New.
The system updates the Until field with the date you reassigned the unit to a different driver without closing the window. -
To close the window without saving your changes, click Cancel.
This illustration shows how the system reassigned unit 0016 from the driver in the bottom illustration to the driver in the top illustration.
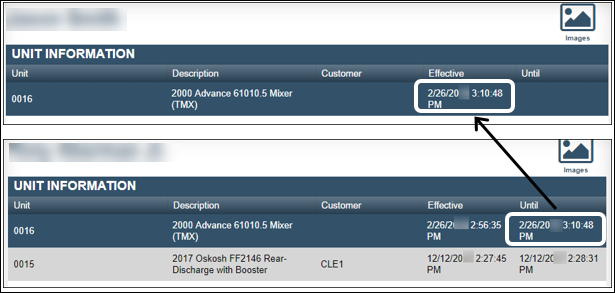
-
Removing a driver from a unit
To remove a driver from a unit:
-
Click the Units tab.
The Unit Information section appears. -
Select the unit you want to remove.

-
Click Unassign.
The Unassign Unit window opens. It states, "Unassign unit Unit ID?" -
Click Unassign Unit to remove that unit from the driver.
The system updates the Until field with the date you removed the driver from the unit.
To close the window without saving your changes, click Cancel.
Renumbering an employee record
If you renumber an employee record, you change that employee’s ID number. When you renumber an employee’s record, the system updates that employee’s ID in the following:
-
Employee master record
-
Indirect charges
-
Repair orders
-
Inspection tickets
-
Tools assigned to that employee
To renumber an employee ID:
-
Click Renumber Employee.
The Renumber Employee window opens.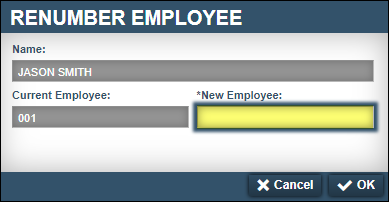
-
In the New Employee field, enter the new ID number.
-
Click OK.
The Renumber Employee message window opens. It states, "Are you sure you want to renumber employee Old ID Number to New ID Number?" -
Click Renumber Employee.
The Employee field displays the new ID number.
Terminating an employee
If an employee leaves your company, you should identify that employee’s master record as TERM (Terminated). You terminate employees on the Employees page.
| For these changes to take effect, you must restart TMT Fleet Maintenance. |
To terminate an employee:
-
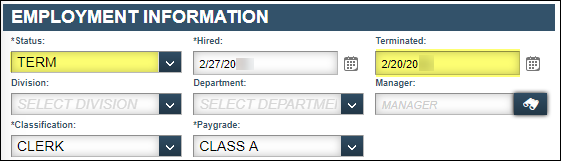
In the Employment Information section, do one of the following:
-
In the Terminated field, enter the terminated date.
The Status field value changes Term. -
In the Status field, select Term.
The Terminated field value becomes the date you changed the status.
-
-
Depending on the employee’s type, do one of the following:
-
Employee or Both
-
Click the Misc tab.
-
In the Employee Permissions section, toggle the RO Enabled? option to NO.
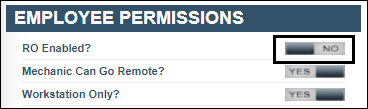
Note: Changing this option prevents you from adding this employee’s ID to future repair orders.
-
Click Save.
-
-
Driver
Click Save.
-