Creating purchase orders
A purchase order (PO) is a written authorization from a buyer to acquire goods or services. The document authorizes a supplier to deliver to the buyer at the price, quality level, delivery date, and certain other terms specified in the agreement. A purchase order is legally binding after the supplier accepts it.
For details on PO types, see: What are the different types of purchase orders?
Creating a purchase order
To create a purchase order:
-
Do one of the following:
-
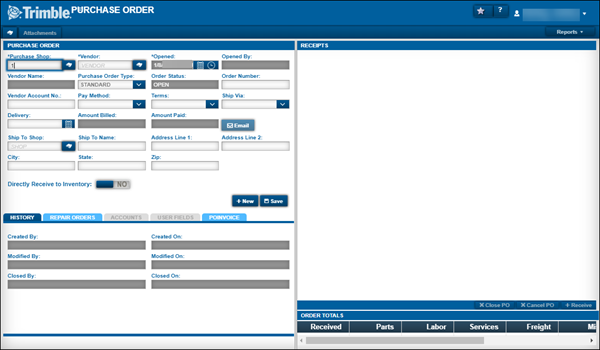
Go to Menu > Orders > Purchase Order.
The Purchase Order page opens. -
Go to Menu > Orders > Purchase Order Listing.
The Purchase Order Listing page opens.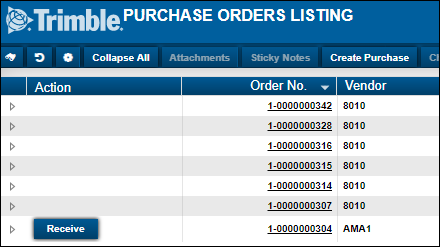
-
Click Create Purchase in the command bar.
The Purchase Order page opens.
-
-
-
Click New.
-
In the Purchase Order section, make entries in the required fields.
If you want, you can make entries in all fields. For details about individual fields, see Purchase Order header.
Note: The system fills the Order Number field automatically.
-
Click Save.
Adding Details to a receipt
| You cannot add line items to a receipt that is Closed. |
To add Line Items to the PO:
-
Click Add.
The Create New Line window opens. The Part Line Type is selected by default.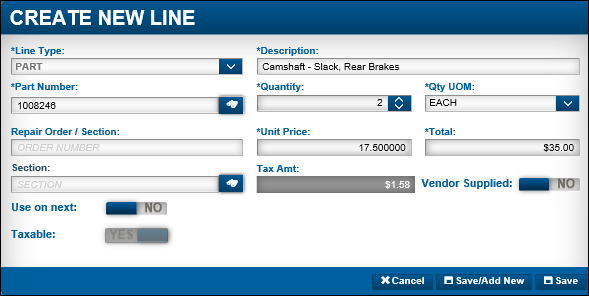
-
Select a Line Type from the drop-down list. Choices include: Part, Comment, Services, Tax, Freight, and Miscellaneous.
For next steps, go to the line type you want to add.
-
Misc Line (Miscellaneous)
Part Line
-
In the Line Type field, select Part.
-
Enter the part number or click
 Search.
The Description autofills after the Part Number is populated. -
Enter the Quantity you want to purchase.
The Qty UOM defaults to the system setting for that part. -
If the part record you entered is linked to a Repair Order/Section, in the Repair Order/Section field, enter the repair order number. Otherwise, leave the field blank.
-
If you entered a repair order number, in the Section field, enter the repair order section number.
-
If you intend to use the same Repair Order/Section and Section fields for the next line item you add, toggle the Use on next option to YES. If not, keep the default response of NO.
Note: If you set to YES and select Save/Add New after completing the following steps, a new part line will be displayed that includes the repair order and section numbers from the initial or previously entered line item.
-
Keep the default values for the remaining options and fields.
Field definitionsRequired field: *
Field Definition Unit Price *
Populates with a price for the part if the vendor used has previously been set up for pricing or used previously to purchase the part record. Otherwise, defaults to $0.00.
If Use Last Cost For New Vendor Purchases is set to NO in Setup > Options > Application Options, the last cost will be used instead of $0.
Total *
Calculated by the system based on the quantity ordered and the unit price.
Taxable
Automatically set by the system based on the settings in the shop inventory for the part record. Calculates the Tax Amt for the part.
Vendor Supplied
Allows tracking of vendor-supplied parts in the system. If the vendor part number has never been entered in the system, the Vendor Part Information dialog will be displayed. This allows entry of vendor part information including warranty information to track warranty on vendor parts. If the vendor part number has been entered in the system, the Edit button will be enabled so the vendor information for the part may be edited or reviewed.
-
If you use any of the four PO User Defined Fields located at the bottom of the Create New Line window, set the values for each.
-
When you are finished, do one of the following:
-
Click Cancel to cancel the line item and close the window without saving.
-
Click Save/Add New to save the line item and display a new line item window.
-
Click Save to save the line item and return to the purchase order page.
-
Comment Line
-
In the Line Type field, select Comment.
The Create New Line window refreshes to display the Comment line type.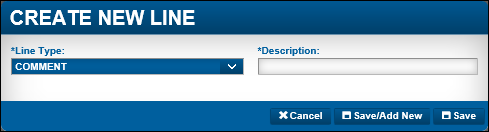
-
Enter your Comment.
Note: Enter no more than 120 characters for the Comment line type or the following message displays: "Validation failed for one or more entities. See 'EntityValidationErrors' property For details. Entity validation errors: The field DESCRIP must be a string or array type with a maximum length of 120."
-
At this time you can:
-
Click Cancel: The system will cancel the line item and close the window without saving.
-
Click Save/Add New: The system will save the line item and display a new line item window.
-
Click Save: The system saves the line item and returns to the purchase order page.
-
-
To view all comments, in the Receipts area, click the Comments tab.
Service Line
-
In the Line Type field, select Services.
The Create New Line window refreshes to display the Services line type.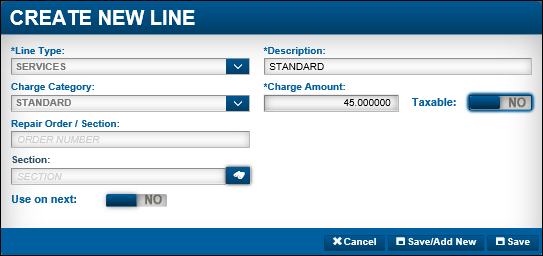
-
Select the Charge Category.
The Description autofills after you select the Charge Category.Depending on system settings, charge categories might require the Repair Order/Section and Section fields or used without assigning repair order information. See Creating Charge Categories for details.
-
In the Charge Amount field, enter the charge for the service.
-
Toggle the Taxable option to YES if the service is taxable or just keep it at the default value of NO.
-
If the part record being entered will be linked to a Repair Order/Section, enter the repair order number in the Repair Order/Section field.
-
If the repair order number is entered, enter the repair order section number in the Section field.
-
If you intend to use the same Repair Order/Section and Section fields for the next line item you add, toggle the Use on next option to YES. If not, keep the default response of NO.
Note: If you set to YES and select Save/Add New after completing the remaining steps, a new part line displays with the repair order and section numbers from the initial or previously entered line item.
-
If you use any of the four PO User Defined Fields, set the values at this time.
-
When you are finished, do one of the following:
-
Click Cancel to cancel the line item and close the window without saving.
-
Click Save/Add New to save the line item and display a new line item window.
-
Click Save to save the line item and return to the purchase order page.
-
Tax Line
| It is not customary to manually add tax lines to the PO as the system typically creates a tax line based on the line items added to the PO. |
-
In the Line Type field, select Tax.
-
Select the Charge Category.
The Description autofills after you select the Charge Category.Charge categories used for taxes must be created prior to being used on the PO. See Creating Tax Rates and Fees for details.
-
In the Charge Amount field, enter the charge for the tax.
-
Do one of the following:
-
Click Cancel to cancel the line item and close the window without saving.
-
Click Save/Add New to save the line item and display a new line item window.
-
Click Save to save the line item and return to the purchase order page.

-
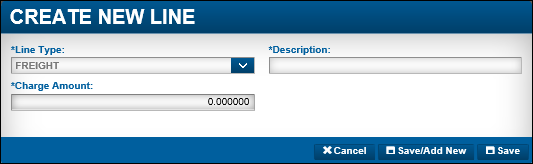
Freight Line
-
In the Line Type field, select Freight.
-
In the Description field, enter the description to be associated with the freight charge.
Note: There is no default value for this field.
-
In the Charge Amount field, enter the charge for the freight.
-
Do one of the following:
-
Click Cancel to cancel the line item and close the window without saving.
-
Click Save/Add New to save the line item and display a new line item window.
-
Click Save to save the line item and return to the purchase order page.
-
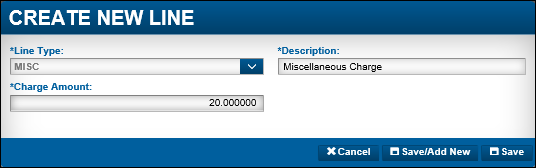
Misc Line
|
-
In the Line Type field, select Misc.
-
In the Description field, enter the description to be associated with the miscellaneous charge.
Note: There is no default value for this field.
-
In the Charge Amount field, enter the amount of the misc charge.
-
Do one of the following:
-
Click Cancel to cancel the line item and close the window without saving.
-
Click Save/Add New to save the line item and display a new line item window.
-
Click Save to save the line item and return to the purchase order page.
-