Bay configuration
The Bay Configuration page is used to manage bays used with Shop Scheduler and Shop Planner.
A bay assigned to a shop may be associated with a work shift. The shift can set the working hours for the bay and not allow anything to be scheduled outside that shift. A work shift can have time slots associated with it that determines what blocks of time a repair can be scheduled.
A bay can allow duplicate appointments or allow only one appointment for a time period as well as be restricted to certain unit types.
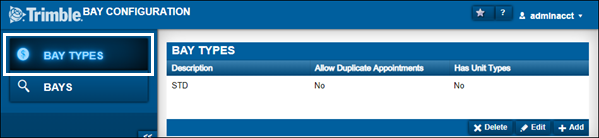
Go to Menu > Setup > Bay Configuration to load Bay Configuration page. The Bay Types tab displays when you open this page.
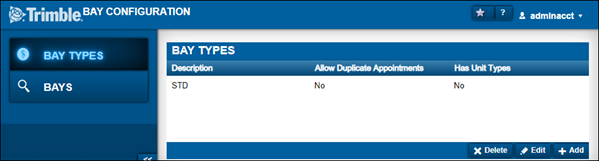
Bay Types
A bay type defines the attributes associated with the bay assigned to a shop.
The Bay Types tab is used to manage Bay Types.
| Description | Name of the bay type |
|---|---|
Allow Duplicate Appointments |
Indicates whether multiple appointments can be allocated within a specified time frame for the bay type Options are:
|
Has Unit Types |
Indicates if the bay type has unit type restrictions Options are:
|
Bays
The Bays tab is used to manage the assignments of bay types to shops.
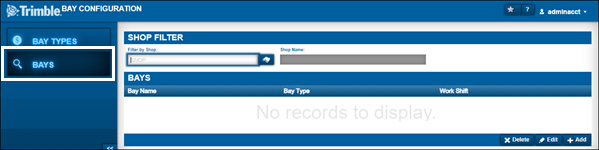
The Bays tab has two sections:
-
Shop Filter
Used to display the bay types assigned to a specific shop.
Field definitionsRead-only field: §
Filter By Shop Shop ID Shop Name §
Shop description
-
Bays
Displays the bay types assigned to a specific shop.
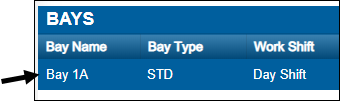
Field definitionsBay Name Bay name Bay Type
Bay Type description
Work Shift
Work shift name
Working with bay types
Before you can manage bay assignments (add, edit, or delete them), you must first create the Bay Type.
A bay type defines the attributes associated with the bay assigned to a shop.
A bay type can allow duplicate appointments or allow only one appointment for a time period as well as be restricted to certain unit types.
Adding a new bay type
To add a new bay type:
-
Go to Menu > Setup > Bay Configuration.
The Bay Configuration page opens. The Bay Types tab is displayed by default. -
Click Add.
The Add Bay Type window opens.
-
In the Description field, enter the bay’s description.
Note: You can enter up to 60 characters and each bay type description must be unique.
-
If the bay type will allow multiple assignments for a time period, toggle the Allow Duplicate Appointments option to YES.
-
Do one of the following:
-
Click Save.
The system saves the bay information. The window closes. -
Click Save & Add New.
The system saves the bay information. The window remains open to allow you to add another bay.
-
To close the window without saving your changes, click Cancel.
Editing an existing bay type
To edit an existing bay type:
-
Go to Menu > Setup > Bay Configuration.
The Bay Configuration page opens. The Bay Types tab is displayed by default. -
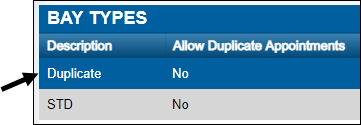
In the Bay Types section, select the bay type that you want to edit.
-
Click Edit.
The Edit Bay Type window opens. -
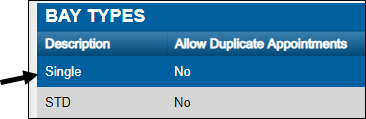
Make changes as needed.
This illustration shows an updated bay type.
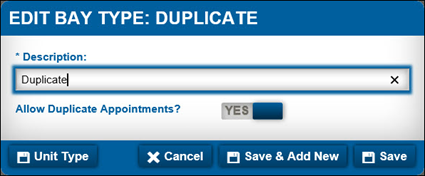
Note: To add or delete Unit Types on a Bay Type, see Managing unit types on a bay type.
-
Do one of the following:
-
Click Save.
The system saves the bay information. The window closes. -
Click Save & Add New.
The system saves the bay information. The window remains open to allow you to add another bay.
-
To close the window without saving your changes, click Cancel.
Deleting an existing bay type
To delete an existing bay type:
-
Go to Menu > Setup > Bay Configuration.
The Bay Configuration page opens. The Bay Types tab is displayed by default. -
Click Delete.
The Delete Bay Type message window opens. It asks, "Are you sure you want to delete Bay Type Bay Description? All associated Bays must be deleted before you can delete this Bay Type." -
Click OK.
The Bay Type is removed.
To close this window without saving your changes, click Cancel.
Managing unit types from a bay type
Unit Types can be added to a Bay Type. This restricts the type of unit that can be assigned to a bay in Shop Scheduler.
Adding a unit type to a bay type
To add a unit type to a bay type:
-
Go to Menu > Setup > Bay Configuration.
The Bay Configuration page opens. The Bay Types tab is displayed by default. -
Select the bay type.
-
Click Edit.
The Edit Bay Type window opens. -
Click Unit Type.
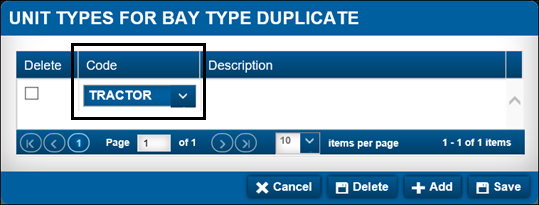
The Unit Type For Bay Type window opens. -
Click Add.
-
Select the Unit Type using the drop-down list in the Code column.
-
Click Save.
-
Repeat steps 5-7 for add additional unit types.
To close this window without saving your changes, click Cancel.
Deleting a unit type from a bay type
To delete an existing unit type from a bay type:
-
Go to Menu > Setup > Bay Configuration.
The Bay Configuration page opens. The Bay Types tab is displayed by default. -
Select the Bay Type.
-
Click Unit Type.
The Unit Type For Bay Type window opens. -
Click the checkbox in the Delete column next to the unit type for all unit types to be deleted.
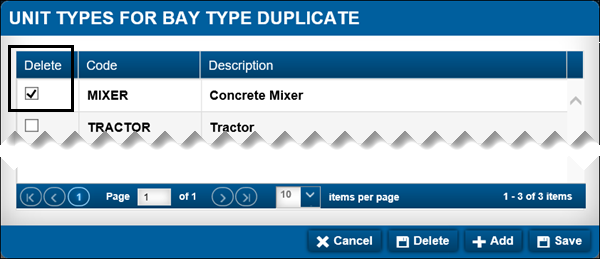
-
Click Delete.
The Remove Bay Type Unit Type message window opens. It asks, "Are you sure you want to remove 1 Bay Type Unit Types?" -
Click OK.
The system deletes the unit type. The window closes.To close this window without saving your changes, click Cancel.
-
Repeat Steps 4-7 as needed.
To close this window without saving your changes, click Cancel.
Managing bay assignments
In order to use a shop in shop scheduler, the shop must have bays assigned to it in the Bay Configuration page, Bays tab.
A bay assigned to a shop may be associated with a Work Shift. The shift can set the working hours for the bay and not allow anything to be scheduled outside that shift. A work shift can have time slots associated with it that determines what blocks of time a repair can be scheduled.
Adding a new bay assignment
To add a new bay:
-
Go to Menu > Setup > Bay Configuration.
The Bay Configuration page opens. The Bay Types tab is displayed by default. -
Click the Bays tab.
The Shop Filter and Bays section are displayed. -
In the Filter By Shop field, enter the shop ID and press ENTER.
The Bays section displays any existing bays for this shop. -
Click Add.
The Add New Bay For Shop window opens.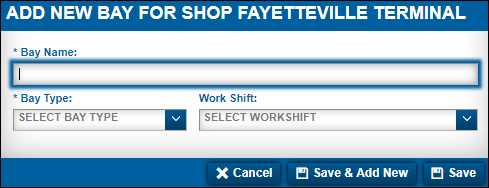
-
Make entries in the following fields.
Field definitionsRequired field: *
Bay Name * Bay name Enter up to 60 characters for the Bay Name. Note: Each Bay Name must be unique. Bay Type
Bay type
Work Shift
Work shift description
Note: Work Shifts must be created prior to being able to be assigned to a bay assignment.
-
Do one of the following:
-
Click Save.
The system saves the information. The window closes. -
Click Save & Add New.
The system saves the information. The window remains open to allow you to add another bay assignment.
-
To close the window without saving your changes, click Cancel.
Editing an existing bay assignment
To edit an existing bay:
-
Go to Menu > Setup > Bay Configuration.
The Bay Configuration page opens. The Bay Types tab is displayed by default. -
Click the Bays tab.
The Shop Filter and Bays section are displayed. -
In the Filter By Shop field, enter the shop ID and press ENTER.
The Bays section displays any existing bays for this shop. -
Select the bay that you want to edit.
-
Click Edit.
The Edit Bay For Shop window opens.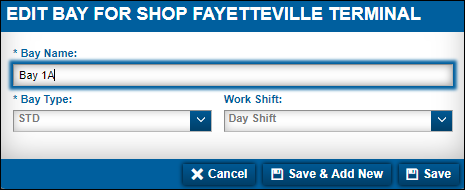
-
Make changes as needed.
-
Click Save.
To close the window without saving your changes, click Cancel.
Deleting an existing bay assignment
To delete an existing bay assignment:
-
Go to Menu > Setup > Bay Configuration.
The Bay Configuration page opens. The Bay Types tab is displayed by default. -
Click the Bays tab.
The Shop Filter and Bays section are displayed. -
In the Filter By Shop field, enter the shop ID and press ENTER.
The Bays section displays any existing bays for this shop. -
Select the bay that you want to edit.
-
Click Delete.
The Delete Bay message window opens. It asks, "Are you sure you want to delete Bay Bay Description?" -
Click OK.
To close the window without saving your changes, click Cancel.