Working with reason codes for accounting transactions
The Reason Codes for Accounting Transactions (RCAT) are used to associate reason codes with account disbursement repair rules so that costs are properly accounted for during the accounting process.
|
By default, the system includes Maintenance and Accident RCATs
Usage:
-
Required on account disbursement repair rules
-
Required on Reason codekeys
Adding RCATs
To add a new RCAT:
-
Go to Menu > Setup > System Setup
The System Setup page opens.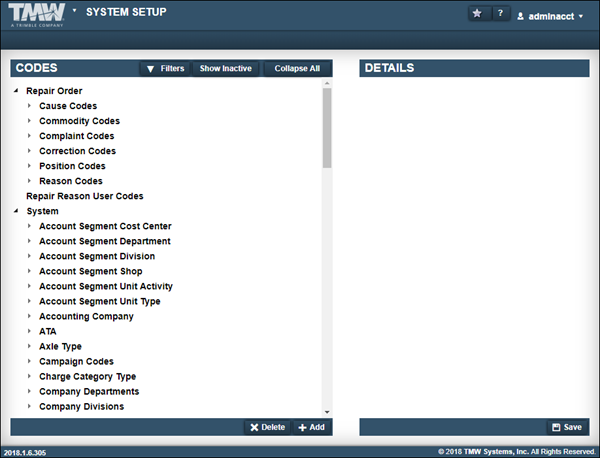
-
In the System section, select Reason Codes for Accounting Transactions.
-
Click Add.
The Details section displays editable fields.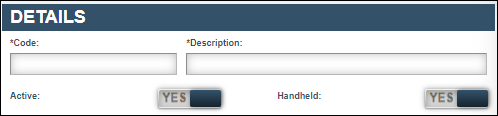
-
In the Code field, enter the new RCAT code.
Note: The code is limited to 12 characters.
-
In the Description field, enter a description.
Note: The description is limited to 60 characters.
-
Do the following as needed:
-
Disable the RCAT
By default, the new RCAT is enabled. If needed, toggle the Active option to NO. When you toggle this option to NO, the system disables this RCAT.
-
Enable with the Mobile Computing add-on module.
By default, the new RCAT is enabled on handheld devices. If needed, toggle the Handheld option to NO. When you toggle this option to NO, the system prevents you from using this RCAT with the Mobile Computing add-on.
-
-
In the Details section, click Save.
Deleting RCATs
To delete an RCAT:
-
Go to Menu > Setup > System Setup
The System Setup page opens. -
In the System section, expand Reason Codes for Accounting Transactions.
-
Select the code to delete.
-
Click Delete.
The Delete Code message window opens. It states, "Are you sure you want to delete the selected code?" -
Click Delete Code.
The system deletes the code. The window closes.
Note: To close the window without saving your changes, click Cancel.