Rotating tires
Tire rotation takes place in Interactive Workstation’s Tire Data page. You can access the page from Mechanic Workstation, Gate In, Gate Out, Yard Check, and Inspection Tickets using the Tire Data button.
| The button name is Tire or Tire Data, depending on which menu item you select in IWS. |
For each tire listed in the unit’s Tire Configuration, you can enter the tire depth and pressure. You can also do tire replacements from the Tire Data window. See Tire Data for more information.
-
Go to Menu > Activities > Interactive Workstation > Interactive Workstation.
Note: For versions earlier than V.2020.2, go to Menu > Activities > Interactive Workstation.
-
Select a user.
-
Click Post.
-
Click the needed menu:
-
Mechanic Workstation
-
Gate In
-
Gate Out
-
Yard Check
-
Inspection Ticket
-
-
Click Tires or Tire Data.
The Tire Data page opens.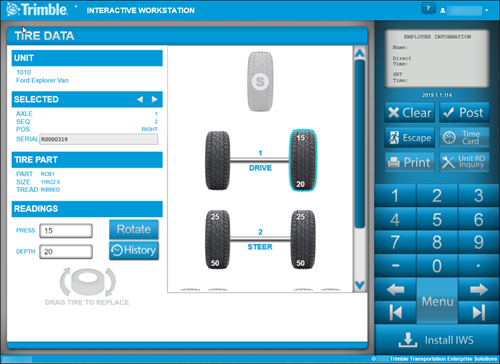
Note: You should enter and save tire pressures and depths before rotating tires. This allows reporting to capture positions correctly.
-
After updating tire pressures and depths, click on the first tire to be rotated.
-
Click Rotate.
On the left side of the Tire Data page, the Drag Tire to Rotate icon is displayed.Warning: Once you start the rotation process, do not click Post until you have moved all tires to their final positions.
-
Drag the first tire you want to rotate into the Drag Tire To Rotate position on the page.
-
Drag one of the remaining tires to the location where the previous tire was.
-
Repeat the rotation process until the original tire that was moved into the Drag Tire to Rotate position is remaining.
-
Drag the original tire into the last open position.
-
Click Post.
Tire Rotation is completed.