Fuel Data Import overview
The Fuel Data Import provides the ability to import fuel and meter readings from a TXT or CSV file. The ticket types include Company and Road. With this setup, you can:
-
Capture fuel usage using an electronic import for fuel transactions that enables you to schedule PM services or obtain cost of fuel per mile information
-
Define imports based on TXT or CSV file layouts for fuel transactions from different sources, which enables you to run the automated fuel import
The import files, which are provided by a vendor, must meet the following specifications:
-
Each valid record in the ASCII file must be of fixed length.
-
Required fields must always be in the same position for each record.
-
Only one fuel ticket/meter update record is read per ASCII record.
-
Records to be uploaded for fuel ticket purposes must be either all road purchases or all company purchases.
-
The last line in the file must have a character return. If you get a data corruption error, open the text file and press enter at the end of the file and try again.
Configuring the fuel data import
You must configure your options for the fuel import file before you can begin using it.
To set up the fuel import feature:
-
Go to Menu > Setup > Import Setup.
The Import Setup page opens.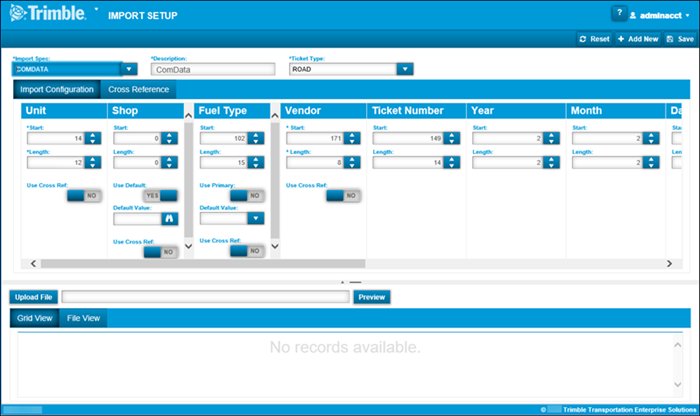
-
At the bottom of the page, click Upload File to review the file format you want to use.
The Choose File to Upload window displays a list of fuel import file formats.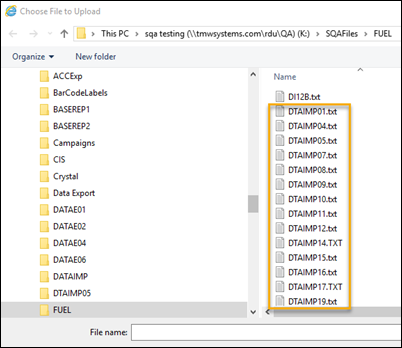
-
Select one of the files from the list and click Preview.
-
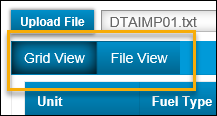
Select Grid View or File View to review the import file format.
-
In the top right of the page, click +Add New.
Note: When you click +Add New, the application validates whether there are changes. If changes are found, the following message is displayed: "You have pending changes, do you still want to continue?" Click Yes to clear the fields and enter new data.
-
Complete the following required fields:
-
Import Spec
Enter a name for your import file setup. -
Description
Enter a brief description for your import file -
Ticket Type
Select Company or Road from the drop-down list of options.
-
-
Enter the Start and Length of the following fields:
Note: An * indicates the field requires an entry.
-
Unit *
-
Shop (Optional)
-
Fuel Type
-
Vendor (* if Ticket Type is Road)
-
Ticket Number (Optional)
-
Year
-
Month
-
Day
-
Julian Date
-
Trip Number (* if Ticket Type is Road)
-
-
Enter the Start, Length, and Decimal for the following fields:
Note: An * indicates the field requires an entry.
-
Quantity (* if Ticket Type is Road or Company)
-
Cost (* if Ticket Type is Road)
-
Meter *
-
-
Click Save.
Creating cross-references for fuel data imports
Cross-references are provided for values that might be different in the ASCII file than they are in the Fleet Maintenance web application. You can create cross-references for one of the following cross-reference types: FuelType, Site, UnitID, and VendorID.
Complete the following steps to create a cross-reference.
-
Go to Menu > Activities > Import Setup.
The Import Setup page opens. -
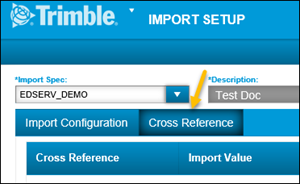
In the Import Spec field, select the import file that must have a cross-reference for one of its values.
-
Click the Cross Reference tab.
-
Click +Add.
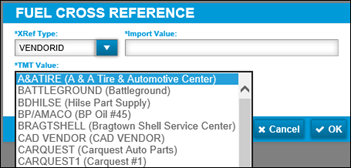
The Fuel Cross Reference window opens.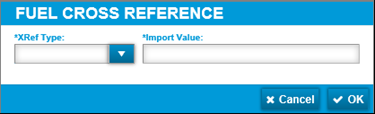
-
In the XRef Type drop-down list, select from the four types of cross-references available:
-
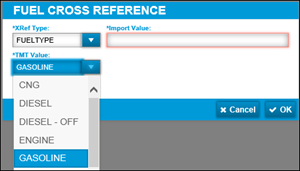
FuelType
-
Select FuelType.
-
In the TMT Value drop-down list, select the value you must cross-reference.
-
Enter the Import Value that corresponds to the TMT value.
-
Do one of the following:
-
To cancel and return to the Cross Reference page, click Cancel.
-
To save the information for the cross-references, click OK.
-
-
-
Site
-
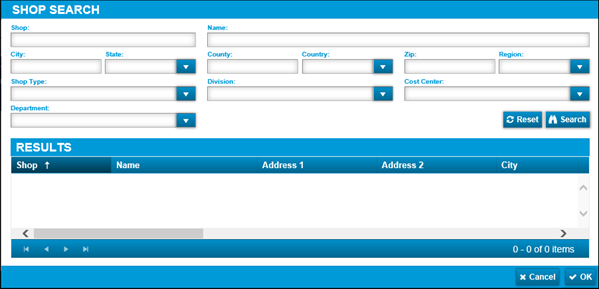
Select Site.
-
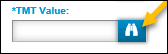
In the TMT Value drop-down list, click
 .
.
The Shop Search window opens.
-
Click
 .
. -
Select a Shop from the list and click OK.
-
Enter the Import Value that corresponds to the TMT value.
-
Do one of the following:
-
To cancel and return to the Cross Reference page, click Cancel.
-
To save the information for the cross-references, click OK.
-
-
-
UnitID
-
Select UnitID.
-
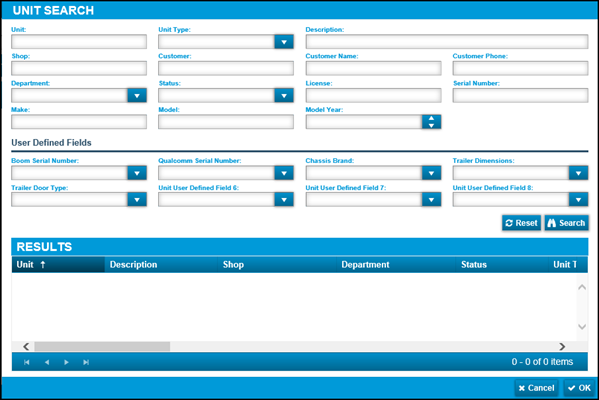
In the TMT Value drop-down list, click
.
The Unit Search window opens.
-
Click
. -
Select a Unit from the list and click OK.
-
Enter the Import Value that corresponds to the TMT value.
-
Do one of the following:
-
To cancel and return to the Cross reference page, click Cancel.
-
To save the information for the cross-references, click OK.
-
-
-
VendorID
-
Select VendorID.
-
In the TMT Value drop-down list, select the value you must cross-reference.
-
Enter the Import Value that corresponds to the TMT value.
-
Do one of the following:
-
To cancel and return to the Cross reference page, click Cancel.
-
To save the information for the cross-references, click OK.
-
-
-
-
In the top right of the Cross Reference tab, click Save to save the changes to the cross-reference(s) you created.
Importing fuel data
After configuring your fuel data import file, you can import fuel data and capture usage information from company or road fuel. The fuel data import process creates a batch or uses an existing batch where you can associate the fuel specification with a shop. This creates a fuel ticket for the shop, if the import is completed successfully. If there is a mismatch in the data, the system logs an exception in the Import Exception grid.
To import fuel data:
-
Go to Menu > Activities > Fuel Data Import.
The Fuel Data Import window opens.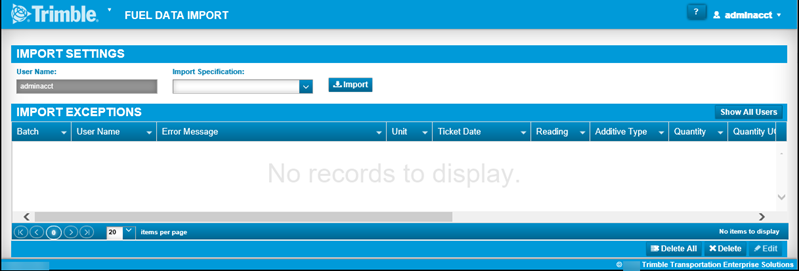
-
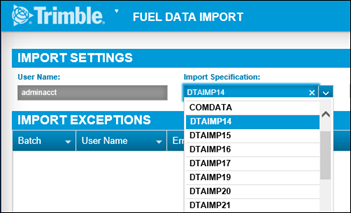
In the Import Specification drop-down list, select the file you want to use.
-
Click Import.
The Batch Management window opens displaying a list of imported fuel orders.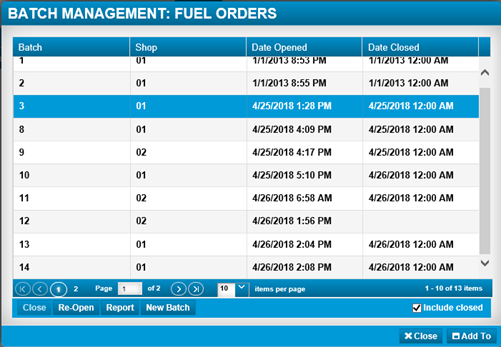
-
If you want to include closed fuel orders, check the Include closed checkbox.
-
The following tasks are available in the Batch Management window:
-
Close
To close open batches, click one or more batches. Then click Close. The date appears in the Date Closed column. -
Re-Open
To use this function, click the Include closed checkbox. After selecting this option, the closed batches are added and displayed in the Batch Management window. Select one or more of the closed items and click Re-Open. The Date Closed for those items no longer display since the item has been reopened. -
Report
When you select a batch and click Report, the Report tab displays at the bottom of the page listing the following options:-
Fuel batch detail report
-
Fuel batch disbursement report
-
Fuel batch summary report
-
Fuel batch summary disbursement report
-
You can toggle these options to YES or NO and click Print Report. After the View Report window displays showing fuel data, you can select to Close, Email, or Print the report.
-
New Batch
Use this function to create a new batch based on the import file you created when you configured your fuel data.
-